Need an idea for a Holiday Gift? How about one for yourself — in EVERY Color! How to Crochet a Hat!
Check out the Threadbanger Episode here! or down below:

Materials:
 10.5 Crochet Needle
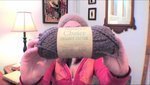 Yarn
Yarn
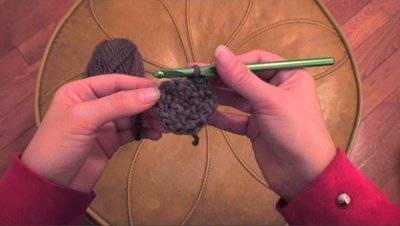
1. Begin with a slip stitch and 8 chain stitches.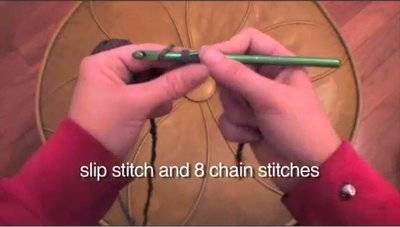
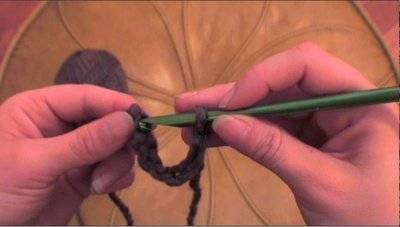
2.
Connect the two ends by putting your needle through the first stitch
and do 2 single crochet stitch in each stitch so you end up with 16
stitches around the outer ring.
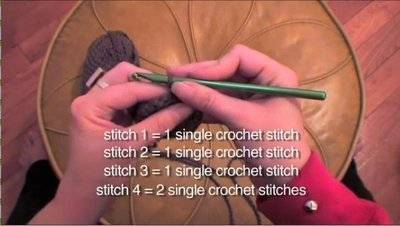
3. For the second row:
1st stitch: do 1 single crochet stitch,
2nd stitch: do 1 single crochet stitch,
3rd stitch: do 1 single crochet stitch,
4th stitch: do 2 single crochet stitches,
do this repetition until you reach the beginning of the row marked by the tail.

4. The third row is a single crochet stitch all the way around.
5.
The 4th row is 2 single crochet stitches in each stitch all the way
around. Try to keep your hat flat, you don’t want it to roll quite yet.
6. The next row is:
1st stitch: do 1 single crochet stitch,
2nd stitch: do 1 single crochet stitch,
3rd stitch: do 1 single crochet stitch,
4th stitch: do 1 single crochet stitch,
5th stitch: do 2 single crochet stitches,
do this repetition until you reach the beginning of the row marked by the tail.
7. When you reach the beginning again, its a single crochet stitch all the way around.
8. The next set is:
1st stitch: do 1 single crochet stitch,
2nd stitch: do 1 single crochet stitch,
3rd stitch: do 1 single crochet stitch,
4th stitch: do 1 single crochet stitch,
5th stitch: do 1 single crochet stitch,
6th stitch: do 2 single crochet stitches,
do this repetition until you reach the beginning of the row marked by the tail.
8. Once again, when you reach the beginning again, its a single crochet stitch all the way around.
9. The next set is:
1st stitch: do 1 single crochet stitch,
2nd stitch: do 1 single crochet stitch,
3rd stitch: do 1 single crochet stitch,
4th stitch: do 1 single crochet stitch,
5th stitch: do 1 single crochet stitch,
6th stitch: do 1 single crochet stitch,
7th stitch: do 2 single crochet stitches,
do this repetition until you reach the beginning of the row marked by the tail.
10. Instead of doing a row of single crochet all the way around, do the counting rows again only modify stitch 8:
1st stitch: do 1 single crochet stitch,
2nd stitch: do 1 single crochet stitch,
3rd stitch: do 1 single crochet stitch,
4th stitch: do 1 single crochet stitch,
5th stitch: do 1 single crochet stitch,
6th stitch: do 1 single crochet stitch,
7th stitch: do 1 single crochet stitch,
8th stitch: do 2 single crochet stitches,
do this repetition until you reach the beginning of the row marked by the tail.
11. Counting row again, but modify the 9th stitch:
1st stitch: do 1 single crochet stitch,
2nd stitch: do 1 single crochet stitch,
3rd stitch: do 1 single crochet stitch,
4th stitch: do 1 single crochet stitch,
5th stitch: do 1 single crochet stitch,
6th stitch: do 1 single crochet stitch,
7th stitch: do 1 single crochet stitch,
8th stitch: do 1 single crochet stitch,
9th stitch: do 2 single crochet stitches,
do this repetition until you reach the beginning of the row marked by the tail.
12. This row, the same counting technique but modify to do 2 single crochet in stitch 10.
13. Modify the same counting row to do the 2 single crochet in stitch 11.
14. Again for stitch 12.
15. Against for stitch 13.
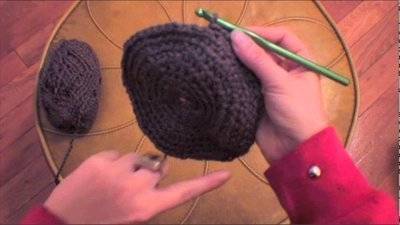
16.
Single crochet in everything stitch around and around and around until
you’ve reached your desired depth. You will start to notice the hat
curl, this is expected.
** If you run out of yarn, simply tie the end of the used yarn to the end of the new yarn **

17. Once you’ve reached your desired depth, you need to close up the rim. We’re back to counting:
1st stitch: do 1 single crochet stitch,
2nd stitch: do 1 single crochet stitch,
3rd stitch: do 1 single crochet stitch,
SKIP 4th stitch,
5th stitch: do 1 single crochet stitch,
do this repetition until you reach the beginning of the row marked by the tail.
18.
For the final row, repeat the counting in step 17 but skip 2 stitches.
Pull the loop out really big, snip the end and tie a knot and you are
DONE!
FIN!