
Science was never my best subject, but every now and then I find myself using a little book learning in my everyday life. And this project? Definitely one of those times. It turns out Sharpie marker ink mixed with rubbing alcohol creates a very striking effect. Add some ScotchBlue™ Painter’s Tape![]() , and you’ll be able to make a unique, DIY geometric textile worthy of hanging on your wall.
, and you’ll be able to make a unique, DIY geometric textile worthy of hanging on your wall.

The resulting effect is something akin to tie-die, but not in the 70’s hippy sort of way… in the modern, ombre, pop of color style that’s so popular today. The process is simple, and doesn’t require many materials. Here’s what you’ll need:
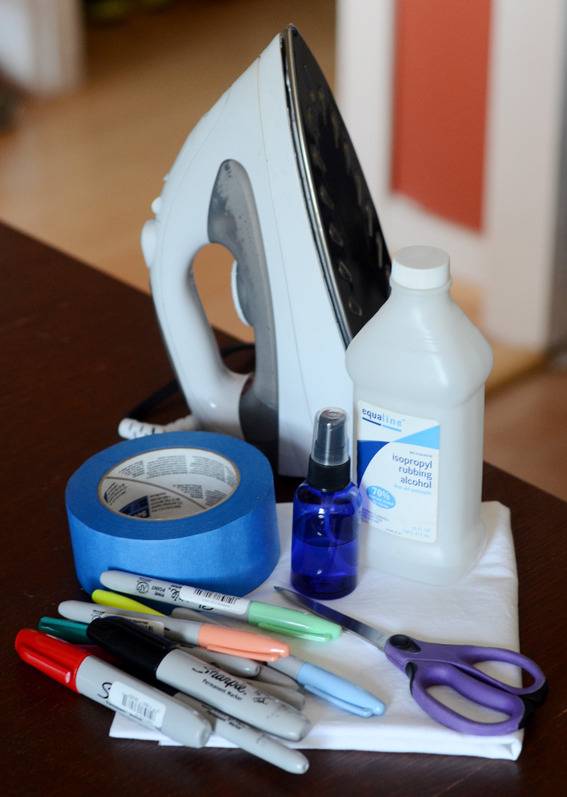
- Sharpie markers in assorted colors
- Rubbing alcohol
- ScotchBlue™ Painter’s Tape

- Cotton fabric with a fine weave
- A spray bottle
- Scissors
- Iron
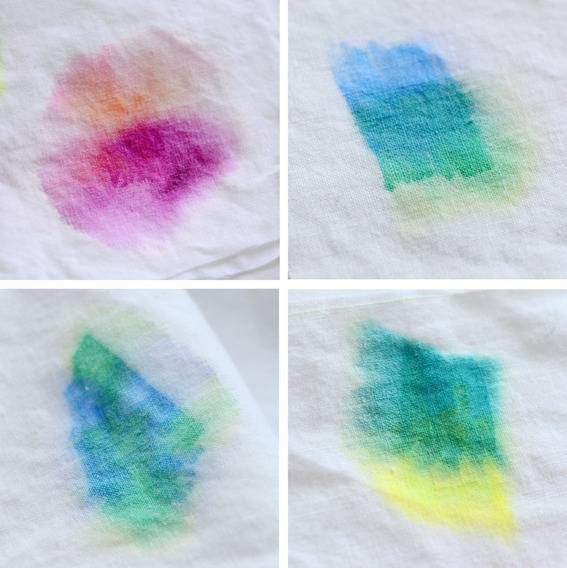
Above are a few different color combinations that I experimented with before creating my final textile. I would recommend trying out some test pieces before you jump in, because as you can see, each color blends differently than the next and they overlap in different ways.
Now, here’s what you do:
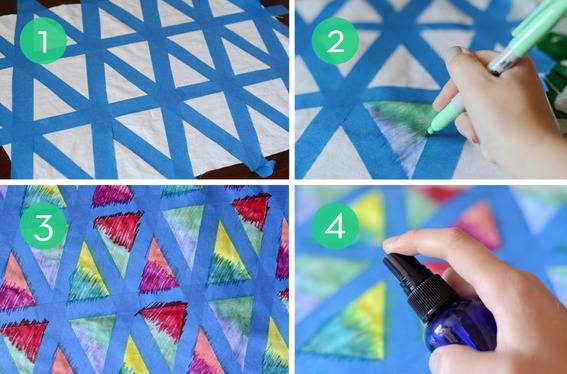
1. Iron your fabric so that it is wrinkle-free, and place it on a flat surface. Lay down your ScotchBlue tape in whatever pattern you’d like, pressing firmly. The tape creates a stencil, acting as a a resist to the marker ink. The area underneath the tape will be left with a less intense color wash when everything is all said and done.
2. Next, fill in every part of the fabric that’s not taped using your Sharpies. I did two colors inside of each triangular space, and I stuck to a certain pattern for consistency. I would recommend overlapping colors.
3. Your fabric will look something like the image above once you’ve filled in all the white space.
4. Make sure you head to a well-ventilated area, and put a small tarp or some plastic bags on your work surface. Now spray your Sharpie ink with rubbing alcohol. Don’t be shy here, really soak the fabric. Let it dry for a bit, and spray it again until you’ve reached your desired effect.
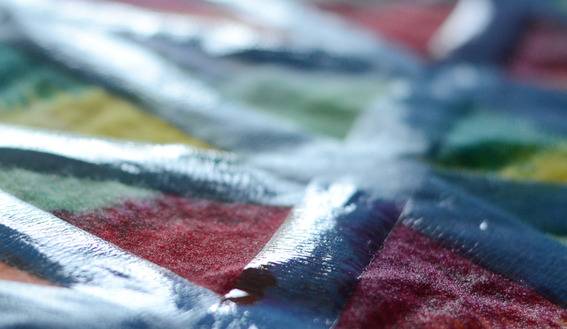
It will look similar to mine above for quite a while until it dries completely (which will take a few hours). Then it’s time to remove the painter’s tape and see what sort of magic has happened underneath. Chances are, it will look something like this:
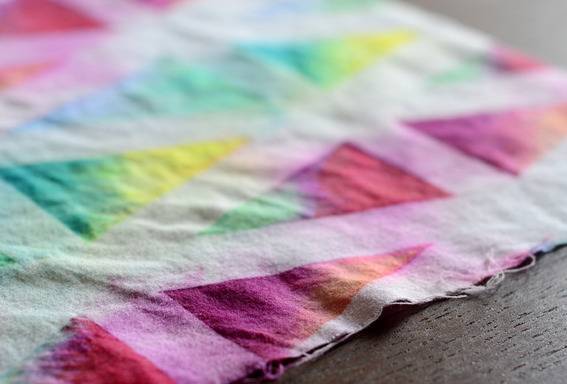
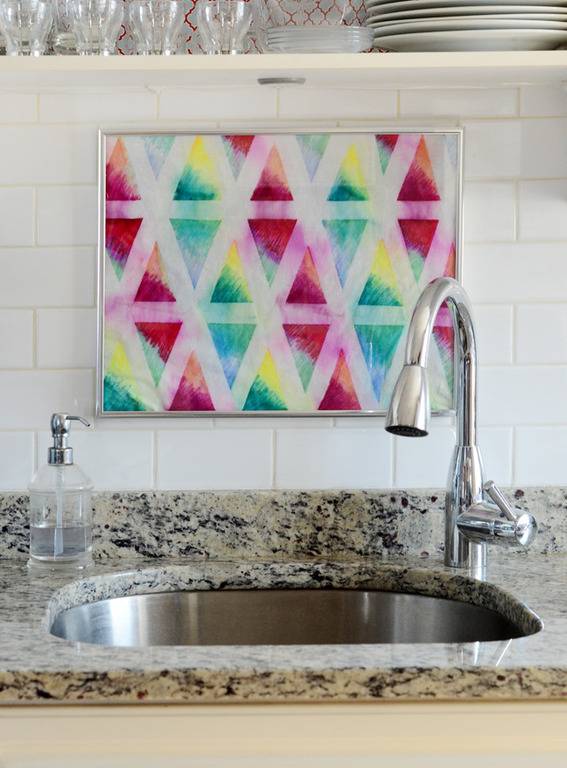
A small word of advice here… although you’re using permanent marker, the technique does not create a permanent dye. So don’t use it as a shower curtain. Using a dry iron afterwards will help to set the color, but it will still run a bit when moistened. It is best used as a wall hanging (or for any purpose where it won’t be exposed to water or extreme moisture). I framed mine and hung it in the kitchen.
For more creative ideas, check out the ScotchBlue™ Painter’s Tape Pinterest Page![]()
![]()
This post is a collaboration with ScotchBlue™ Painter’s Tape. To join the creative community, visit www.facebook.com/ScotchBlue.
I wonder if scotch guard might help set the fabric?
That’s a good thought Beth, I’ll have to give that a try!
Thanks – sharpie makes a more expensive fabric sharpie. Wondering f it’ll still be permanent combined with the spray!
Thanks – sharpie makes a more expensive fabric sharpie. Wondering f it’ll still be permanent combined with the spray!
Mine did not turn out like this what so ever. I followed the steps above, and it was supposed to be a mother’s day gift. The colors did not blend at all and I used half a bottle of rubbing alcohol. I’m very disappointed.
Sorry to hear that yours didn’t turn out the way you had hoped @anonymous… perhaps different types of fabric take the ink differently? It’s hard to tell what might have happened without seeing it in person…
Hi, I know this post is older, but I’m interested in making a collaborate project for my preschool’s silent auction. This seems perfect! Can you tell me what is the best type of cotton? I’m going to test it with my kids first before trying it with the preschool.