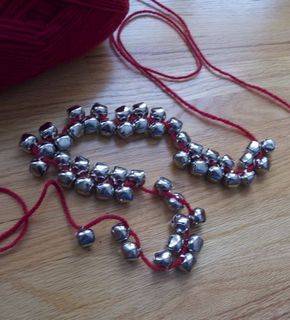
A Christmas bell garland brings nostalgic charm and festive jingle sounds to your holiday décor. This crocheted jingle bell garland looks intricate but requires only one basic crochet stitch, the chain stitch, making it perfect for beginners who want to create handmade holiday decorations.
In less than an hour, you can craft a beautiful garland that adds vintage appeal to your Christmas tree, mantel, or doorway.

Why Make a Christmas Bell Garland
Handmade holiday decorations create a personal touch that store-bought items can’t match. A DIY jingle bell garland offers several advantages:
- Budget-friendly: Materials cost under $10 for a full garland
- Customizable: Choose any yarn color to match your décor
- Versatile: Use on trees, mantels, stair railings, or doorways
- Gift-worthy: Makes a thoughtful handmade present
- Beginner-friendly: No advanced crochet skills required
The gentle jingle of the bells adds an extra sensory element to your Christmas decorations, creating that quintessential holiday atmosphere.
Materials You’ll Need
Before you begin your Christmas bell garland, gather these supplies:
- 50 jingle bells (15mm size works best)
- 1 ball worsted weight yarn (red is classic, but any color works)
- Darning needle (for threading bells)
- Size H crochet hook (5mm)
- Scissors
- Hot glue gun (optional, for securing ends)
You can purchase these materials at any craft store or online. Consider buying bells in bulk if you plan to make multiple garlands.
Optional Customizations
- Silver or gold bells for a metallic look
- Metallic yarn for extra sparkle
- Multiple colors of bells for a playful garland
- Ribbon instead of yarn for a different texture
- Various button sizes mixed with bells for added interest
Step-by-Step Instructions
Thread the Bells onto Your Yarn
This crucial first step makes the construction process much easier. While your yarn is still on the ball or skein, thread your darning needle with the yarn end. String all 50 jingle bells onto the yarn, spacing them approximately 12 inches apart along the strand.
As you work through the project, you’ll unravel more yarn from the ball and slide the bells along. This method prevents tangling and allows you to control bell placement as you crochet.
Pro tip: Keep the bells mobile on the yarn rather than pushing them tightly together. This prevents bunching and makes it easier to move each bell into position when needed.
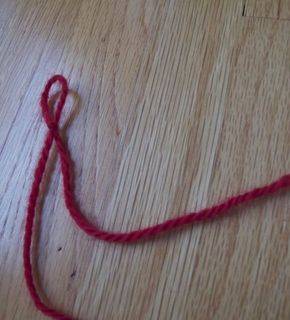
Create Your Starting Slip Knot
Remove the darning needle from your yarn. Form a slip knot at the beginning of your yarn strand by creating a loop and pulling the working yarn through it. Place this loop on your crochet hook and gently snug it—not too tight, as you need the yarn to move freely through the loop.
If you’ve never made a slip knot, think of it as creating a simple adjustable loop that serves as your anchor point.
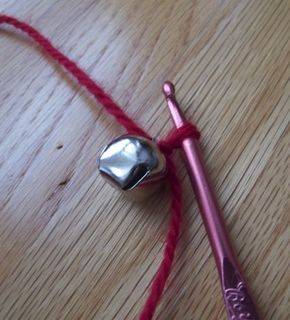
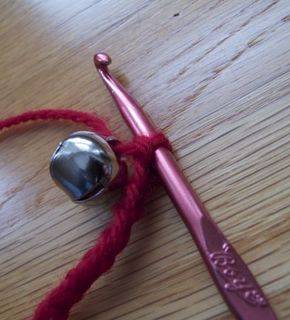
Begin the Chain Stitch Pattern
Pull the nearest jingle bell along the yarn until it sits right next to your slip knot on the hook. Now you’ll create your first chain stitches:
- Hook the yarn (called “yarn over”) by catching the working yarn with your crochet hook
- Pull this yarn through the loop already on your hook
- Congratulations—you’ve made one chain stitch!
Repeat this process 14 more times for a total of 15 chain stitches. These chains create the space between each bell in your garland.
Tension tip: Keep your stitches loose enough that the hook moves easily through each loop. Tight stitches make the garland stiff and difficult to drape naturally.
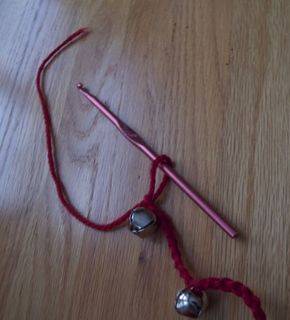
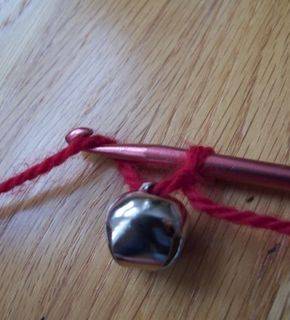
Incorporate Each Bell
After completing your first set of 15 chains, slide the next jingle bell down the yarn until it reaches your hook. The bell should nestle right against your last chain stitch.
Now repeat the chain stitch pattern: yarn over and pull through 15 times. The bell becomes anchored between the two sets of chains.
Continue this pattern—15 chains, move bell into position, 15 chains, move next bell—until you’ve incorporated all 50 bells into your garland.
Finish and Secure Your Garland
When you’ve added the final bell and completed the last set of chain stitches, cut the yarn from your ball, leaving a 6-inch tail.
To finish:
- Yarn over one final time
- Pull this tail completely through the loop on your hook
- Thread the tail through the hole in the last jingle bell
- Tie a secure knot around the bell hole
- Repeat with the starting end of your garland
For extra security, add a small drop of hot glue to both end knots. This prevents the garland from unraveling during storage or use.
Tips for Success
Creating your jingle bell garland becomes easier with these helpful tips:
Maintain consistent tension: Your chains should be loose enough to drape but tight enough to hold their shape. Practice a few chains before starting if you’re new to crochet.
Use a clean workspace: Bells can tangle or roll away. Work on a large, clear surface with good lighting.
Count as you go: If you tend to lose count, place a stitch marker every 5 chains. This makes it easy to verify you’ve completed 15 chains between bells.
Adjust spacing: The 15-chain spacing creates a classic drape. For a fuller look with bells closer together, try 10 chains. For a more dramatic swag, increase to 20 chains.
Make multiple shorter garlands: Rather than one very long strand, consider making several shorter garlands. This approach offers more styling flexibility and makes the project less overwhelming.
Practice first: If you’ve never crocheted before, practice the chain stitch for a few minutes before threading on your bells. Once you get the rhythm, the project moves quickly.
Styling Your Christmas Bell Garland
Your finished Christmas bell garland works in numerous decorating scenarios:
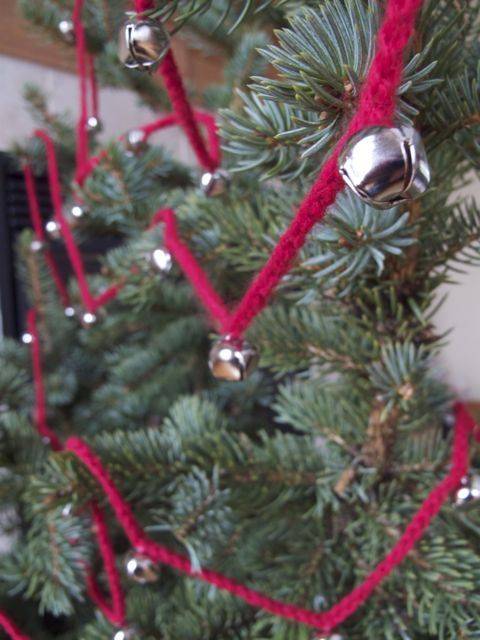
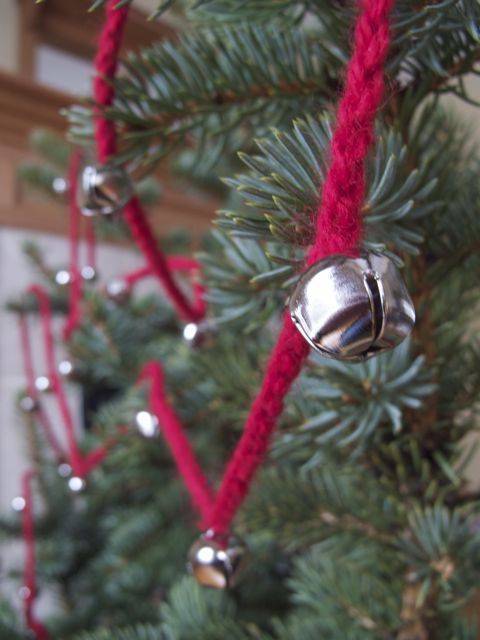
Christmas tree: Drape the garland vertically from top to bottom or wind it horizontally around the tree like traditional tinsel. The bells catch light beautifully among the branches.
Mantel decoration: Swag your garland across the mantel, allowing it to drape naturally. Layer it with evergreen branches, pinecones, or other holiday greenery for a full, festive look.
Staircase: Wind the garland around stair railings, securing it with small pieces of floral wire or ribbon at intervals. The bells jingle delightfully as people pass by.
Doorway or window frame: Tack the garland around door frames or windows to create a festive border. This works especially well for archways and wide doorways.
Wreath accent: Wrap your garland around a plain wreath form to add dimension and sound. Combine with ribbon, ornaments, or fresh greenery.
Table runner: Lay the garland down the center of your holiday table as a unique runner. Weave in battery-operated fairy lights for extra sparkle.
Troubleshooting Common Issues
Even with a simple project, you might encounter a few challenges:
Chains are too tight: This is the most common beginner issue. If your chains feel stiff or you struggle to insert your hook, you’re pulling too tightly. Start over with a more relaxed hand position, allowing the yarn to flow more freely.
Bells bunching up: If bells cluster together instead of staying spaced out, pause and redistribute them along the yarn. Keep them about 12 inches apart on the working yarn at all times.
Lost count of chains: Use small stitch markers or even paper clips to mark every 5 chains. This makes counting easier and helps you maintain consistency.
Yarn tangling: Work directly from an organized ball or skein rather than a loose pile of yarn. Keep your work area clear of other projects or materials that could catch on the yarn.
Garland twisting: Chain stitches naturally want to twist slightly. This is normal and actually adds to the handmade charm. If it bothers you, gently steam the finished garland (without touching it with the iron) to relax the chains.
Bell holes too small: If your yarn doesn’t fit through the bell holes, either thread the bells onto thinner yarn or find bells with larger holes. Most 15mm jingle bells accommodate worsted weight yarn perfectly.
Customization Ideas
Once you master the basic technique, experiment with these variations:
- Color blocking: Use different colored yarn sections for a modern look
- Mixed metals: Alternate silver and gold bells throughout the garland
- Size variation: Mix 12mm, 15mm, and 18mm bells for visual interest
- Jute or twine: Replace yarn with natural jute for a rustic farmhouse style
- Metallic yarn: Use gold or silver metallic yarn for extra holiday sparkle
- Add buttons: Thread decorative buttons between some bells for a crafty touch
- Pompom accents: Add small yarn pompoms between bells for a playful garland
Storage and Care
Proper storage ensures your Christmas bell garland lasts for many seasons:
- Wrap the garland loosely around a cardboard tube or your hand
- Place in a storage box with tissue paper to prevent tangling
- Avoid crushing or compressing the bells
- Store in a dry location away from moisture
- Label the box clearly for easy identification next year
If the garland becomes dusty, gently wipe the bells with a slightly damp cloth and allow the yarn to air dry completely before storing.
Frequently Asked Questions
How long does it take to make a Christmas bell garland?
Most people complete a 50-bell garland in 30-45 minutes once they get comfortable with the chain stitch rhythm. Complete beginners might take up to an hour for their first garland.
Can I use different types of bells?
Yes! Any bell with a hole through it works for this project. Sleigh bells, craft bells, or decorative bells all create beautiful variations. Just ensure the holes are large enough for your yarn to pass through easily.
Do I need crochet experience?
Not at all. This project uses only the chain stitch, which is the most basic crochet technique. If you can make a loop and pull yarn through it, you can create this garland.
What if my chains are too tight?
Restart with a more relaxed hand position. Try holding the yarn more loosely and allowing it to slide through your fingers naturally rather than gripping it tightly.
How do I store my bell garland?
Wrap it loosely around your hand or a cardboard tube, place it in a storage box with tissue paper, and store in a dry location. This prevents tangling and keeps it ready for next year.
Can I make the garland longer or shorter?
Absolutely. Purchase more or fewer bells depending on your desired length. A package of 50 bells creates a garland approximately 60-65 feet long with 15-chain spacing between bells.
What’s the best yarn for this project?
Worsted weight yarn (medium weight, #4) works best because it’s sturdy enough to support the bells while remaining flexible for draping. Wool, acrylic, or cotton yarns all work well.
CROCHETED CHRISTMAS BELL GARLAND
Create a festive Christmas bell garland using simple chain crochet stitches. This beginner-friendly project requires no advanced crochet skills—just basic chain stitches connect jingling bells into a charming vintage-style garland perfect for decorating your tree, mantel, or doorways. The completed garland measures approximately 60-65 feet and takes less than an hour to make.
Materials
- 50 jingle bells (15mm)
- 1 ball worsted weight yarn
- Darning needle
- Size H crochet hook (5mm)
- Scissors
- Hot glue gun (optional)
Instructions
- Thread the Bells Thread all 50 jingle bells onto yarn while still on the ball. Space bells approximately 12 inches apart along the yarn.
- Make a Slip Knot Create a slip knot at the yarn end and place it on your crochet hook.
- Chain 15 Stitches Pull the first bell to the hook. Yarn over and pull through loop 15 times to create 15 chain stitches.
- Add Next Bell Slide the next bell down to your hook.
- Repeat Chain 15 stitches, move next bell into position. Repeat until all 50 bells are incorporated.
- Finish Cut yarn leaving 6-inch tail. Pull tail through final loop. Knot both ends around bell holes.
- Secure (Optional) Add a drop of hot glue to knots for extra security.
This crocheted Christmas bell garland demonstrates that handmade holiday decorations don’t require advanced crafting skills.
With just basic chain stitches and about 45 minutes of time, you can create a charming, personalized decoration that adds both visual appeal and delightful jingle sounds to your home.
The beauty of this project lies in its simplicity and versatility.
Whether you stick with classic red yarn and silver bells or experiment with custom colors and mixed metals, your finished garland will become a treasured part of your holiday traditions.
Try making several garlands in different color combinations to give as gifts or to create a coordinated look throughout your home.
Once you’ve mastered the technique, consider teaching friends or family members.
This project makes for an excellent group crafting activity during the holiday season.
This looks really easy and very cute can hardly wait till I get the jingle balls. Hope I can find the sight again when I need it.