
While helping a friend with her booth for a trade show, we learned how to install grommets simply and frustration-free. If you need grommets installed for a craft, drapes, shower curtains, drawstring totebags, or your handsewn tent, DO NOT think that a grommet kit from a fabric store will be sufficient. Try to get a semi-industrial kit from the hardware store. They are heavier duty and the pricing is more reasonable. If you really want the jumbo grommets, take your project to a drapery workroom and see if they’ll install them for you using their very expensive, heavy duty equipment.
By the way, the term eyelet is used when referring to small grommets and grommets are most commonly made from metal or plastic.
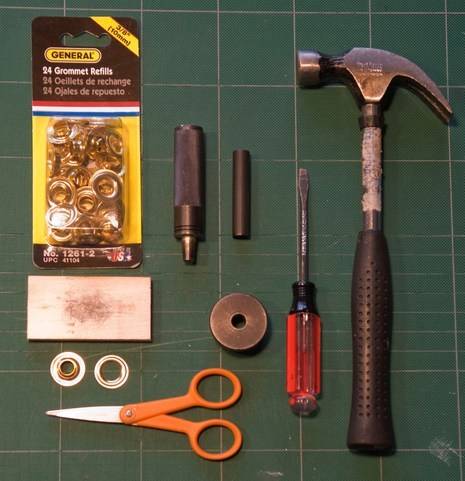
Gather Your Supplies:
Grommet Kit including grommets and tools
Pencil
Ruler
Scissors
Hammer
Screwdriver
Fabric
Before we started, we folded one end of the ribbon over and with fused a fold with fusible hem tape. The grommet works best if it is inserted through a double layer of fabric or ribbon.
What You Do:
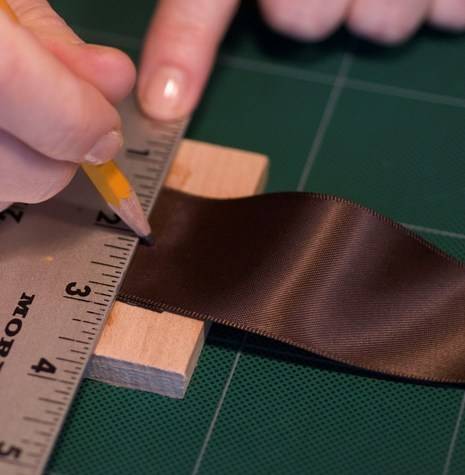
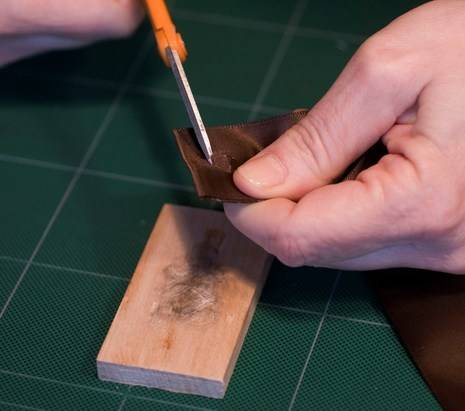
1. Measure where you want the center of your grommet and mark with a pencil.
2. Take the grommet hole punch and center it on your mark, pound to make an indentation. 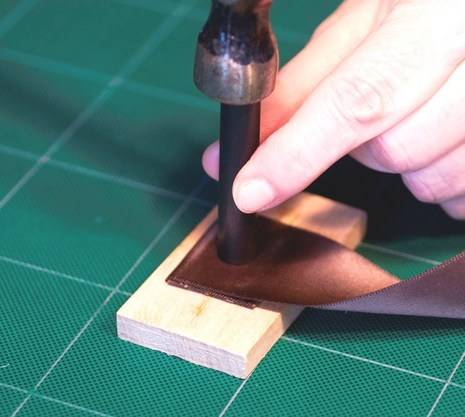
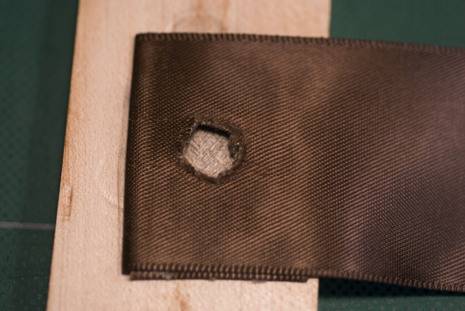
3. Using an exacto-knife or razor, cut an “x” inside of the circle you pounded in to your fabric.
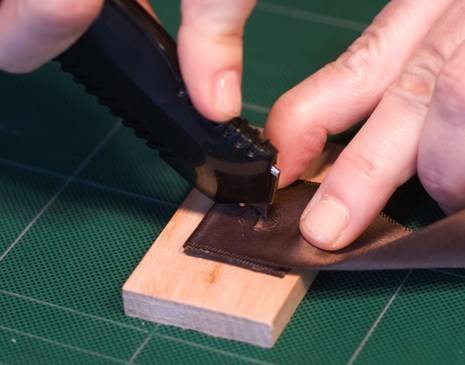
4. Using sharp, tiny scissors, cut out the circle.
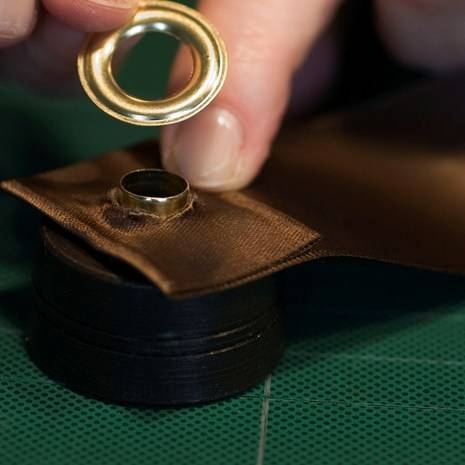
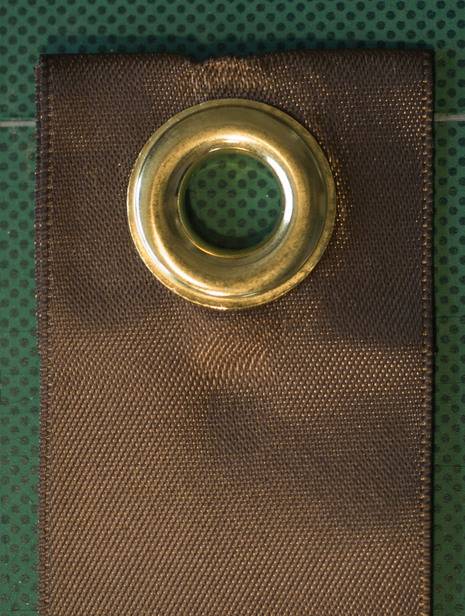
5. On right side of fabric, insert the main grommet piece (the one with the protrusion) through the hole. On the wrong side of your fabric, place the ring on top of the protrusion with the domed side facing up.
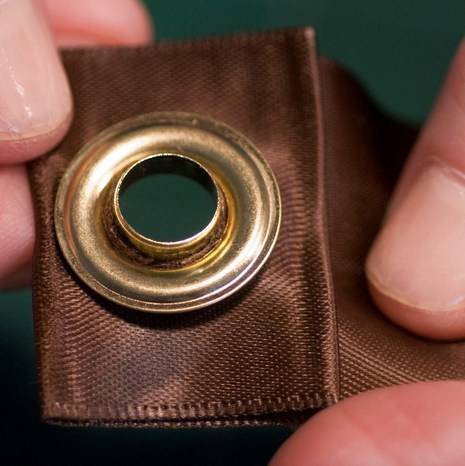
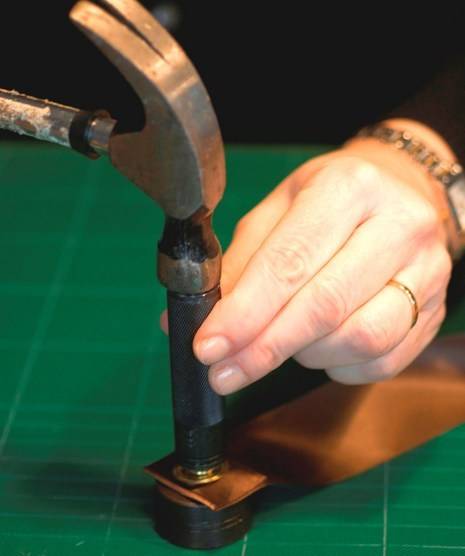
6. Take the short, round grommet tool with the hole through the middle and place it on a solid surface.
The top of this piece has a small groove in it so that the right side of the grommet fits down in it a bit. Now place the larger grommet tool down through the center hole of the grommet. Check to make sure you are going to pound the grommet in place with the wrong side of the fabric facing up. Hit solidly with the hammer five times. Check to make sure the seal is tight around the ring. If necessary, use the flathead screwdriver to pry the pipe tool off of the grommet.
Flip fabric over and admire your professional looking grommet.
All fine and dandy working horizontally, but try that on an existing, heavy gauge shelter garage fabric. Ain’t gonna happen. Need a more all-encompassing approach.
This is such a quick and fun project! I love how you broke down the steps – it makes it seem so easy to add grommets to anything. Can’t wait to try this out on some of my home decor pieces! Thanks for sharing!