
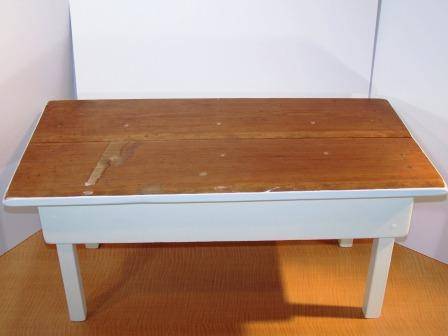
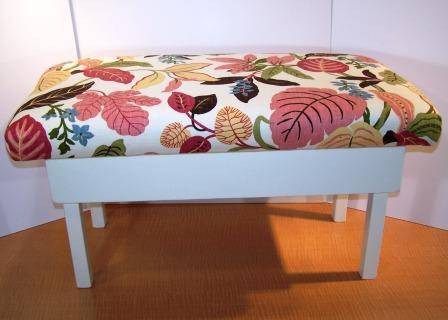
What do you do with an old coffee table with a dinged up or stained top? Turn it into a soft, lovely, upholstered bench for your hallway, end of your bed or as an upholstered ottoman in front of the sofa. This pine bench was $13.99 at Goodwill (a little overpriced in my opinion). With some fresh new fabric, supplies and these simple instructions, it morphed into a different creature.
FIND A TABLE AND LET’S GET STARTED!

The UGLY GOBLIN
WHAT YOU NEED:
ugly table
sandpaper
primer
paint
paintbrush
cordless drill
dacron or cotton batting
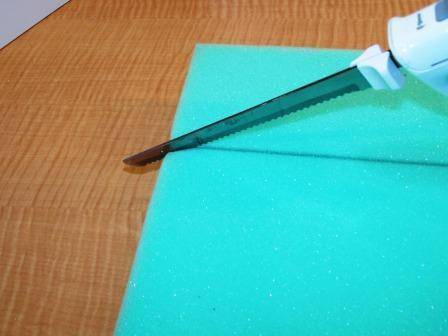
3″ foam (Fabric stores will cut it to size for you, straight lines only)
electric knife with silicone spray
spray adhesive
twine or string
scissors
LONG needle (most fabric stores with basic upholstery supplies carry these)
staple gun (an upholstery staple gun connected to an air compressor works best) It’s possible, yet trying, to use a manual staple gun or try a nail gun
staples
crescent or standard pliers
flat head screwdriver for staple removal
button forms for covered buttons (available at fabric stores)
enough fabric to cover your project
BANDAIDS
WHAT YOU DO:
1. Lightly sand, prime and paint legs of old coffee table. Measure, mark and drill holes where you want your covered buttons to be.
2. With foam on work surface, place coffee table upside down on foam. Measure and mark on foam 1/2″ from all edges of table top. With yardstick, draw straight lines on 1/2″ marks for cutting lines.
Using electric knife, cut foam making sure you keep knife blades at a right angle to foam, cutting straight along marked lines. If knife gets slow, spray blades with silicone.
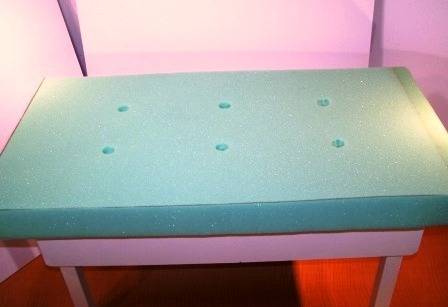
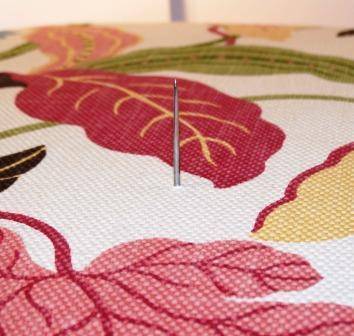
3. Spray one side of foam with adhesive and center it on top of coffee table. Taking long needle, poke up through drilled holes and mark foam where buttons will be placed. Cut or pinch out a bit of foam where markings are.
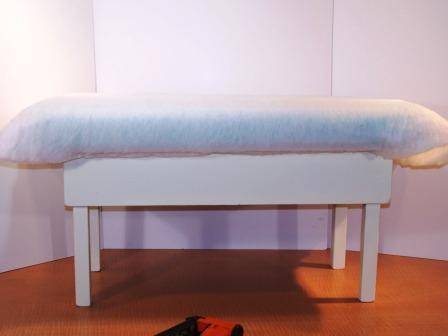
4. Cut enough dacron batting to fit over top of foam plus 3 inches.
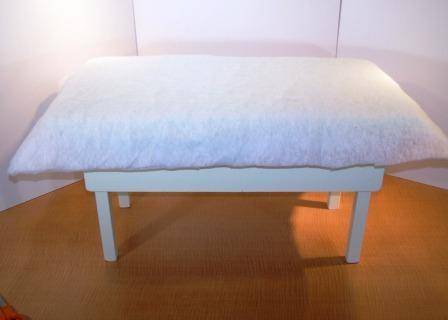
5. Starting at center of one long side, begin stapling dacron in place pulling dacron down, diagonally and back in towards edge. Stop stapling 3 inches from corner. Repeat on opposite side, then move to short sides.
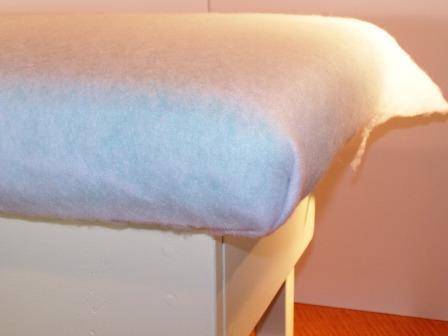
6. Finish corners like you’re folding a crisp, flat sheet corner, folded and tucked under, pulled taut and stapled securely. Repeat this for remaining corners.
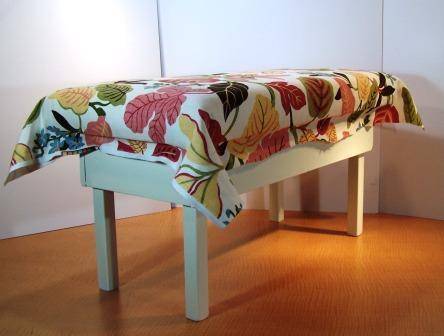
7. Lay your fabric over the top of bench, centering design if necessary. Feeling where the edge is, allow five extra inches for pulling and stapling. Mark fabric and cut off excess all around.
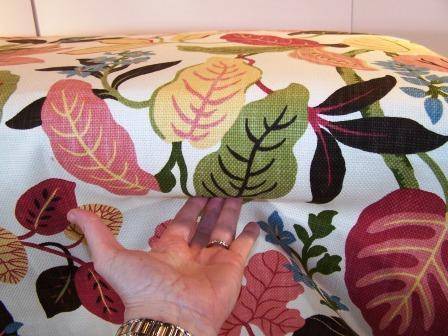
8. With this workable size of fabric, repeat steps 5 and 6, always pulling snugly and diagonally down and in towards edge so you can set staples uniformly on underside of wood top. Work carefully to get corners nice and snug. If you need to re-do, use screwdriver and pliers to pull out staples, always pushing screwdriver AWAY from your other hand.
9. Poke long needle up through bottom of table and mark fabric for button placement.
10. Make covered buttons from scrap fabric. For the perfectionists, make note of the fabric pattern at button marks so buttons can be made to match the pattern.
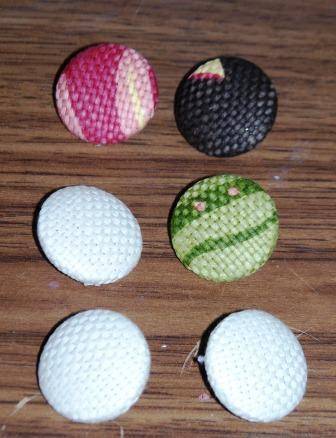
11. Cut 14-18 inch pieces of upholstery twine or string. Fold in half, poke loop of twine through eye of button. Thread the two loose ends through the twine loop. Pull snugly. Buttons are now ready to be threaded down through bench top.

12. For the finale, you take the needle and poke it up through the hole in the bottom of the bench, eye side first. Thread the twine through the eye and pull down through the bench foam and wood. With stapler and dexterity, pull twine tight to get button pulled down into foam and with other hand manuever the stapler so you can “catch” the twine and give it few staples. You may have to make a few adjustments to get the buttons tight enough and uniform. For security, fold twine back over itself and staple again.

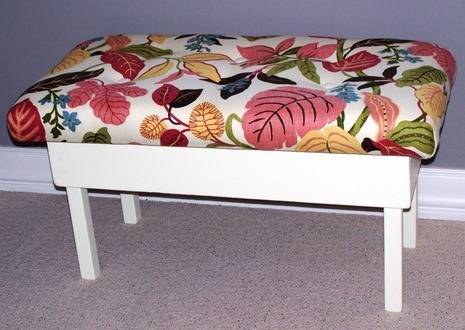
I love this bench. If I had to do it again, I would have used a table that had a more decorative base. This looks so simple and plain. It’s a good thing the fabric is so SNAZZY.
That’s it. BE YOU tee FULL!! What’s the next project?
Thanks for tutorial. I needed it for my project. And besides… sometimes what looks like an antique may just be an old piece of furniture. And sometimes antiques are just plain UGLY.