Hey everyone and welcome to the technical blog for Episode#4 (zombie make-up). I think every filmmaker has made, or thought about making, a zombie movie. I don’t know what it is, but zombies are an irresistible gem in the lexicon of potential movie subjects. As always we invite viewers to improve our design and send us video clips of your projects. All you have to do is upload, and you could be featured in our monthly user submitted podcast.
Shopping List
- Liquid Latex (flesh tone).
(You should be able to buy this at any decent costume shop, or you can get it online at places like http://www.liquidlatexworld.com/ ) - Toilet Paper.
(Or “Bathroom Tissue” for all you people who are afraid to say “toilet”.) - A Basic, multi-color make-up kit.
(I used a 5 color “aging kit” that I bought at a costume shop, but you could use any make-up as long as it has some flesh tones, reds, and maybe some greens. It all depends on how “dead” you want your zombie to look.) - White face cream.
(This is going to be the base of almost any movie make-up you’ll do. It’s like primer for your effect. You can get this at ANY costume shop.)
A few warnings…
First things first, when working with liquid latex you need to make sure your actor/actress is not allergic. Apply a small patch to the under side of their forearm and wait at least 15 minutes to see if it gets red and swollen. Most people are not allergic, but you don’t want a pissed off actor with a red and puffy face in your life…believe me! Now that you know your subject is allergy free, have them wash there face, then put their hair back with something. Also men (or women I guess) should shave all excess hair off their face. Eyebrows are OK, but a beard or some stubble is really going to be painful when you try and remove the latex. Latex in your hair is a very bad thing. Heed these few warnings and your zombie make-up will go much smoother.
The process
First thing you do is apply a thin, but even layer of liquid latex to the subjects face. This will be our base layer. Wait 15 minute for it to dry. You’ll notice that as liquid latex dries it turns mostly clear.

Next comes the toilet paper or “TP”. What is so amazing is that you can make a lot of different skin effects with just TP and liquid latex. For this particular zombie I made the cheeks look all wrinkly and dead, and (as you’ll see below) an open gash on his forehead. But you can do a lot more by just playing with these two elements. The more you add to you subjects face the more you have to play with and make gross looking.
For the gross looking cheeks I put a single layer of TP on each cheek, then using a liberal amount of liquid latex I sealed them to my actor’s face. Allow to dry.
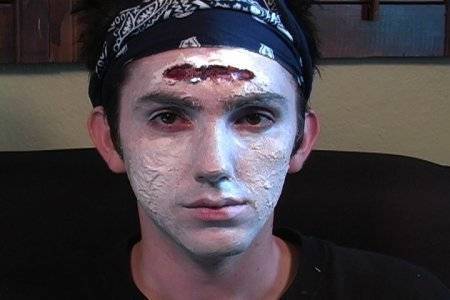
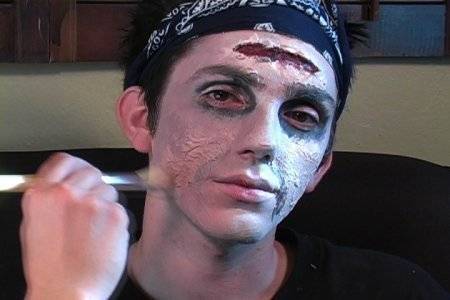
Now we can focus on the open gash on Mike’s forehead. I’m going to do basically the same thing as on the cheeks, but this time I’m going to leave much more loose TP in the center. The reason being is to have extra “flesh” to tear open once the liquid latex and TP dries.
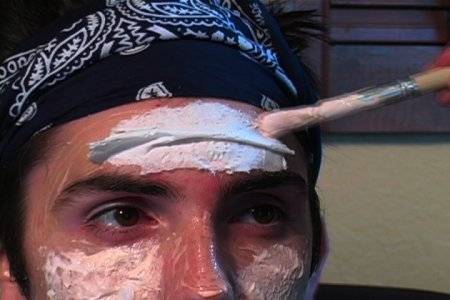
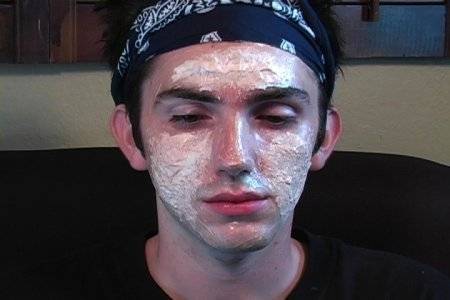
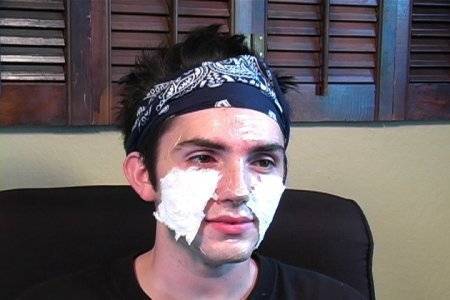
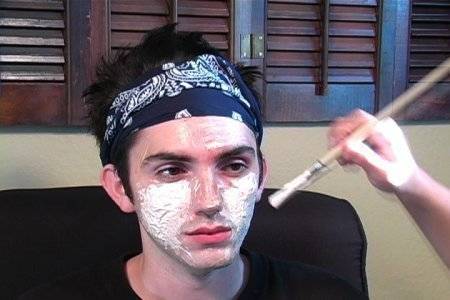
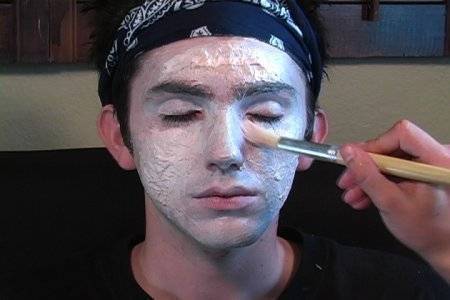
So now you have some gross looking white skin on your actor’s face and you need to blend everything together. Start with a base layer of white cream make-up. Don’t worry when you actor starts looking like a mime with leprosy, the white make-up just acts like a primer to build the rest of the color.
Now go and rip open that extra “flesh” we built up on the forehead. You might have to get the tear started with something sharp, so please be very careful. Open up the gash in an irregular pattern and fold back the extra flesh to reveal your actors real skin. Then fill in the inside of the wound with really dark make-up. I just mixed red and black. This should create a really cool looking wound.

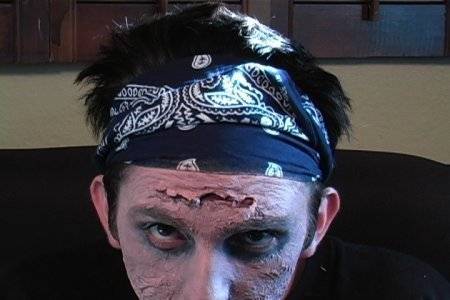
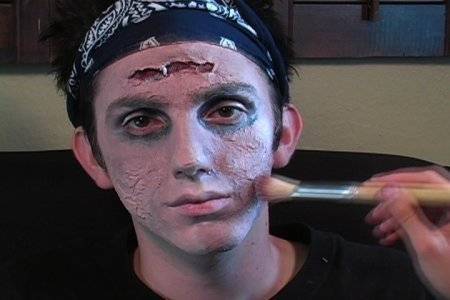
The next thing I would do is darken around the eyes and mouth like so…
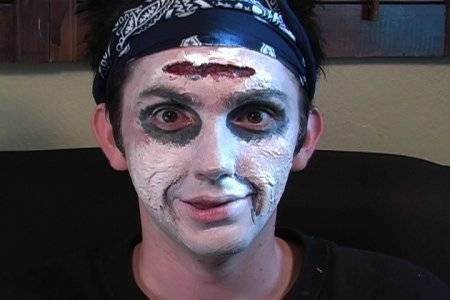
We’re almost done. The last few layers of make-up are all about blending until it looks right. I started with a base color that was slightly more red then regular flesh tone, but really I feel zombies come in all shapes, sizes and colors. After the base color I started gradually adding more colors until it “looked gross”. A good rule (which I break here) is to start with the lightest color and move darker. Take a look at the photos below to get an idea of what I did.
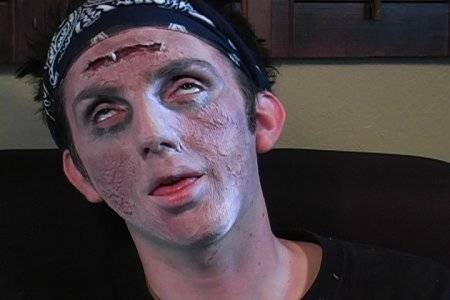
That’s basically it. If you want the total zombie experience go to your local thrift store, buy some old dress clothes and ruin them! Rip them, wrinkle them, rub them in the dirt. Your gross zombie make-up and fresh from the grave clothes will make a great addition to the league of the living dead.
Please post your questions or comments.
Just a tiny bit since it’s glue but u just have to rip it off fast