Hello, first of all I apologize for my odd english, my native tongue is not english but french.
I’m currently making a basic cardboard furniture, so I will try to explain how I’m doing it.

You need 3 identical corrugated cardboard sheets, mine are 70cm x 60cm, at least they must be double layered like :

The 3 sheets are :
- The frontage
- The inner
- The back
They will be the 3 layers of your furniture, you can think of it as a 3D volume made by the extrusion of a 2D drawing.
1. Draw the outlines of your furniture on the first sheet like on the example

2. Then cut it with a cutter…
3. Repeat 1 & 2 to make the inner (put the frontage over the second sheet to draw its outlines).
4. Put the frontage over the third sheet and report on it the outer outlines (if there are any, on my example there’s no outer outlines so the back is simply the unchanged sheet!) and cut it as needed.
here is an example where the back needs some cutting (taken from http://camillecarton.free.fr the best french site about cardboard furniture making) :
(Fond = back, intermédiaire = inner, Façade = frontage)
5. Now you must make up your mind and find where you need to put cross-pieces to put the 3 profiles sheets.
You must use the inner profile as it is the one where you will encase the cross-pieces. On each place where you want to put a cross-piece, you must cut on the inner profile a notch where it will encase.
here is a cross-piece :
(Note that cross-pieces width will correspond to the fourniture inner width)
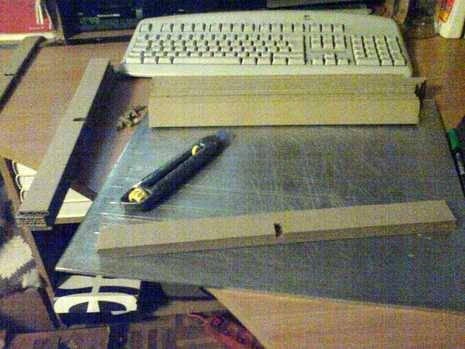
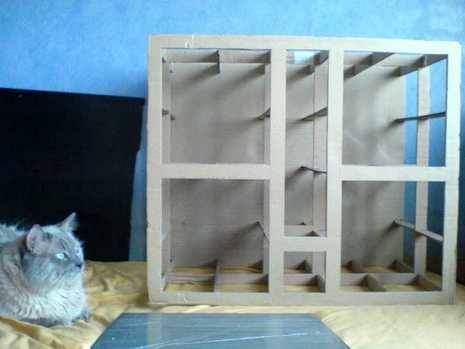
and here is my inner profile with all the notches cut :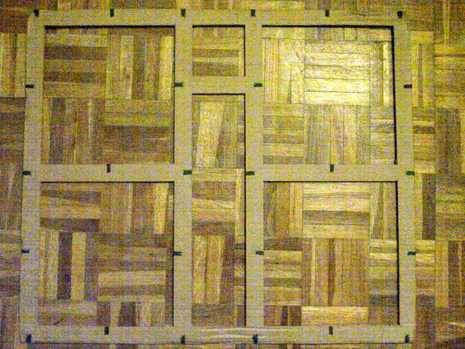
6. Before to encase the cross-pieces in their notches, you must put the inner profile on the two other profiles to mark the place of every cross-piece by drawing a line with a pencil thru every notch, be sure to put the good side of the sheet, the one that will be inner the furniture, usually the ugly side where one can see the corrugated.
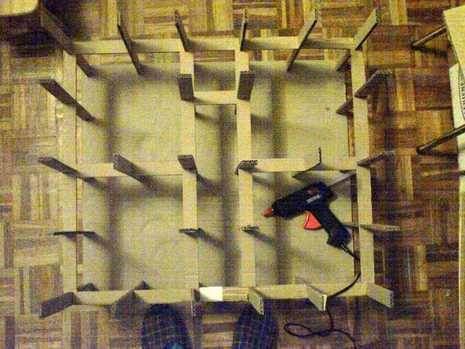
7. Now simply assemble the cross-pieces in their notches. On my example, all cross-pieces are of the same size, but if their length is always the same, their height depends on your furniture outlines, so that its height fit with the ceilings and the floors of the furniture parts. It’s best to glue the cross-pieces in their notches, use a glue gun, just put a drop of glue, assemble and handle the cross-piece and the profile together a few seconds and its glued.

8. Then assemble the back to the cross-pieces, one by one, just put each one in front of the mark you made, a thin line of glue, you handle them together a few seconds and it’s done.
9. Do the same with the frontage.
10. Now you must cover every wall with cardboard, just measure needed dimension for the first wall then cut corresponding cardboard, glue the cross-pieces and/or sheets that will be in contact of it, then put it and hold it tight some seconds for the hot glue to solidify. Then continue for adjacent wall and so on. On my example There is 24 cardboard chunks to put in order to cover all the inner spaces, and only 4 big ones for the outer. All my chunks are simple ones, but it won’t be different if there were curved ones, except that for every curve chunk I would have needed to break its straightness by rolling it over something curved like a bottle.
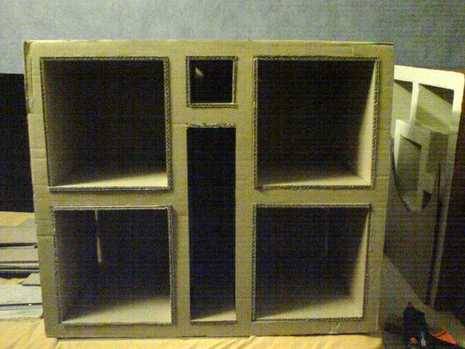
Yé, here we are, the construction is finished, there are some steps to complete to strenghen and then decorate it. First each angle, I mean each place where two cardboard pieces meet, must be glued with kraft roll bands here due to the 6 niches there are 88 kraft bands to glue, sure it takes some time but that’s really worth it. After that there’s another thing that I do to strenghen it too, I fully cover it with a plaster that we call “enduit cyber-bricoleur”, enduit is the french word for plaster and cyber-bricoleur is the name of the website that published that recipe (see here).
I don’t know it you have all the needed ingredients in your country, but here they are, given in the order where they must ideally be melted : (I assume you use a small unit like a soup spoon or cup of coffee)
- Precipitated chalk : x9 (white chalk powder usually used to opacify store’s front)
- PVA glue : x6 (usually use to glue wood)
- Water : x3
- linseed oil: x1 (of a smaller unit, I mean a coffee spoon if u used a soup spoon)
Just melt each ingredient with the former ones, and give it a 5 minutes rest. It is possible to color the plaster otherwise it will be white.
Then cover the furniture of one coat, and very important, let it dry, before to apply another coat. If you want your furniture to be very clean and soft, you can sandpaper very softly.
You can also add some texture to the plaster, paper pulp that will add to its solidity, sand or coffee marc (my favorite texture that I also use with only acrylic paint) or cork or anything, but if you do so you need to also add x4 dried wallpaper glue before the linseed oil.
After that, you can choose to cover the whole furniture with some paper that will make it fit well within your appartment style, or you can simply do like I did and paint it with any paint that you like, I recommand white acrylic paint where you can put lots of texture and colorant.
And finally here is the last thing to do : cover the furniture with 2 or more coats of floor vitrifying, the water based one if you can afford it. It’s expansive but it will allow you to wash your furniture and it will also protect it against small shocks and scratches.
Then you are done.
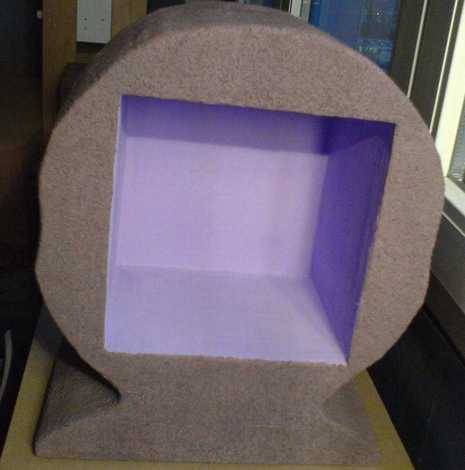
Here is a tiny furniture I just did last week-end, very easy to do…