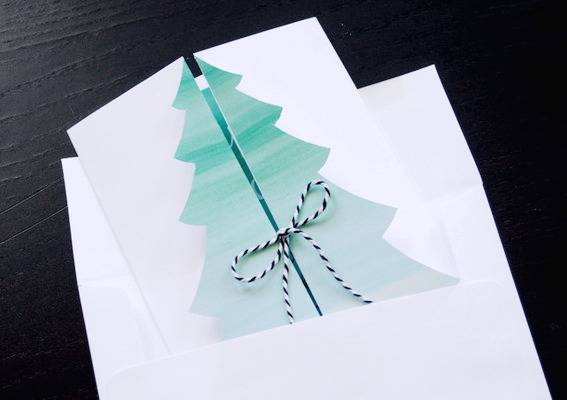
As the holidays continue to grow near, it’s time to start thinking about holiday cards. So this year, I offer this festive watercolor card. It combines the best of both worlds: some hand painted and customized goodness, and the fact that it only takes minutes to make, so you don’t have to cut your list short. Click through to find out what it looks like on the inside – and how to make one yourself.

The tree opens up to reveal a holiday message and space to write a note to the recipient. The ombre watercolor effect is part of the printable file, so although it will look like you’ve spent hours on it, it really only takes minutes to print and assemble. You can even take the project a step further by customizing the cards to give each one a different feel. So let’s get started.
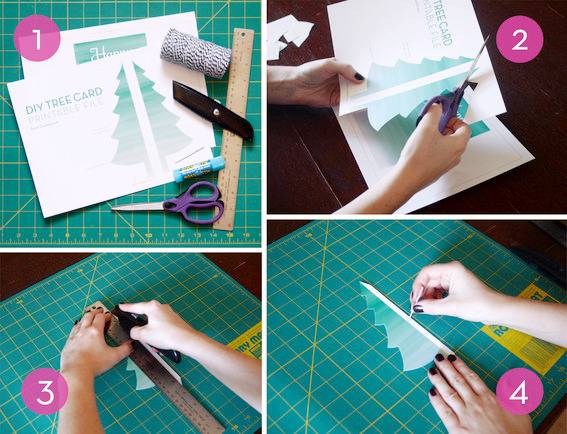
1. Here’s what you’ll need:
- Printable tree PDF file (download it here)
- Cardstock
- Scissors
- X-Acto knife
- Self-healing mat (or a piece of cardboard)
- Metal ruler
- Glue stick
- Baker’s twine or string
- Large needle
2. Begin by printing out the tree file on white cardstock, using your printer’s highest quality settings. Next, cut out each side of the tree on page 1.
3. Now it’s time to score along the fold line on the tree. With the printed side up, lay your ruler along the dotted fold line. Run your X-Acto knife gently down the length of the ruler, cutting only the first layer of paper. Make sure that you don’t cut all the way through. This will give the folded edge a nice smooth appearance.
If you’ve never scored anything before, it might be helpful to practice on another piece of cardstock first.
4. Now poke a small hole through the tiny circle that you’ll see along that same fold line. Do steps 3 and 4 on the other side of the tree as well.
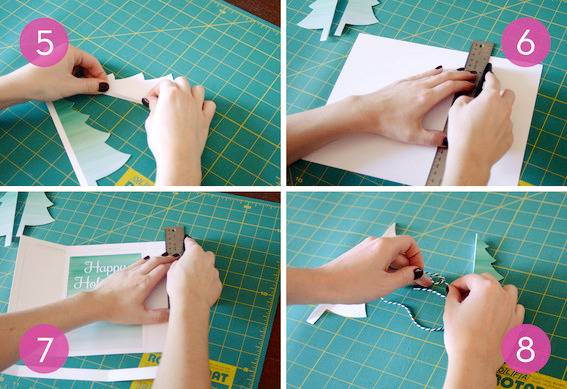
5. Now fold your nicely scored lines.
6. Next, grab the “Happy Holidays” page of the printed file and use your ruler to partially bend each fold line (noted on the top and bottom edges of the page). Flip the page over to the blank side and score along those two bend lines. When you turn it back over to the “Happy Holidays” side, the left and right flaps should easily fold into the middle.
7. Now trim the edges off using your X-Acto knife along the cut lines.
8. Now cut two pieces of bakers twine or string. Each one should measure 15 inches. Tie a knot at one end of each piece.
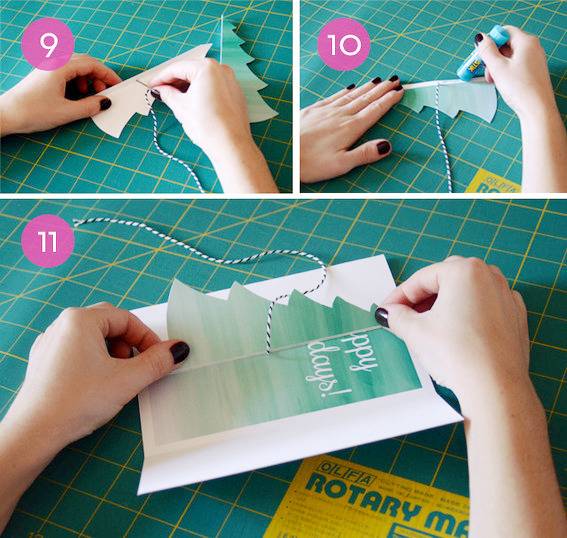
9. Thread the end of the string that isn’t knotted through the needle, and draw the string through the hole you made in step 4. It should come from the blank back side of the tree through to the front.
10. Run a line of glue along the white edge of the tree.
11. Attach it to the card flap as shown above. Repeat steps 9, 10 and 11 for the other side of the tree.

And that’s all there is to it! There are many fun ways that you could customize this tree card to make it your own, too. Add some “snow” to the edges of the tree using white paint, or attach sequins or stickers to look like ornaments. You can also experiment with the string. You don’t have to wrap the bow all the way around the card, you could simply tie it right at the front (see bottom photo). Or you can try a brightly colored piece of string. Or a different color for each side.

Have fun customizing your tree card… don’t be afraid to raid your craft drawer. The possibilities are endless!