
Organization is not my strong suit. Of course, I enjoy being organized, but somehow I never quite get there. So, I thought a new calendar might help to keep my schedule in order. I wanted to make one that I could reuse each month to keep track of my projects and appointments, so I decided to make a perpetual chalkboard version. And then? I stumbled upon the miracle of clear chalkboard paint… and the rest is, well, my own DIY perpetual calendar.
This stuff is like magic, people… you can paint it on virtually anything, and suddenly you’ll have chalkboards all over the house. Or…maybe that’s just me. But it’s a really great product. I bought mine on Amazon.com… it’s called Clear Chalkboard Coating by Americana. So anyways, enough gushing, and on to the tutorial.
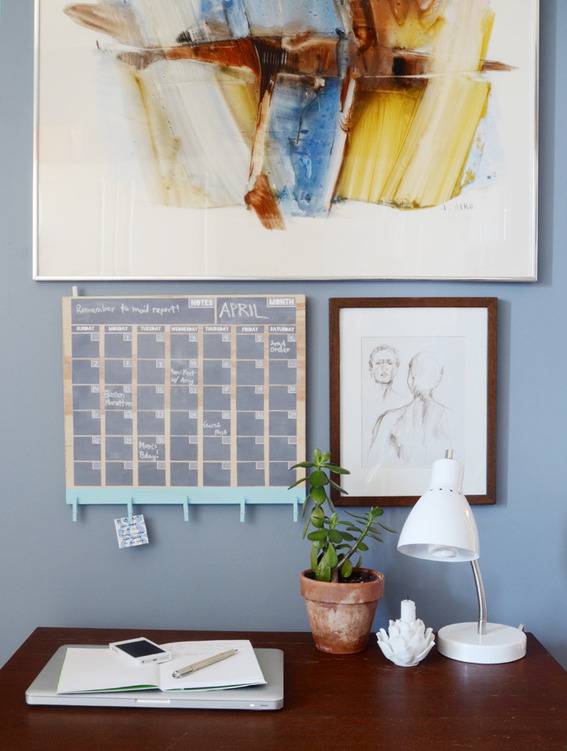
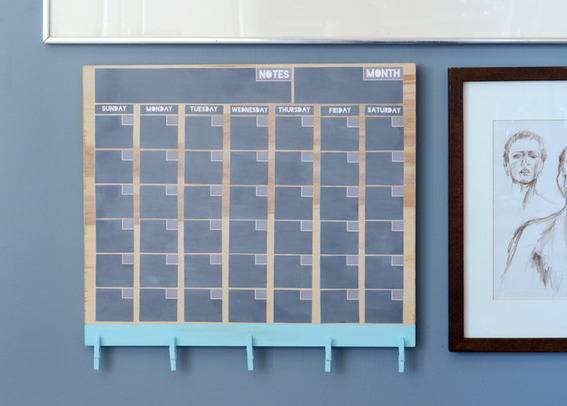
This perpetual calendar is handy because you can reuse it over and over again, and it has the added bonus of mini clothespins along the bottom to clip notes, invitations, etc. It’s not a difficult project, and it won’t take more than an hour or two to complete (with some drying time).
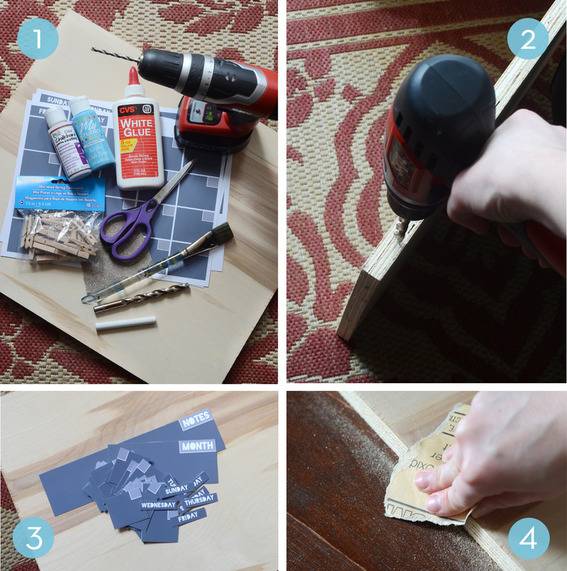
1. First, gather your materials. You will need:
- Printable Calendar Squares (click here to download template)
- 3/4″ plywood – I had mine cut to 15×17″
- Mini Clothespins
- Clear Chalkboard Coating
- Paint and brushes
- Elmer’s Glue
- Scissors
- Medium and fine grit sandpaper
- Screws for hanging, size 1″ (or nails if you don’t have a drill)
- Painter’s tape
- Chalk
- Drill with 3/8″ drill bit (optional)
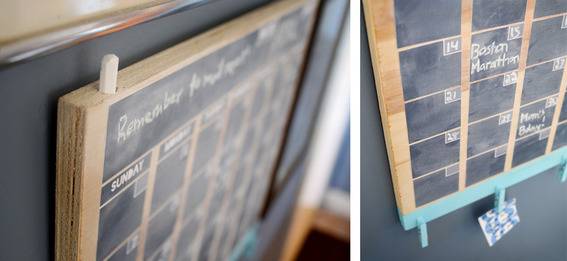
2. If you have a hand drill at your disposal, drill a hole along the top edge of the longer 17″ edge of the wood. This will be your chalk holder. If you don’t have one, you’ll can just find another place for your chalk!
3. Now print your calendar squares and cut them out.
4. Next, sand your wood until it has a nice, smooth finish.
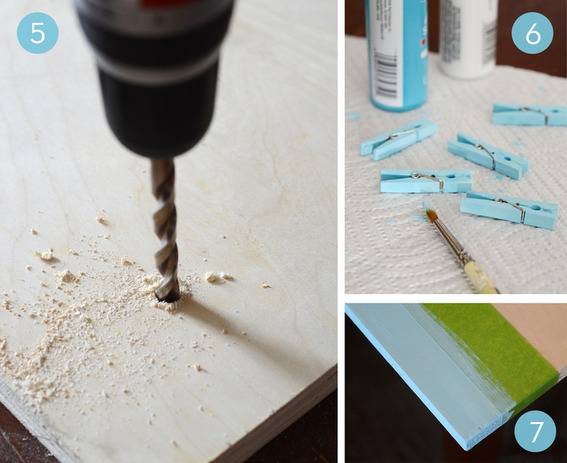
5. Drill two holes on the back of the wood for hanging – place one 2″ from the top and left edges, and the other 2″ from the top and right edges. Skip this step if you don’t have a drill.
6. Paint five mini clothespins blue (or whatever color you have chosen). Leave them aside to dry for a half hour, and then do a second coat.
7. Place painter’s tape along the bottom 17″ edge, leaving a 1″ wide strip uncovered. Paint that area the same color as your clothespins. Carefully remove the tape after a half hour.
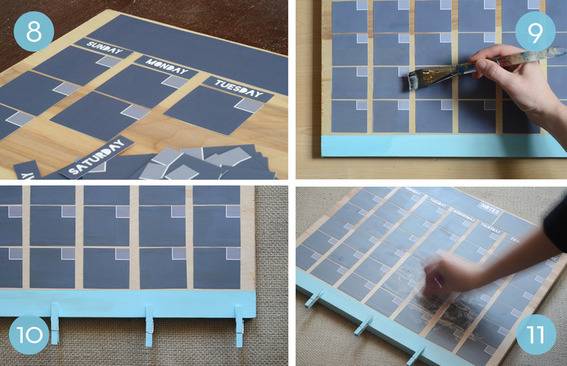
8. Lay out all of your calendar pieces, starting with the “notes” piece in the top left, and the “month” piece in the top right. Below those, evenly space the days of the week. Then place all 42 remaining squares below the days of the week and above your strip of color. They should be laid out in a grid with 7 along the top axis and 6 down the side axis. (Yes you need 6 weeks worth, trust me).
Once everything is laid out, glue each piece to the board. I find that using a paintbrush is the easiest way to do it, so you can “paint” the glue right to the edge of each square. The pieces may curl up around the outside a bit while they dry, just pat them back down again.
9. Once the glue has dried (it takes about an hour), use a wide paintbrush to liberally apply the clear chalkboard coating according to the directions on the bottle (two coats, one vertically and one horizontally). Let these dry in between too.
10. Glue your clothespins to the bottom edge.
11. Let your calendar dry overnight. Last, condition the chalkboard. This is a fancy way of telling you to lay a piece of chalk down on its side and rub it across the whole surface. Then wipe clean with a dry paper towel.
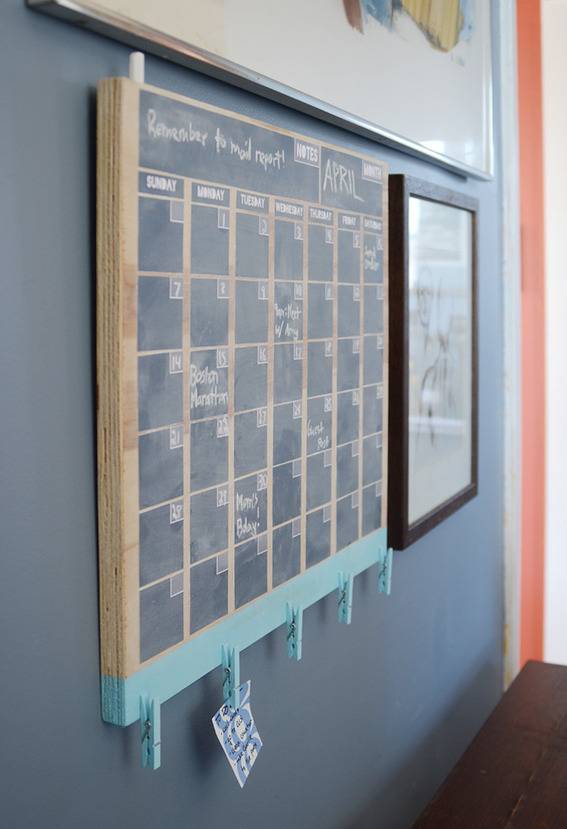
And that’s it! Now it’s time to hang your fancy new calendar. Measure the distance between the holes on the back of the board and hang screws on your wall according to those measurements. If you don’t have a drill, simply insert nails into the back of the board instead and string picture wire between them. Insert a third nail into the wall and hang it that way.
Hope this chalkboard helps you get organized this spring… it sure has helped me. Happy crafting!
I think this is so clever. I have found that I have had to search back on a calendar for dates things happened, like a plumbing problem with a new house. A well run paper lets me find a trail. I keep calendars for three years in a file folder, and discard the oldest one each January. I make notes when a worker comes, a couch is delivered, etc.