In this guide, we will walk you through the process of how to make paper look old using simple supplies and techniques. Whether you want to create a vintage-inspired letter, poem, or artwork, aging paper can add character and a sense of history to your creations.

Are you looking to add a touch of vintage charm to your paper crafts or writing projects? Aging paper is a great way to achieve that antique look without waiting years for your paper to naturally yellow and deteriorate.
Why Age Paper?
Aging paper transforms new, crisp sheets into antiques that whisper tales of the past, infusing your projects with an air of timelessness and mystery.
This technique is perfect for those looking to infuse their craft or writing projects with a sense of history and depth that only the appearance of age can provide.
It’s an excellent approach for creating props for themed events, such as historical reenactments, Halloween decorations, or theatrical productions, offering authenticity to the narrative being told or the setting being recreated.
But also, aged paper serves as a fantastic background or medium for scrapbooking lovers and artists aiming to achieve a rustic or antique aesthetic in their work.
It adds a layer of sophistication and intrigue, particularly in art that evokes an ancient era.
For writers, using aged paper can create a unique presentation for poems, short stories, or personal letters, making the content even more memorable for the recipient.
Playing around with aging paper can be a really cool hands-on experience. It helps you connect with traditional techniques and makes you appreciate the old-school vibe even more.
It’s a simple yet profoundly effective way to add character to modern papers and blend the old with the new in creative works.
Whether it’s for the joy of crafting or the desire to make your work stand out, aging paper opens up a world of artistic possibilities, allowing individuals to explore and express themselves in uniquely vintage styles.
Supplies You’ll Need for Aging Paper
Get ready to make some cool old-looking paper! You won’t need anything fancy – just some basic stuff you probably already have at home.
It’s an easy project for anyone who wants to give their crafts or writing a vintage vibe.
Here’s what you’ll need:
- A sheet of paper to age. Regular printer paper Will work for this project. IIf you want to print text or images on your paper, do it before you start aging the paper. This way, the content will blend in seamlessly with the aged background.
- Hot, black coffee. Approximately 1/4 cup will be needed to cover the paper and initiate the aging effect. The coffee stains the paper and contributes to its dark hue, which contributes to the overall aged appearance.
- Instant coffee. A teaspoon or so of instant coffee granules will be sprinkled over the wet paper to create varied textures and deeper shades, mimicking the inconsistencies found in genuinely old paper.
- A baking tray. Choose one that is larger than the piece of paper you plan to age. This will serve as a container for your paper as you apply the coffee and as a safe surface for oven aging.
- A sponge brush or a soft bristle brush. This tool will help you evenly distribute the coffee over the surface of your paper, ensuring full coverage for an authentic aged look.
- Paper towels. Handy for soaking up any excess coffee to prevent overly saturated spots and to help control the drying process.
- An oven. Essential for the final step, where controlled heat will accelerate the drying and aging of your paper, solidifying the vintage effect you’ve created.
Armed with these supplies, you’re ready to transform ordinary sheets of paper into timeless pieces with an old-world charm.
Preparing Your Paper
Begin the transformation by turning your oven to its lowest heat setting to ensure a gentle aging process.
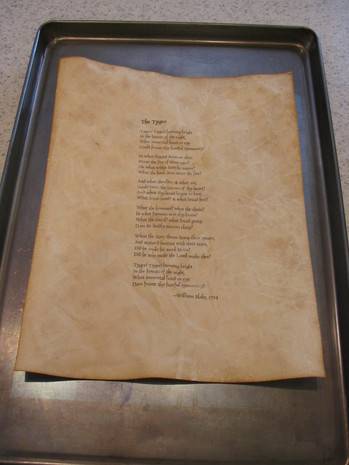
Take the chosen sheet of paper and crumple it into a tight ball.
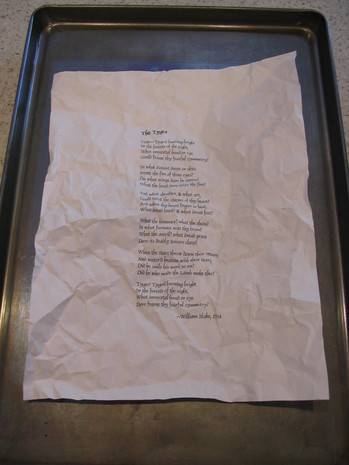
This step introduces creases and wrinkles that mimic years of handling and storage. Carefully unfold the paper, being mindful not to tear it, and lay it flat on your baking sheet.
This setup acts as your workspace and containment for the upcoming steps.
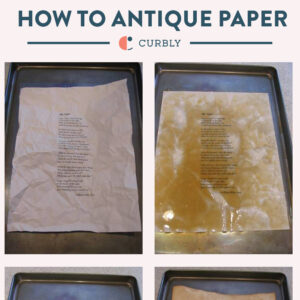
Proceed by evenly pouring the hot black coffee across the surface of your paper.
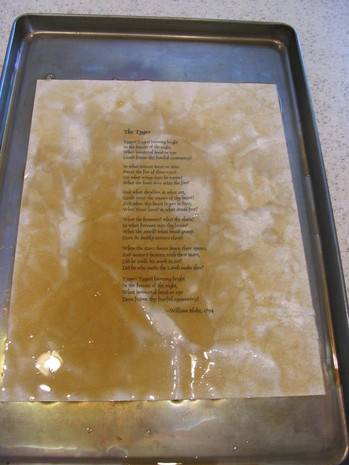
Using a sponge brush or soft bristle brush, gently spread the coffee, ensuring every inch of the paper is tinted.
The goal is to achieve an even coat while also allowing some areas to be darker than others, simulating natural aging.
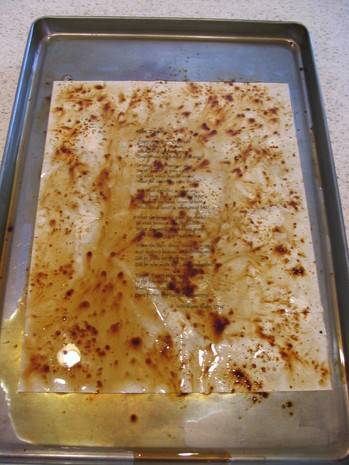
Now, sprinkle the instant coffee granules over the moist paper. This addition enriches the paper’s texture and color variance, offering spots and specks that are characteristic of old documents.
Allow the paper to sit for a few moments, giving the coffee granules time to dissolve partially and “blossom” into intricate patterns.
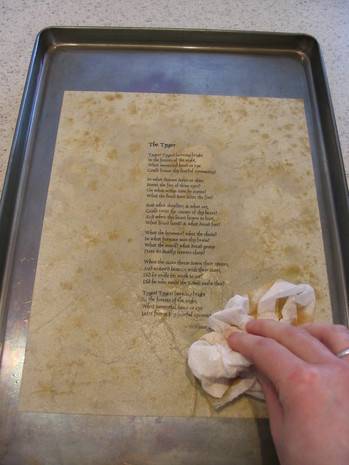
After a brief wait, take paper towels and dab away any excess coffee.
This step prevents overly saturated areas that could compromise the paper’s integrity.
After finishing these preparations, your paper is ready for the last step in the oven, which will give it that vintage look you’re aiming for.
The Aging Process
Just keep an eye on your paper in the oven. The low heat and coffee combine to give it a really authentic, aged look.
The magic of this process lies in the way the coffee stains and the oven’s warmth accelerate the paper’s aging, mimicking years of natural wear and tear within minutes.
As the paper dries, check out how it changes – the edges start to curl, the colors get richer, and the paper’s texture starts to look like an old document.
This is a crucial stage where the nuances of the aging effect truly come to life.
The combination of heat and moisture interacts with the paper fibers, creating a varied patina that adds depth and character.
Watch for any changes in the paper’s condition and be ready to remove it from the oven once it achieves the desired vintage look.
In this special setup, you can control how aged you want something to look. You can make it appear lightly aged, giving it a hint of old-fashioned charm, or you can make it look deeply browned and textured, as though it has been around for centuries.
Remember, each piece of paper reacts differently, so this step is as much about observation as it is about action.
By adjusting the duration in the oven and the amount of coffee applied, you can customize the end result to fit your specific creative vision.
This part of the process invites you to engage directly with the material and play an active role in creating your vintage masterpiece.
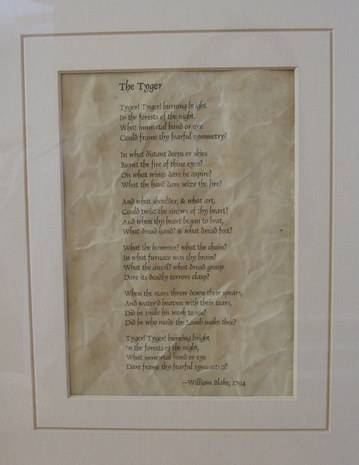
What To Do With Your Vintage Sheet
Why not give your home or office a historic touch?
Enhance your favorite quotes, family photos, or abstract artwork with the weathered appeal of the aged paper to create one-of-a-kind framed art pieces.
The paper adds a unique, rustic texture to every design and a story-like narrative that commercial, brand-new papers often lack.
Even simple decor items, like homemade bookmarks, gift tags, or festive ornaments made with this antiqued paper, become beautiful keepsakes, adding a subtle yet impactful vintage charm to your space.
Some ideas for your aged paper include:
- Transform it into an antique-looking map for a treasure hunt, giving it an air of authenticity that enhances the excitement of the quest.
- Incorporate it into scrapbook layouts or as a cover for handmade books. It provides a warm, nostalgic feel that complements your memories or stories.
- For poets and writers, it becomes the perfect backdrop to pen down verses or tales, lending them an old-world charm that resonates with readers.
- Artists can use it as a distinctive medium for sketches or watercolors, adding a vintage patina to their artwork that cannot be achieved with pristine white paper.
- It serves as an exquisite material for creating themed party invitations or menus, instantly transporting recipients to another era.
Let your imagination guide you in repurposing your vintage sheet, exploring beyond conventional uses, and embracing the unique character it brings to each project.
Tips for Success
Exploring a variety of paper types can yield interesting results in the aging process, as each may absorb and react to the coffee or tea differently, producing unique textures and shades.
Switching to black tea instead of coffee can give a more subtle but equally charming aged look with its unique scent and possibly a lighter color, providing flexibility for your creative projects.
When engaging in this transformative process, it’s crucial to maintain vigilance, especially while the paper is in the oven, to prevent any unforeseen accidents.
This includes monitoring the paper closely for signs of overheating and being prepared to intervene should any issues arise.
After removing your aged masterpiece from the oven, patience is key; allow it to cool down thoroughly to ensure it retains its structure and prevent any potential harm from handling too soon.
Being creative is what we’re all about in this project.
Don’t hesitate to experiment with different techniques, such as varying the amount of coffee or tea used, adjusting the oven drying time, or incorporating other elements like vinegar for added effects.
Each adjustment can lead to new discoveries, further enhancing the uniqueness of your vintage creations.
How To Age Paper
Materials
- A piece of paper you want to age. (I used regular 24 lb. laser paper. Of course, print your poem, passage of writing, and etc. to the page before you attempt to antique it.)
- 1/4 cup of hot, black coffee. (Although I’ve only used coffee, I’m sure tea would work.)
- A teaspoon or so of instant coffee. (I haven’t used fresh ground coffee or tea leaves, but they might work too.)
- A baking sheet (cookie sheet) larger than the piece of paper you want to antique.
- Sponge brush, or soft bristle brush.
- Paper towels.
- An oven.
Instructions
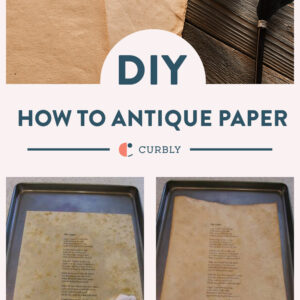
- Pre-heat oven to lowest setting. For me it was 200 degrees.
- Crumple up your piece of paper into a ball, then smooth it out and place in your baking tray.
- Pour hot coffee over your paper. Spread coffee over/around your paper with a sponge brush. I puddled a little too much. You can see the excess liquid in the lower left corner in the picture below.
- Sprinkle instant coffee over your paper.
- Let stand for a few minutes, letting the coffee crystals “blossom.”
- Using a couple of paper towels, dab the coffee up so none is pooled on the baking sheet or paper.
- Slide sheet into oven. Keep a watch on your project just in case of flame ups.
- “Bake” sheet for about five minutes or until paper is dry. You can tell it’s drying when the edges of the paper start to curl up.
So easy! And it totally worked. Thanks!
Or you can take a iron and keep pressing over it
Could you maybe post your results?
Will it be fine if I write on the paper before this process instead of printing it? Or will the ink run of?
I love the look, but need it to laminated. Would that work at all? or would the laminating ruin the effect you have with the crinkles??
can you blow dry the paper instead of put it in the oven?
I just tried this and it works really great!! Other websites recommend buying parchment paper, but this really looks way more authentic. I baked on 175 degrees celsius. Don’t walk away because it bakes really fast.
I am thinking of using this as a piece in a multi-media work I am doing. I wonder how it would hold up to varnishing? Anybody have any ideas?
Thank you so much! This worked amazing! I did not wrinkle my paper because I am using it in a project and wasn’t sure I would like the wrinkles. I also used regular (finely ground) coffee grounds sprinkled on the top and it worked just as good as the instant.
i think that this is a great way to make paper look old! it is uniqe and great!
I love your technique of aging paper. This year I’m making my own valentines card and wanting to age the prints. Thank you
Will this work on photograph paper?
No any water to photograph paper will cause ink to run
Can we do this with ten page at once?
Wow! I never thought of doing this. It super cool! Thanks for sharing.
I like this idea
I must’ve done something wrong because my paper stuck to the pan. Any tips???
Oh no! Could there have been too much water left on the paper? Or perhaps it was in the oven too long?
This was exactly what I was looking for. For my D&D campaign, I needed a lost page of a diary too look old an tattered. After I processed the page with these steps, I showed it to someone, not into D&D, and he told me it looked like a 600 year old page. My target was about 500 year 😀 so mission accomplished! THANX!