
A quick search on the Google tells us that one stone cabinet knob can cost upwards to$14 a pop. That is all kinds of crazy expensive, especially when you’re outfitting an entire kitchen. Mine, for example, has 30 knobs. Multiply that by 14 and you’re talking $420 just for knobs. I decided there MUST be a more cost-effective way to get the stone look for less.
Enter Sculpey, which, if you don’t know, is a polymer clay that you bake in the oven. I had seen other crafters use the stuff to make faux rocks, so I decided to use it to turn regular old knobs into stone look-a-likes. At the outset, I wasn’t sure how these were going to turn out, but I must admit that I was impressed with the results. They DO look like stone.
Now, before we start the how-to part of this post, there’s something you need to know. I used ceramic knobs, because I had them in my stash, but metal knobs would work perfectly too. What won’t work is wood knobs. So, keep this in mind. Now, to the good stuff.
What you’ll need to make faux stone knobs:
- Sculpey (or polymer baking clay of your choice). I used only 2 colors for these five knobs: Translucent and Black. Sculpey DOES make Gray Granite as well as small collections of colorful granite too. The former would be the easiest way to go but not NEARLY as versatile; the second provides variety but at a much higher cost. Also, one package of 2 oz Sculpey will cover EIGHT 1” knobs. That means at a cost of about 2 bucks a package, each knob will set you back 25 cents. A far cry from $14, huh?
- Knobs; ceramic or metal
- A baking sheet and aluminum foil
- An oven
- Kosher salt, Martha Stewart Crystal Fine Glitter, nutmeg and a wood rasp. NOTE: Not all of these are necessary for each knob look; it depends on which look you’re going for. (More on that ahead.)
Step one:
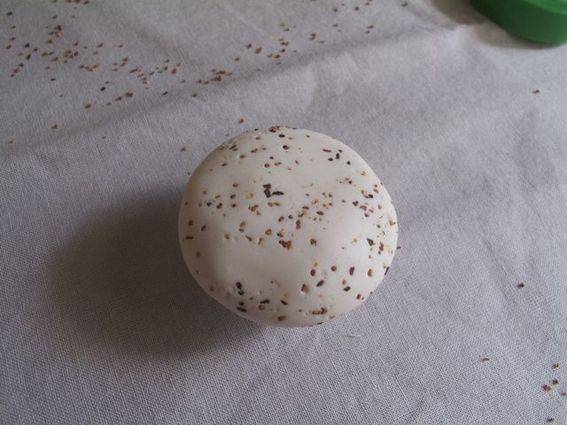
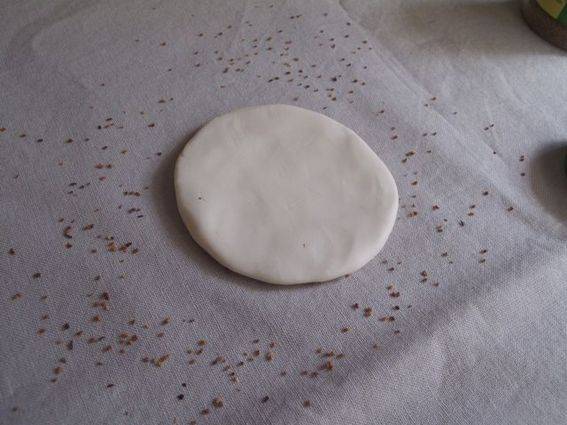
Pull one half of one section (there’s 4 in a standard package) of the clay from the package and kneed it until it is soft and pliable. Form a 1/8” to 1/4” thick pancake that is a bit larger than the diameter of your knob. (This is a picture of the prepared “Corian” look-a-like.)
Step two:
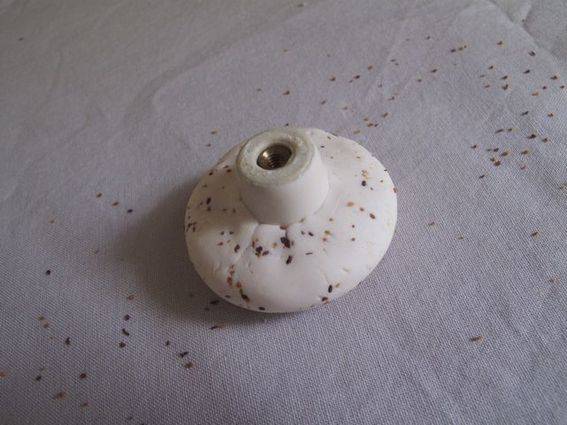
Form the disc around the front of your knob.
Use a back of a table knife to form the Sculpey to the back of your knob.
Step three:
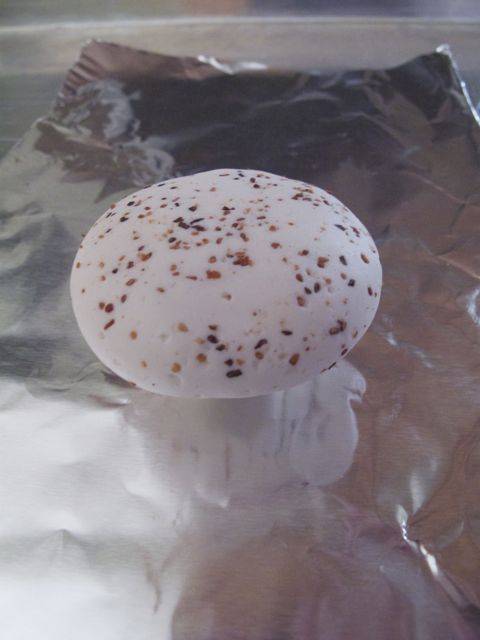
Follow the baking instructions on the Sculpey, putting the knob(s) on a baking sheet that has been lined with aluminum foil.
Step Four:
Remove from oven, cool and install. And that’s it, as far as forming and baking is concerned!
Now we’ll move on to how to get the individual faux stone looks.
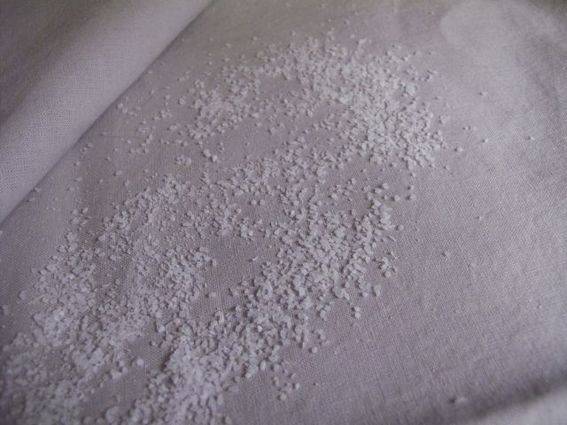
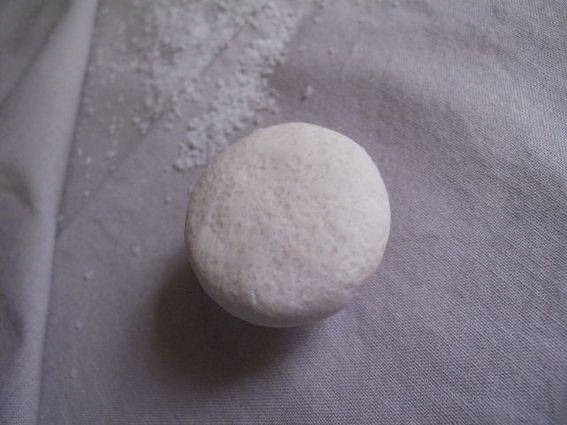
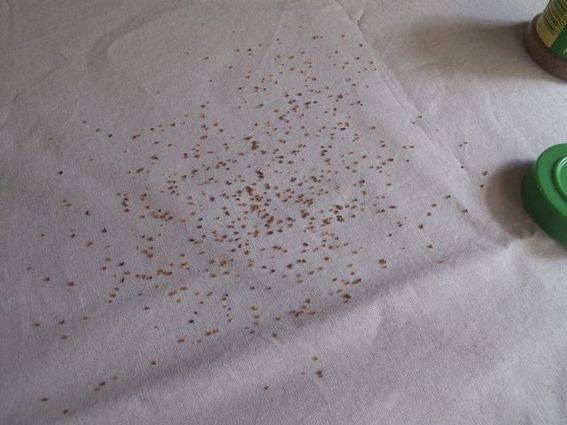
For the Travertine look, use the Translucent clay. After forming into a pancake, press one side of the disc into Kosher salt that’s been scattered on a flat surface Follow the instructions above. When it’s done baking, soak it in a glass of water to dissolve some of the salt.
Scattered salt:
Travertine before baking:
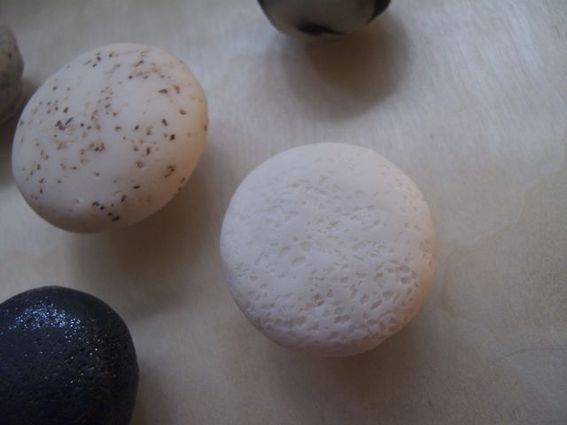
Close-up of the Travertine completed:
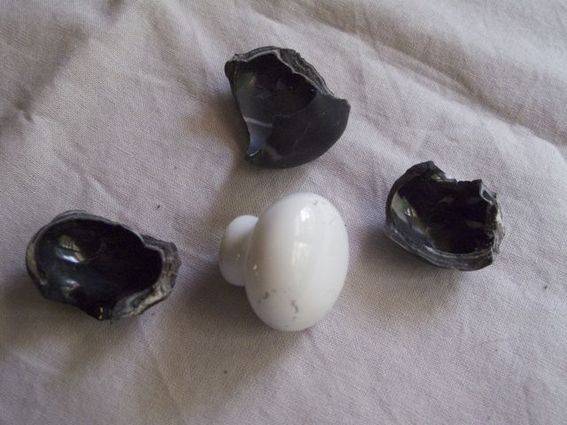
For the Black Granite, use the Black clay. After forming into a pancake, press one side of the disc into very fine glitter.
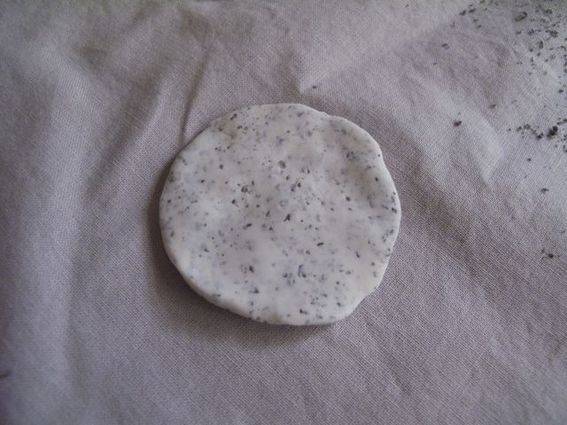
For the Marble look, use 1/8 of a section of black and two 1/8 sections of white and form into three oblong pancakes. Stack the pancakes with the black in the center. Twist the stack once or twice and form into a ball, then form into a pancake as you did in Step 1 above.
For the Gray Granite look, bake a bit of the black Sculpey, and then use the wood rasp to grate about 1 teaspoonful of it. Form a translucent pancake and press one side of it into the rasped material.

After pressing into the rasped material:
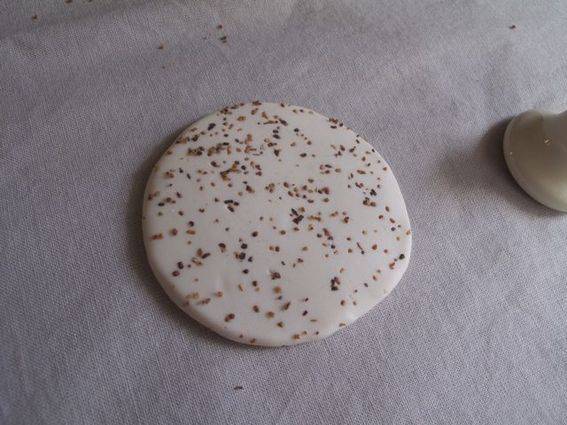
For the Natural “Corian” look, form a pancake of translucent Sculpey and press it into nutmeg.
Of course, these were the results of MY experiments getting stone looks, but I’d really encourage you to try whatever you think might work like using different colors blended together or different spices. Also, if you’re unhappy with the final results, you CAN pry the clay off the knob and start over. Use a side cutter to cut the clay and then pry it off with a screwdriver. If you’re doing a bunch of knobs, look for Sculpey in big bricks, which will save you even more money!
This is awesome! I will give it a try TODAY. Many thanks for posting.
Gracias””