First a short story. Last August I went to a well-regarded local garden center and spent about 40 bucks on a wind chime. After ONE MONTH, this is what it looked like:
The wood was split and the finish (yes, it had a finish) was peeling. So, when I determined to design/make a wind chime, I decided early on to use a durable wood. My first thought was to use redwood, but redwood here in the Midwest is hard to come by. Ultimately I went with Ipe. Now, Ipe is not an inexpensive species of wood, (although it is less expensive than teak). A 6′ x 6″ piece ran me about 40 bucks, but it’s virtually indestructible, gorgeous and perfect for outdoor applications. If, however, your chime will be in a covered area, such as a porch, then plain old pine should work just fine.
The second criteria for my design was that no knots would show. If you’ve ever studied store-bought chimes, there’s no (or few) knots visible, and if you’ve ever studied typical DIY chimes, there’s knots a-plenty. So, no knots.
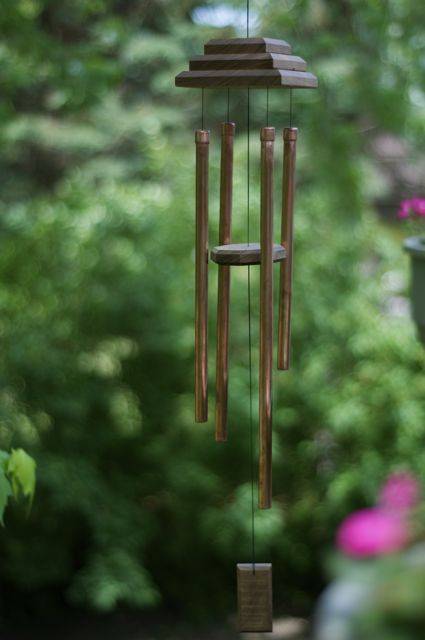
Thirdly, I wanted my chime to have some serious resonance. I have other chimes that have a higher tone; this one needed to be deep and rich.
And finally, I wanted my chime to have a Zen quality.
Ultimately, I was able to achieve my wind chime goals. With this tute, you’ll be able to get the same results too.
Materials:
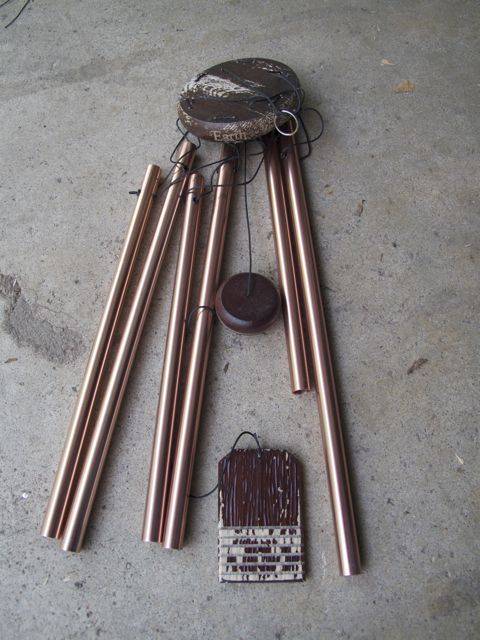
- 5 feet of 1/2” copper pipe
- 4 – 1/2” copper pipe caps
- 2-part epoxy for copper
- 3′ x 6″ Ipe or redwood (Our board width measured 5-5/16” wide. Yours may or not be the same.)
- Black nylon (We used 36lb test Musky Master found at a local sporting goods store.)
- Drill
- 1/16” & 3/16″ drill bits
- Saw, table or otherwise
- Pipe cutter
- 8 – 1 1/4” finish nails and hammer
- Very fine sand paper
- Tape measure
- Pencil
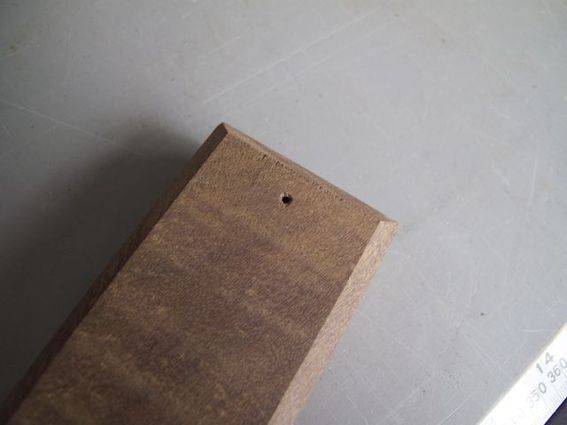
A note on counterboring: To counterbore, we simply used the 3/16″ drill bit to drill a relief cavity (about a quarter inch deep) for the knots.
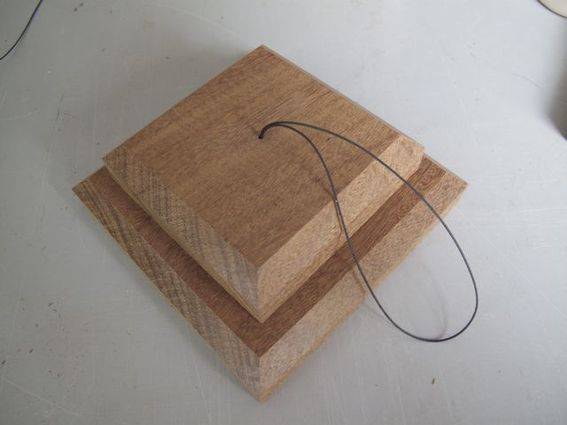
Step 1: Cut wood into the following sizes:
1 piece at 5 5/16” x 5 5/16”
1 piece at 4 5/16” x 4 5/16”
1 piece at 3 5/16” x 3 5/16”
(These three pieces will be assembled to create our cap.)
Note: If your wood does not measure 5 5/16″ wide, just cut the largest piece square and subtract 1” for each of the next two parts.
1 piece at 3 1/2” x 1 3/4” (This will be our wind sail.)
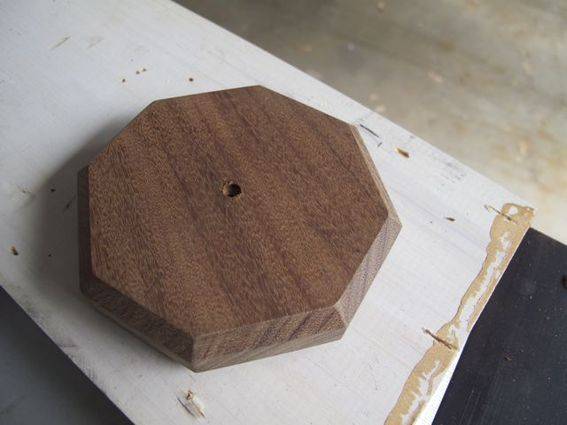
1 piece at 3 1/2” x 3 1/2”. Cut each corner on this piece to fashion and octagon. (This will be our striker.)
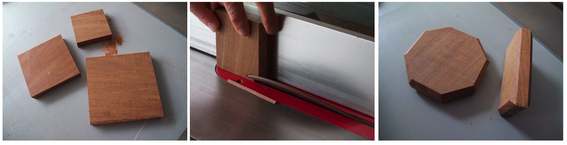
Step 2: Chamfer the top edges of the 3 squares at 45 degrees using a table saw, router or sander. (If cutting, always cut the end-grain ends first. The other two cuts will address tear out.) Then chamfer ALL edges of the striker and wind sail.
Step 3: Cut copper pipe into lengths measuring 18”, 16”, 14” & 12”. De-burr pipe ends with sandpaper. (Hint: Very fine sandpaper will take off any ink print that may be on the pipes and make them gleam.)
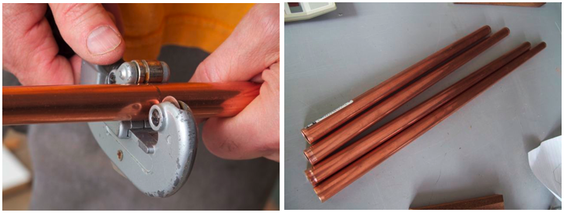
Step 4: Drill 1/16” holes into the center of the 4 copper end caps. Cut 4 lengths of nylon at about 12” each. Thread each into an end cap and knot the end that will be inside the cap. Mix up the 2-part epoxy and glue one end cap onto one end of each length of pipe.

Step 5: Mark center of the smallest square you cut in step one and drill a 1/16” hole at that point. Counterbore the underside (the non-chamfered side) of the square to create a cavity to hide a knot. Cut about a foot of the nylon and thread both ends through the hole you just drilled. Knot the ends and tuck the knot into the counterbored hole.

Step 6: From the underside, nail the second largest square to the smallest square, referring to the picture below for placement.
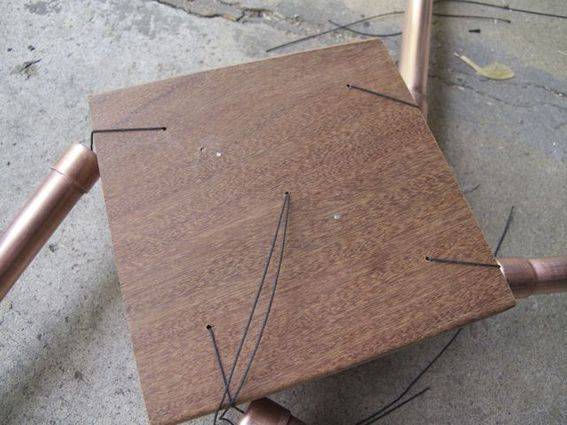
Step 7: Now take the largest square and mark the center. Drill a 1/16” hole here as well as at each corner. Use the squares from the last step to determine where the corner holes should be drilled. (The idea is that the square directly above will cover the holes drilled in this step.)
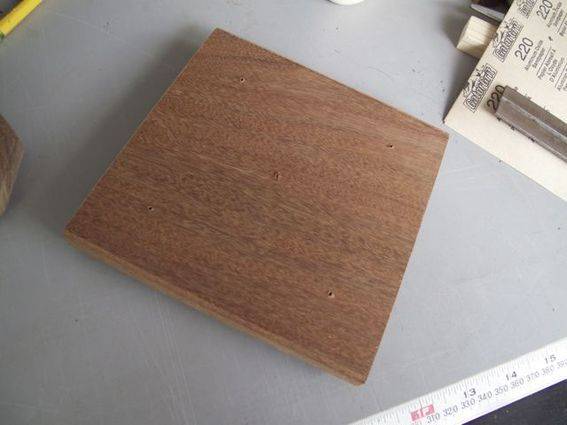
Step 8: Counterbore each of these 5 holes on the chamfer side.
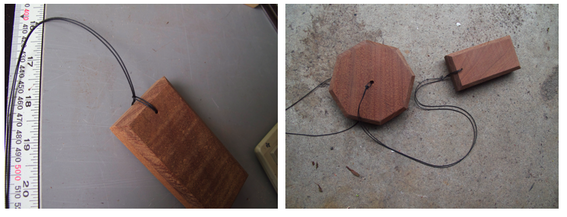
Step 9: Drill a 1/16″ hole at the top (about 1/2” down) of the wind sail.
Step 10: Mark the center and drill a hole into the center of the striker. Counterbore one side.
Step 11: Cut about 5 feet of the nylon. Fold in half and thread it through the wind sail. Use a half-hitch to secure. Make a large knot about 15 1/2” up from wind sail. Thread on the striker–counterbored hole down.
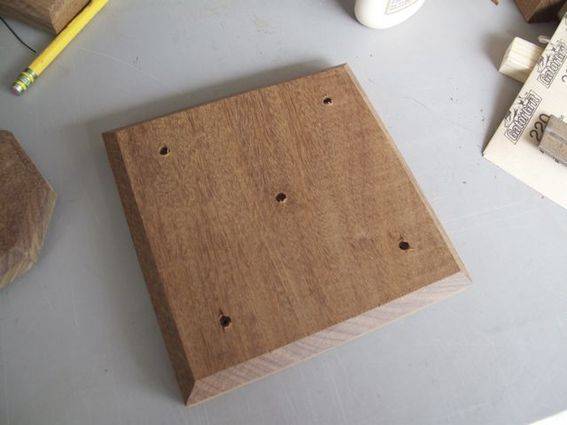
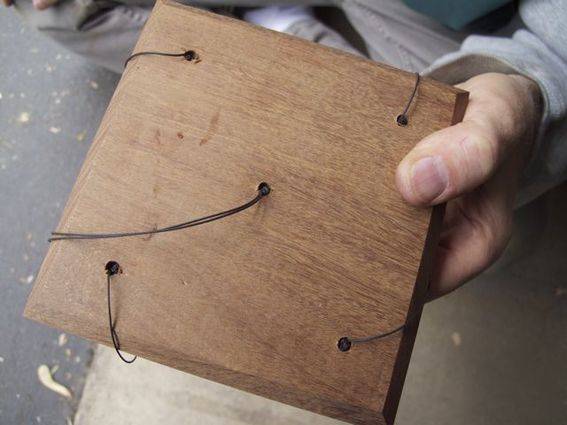
Step 12: Thread the nylon protruding from the pipe and end caps through the four holes in the corners of the largest block of wood. Thread the two longest pipes in opposite corners; this will help keep your cap level. Pictured below is the UNDERSIDE of the block; the counterbored holes will be facing UP when assembled.
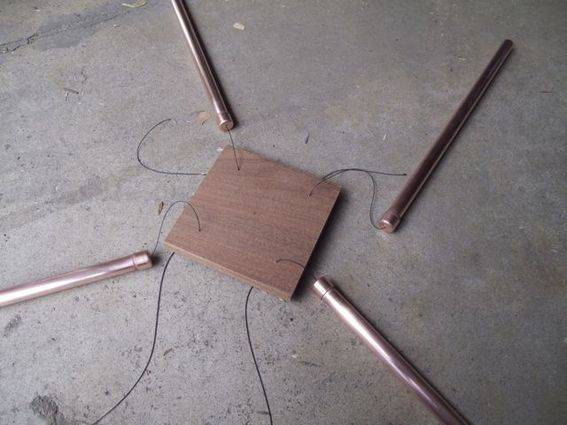
Knot each and hide the knots in the counterbored holes. (Our pipes hang approximately 2″ down from the cap.)
Step 13: Thread the nylon coming from the striker/wind sail assembly through the center hole in the bottom square (counterbored side is facing down in the picture below)….
 …and knot well. (Our striker is approximately 7 1/2″ from the cap.) Pictured below is the counterbored/knot side of the block pictured above.
Step 14: Finally, nail the top two blocks to the bottom block from the underside, hang and wait for a gust of wind.