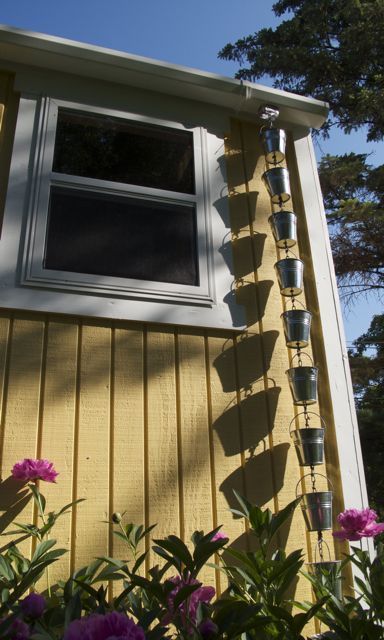
In our second original outdoor decor project for this month, we’re going to make a rain chain! Why? Because they’ve become a very popular alternative to the utilitarian downspout as a way to direct rain from your gutters to the ground. Search ‘rain chain’ on the google and you’ll see that besides being popular, they can be very expensive. My DIY alternative, however, can be assembled in about an hour and costs around 30 bucks.

Materials:
- 11 small galvanized steel buckets, (the ones I bought for the project measure 4 1/4″ high [6 3/8″ with the bail] with a top opening of 4 1/8″ in diameter and a bottom of 2 7/8 in diameter) You can find similar buckets on Amazon or on Etsy.
- 8′ of 1/2″ chain
- 15 – 1″ S-hooks
- 1 – 3 1/2″ eye-hook, or large enough to hold the weight of the chain and buckets
- 1 aluminum downspout outlet to fit inside the hole in your gutter
- drill
- 1/2″ drill bit
- pliers
- caulk, for outdoor application
- eye protection
- round file
NOTE: The length from your eave to the ground will determine the exact length of your chain as well as how many buckets you’ll need. My rain chain needed to be 8′ long to reach from downspout to ground, thus the 8′ of chain in the materials list.
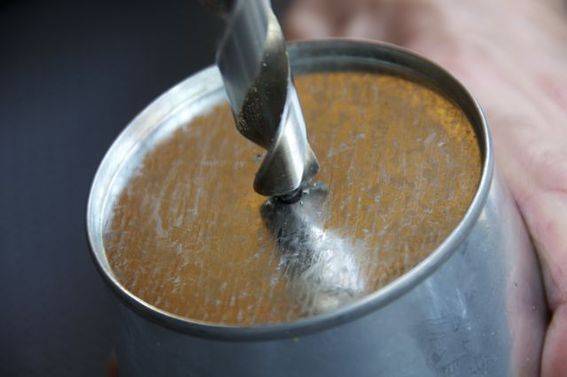
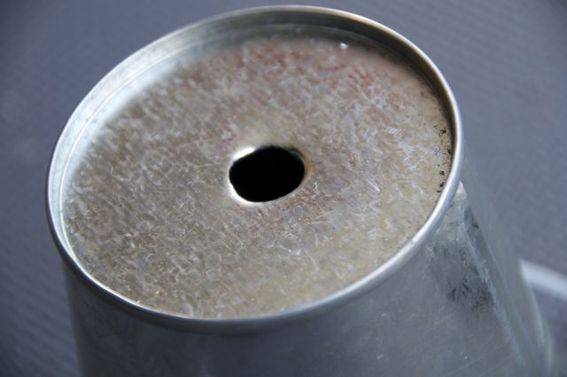
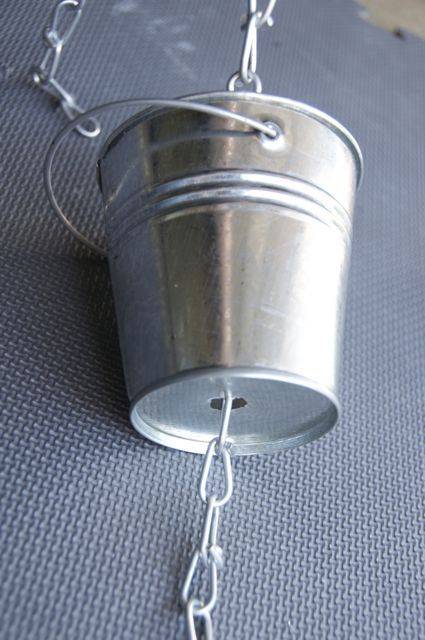
Step 1: Drill 1/2″ holes in the center of each bucket and de-burr as necessary with the round file.
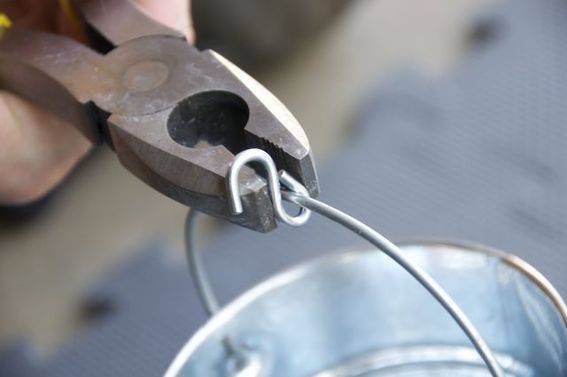
Step 2: Put an S hook on the handles of the buckets; use pliers to close the side around the handle.
Step 3: Thread the buckets onto the chain (through the holes you drilled in step 1), spacing them equally apart. (It’s helpful if you can hang the chain while you do this. I hung mine from a rafter in the garage.)
Step 4: Crimp the S hooks (that you installed in step 2) into place through the individual links in the chain, spacing the buckets evenly down the entire length of the chain.
Step 5: Install the aluminum downspout outlet into the hole in the gutter; put a bead of caulk around the lip of the outlet to secure it in place.
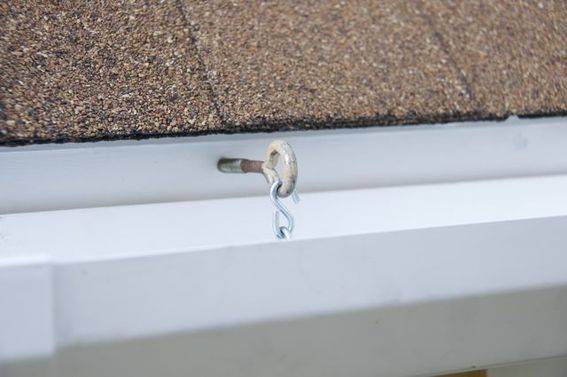
Step 6: To hang the rain chain, I used a 3 1/2″ eye hook that I screwed into the fascia board of my garden shed; I then crimped on an S-hook to the top of the chain and fed it through the aluminum downspout outlet we installed in step 5. Then I simply crimped the S-hook onto the eye hook.
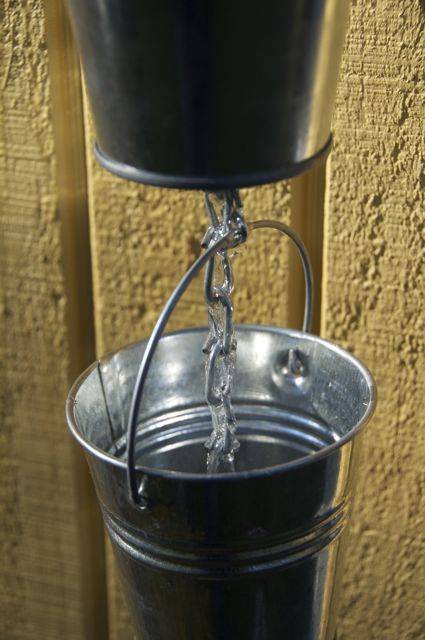
Step 7: Stand back and admire your handiwork and wait for a rainfall!
P.S. You’ll want to check your buckets periodically throughout the season for debris that might impede the proper funneling of the rain.

Looking for more rainy day projects? Chase the Rainy Days Away with this DIY Painted Umbrella
I attached a black plastic hose to my shepherd hook (for plants) attached my
rain chain from the top hook. Sat a tub below the chain, with a circulating pump and made a fountain.
The rain chain you pictured looked good from the side but there was no place for the water to flow down. My Rain chains have 1.5-2.5 inch opening where you have a drilled hole 1/2 inch? There are times when the rain comes down so rapidly that it overflows the capacity of my rain chains to channel the water down. I think that the bottoms of your little buckets should be totally removed to make your cute rain chain actually function.
Agreed. That’s what I plan to do.
Great idea! Found buckets at ACMoore. The ones I used are a little smaller and used a bigger chain. Made a much larger hole in the buckets to accomodate the larger chain and allow as much water to pass through as possible. Instead of using the S hooks, just unbent the handle and slipped it through the chain links and rebent it back. Also since I love the look of copper, I used a spray paint in copper and painted all the buckets. The chain was already a dark bronzed color so they go together well. Now just waiting for some rain.
I saw a rain chain made out of bamboo cups. As the upper one filled, it tipped over into the next one. Made a clicking noise as they tipped over, then turned upright and filled again. If anybody has instructions, I’d love that one.
Awesome DIT article, I plan on using little white buckets from our wedding reception to build this. Found white chain at ACE to match. I plan on making a large hole in them so debris can flow and get caught on my rain barrels screen. More people should use rain barrels with these chains 🙂
I just purchased a portion of a gutter system since my patio does not have one. To keep debris out of that portion of the gutter, place window screen over the top of the down spout. It should help tremendously. I purchased my galvanized buckets at Hobby Lobby (most craft stores carry them). I would like to know where I can purchase the copper pieces at a cheaper price. I live in a small town in New Mexico. I am very limited on where I can buy these items.
Just put up at my mini horse barn in Winston Salem and mid October it will be 78 and sunny. Not that I like rain but kinda looking forward to watching them in action, which should be in a week. FYI, I went to Lowes for all the materials to include buckets. Thanks for you ideas, my Minis should love it.
at the bottom of the buckets I drilled a hole 1 1/4 to allow leaf debris to pass thru otherwise the buckets filled and water overflowed