
In my bedroom I have a small, awkward wall. Nothing fits there but my vintage library chair, and it has become the neglected space in the room. I recently decided that I needed a clock in my room; not just any run-of-the-mill time keeper, but one that would make my wall of woe a little more interesting while keeping with the modern feel of my bedroom. I looked everywhere, and nothing was in my taste and in my small budget, so I decided to make exactly what I wanted. To make a modern wall clock like mine, just do as I did:
Supply List:
- Clock Kit with 4 1/2″ minute hand (I bought the kit at Hobby Lobby, and then purchased longer hands separately)
- Plywood, no thicker than the shaft of your clock kit, cut 20″ square
- Jig saw
- Electric Sander, sandpaper
- Paint Colors of choice
- Ruler, pencil
- Contact paper or vinyl
- Exacto knife or electronic craft cutter
When I went hunting for plywood for this project, I knew I wanted something a little on the nicer side so it would take paint well and hang straight. I was lucky and found the perfect piece in the cull bin at the hardware store for a whopping 51 cents! Somehow, I felt like this project was meant to be.
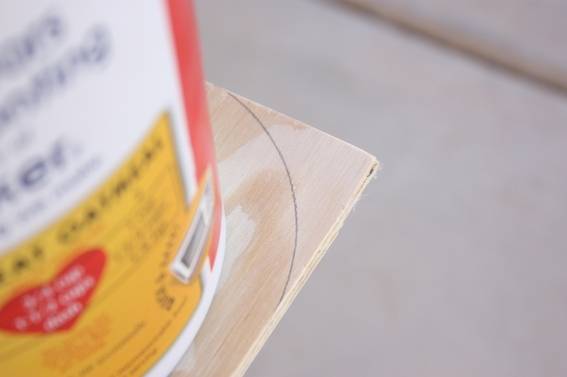
I wanted the edges of my clock to be rounded to give the overall clock a softer look. I used a can of dry oats to trace a nice curved edge on each corner.
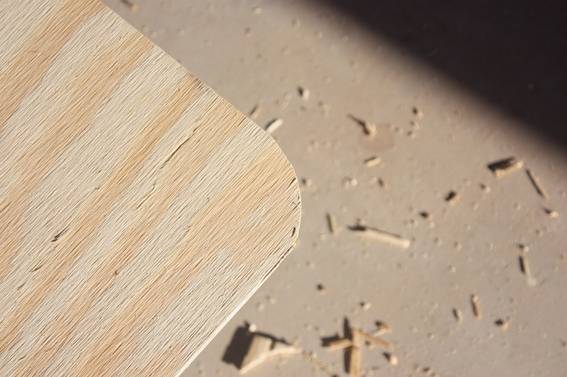
I carefully cut around each corner using a jig saw. The edges were a little rough (I’m terrible with a jig saw), so I gave them a good sanding with an electric sander to get a cleaner edge. While you are at it, sand the front of your plywood with a fine grit sandpaper to get it nice and smooth.

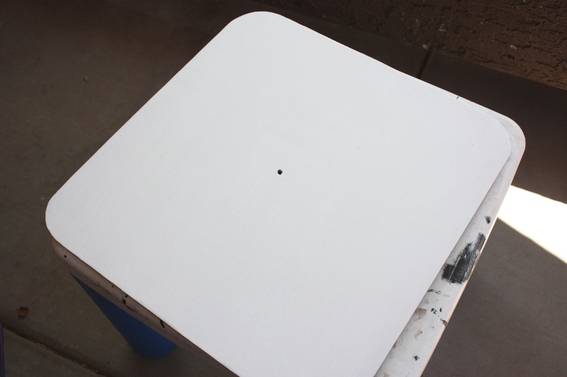
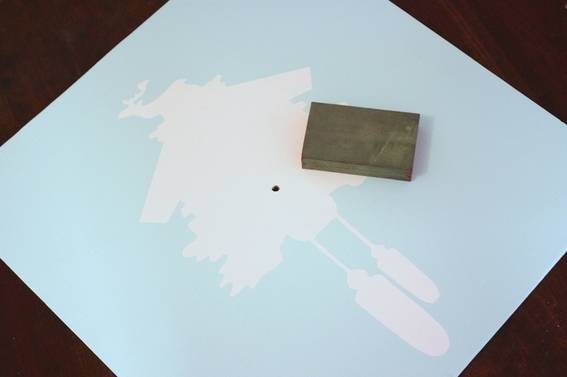
The plan was for my clock hands to be centered on my plywood, so I marked the center of the board and drilled a hole for my movement shaft at this point. Depending on the image you are going to use, you may want to drill your hole later.
Next, I painted the plywood the color I wanted my cuckoo clock . I also made sure to paint the side edges of the clock too, since those will be visible on the wall.

I cut out a silhouette image of a cuckoo clock using an electronic cutting machine and contact paper, but your image of choice could be done by hand as well using a craft knife, like Exacto. I actually cut two images- my first attempt was too small and I had to scale it larger to look good. Learn from me: measure and do a mock-up first!. Carefully place the contact paper image on the plywood. Make sure it is adhered really well along the edges so your next layer of paint doesn’t bleed through.
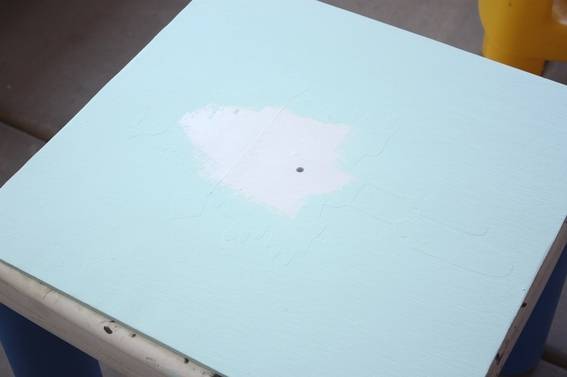
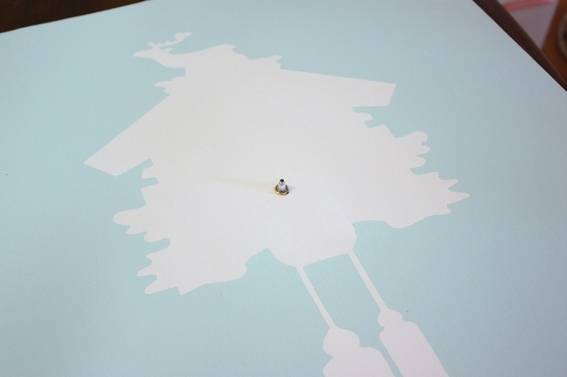
Now, add your second color of paint (I used leftovers from a laundry room project). Use as many coats as necessary, but be careful when painting around the contact paper edges.
When the paint is dry, pull off your contact paper. If you had a non-centered image, this is where you should carefully drill your hole and add any paint-touch ups from drilling. I had only one or two places that needed small amounts of touch-up paint around the image edge. Since I had to do a few coats of blue paint, I gave the whole board a good sanding with a foam palm sander to get it smooth after my touch-ups had dried completely.
The only thing left to do is start assembling your clock, following the directions on the kit. Don’t forget the battery!
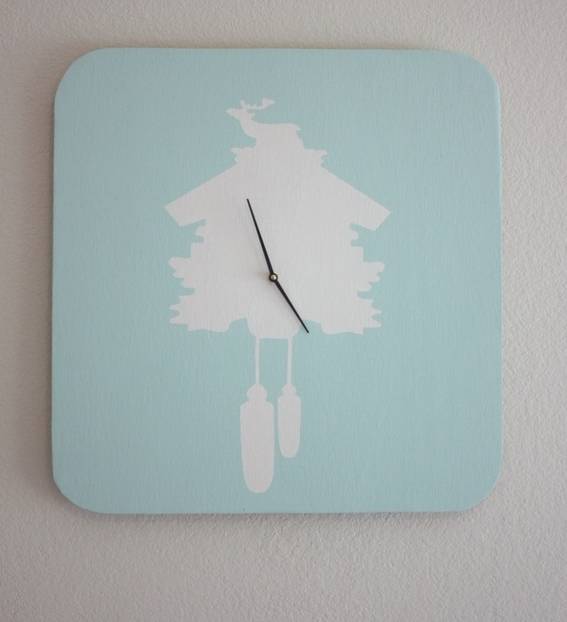
My clock part came with a hanger, so I simply put a nail in my wall and hung it up.
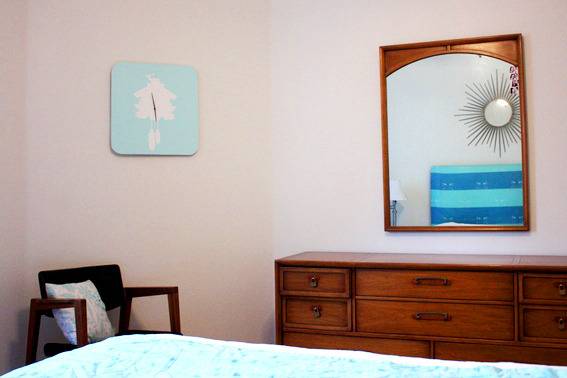
Now the sad blank space on my bedroom wall has a unique piece of functional art to adorn it. The modern update to a classic cuckoo was just the right touch, especially since it pays homage to our Austrian and Scandinavian roots. It is a bonus that it is the same color as everything else in my room, too…