
Welcome to our newest blog series, My Total Office Makeover, in which Curbly’s editor-in-chief, Chris Gardner, realizes that as a full-time design and craft blogger working from home, he’d better transform his second bedroom into an inspiring space where work can actually get done.
Part V: The DIY Drafting Table Having figure out adequate storage solutions, a media workstation, and an all-purpose desk for general work, the last major furniture solution loomed: I needed a large work surface for art and craft projects: sewing, fabric-cutting, drawing, papercrafts, design and layout, etc. It’d have been awesome to have a dedicated cutting table and an drafting table, but I wouldn’t have the room. A large drafting table would work, but they’re often very large, and the support trestles can take up a lot of space, and I didn’t have any to spare.
When I discovered the IKEA VIKA BLECKET top, with its built it lightbox option, tool tray, and generous size, I knew it’d be perfect, but the recommended ARTUR trestles had a large footprint, and wouldn’t fit in my current room design. So, I came up with a hacked option that would allow for the adjustable angle, but not suck up so much valuable floor space. And I saved a little money as well.
Materials
- Flat desk surface, such as a secondhand table, solid core door, or new modular desktop, like the IKEA VIKA system
- 2x desk-height table legs, like the IKEA VIKA CURRY
- 2x adjustable-height table legs, like the IKEA VIKA KAJ
- 2x heavy-duty 3″ one-way hinges and accompanying screws
- scrap 1/2″ plywood and hardboard
- saw
- electric drill and assorted bits
- metal file or rotary tool
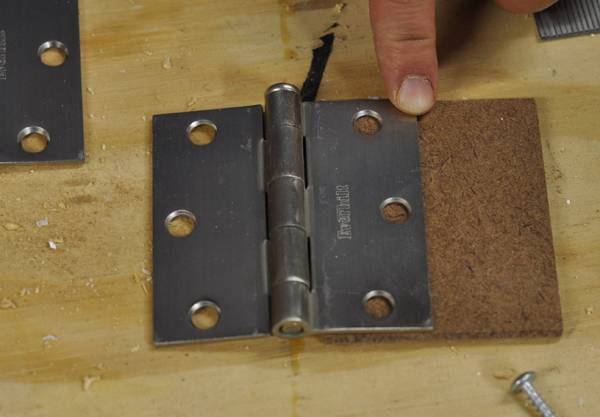 1. The idea here is to place the adjustable legs on the back, and the standard legs in the front, allowing the angle of the table to be adjusted. Since changing the height of the back of the table will necessitate a different angle of contact at the front of the table, the hinges allow for that adjustment. The scrap wood allows for accommodation of the hinge, and provides a strong surface into which the screws can bite.
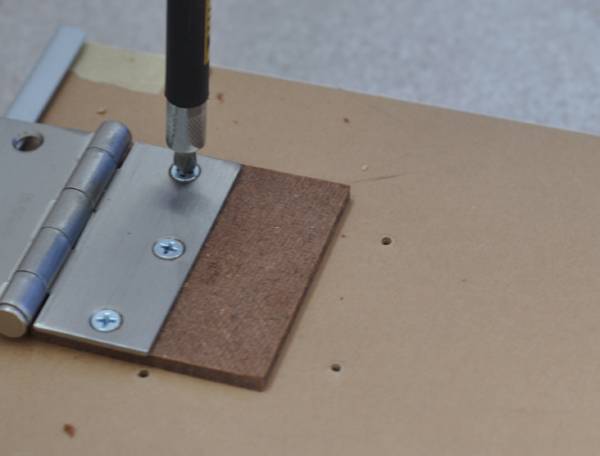
2. So, cut the 1/4″ hardboard or plywood into 3″x 2 1/2″ rectangles, and secure them to the front of the table by drilling pilot holes and then attaching the hinges via screws, as in the photo above.
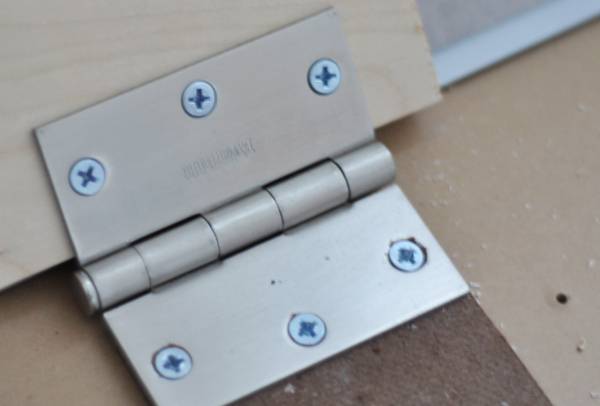 3. Then, cut the 1/2″ plywood into 4″ x 4 1/2″ lengths and secure to the other side of the hinge. (Please ignore the stripped screws…I know better than that. Drill pilot holes!)
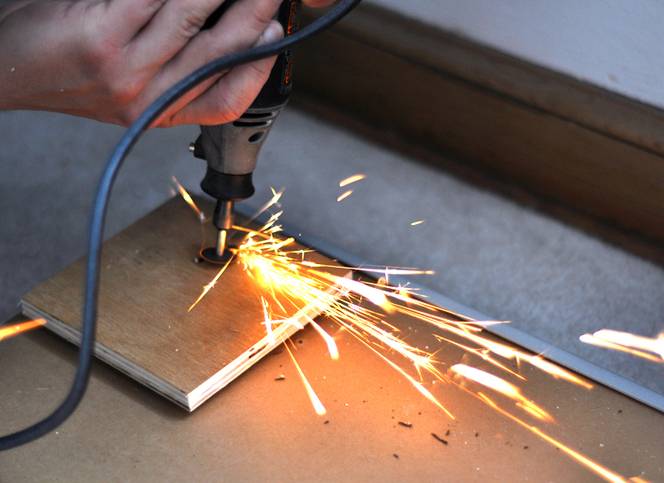
4. Use a file, grinder, or rotary cutter to cut or smooth any protrusion of the screws, then attach the fixed legs to this side of the plywood.
5. Then, attach the adjustable legs to the back of the desktop, and invert. Set the back legs to the desired height (if you’re using the IKEA legs, it’s lefty-tighty for some reason).
The only flaw in this system is that the desk has to sit further from the wall the higher the back goes, but it’s not terribly far. And obviously, the desk can’t sit vertically as in some drafting tables, but it can’t do that on the IKEA trestle either. It gets to nearly a 45-degree angle, and that’s good enough for me.
You could also use the adjustable legs on the front as well, and still use the hinge-technique on the legs.
Buy or DIY?
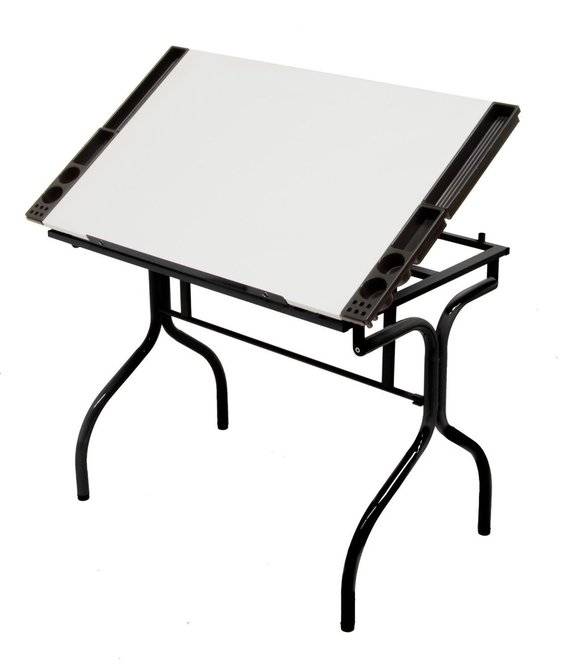
Save some space with this handy craft table from Studio Designs.
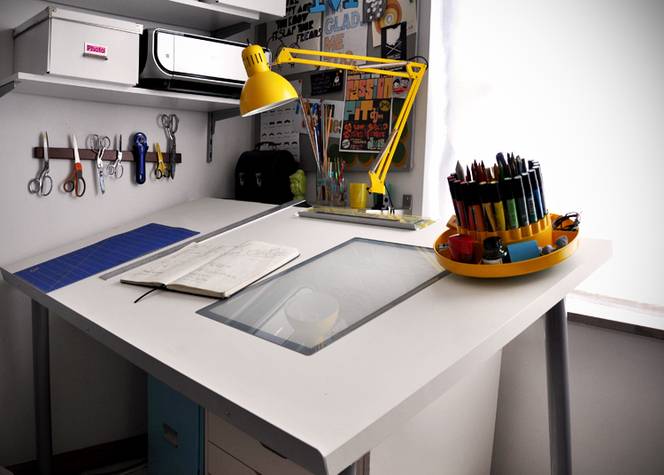
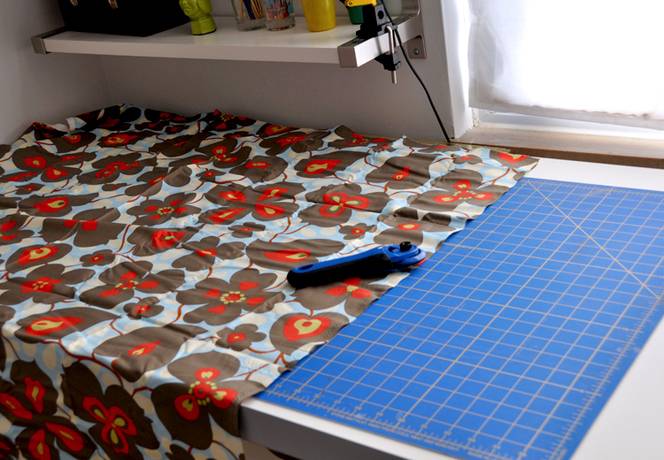
Here’s mine set flat for fabric cutting tasks:
Yes I’m interested in buying this kind of desk. Can any body please me make one for me or how to purchase this table? I want to buy it, for my work. How much? Thank you I really appreciated
Help me I mean.
This is such a clever idea! I love how you’ve transformed an ordinary desktop into a versatile drafting table. The adjustable feature is especially useful for different projects. Can’t wait to give this a try! Thanks for the inspiration!
This is such a fantastic idea! I’ve always wanted a drafting table but couldn’t justify the cost. Your step-by-step guide makes it seem achievable, and I love that it can be customized to any desktop. Can’t wait to give this a try! Thanks for sharing!