
My friend and Curbly team member Capree has an amazing dining room, where she created this awesome hand painted branch wall. Her hard work is accented by her spectacular light fixture, which is a single bulb surrounded by thin metal rods that jut out at artfully random angles, the Twig Light by Fire Farm.
I loved it so much, I decided to take a stab at recreating it myself. And I did! I don’t know how to weld, so I knew I couldn’t make one from metal, and I was worried about holding everything in place for glue to dry, but I figured out a workable solution that only took me about two hours, start to finish. As it turns out, the whole thing ended up costing me less than $10.00 USD, as well, which is a lot of lamp for the buck.
Here’s how to do it:
Materials
- Lamp and cord pendant set, such as the IKEA Hemma ($3.99)
- 10 3/16″ wood dowels, 36″-length ($.29/e; $2.90)
- 1 can spray paint ($2.95)
Total: $9.84
Tools
- Saw or utility knife
- Hot glue gun and yellow (wood) glue sticks
- Two-part epoxy, Household Goop, or E6000 glue
- Tin snips or sharp scissors (optional)
1. Use the saw to cut the dowel rods in half at once, giving you 20 lengths of 18″. Any type of saw will work here: a hand saw, coping saw, hacksaw, miter box, or power miter saw. Since the dowels are so thin, you could even use a utility knife and hard surface.
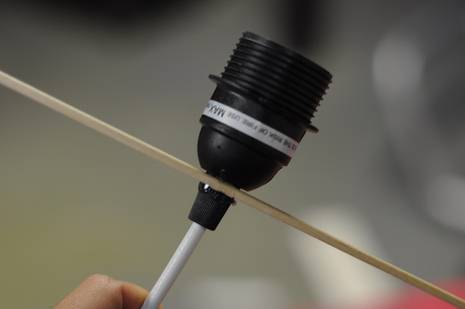
2. Take one dowel rod, and glue it onto the light cord set. Glue it at the center, and at 90-degrees. This is the only point where the dowels actually touch the lamp, so make sure it’s a nice, strong joint. Yellow glue doesn’t love plastic, so I used a 2-part quick drying epoxy, but any strong glue will work here.
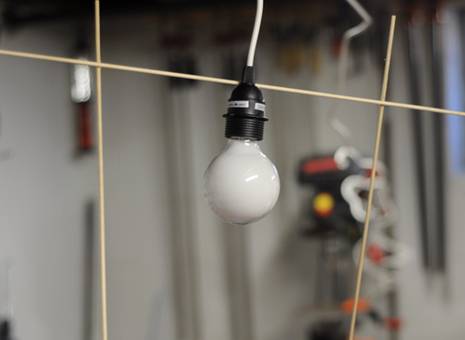
3. Once that joint has dried, insert a bulb so that you’ll always be working considering its weight. Find some way to hang the light at a comfortable working height – the supports between the joists in a basement work perfectly. Warm up your glue gun, and insert yellow glue sticks. Using glue approved for wood is essential here, and the quick drying time of hot glue means you don’t have to hold the dowels in place or use clamps. Awesome! Also, you’ll want use some kind of drop cloth or scrap surface under your work area to catch dripping hot glue.
Glue two dowels at 90-degrees to the main support to begin to create your structure.
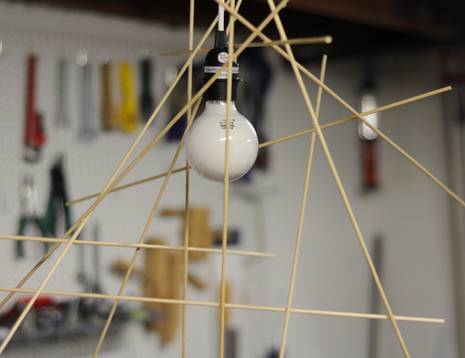
4. Then, continue to add dowels. Take your time and experiment with different angles and placements. Note that most of your dowels will be oriented more-or-less vertically, which just a few horizontal ones for support and balance. Be sure to move around the piece, noting how it looks from all angles. Of course, you’ll want to be sure to not capture the bulb, and be sure there’s space to change it.
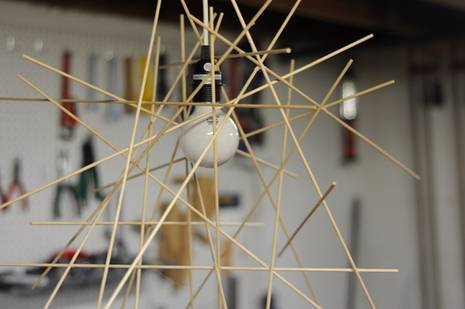
5. With practice, you’ll learn to use just the right amount of glue to make a strong joint, but not creating the crazy blobs and strings that hot glue tends to make. Keep an old pencil or junk piece of dowel handy to wipe away excess glue. Keep adding dowels until it looks finished. If you don’t need all 20, there’s no need to use them. My finished piece had 17.
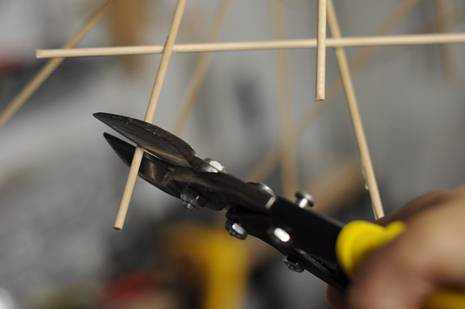
6. At this point, I realized that some of my dowels extended a bit too far. Use tin snips or sharp scissors to cut the dowels to create an overall cube shape with balanced dimensions. I also used a hot soldering iron with a narrow tip to remove any excess glue globs.
7. Once everything has cured, take it outside or into a well-ventilated area, and spray paint the whole thing. Remove any stickers or labels from the socket before painting – I didn’t, and wish I had. And be sure to leave your dummy bulb in so no paint goes into the socket and messes with the connections. One coat of spray primer and one coat of white was enough for a perfectly glossy finish.

Final thoughts:
Getting it right. There are a few early-placed dowels whose angles I don’t totally love. It’s hard to get randomness to look just-so-perfect. I definitely got better with practice, so take your time and envision how each dowel will look in the finished piece. Keep the cube shape in mind, and you’ll be set.
Durability. This thing is actually stronger than I thought it would be. No, it’s not welded steel, but I dropped it on the ground from four feet or so, and it survived with no problems. Obviously, you’ll need to be careful while moving it, but that’s true for most chandeliers. I’ve had it hanging above my dining table for two weeks, and everthing is great. I have no idea how long it’ll last, but for less than $10.00, I’ll happily make more.