Tripods can shoot just about every angle but one: straight down. Its very design demands that the legs will get in the way. Attaching the tripod to the ceiling or the camera to a boom stand is an option, but the thought of dangling a camera in such a way is frightening. Plus, if you’d like to use the camera for animation, keeping the camera still is essential. Professional camera stands are great, but are quite expensive.

So, here goes: A DIY downshoot stand for still and macro photography and animation, that keeps the camera in a single and safe position. Cost: around $20.
Materials:
• 1/2” threaded galvanized piping
o 3 x 24” lengths (if you work with very small objects, you might use one 24” and two 18” or even 12” lengths)
o 2 x 90-degree elbows
o 2 x end flanges
• 1 x ¼” bolt, 2” length
• Several ¼” washers
• Steel mending plate
• Small rectangle of hardwood or MDF, slightly bigger than plate
• Soft, sturdy material, such as felt and non-stick shelf lining
• #10 (or other thin, long) bolts and nuts and washers, 2” length
• 2 x 24” lengths of 2 x 4” lumber
• 8 x 1 ½” wood screws
• Electric drill and drill bits
• Plumber’s epoxy
• Velcro strips
1). First, we need to create a base plate that attaches to the threaded tripod hole and support the camera. Attach the mending plate to the larger rectangle of hardwood with the included screws. Then, drill a ¼” hole through the center of both pieces, using a slower speed when drilling through the metal.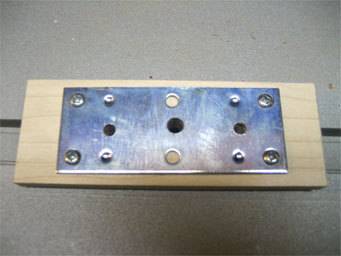
2). Next, drill two 3/16th holes on either side of the center hole. Drill two matching holes in the center of one of the 24” pipe pieces, then attach the plate to the pipe with #10 bolts, nuts, and washers. Then, using the ¼” hole in the plate as a guide, drill a ¼” hole through the pipe.

3). Then, thread it into your camera, and note how much extra room there is. Take the camera off, and then tighten this gap with the appropriate amount of washers. Next, squish together some plumbers epoxy (the doughy stuff in the tube), and apply to all touching metal parts- the bolt, in between the washers, the pipe, etc. The goal is to prevent the bolt from spinning, since we can’t use a nut.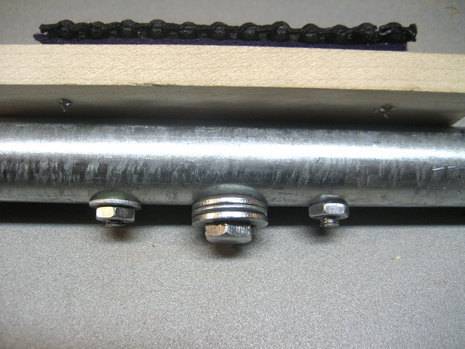
4). Once the epoxy has dried, we need to protect the camera from the hardware. I glued on a piece of wool felt, and then a layer of non-stick shelf lining. Of course, it’s necessary to cut a hole to accommodate the ¼” bolt.
5). Attach the 90-degree elbows to the pipe with the bracket, and then screw on a pipe to each end. Arrange the pipes so you have a flat (upside down) u-shape, with the sides perpendicular to the top bar, and the support plate faces outward.
6). Twist the flanges onto the ends, and place them onto the 2 x 4”s, about 9 inches from the back. Attach the flanges to the wood with 1 ½” screws.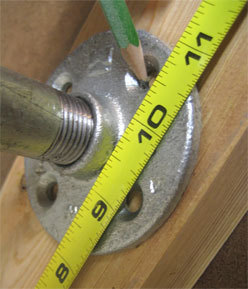
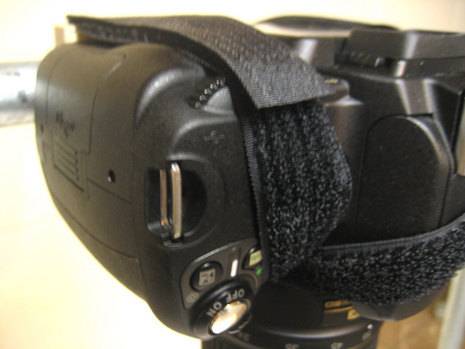
7). Attach the camera, and then cut two strips of Velcro (use the all-in-one kind, with the integrated hooks and loops), and wrap them around the camera to support the weight. Stay clear of any controls.
8). To use, simply clamp the 2×4”s to a flat surface. Use the side bars to support any extra lights, etc.
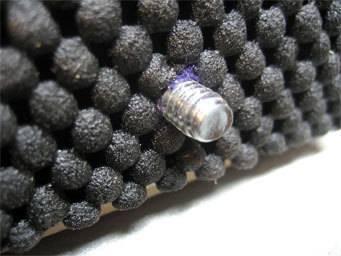
My thoughts: I took a time lapse overnight, and noticed no movement in the camera. Sweet. I also realize the height isn’t adjustable (yet), but I find I can do anything I want with the zoom on the camera lens. I can fill up the frame with a #10 bolt, which is good enough for me.
Cheers.
Hi. I am about to build one in wood that will be able to move up and down. The idea is to use pine wood or similar to build a column with an aperture messuring 4 inches long to fit a 3/8 by 4″ bolt, inserted in another cut of wood to put the camera on. I would only build the column and use a common table for the pictures. The lamps will be optional since I think I can use day light indirectly. I’ll send the pictures later.
The design and functionality are nice but I don’t know if the cost of material has shot up in the years since this was written or if the author guessed at the cost because he had all this already handy at home but this is DEFINITELY NOT a $20 build. Total Cost at Home Depot for JUST the 3 pipes, 2 flanges, and 2 elbow joints as of today (9/14/15) came to $37.01. That DOES NOT include the cost of the wood, screws, nuts, washers, non-stick pad, metal plate, epoxy, or velcro that the project calls for as well. You CAN, however, accomplish the same design and functionality with a single 2x3x8 stud board [$2], 8 screws [$2], a bit of wood glue (optional) and one 1/4″ bolt [$0.20] (with washer/nut or glue) for about $5 total; $8 if you have to buy glue. Velcro is optional and only really needed if you have a larger camera. The only other cost you’ll have is paint [$4 for a small can] if you don’t like bare wood.