Make gift boxes from your trash! Take advantage of your brightly colored recyclables, and they’ll be no need for gift wrap.

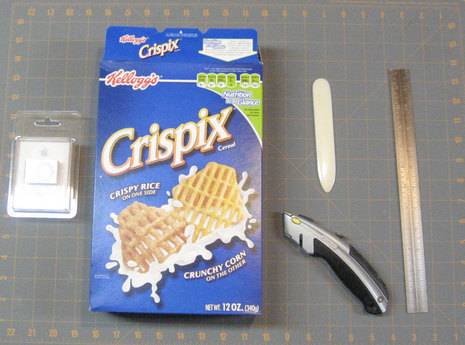
Materials
- Gift
- Cereal box, or other clean food packaging
- Cutting mat or scrap wood cutting surface
- Ultility or craft knife (like a box cutter or X-acto blade)
- Straight edge
- Bone folder or large spoon
- Pencil
- Glue
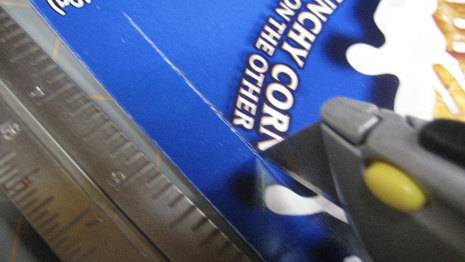
1. Find the glued joint of your box and use the knife to open it, so that the box lies flat as one piece of cardboard.
2. Lay the box color side down and your gift on top. I’ll be using an iPod shuffle that I bought for my dad for Christmas. Using the creases already in the box, measure the length of your gift, and draw that line the entire width of the box.
3. Using your gift as a guide, measure the width of the gift, and draw a vertical line. Turn it ninety degrees, and mark again. Continue marking the entire perimeter of the gift: front, left side, back, right side. See the photo below.
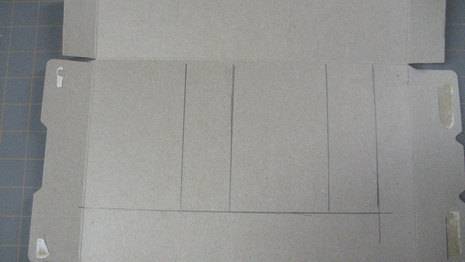
4. Next, measure and mark the depth of the gift on both the top and bottom. Take advantage of the box’s creases whenever you can. Add a 1/2″ to the bottom, and 1 1/2″ to the top.
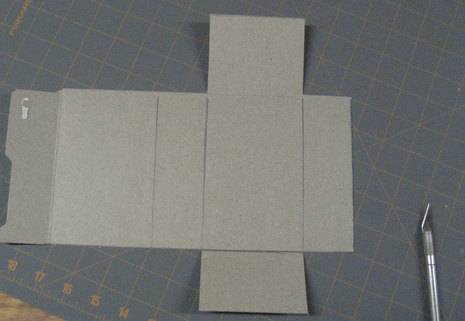
5. Leaving the top flap on the left side, cut your box so that it looks like the photo below. Note the top and the bottom are attached to the third side, which will be the face of the final folded box.
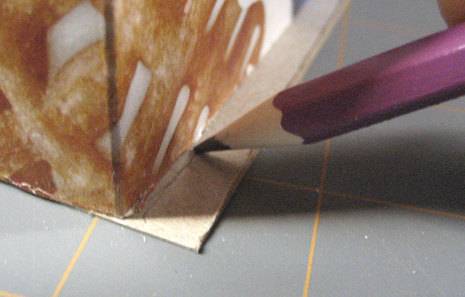
6. Lay the straight edge on top of each of your pencil lines. Use the knife to lightly score each line which you’ll fold. You want to cut about half way through the thickness of the cardboard.
7. Use the side of the bone folder or spoon (the edge will scrap away the color) to crease each of your edges.
8. Fold your box into its final shape. Note the excess on the tops and bottom. Use a pencil to mark this line.
9. On the bottom (the shorter excess) score and fold along this line.
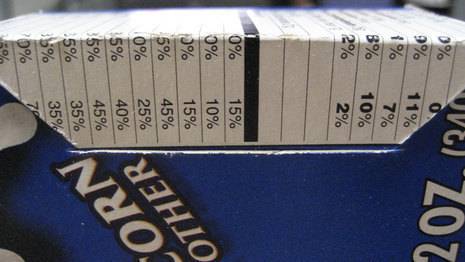
10. On the top, create an arrow shape by cutting the corners at a 45-degree angle only in front of the pencil line. This should look like the tab that you find on top of a cereal box.
11. Measure the width of the tab a specific length, such as 1/2″. Measure that same length from the top edge on the back side of the box, and make a slice the width of the tab.
12. Tuck the tab into the slot, and adjust as necessary.
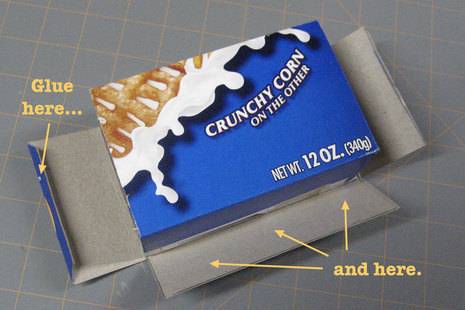
13. Finally, add glue where indicated in the photo. Some paper clips or small clamps will help hold the shape while the glue dries.
14. Marvel at your good work! Add some ribbon, and your done! No paper wasted, and your trash gets a second chance.