
It’s not surprising that I spend quite a bit of time at the craft store. As a full-time craft, design, and art blogger, I’ve grown quite familiar with my looped route of hardware store/craft store/art supply shop/other craft store/supermarket…in that order.
So, it’s always a pleasant surprise when I find some new material or media I’ve never seen before, and to think of all kinds of cool stuff to do with it. This holiday season, it was the papier-mache cone. Since it’s not with the other compressed paper boxes, letters, and forms, it slipped under my radar for the last, oh, two hundred and ninety visits. But, I discovered these little guys when working on my 2011 holiday centerpiece. And the possibilities just kept coming.
So, I was inspired by some little porcelain trees from West Elm, which are now…sold out! (And were…pricey!) No matter, we’re gonna make out own by the dozens, for less than $1.00 a piece.
Materials and Tools
- Papier-mache cones, available in the doll making section of the craft store
- Electric drill and assorted drill bits
- Fine-grit sandpaper
- Optional: Rotary tool and grinding bit
- Matte white spray paint – I used Krylon Flat White Indoor/Outdoor
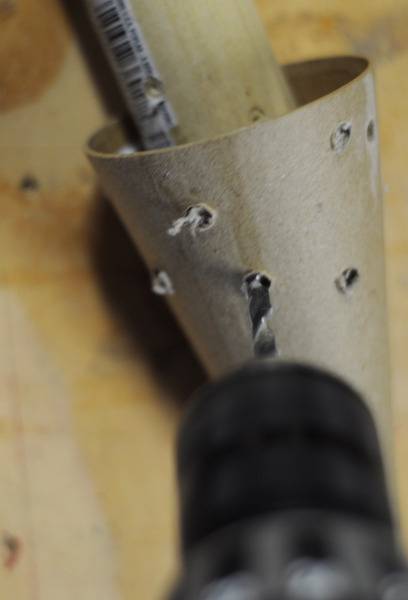
1. Begin by chucking two-three small bits into your drill, and start making holes in a random pattern. I chose to make mine a little more dense and the bottom, and let them thin out towards the top. As you see in the photo, drilling into paper doesn’t always leave a smooth hole, but it can be smoothed out with sandpaper.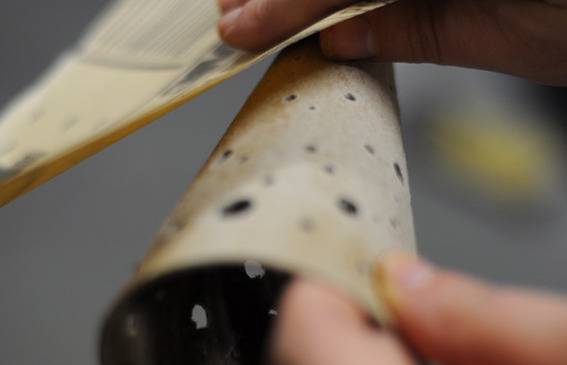
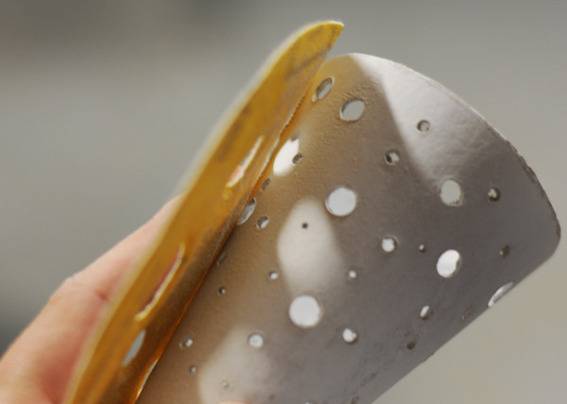
2. If you happen to have a rotary tool like a Dremel or Roto-zip, you can use a small grinding bit to smooth out the holes while maintaining the circular shape. If not, use a pencil or small dowel rod with the sandpaper to make everything smooth.
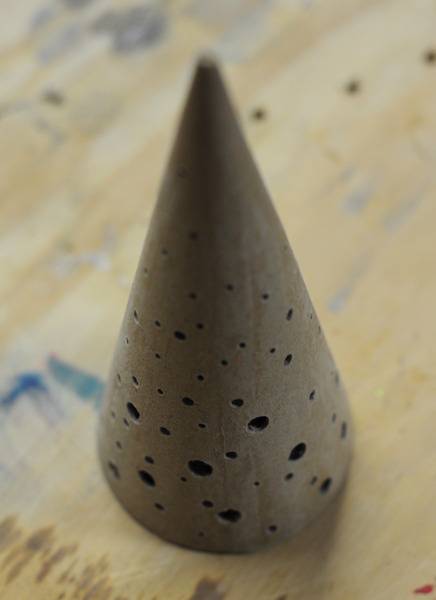
3. Take your trees outside or into a well-ventilated area, and give it a coat of flat white paint. Using flat white transforms these guys into looking like spray-painted cardboard to actual ceramic. Cool, right?
4. Spray painting sanded cardboard will likely make the texture a little…fuzzy. So, sand once more until smooth, and give it a final coat of spray paint.

That’s it. You can make a whole whimsical forest of these guys in not much more time, and for around a dollar a piece. For an extra punch, use a few LED tea lights to make ’em glow with holiday cheer!
Looking for more seasonal DIY projects and ideas?
Injoyed making these a lot, my son keeps them lit in his room all year.
Love this idea! A fun addition might be to line the inside with small scraps of lighting gel to get the effect of Christmas lights.