
There’s nothing like an iconic mid-century classic to set your home apart. Your home can be as contemporary as can be, but add even one Saarinen or Eames piece to your space, and you’ve connected with a movement. You’ve invested in a piece that, fifty or sixty years later, looks as elegant, playful, and amazing as it did when it was first unveiled.
‘Cept, here’s the deal: these guys can be expensive. While you’re paying for comfort and style, you’re also paying for the time of some of the most talented artists of the 20th century, quality materials, and, true, some copyright.
So, get creative, and make your own mid-century classic!
Which, if you’ve tried it, can be a tough thing. Modernism is defined by the use of contemporary materials like bent plywood, molded fiberglass, and curvy steel. It’s hard to mimic that look with one-off pieces and without thousands of dollars of equipment.
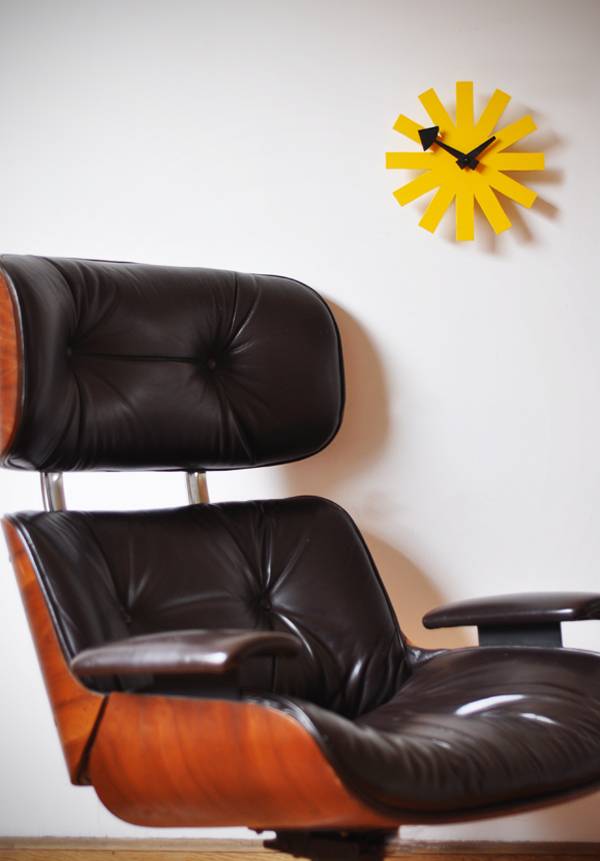
But it can be done. Curbly has previously published an eBook on the subject, which you should snag for a cool $5.00. And, never one to quit trying to recreate the classics (both out of respect for the design/learning how it was made and cause it’s the only way I can afford them), here’s a new easy project: a DIY asterisk clock. Inspired by George Nelson’s classic design, which retails for $300 at the MOMA, I whipped one up with just a drill, a jigsaw, and about $10.00 of materials.
Materials and tools
- 1/4″ or 3/8″ thick hardboard, plywood, masonite, or luan, at least 10×10″
- Spray adhesive or painter’s tape
- Jigsaw or coping saw
- Sandpaper or electric sander
- Electric drill and 5/8″ bit
- Measuring tools and pencil
- 4″ PVC coupler (in the plumbing aisle)
- Thin basswood or balsa (available at the craft store)
- Quartz clock movement and accompaning hands
- Scissors or craft knife
- Spray paint
- Strong glue: yellow wood glue and E6000
- Computer, printer, and this downloadable template
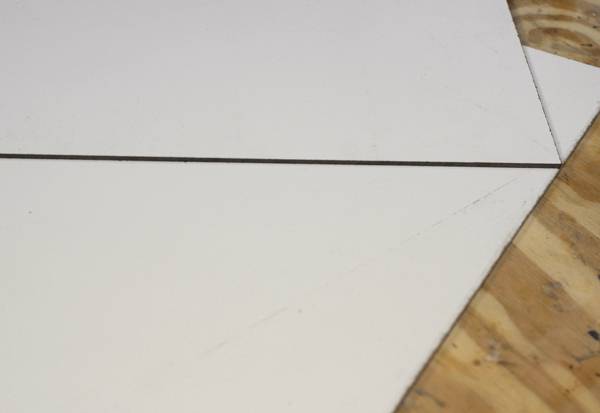
1. I actually made my clock face from a recycled piece of scrap hardboard that I found on the street corner a few weeks ago. It had one white coated surface, which makes me think it served as shower board, or perhaps and old dry erase board. Stylish and recycled. Awesome! If you don’t have scraps lying around, head to the craft store or hardware store and grab a fresh, flat piece of 1/4″ or 3/8″ sheet good like tempered hardboard, plywood, luan, or MDF.
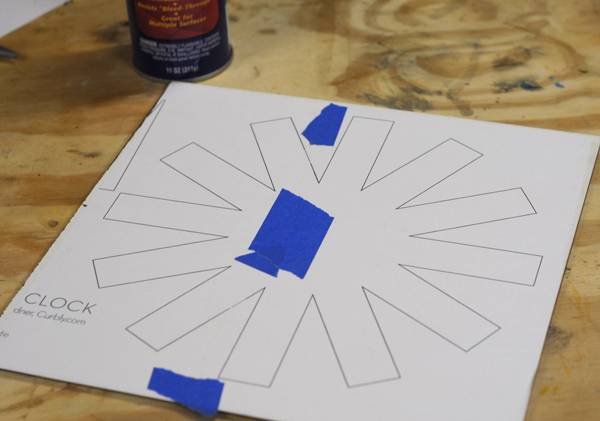
2. Print out the template at full size, either onto an 11×17″ sheet of paper, or spread across two 8.5×11″ sheets. Attach it to your clock face material with tape or repositionable spray adhesive. Make sure that the PVC coupler fits on the inside of the center of the shape, and doesn’t extend into the “arm space.” If you print it at 100% and use standard PVC parts, you shouldn’t have any trouble, but it’s good to check so you don’t have to cut out the shape twice.
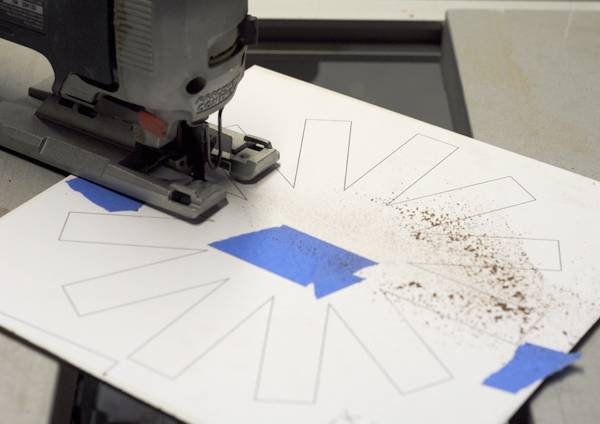
3. Cut out the asterisk shape with a jigsaw. If you don’t have one, you can purchase an inexpensive coping saw at the hardware store which works just as well. The wood here is so thin, it wouldn’t take long to cut. At under $12.00, a coping saw is definitely a DIY best buy.
Be sure to cut on the outside of the lines, and then use sandpaper to sand it to the line, keeping everything nice and geometric.
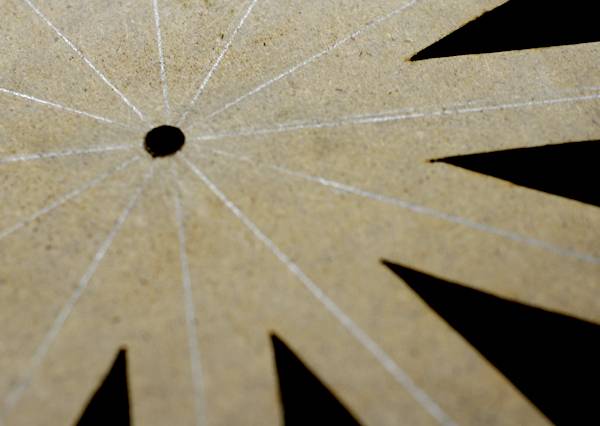
4. Draw a line through the center of each arm to find the center of the clock. Drill a 5/8″ hole through the center to accommodate the clock movement shaft.
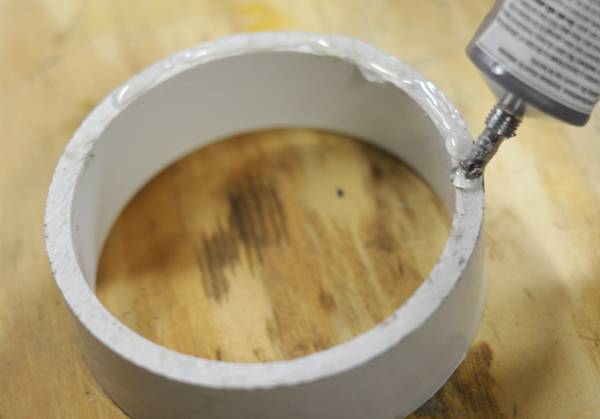
5. Use the strong glue or epoxy to attach the PVC coupler to the back of your face. This will house the clock movement, and get the whole thing off the wall. I cut mine a little shorter, to around 2″. You can do this easily with any handsaw.
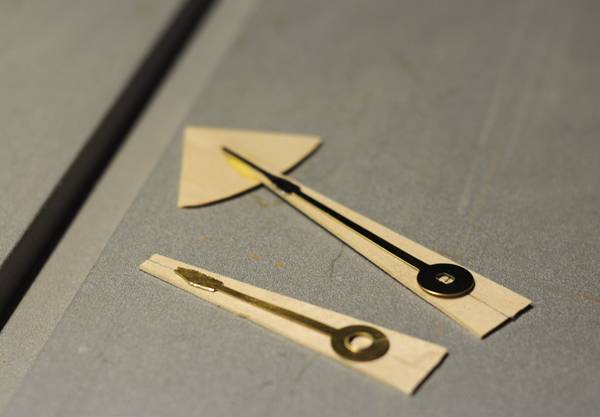
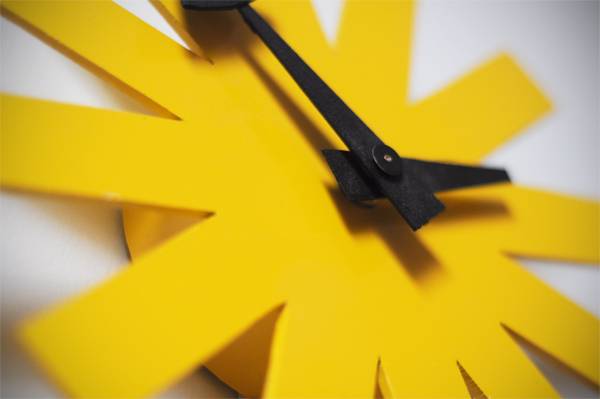
6. While the glue dries, attach the hand templates to very thin balsa or basswood, and cut them out using scissors or a craft knife. Use wood glue to attach the pieces of the minute hand. Make sure your clock hands will fit on the back, trimming them to size if too long or wide. When the glue on the hands and face is dry, spray paint them the colors of your choice.
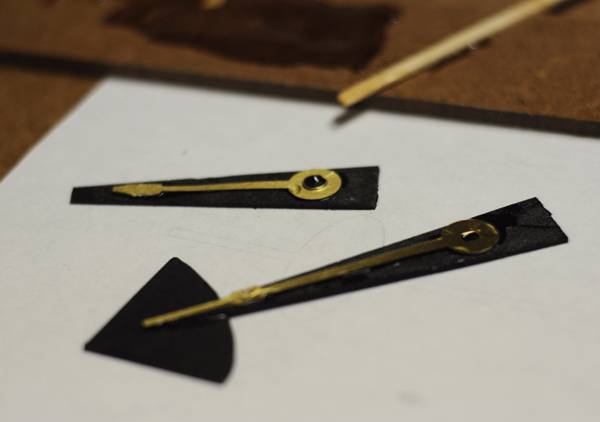
7. When the paint is dry, use glue to attach the clock hands to your DIY facades. Let dry, then use a combo of drill bits and a craft knife to carve away the holes that allow the hands to fit on the shaft.
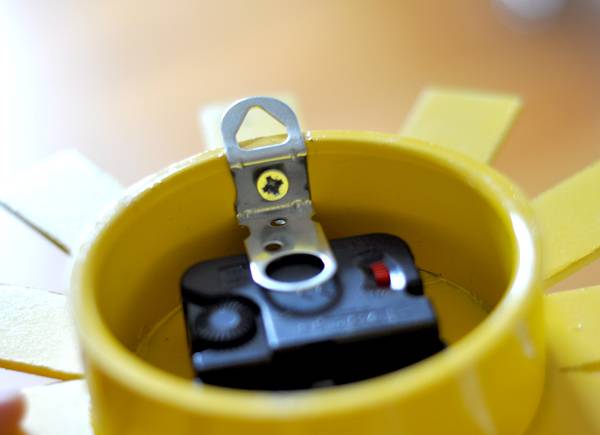
8. Before you assemble everything, find a way to attach your clock to the wall. The inside of my PVC coupler was very round and smooth, so I couldn’t just hang it on a screw/anchor. Use a picture hanger, or do what I did: screw that little metal hanger than come with your clock movement to the PVC. Then, assemble the clock, add the hands, and hang it up.
You know what time it is! Mod time! Err…mid-century time? Um, DIY clock time? I’m trying here, friends.
Good luck!
This Curbly post was originally published in April 2011. We’re re-sharing it because it’s Mid-Century Modern week!
How do you attach the hands? I see no mention of holes.
@S – check out step 7: “When the paint is dry, use glue to attach the clock hands to your DIY facades. Let dry, then use a combo of drill bits and a craft knife to carve away the holes that allow the hands to fit on the shaft.”
Interesting targeting. How many owners of Eames chair are willing to DIY wall clock?