
We all have them: old lumpy pillows that have seen better days but, for whatever reason, we can’t bring ourselves to get rid of. They hide in chests or closets “just in case”, waiting for an unsuspecting overnight guest or even, perhaps, the perfect DIY project. If you have a few of these forgotten pillows, we have the solution for transforming them into something better! Read on!
Katy from KdBuggie Boutique and Designs offers up this clever bed pillow makeover idea and a tutorial to boot. Her solution to the “old lumpy pillow” problem is to turn them into decorative throw pillows instead! This is a super simple project that costs next to nothing (and if you’ve checked out throw pillows in stores or online, you know they can be pretty dang pricey).
All you need for this project is:
- an old bed pillow
- scissors
- straight pins
- sewing machine
- fabric of choice
When you’re ready to start turning “old and lumpy” into “fresh and fabulous”, head on over to KdBuggie Boutique and Designs for the full tutorial!
N.B. – The original tutorial is now offline, so we’re posted a cached version below. The content below was written by Katy of KdBuggie Boutique and Designs
I have been holding on to an old bed pillow {ok, so I have a couple — but it’s always good to have at least 1 extra one in case company spends the night!} One in particular has been staring at me every night when I go to bed… it had taken up permanent residence on my dresser… just waiting for a project to change it into something fabulous! Well… that day finally came! Ta da!!!

If you are looking for a super simple home decor project for next to nothing {$} then please… read on!
Grab an old-ish pillow — if your own pillow is in need of replacing… this is a good excuse to go get a new one.

Next, grab your sewing scissors and cut that sucker in half!

There is a whole lot of extra stuffing in there that you won’t need… so just pull some out and either trash it, or if you are like me, you save it for another future sewing project! ?

Next, cut off about 2″ from each of the pillow halves — I can’t really think of a use for this piece, so I tossed it. If you can think of one… totally save it!

Then, grab your straight pins and pin the edge of your pillow shut. Since it’s bulky there really isn’t a way to iron it down and make it all perfect and neat. So… instead, just kinda eye-ball it. I folded my ends under about 1/4″ and pinned them together.

When it comes to the end – depending on your pillow – you may have extra fabric from the side of your pillow. Here’s what I did. I started by stretching it out.
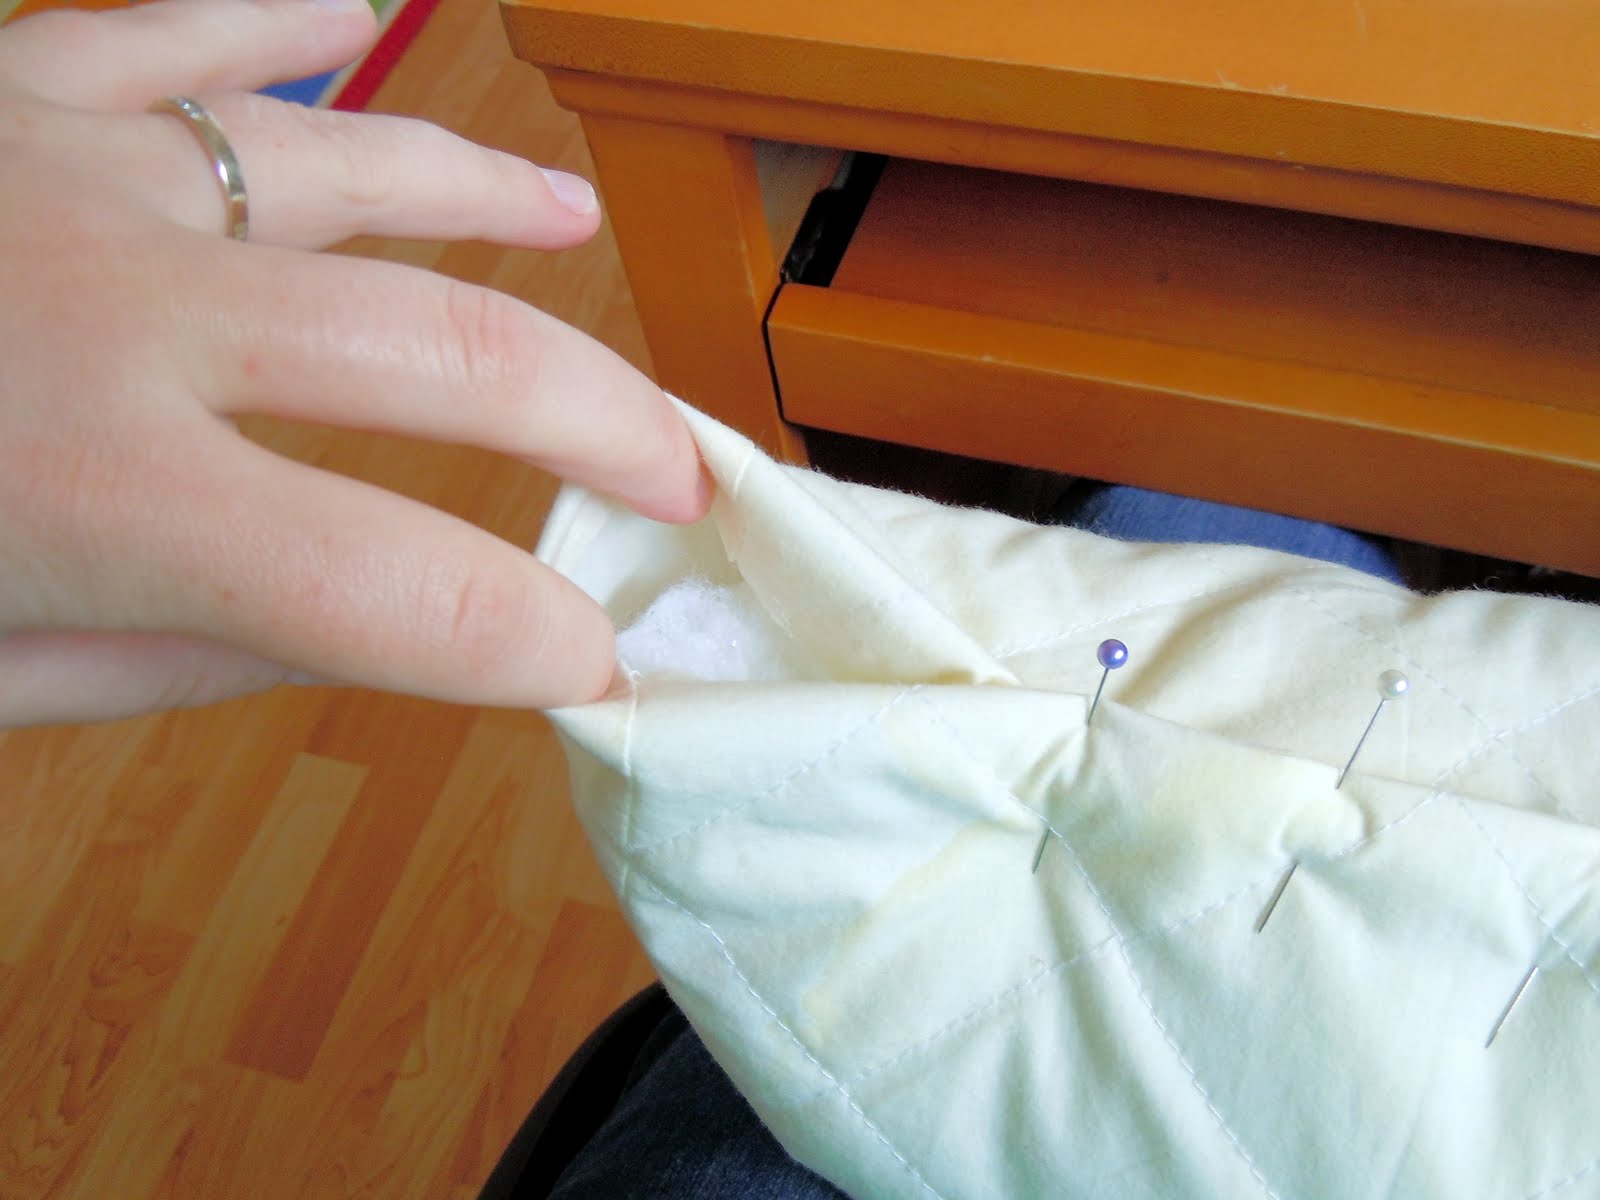
Then I found the middle of the stretched part and folded it in towards the center of my pillow until the side seams lined up. Then I pinned it closed!
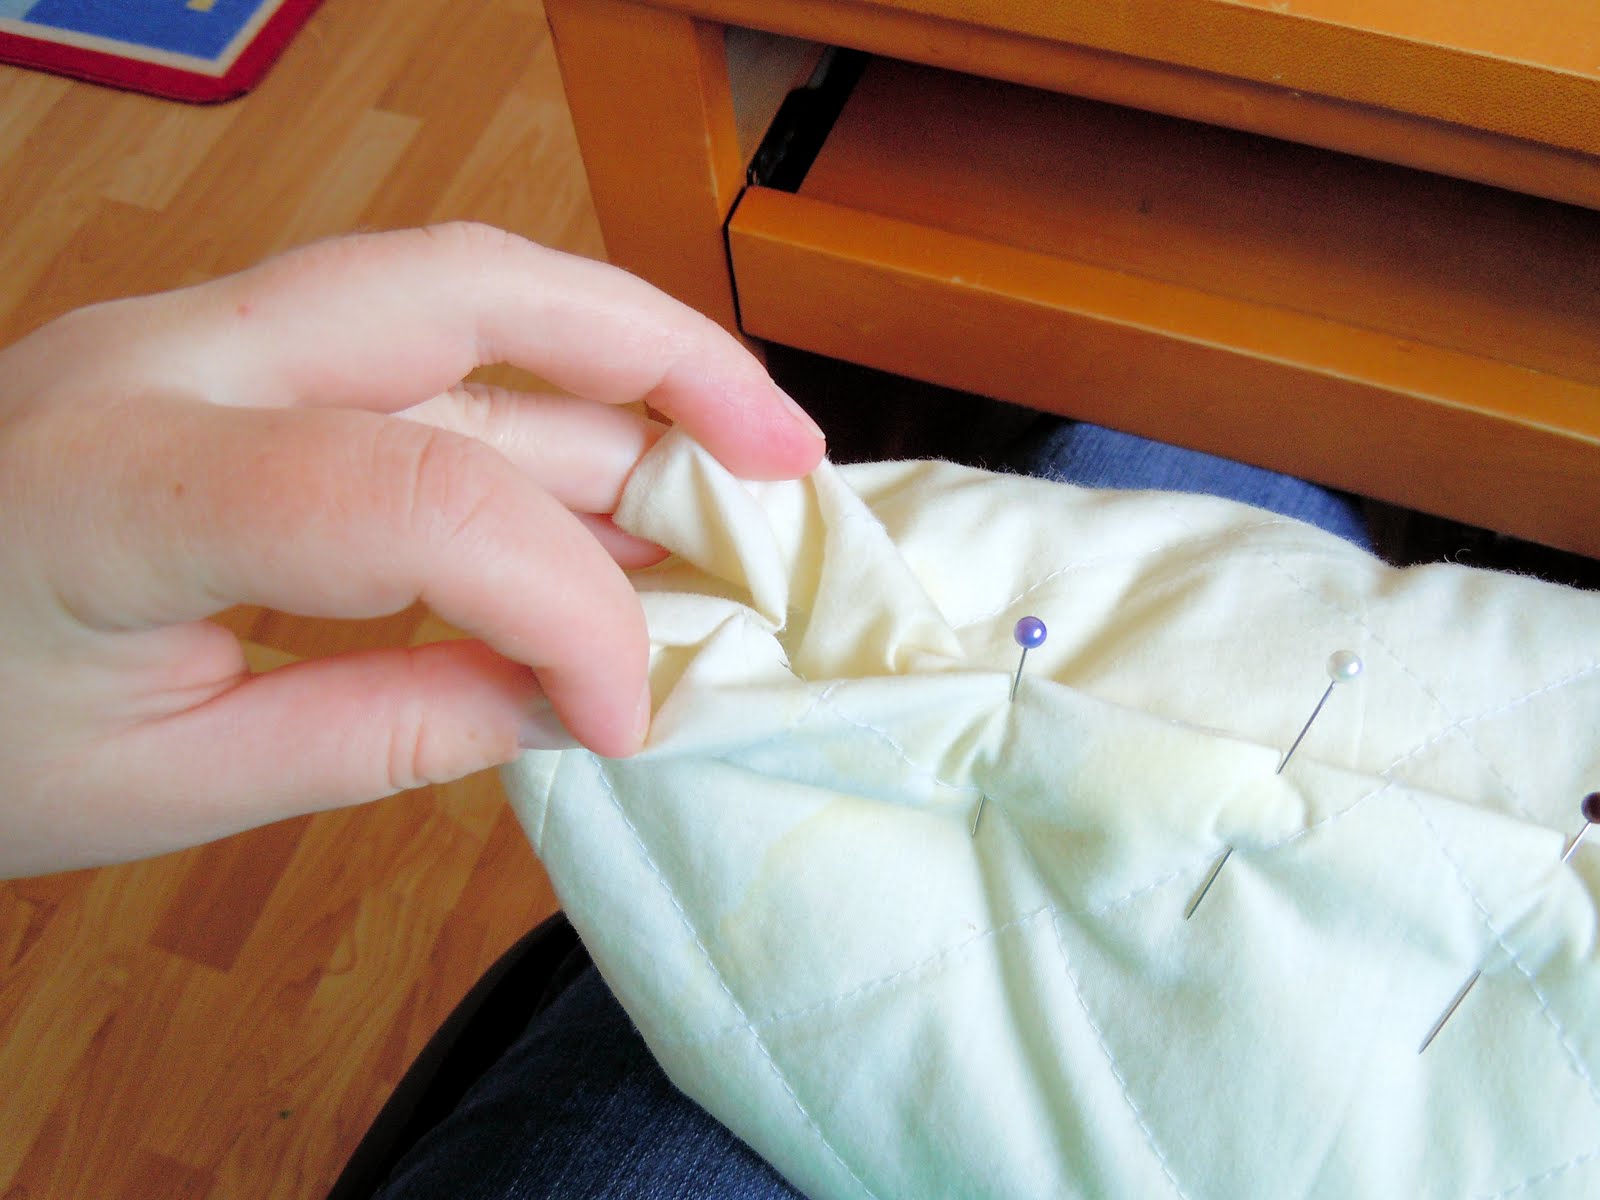
Ta da! All pinned!

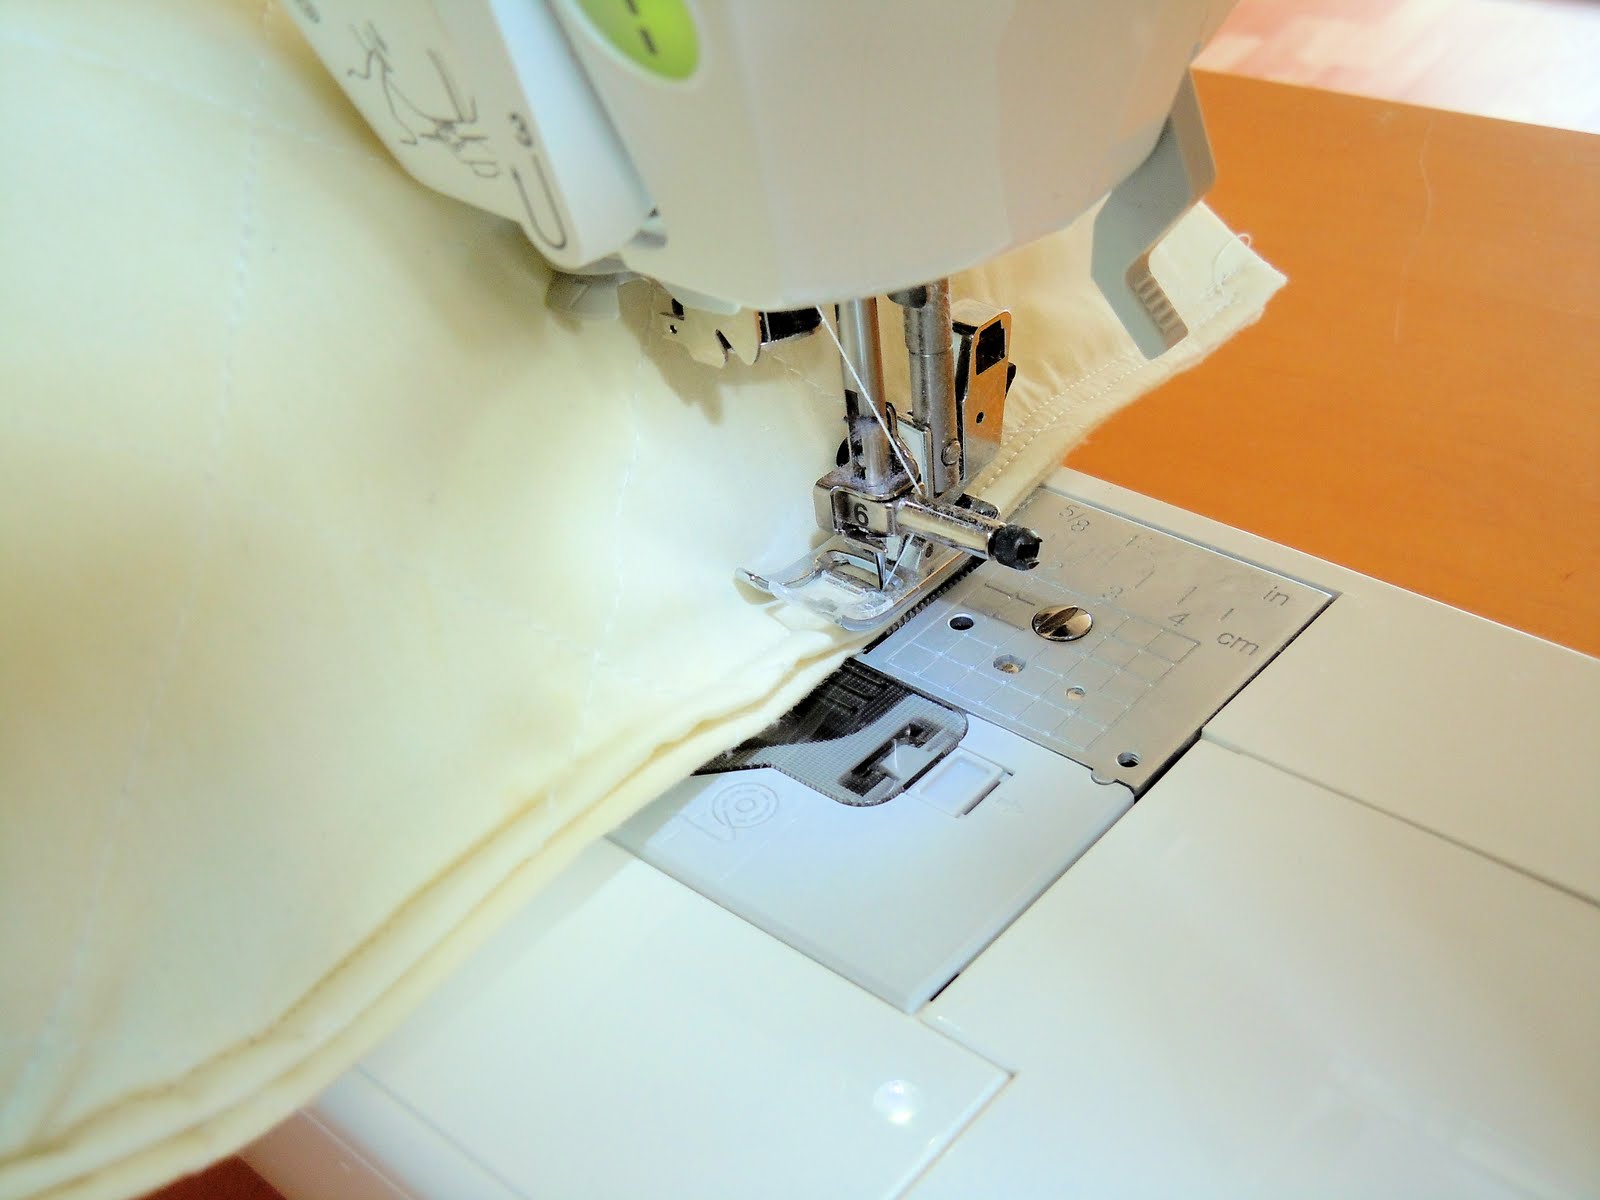
Time to sew! Ya… it was about as easy as it looks to get that little stuffed pillow up there and under the foot of my sewing machine, but once I got it in place, it was super easy to stitch. Just a simple straight stitch with about a 1/4″ seam allowance. All the way down making sure to back stitch at the start and finish.

I chose to add an extra reinforcing stitch to my pillow… heaven knows that pillows in my house get thrown around A LOT by my little ones, so these little guys need all the reinforcements they can get! My seam allowance was about 1/8″ {as close to the edge of the pillow as I could get. Back stitch at the start and finish.
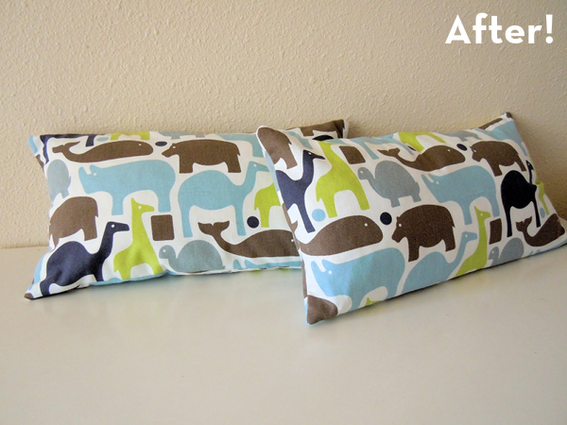
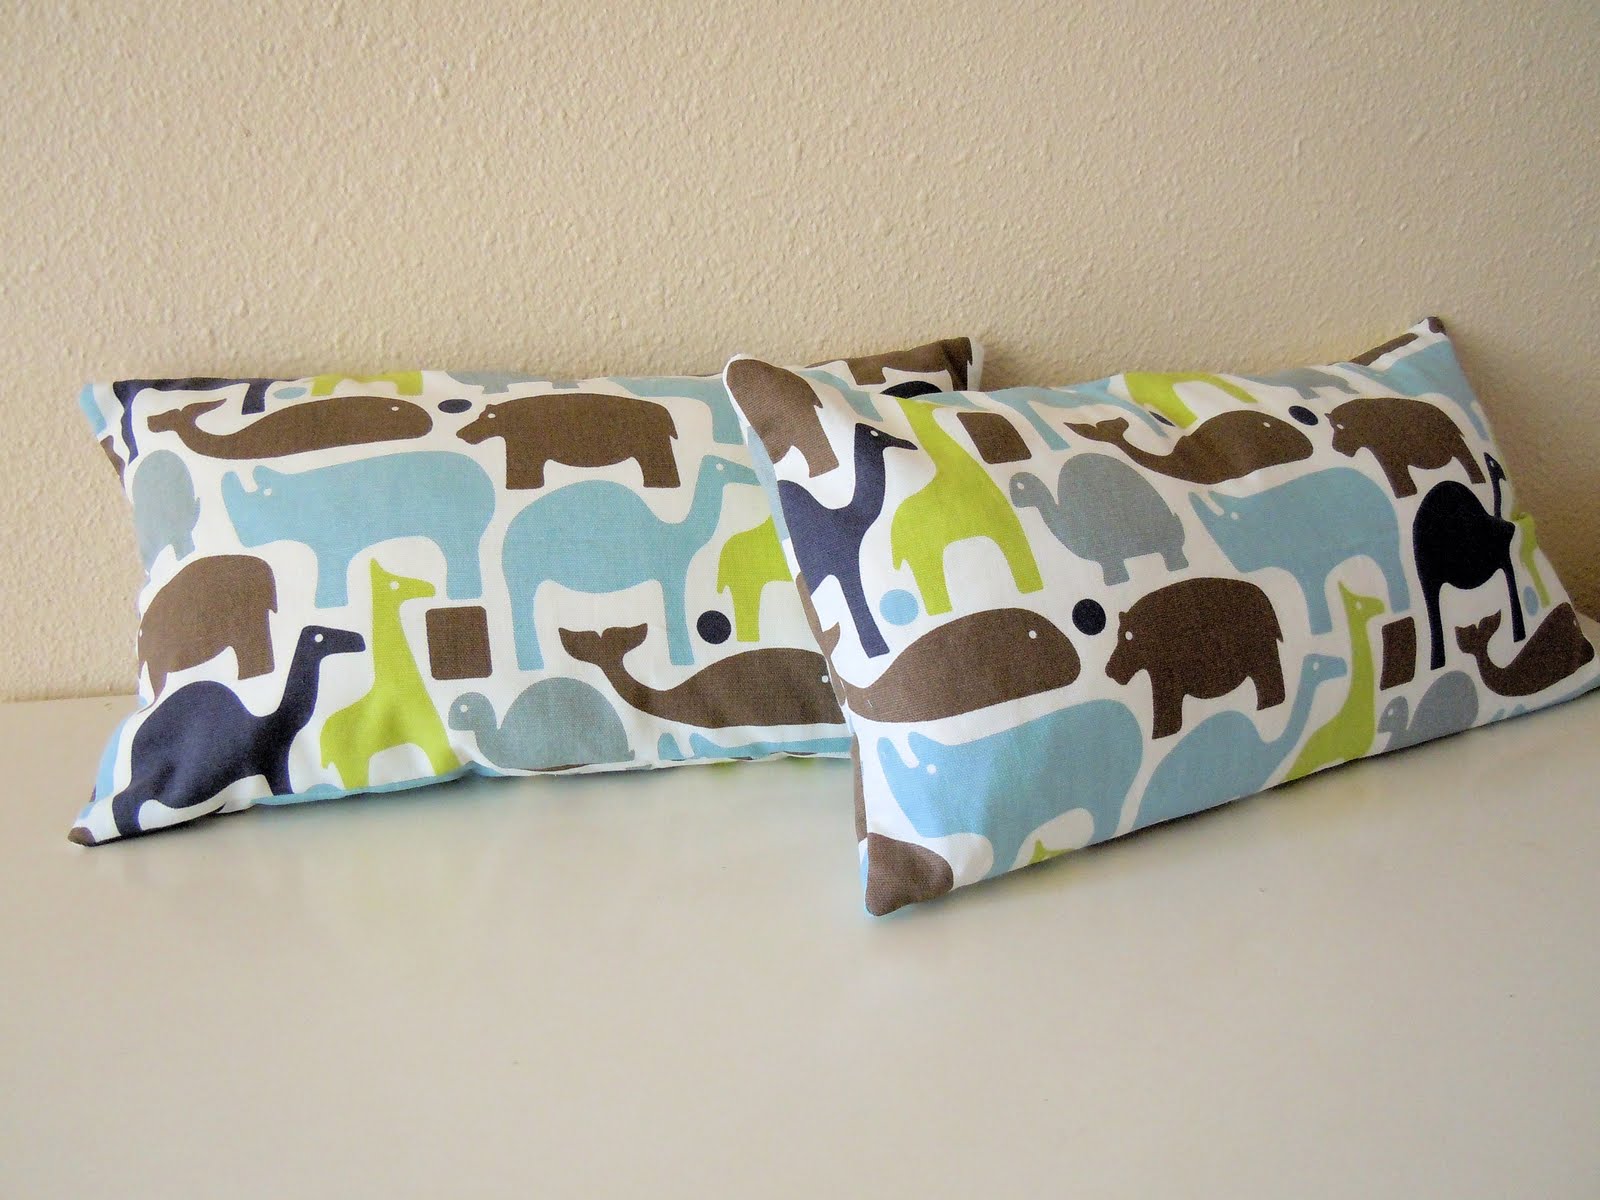
Repeat for the other half of your original pillow and you will have 2 cute rectangle pillows… perfect for covering!

I used my tutorial here to make my pillow slipcovers. I found this cute home decor fabric at Joann’s on sale. These are the colors for my “to be completed” living room/dining room. What do you think!?! I am just waiting on some extra $ to get new slipcovers for my couch and to put up some new baseboards and it is done!

Link to the tutorial is broken. Would love a new link!
Hi guys, looks like the original tutorial is no longer online, so we reproduced a cached copy here with credit to the original author.
No link in your post Bruno 🙁
@val – that’s right, there’s no link because the original tutorial no longer exists online. I updated the post with the original text and photos.
Hi there,
May I know what is the type of stuffing shown in the pillow cut in half above? I would like to reinforce my own and am searching for a similar kind, as it doesn’t look like polyester.
Thank you.
Looks like the slipcover tutorial link is broken – about how much fabric do you need? Thanks!