A couple years ago I attended a play at The Theater in the Round in Minneapolis (really bad site) and in the lobby they had this cool system for hanging cast bios and other info that consisted of wire, pulled taut across a span, in this case from floor to ceiling, with small hardware holding some photos and glass in place.
I inspected it and it seemed like something I could do at home. So next time I was at the hardware store I picked up some very basic hardware for just a few bucks.
People come by all the time and seem to think that it is pretty cool and sometimes I let them think it was hard to do. I estimate the whole project took me half a day and cost me something like $60 for an 8′ x 4′ area – 28 photo holders. The majority of both the time and cost was for the wood photo boards, something that I now realize were really optional. Here is what you’ll need for materials:
- picture hanging wire (enough for each span to cover)
- s-hooks – 1″ or 1.5″ open (2 per photo you want to hang, 1 if not using wood photo boards)
- Hunt bulldog clips (1 per photo you want to hang)
- turnbuckles (1 per span of wire; make sure one side is a hook not an eye)
- splicing sleeves (2 per span of wire)
- screw eyes (2 per span of wire)
- Thumb tacks (1 per photo to hang, only needed is if using wood photo boards)
- Some thin slats of wood cut a bit larger than the photos you want to display (1 per photo to hang)
The tools you will need:
- Drill and small drill bit
- Pliers
- Saw (to cut the wood photo holders)
- Sandpaper (to sand the wood photo holders)
- Paint brush and stain (if you want to finish the wood photo holders)
Here are the super simple steps to do it:
1. Determine where you would like to string your wire(s) across and measure up from the floor so that you can drill pilot holes for the at the same locations. Drill holes. (HINT: when considering the hight of your photo rows, don’t forget to leave room for various photo orientations and sizes if you’re into that sort of thing).
2. Screw in the screw eyes by hand. You may need to use sheet rock anchors if you do not hit a stud.
3. Cut the wire into lengths that are just a bit longer than the span they will cross.
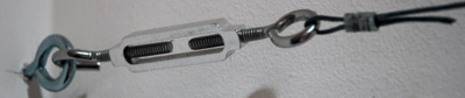
4. Thread one end of the wire though one side of the screw eyes that are in the wall, double them over as shown below, and clamp them together using the splicing sleeves.
5. Attach the other end of the wire to a turnbuckle using the same method making sure that the turnbuckle has plenty of space to screw the two sides toward each other. Tighten the turnbuckle to just before it is to tight and then hook it to the other screw eye.
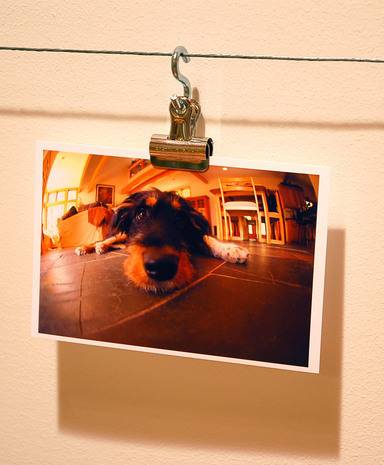
6. Simple shortcut: Just hang your photos with an s-hooks with a bulldog clip though it for that darkroom look, or continue on for the wooden photo boards.
7. Ok, so you like the photo board idea. It really isn’t that hard but it more than triples (or more depending on the number you want to make) the work you will be doing. First thing you will do is cut your boards down to the sizes (and orientations you want) and sand the rough edges.
8. Now its time to drill some holes for the s-hooks. The smaller the s-hook the closer you will have to drill your holes to the edge of the boards. Also be sure to accommodate the gauge of the s-hook.
9. OPTIONAL: you may now stain or paint the boards as you see fit.
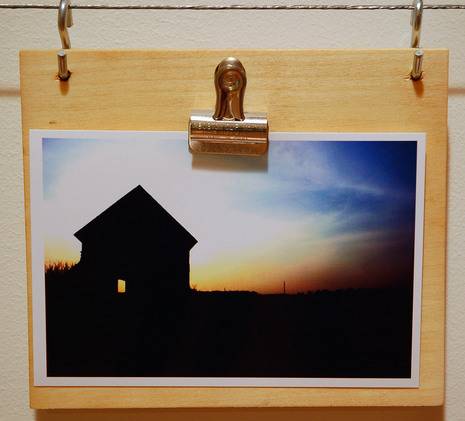
10. Stick a bulldog clip to the photo board with a thumb tack (hint: silver matches well).
11. Slip the s-hooks into the holes and hang your boards. Clip photos to them, and you’re done.
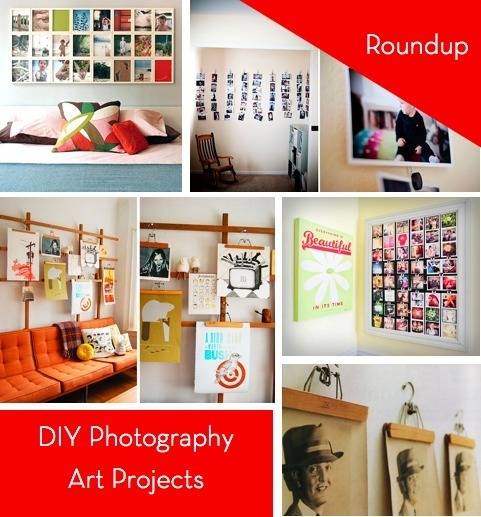
Want some other photo wall ideas? Try these…