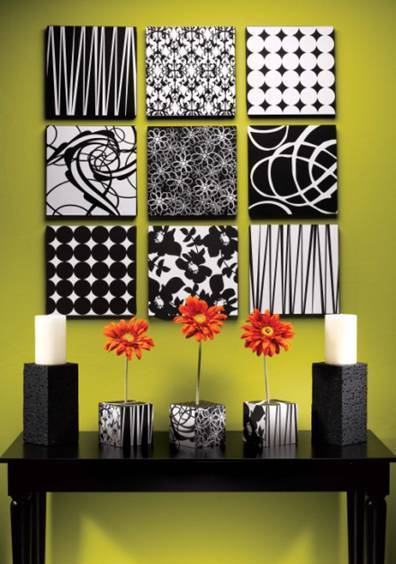
Recently, I received a promotional package in the mail from Dow Chemical with all the supplies needed to make modular wall decor.
The box included:

four 12″ x 12″ x 15/16″ pieces of Styrofoam,
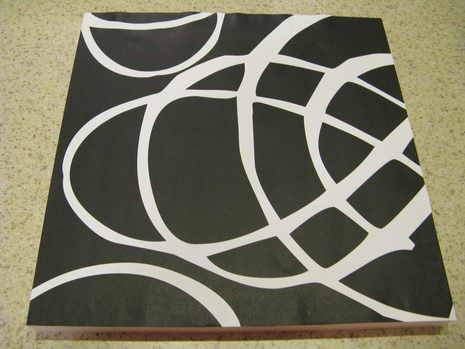
four 12″ x 12″ sheets of black and white scrapbook paper,
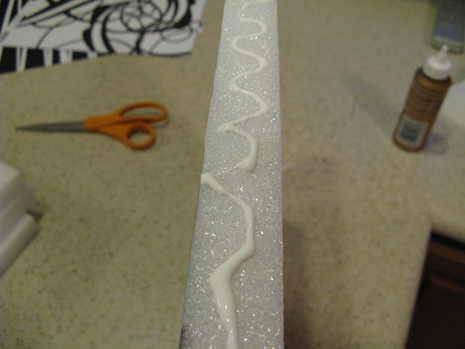
several yards of 7/8″ wide black grosgrain ribbon,
a bottle of Aleene’s Original Tacky Glue,
a bottle of Tombo Mono Aqua Liquid Glue,
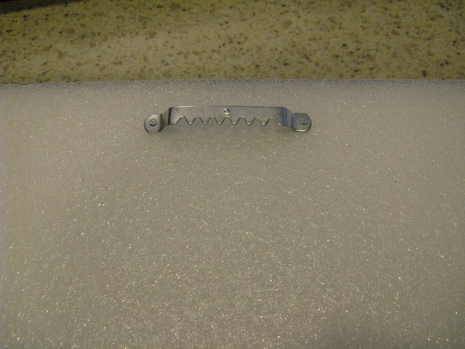
and four wall hangers.
The instructions were as such:
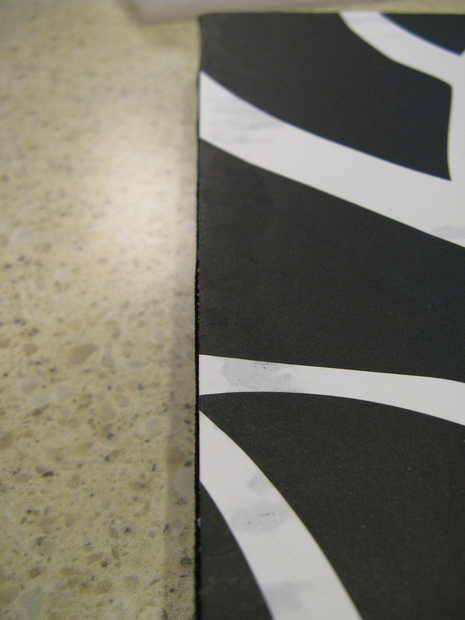
‘Cover foam with coordinating sheets of 12″ x 12″ scrapbook paper; thick white craft glue works great.’ Hmm. This left me scratching my head as I considered the Aqua and the Tacky. Why use the thick craft glue? Won’t that make the paper ripple? It always has in the past when I’ve used it to glue paper. And I’ve used clear liquid glues before when glueing paper with good results, so I decided to use the Aqua (hey, I figured it was included in the box for a reason!) to glue the paper to the Styrofoam.
Next, I used the Tacky Glue to glue on the grosgrain ribbon around the perimeter of the foam squares. I overlapped the ribbon at one corner and pinned it into place just until it dried.
As the glue dried, it was obvious that the Aqua was going to ripple the paper a bit but not as bad as if I had used the Tacky. The glue also discolored the white areas here and there on the paper. The ribbon, however, glued up great.
I then attached one of the accompanying hangers to the back of the foam.
Summing up:
First the good part: The project was very easy to do and it could be a great way to add color to your walls. Although I didn’t have to buy any of the supplies, its cost shouldn’t be that outrageous. The accompanying brochure suggested that–at most–the supplies should set you back no more than 50 bucks. The squares are very light weight, which means they could be held up on a wall with just a straight pin, which means no big holes in the walls, which is good for renters.
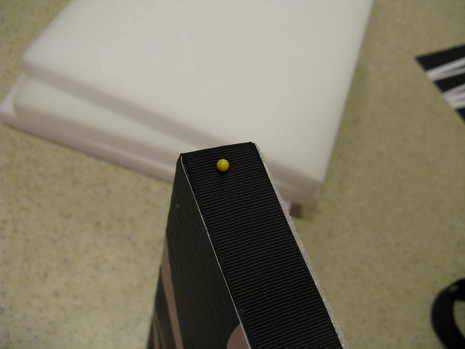
Now the bad part: The rippling of the paper still bugged me. If I did the project again, I’d experiment with different types of adhesives, possibly trying a spray adhesive or even sticky-back tape. Assuming the nails of the picture hanger would actually stay put in the Styrofoam would be naive. I’d put a few drops of the Tacky Glue on the nail heads and hope for the best. Also, the Styrofoam measured 15/16″ thick and the ribbon 7/8″, which left 1/16″ of the Styrofoam showing.
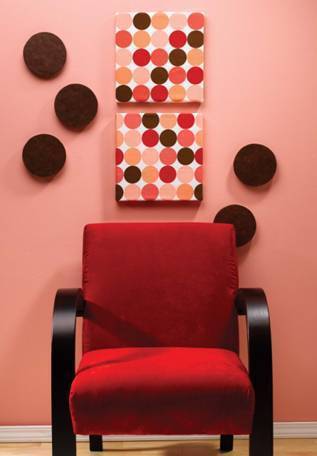
Ultimately, the promotional materials included in the package provide some fabulous pictures that could inspire all of us to give this project a shot–with a little tweaking here and there.
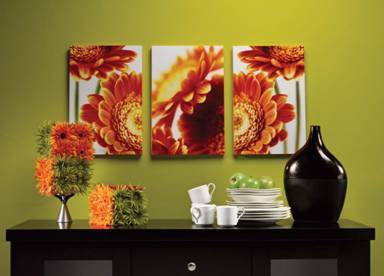
Another option is mounting photos or even fabric on the Styrofoam.
For more information about Styrofoam and other projects using it, visit craft.dow.
One thing you can use instead of styrofoam is the small cearal boxes or boxes you get things in the mail in. Also at most craft stores you can get squares of balsa wood which is incredibly light weight about the same as a square of styrofoam. If you still want to use styrofoam there is a specific glue that tacky glue puts out just for styrofoam products. Or use double back tape . To hang them an not put any holes in your walls command product puts out a velcro type tape set one sticks to the box one to the wall . You actually stick both to box an the back sticks to wall when you press it on an you can move it as many times as it takes to get it the way you want it.
I tried this with styrofoam and scrapbook paper, and tried every glue known to man. But they all either rippled the paper or didn’t stick. So I bought some decorative tacks, and put them around the edges. It actually made it look nicer, and less crafty.
I am hoping this is a good way to insulate an outside wall. I plan to use many in different sizes with similar patterns.
Very inspiring; it’s practical and aesthetic at the same time.
Last year 2014, I got my breakfast nook wall based on your inspiration. I used inexpensive canvas and fabric. I wish I could post a pic for you to see it. I ? it! Thank you for sharing!