
Urban jungle fever is still going strong in the design world, and I don’t mind one bit!
From hanging air plants in every way imaginable, to covering a room with plants of all sizes, this decorating trend has us all “bringing the outdoors in” in ever-inspiring ways.
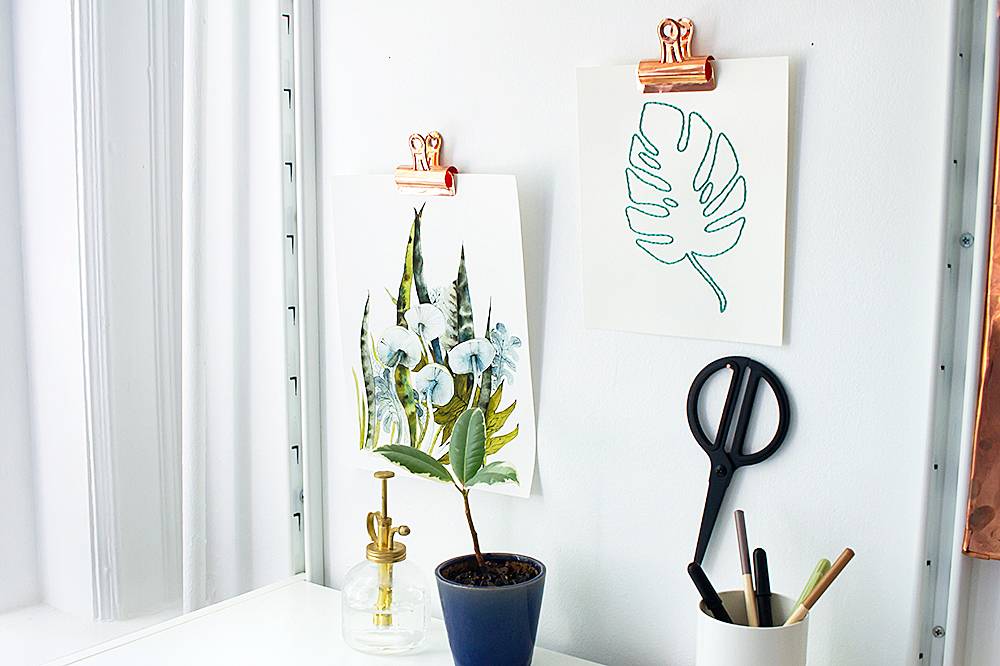
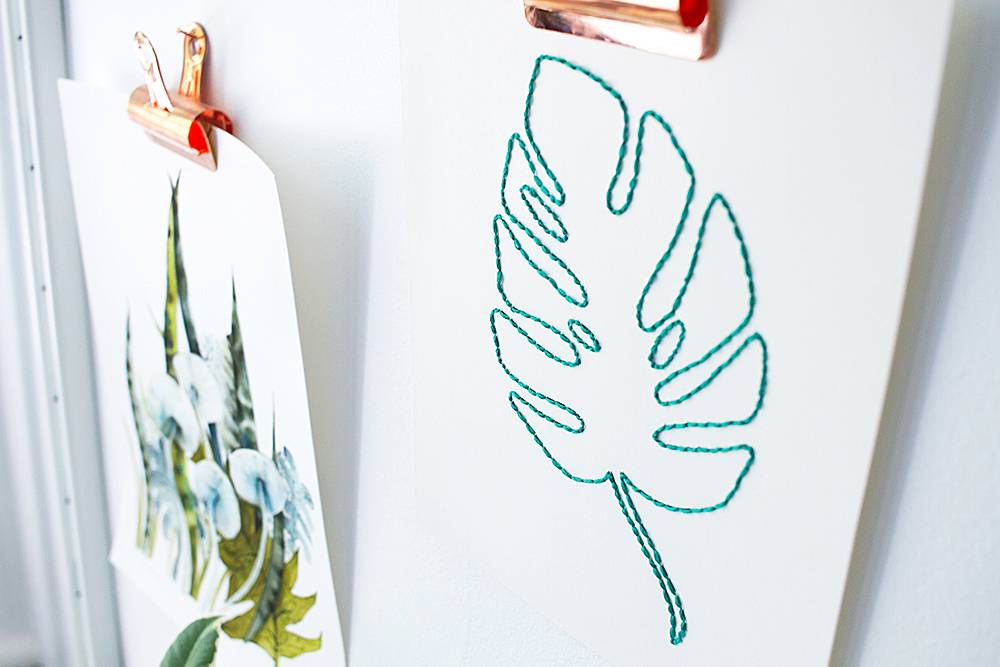
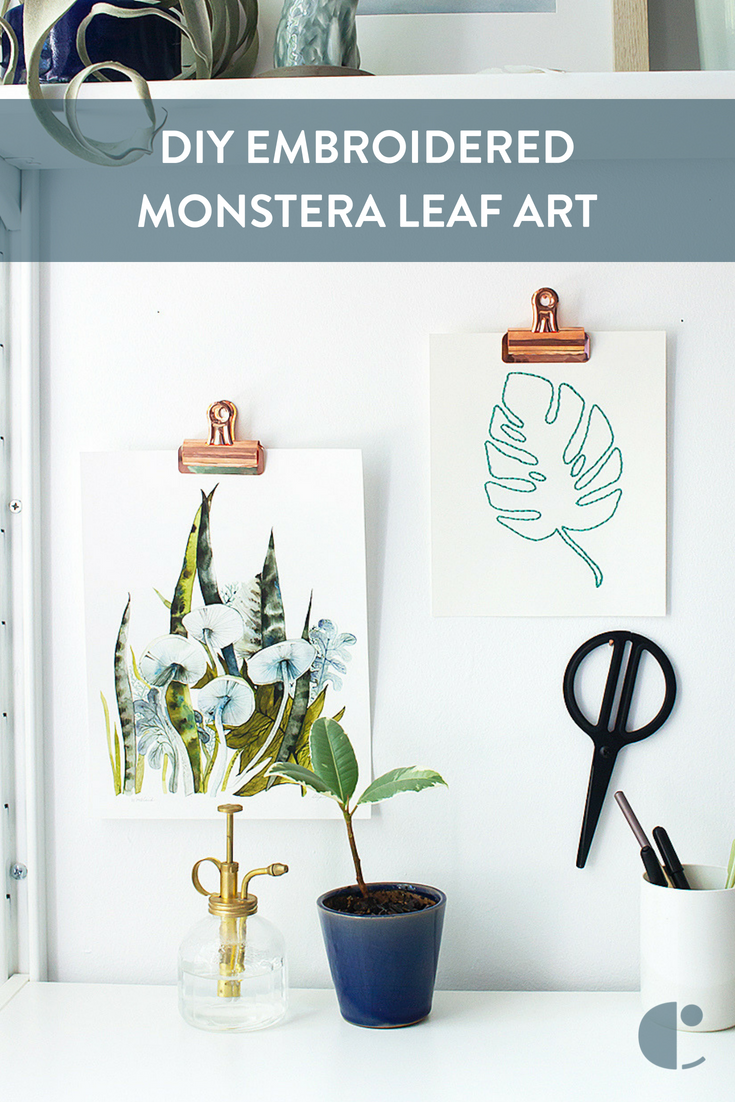
To pay tribute to the uncontested queen of stunning indoor plants, the monstera deliciosa, also known as the split-leaf philodendron, I created this embroidered monstera leaf art print.
Embroidering onto paper creates a lovely texture that adds so much character to an existing art collection. And of course, I made a free printable template, so you can make your own!
Never done embroidery before? Neither had I! Don’t worry, you’ll only use one basic stitch, which is EASY to learn. All you need is a thick paper that can hold up to the stitching, like cardstock or watercolor paper. Ready to get started?
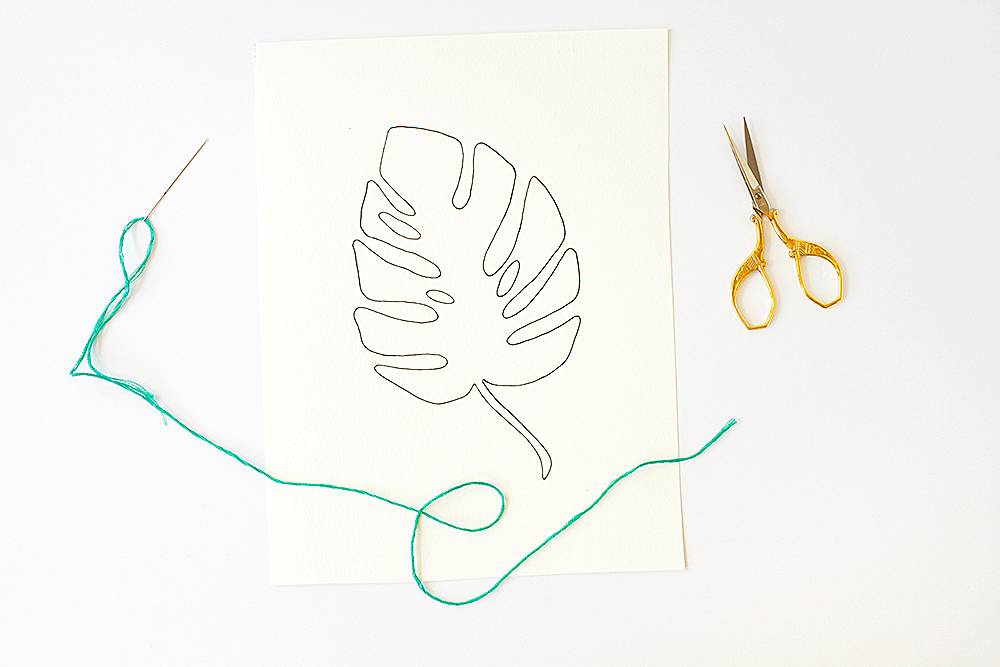
Materials
- Monstera leaf art printable
- cardstock, watercolor paper, or other thick paper to print on
- embroidery floss in your choice of color
- scissors
- sewing needle
I designed the leaf larger on purpose, so that you can have flexibility with the size. When printing, simply change the scale in the printer dialog box to whatever size you like (mine is printed at 75%).
Before you start, you need to learn the embroidery back stitch. Don’t be intimidated, even if you’ve never embroidered a thing! I am by no means a professional maker, and this was my very first attempt at embroidery, so truly–if I can do it, you can do it.
Check out this short video on how to embroider a back stitch. It’s much easier to see what to do with a video, plus you get to listen to some hilarious bluegrass for a minute. Then come back here to put your fancy new back stitch skills to use!
Step
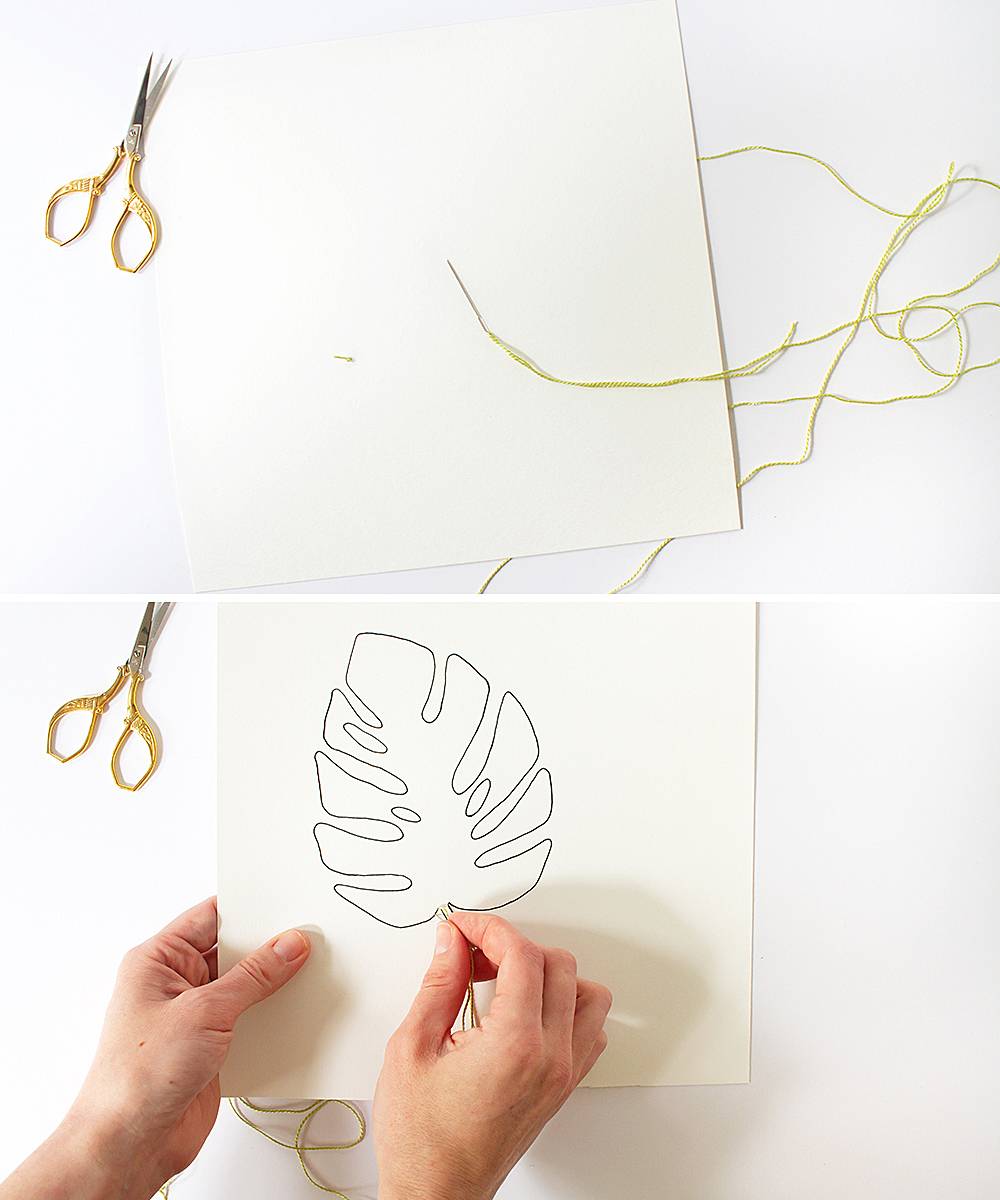
Print the image onto your chosen paper, and thread your needle. Tie a knot at the end of the thread, then pull the needle and thread through the image of the split leaf philodendron from back to front.
Step
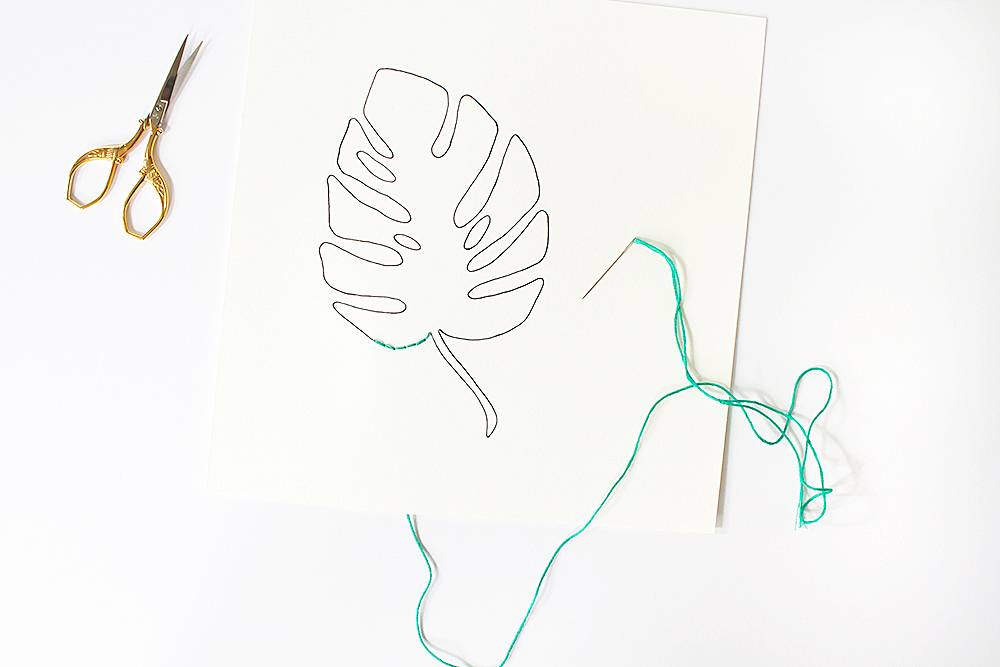
Start stitching! Remember the back stitch pattern from the video.
If you have trouble seeing where to insert the needle from the back of the print, try holding it up to the light.
Step

Keep stitching around the entire image. You are essentially “tracing” the monstera plant with embroidery floss.
To make it around smaller curves, simply shorten your stitch length.
When you run out of thread, cut the end, tie a knot on the back of the print, and start again with a new length of thread.
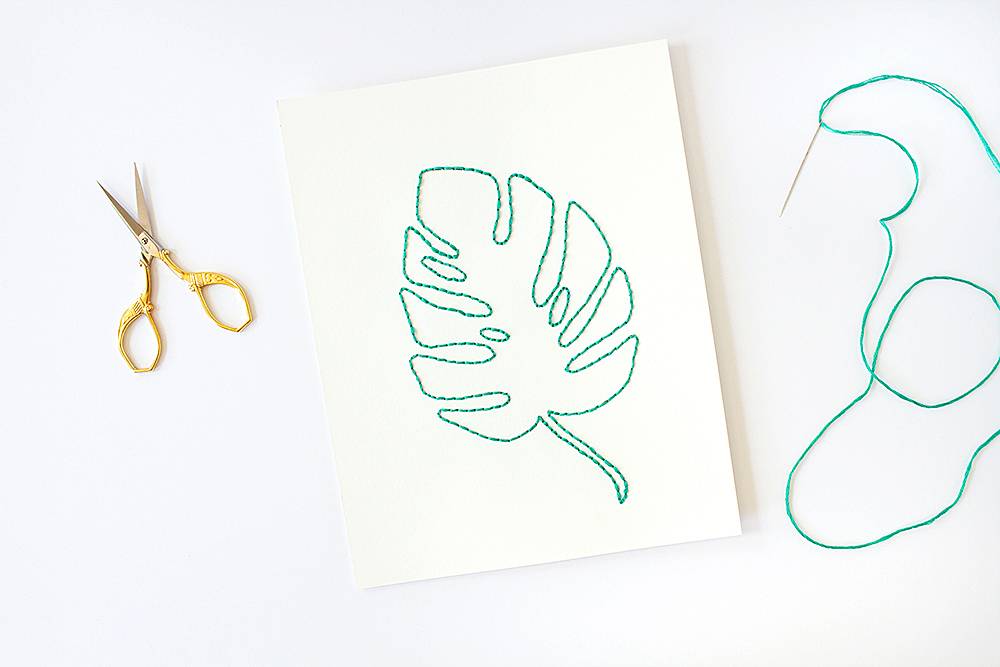
And that’s it! Hang your new plant-a-licious artwork and admire your handiwork.
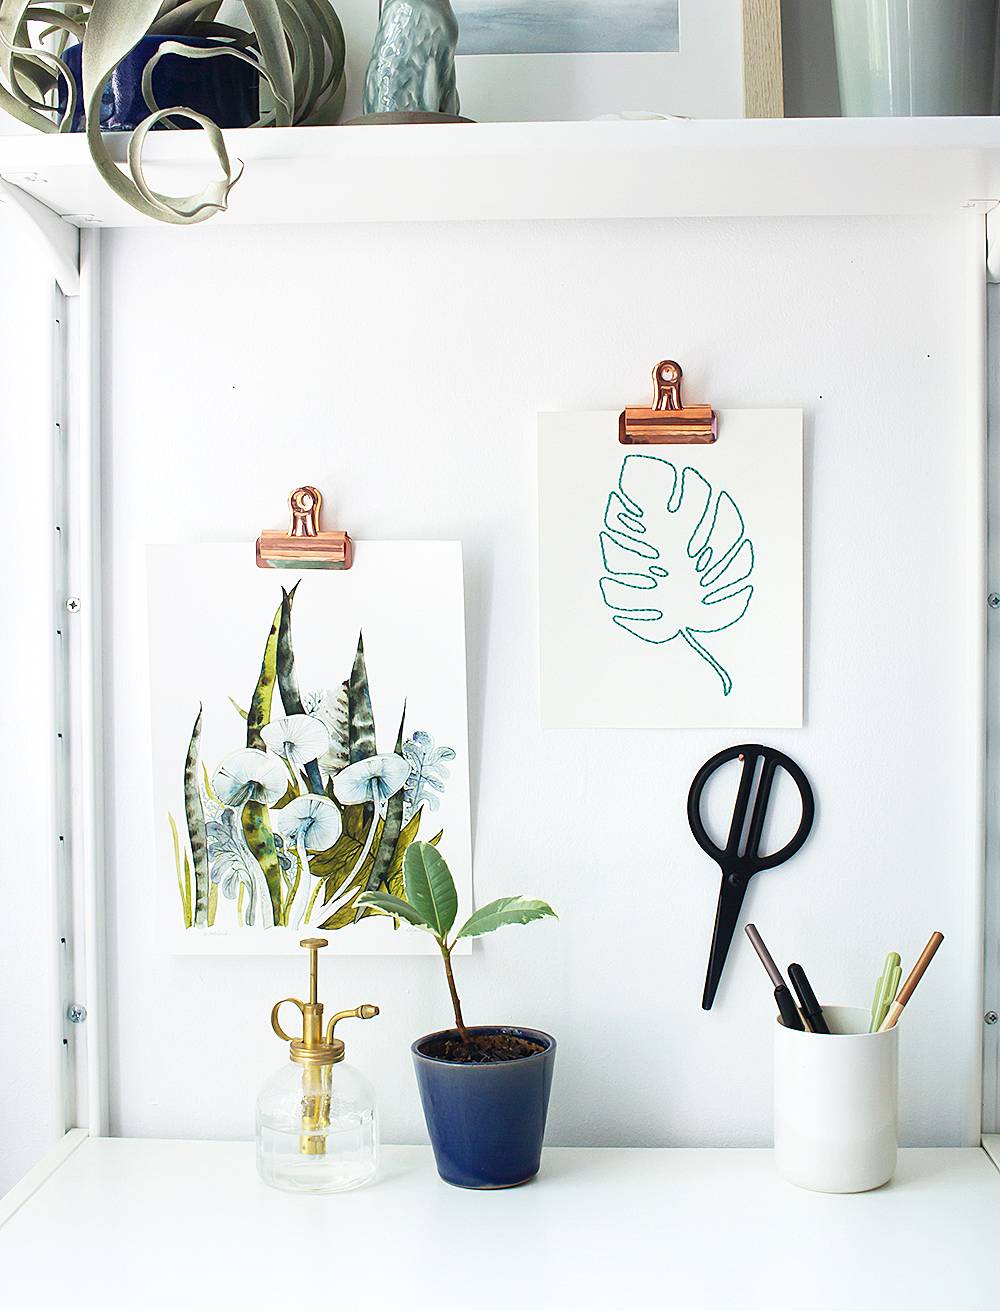
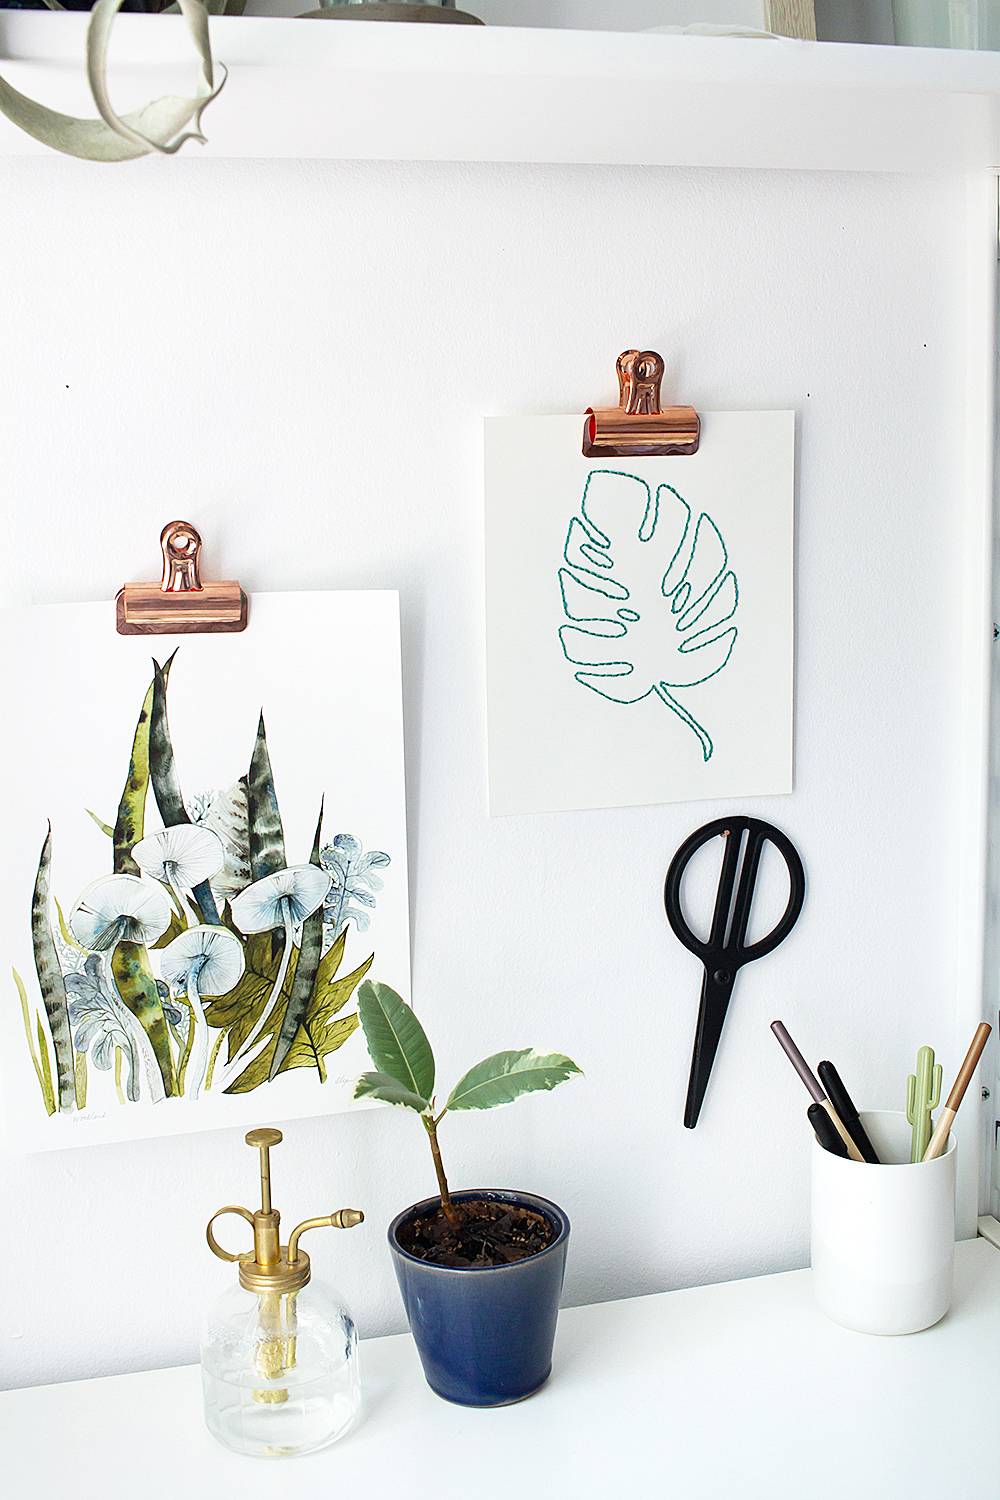
I love hanging art prints of plants because…I don’t have room for more plants in my little apartment!
Don’t you think this project is just perfect to welcome in the summer? Are you inspired to try more embroidery crafts?
Want to see more DIY wall art ideas? Check out some more projects right here!
Beautiful. Please make more embroidery printables.