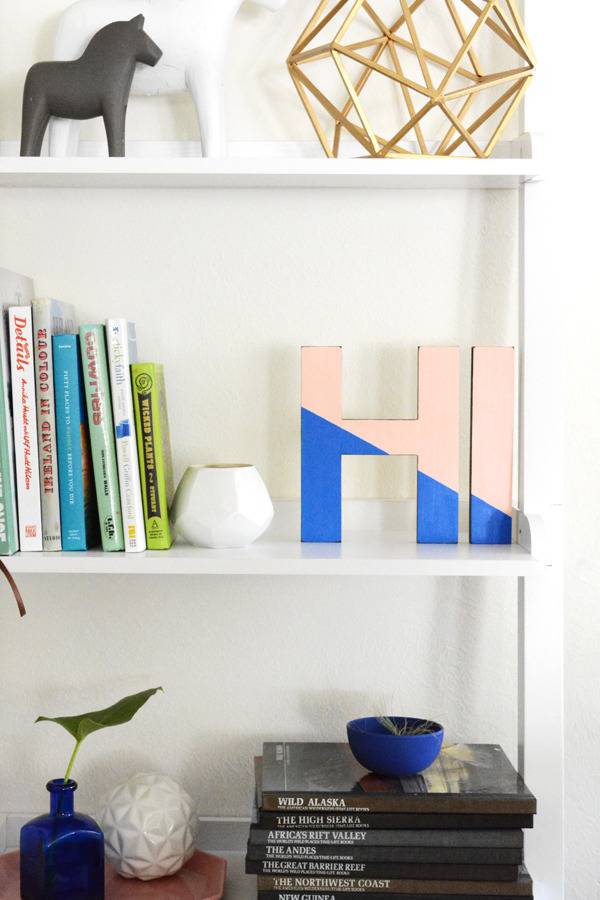
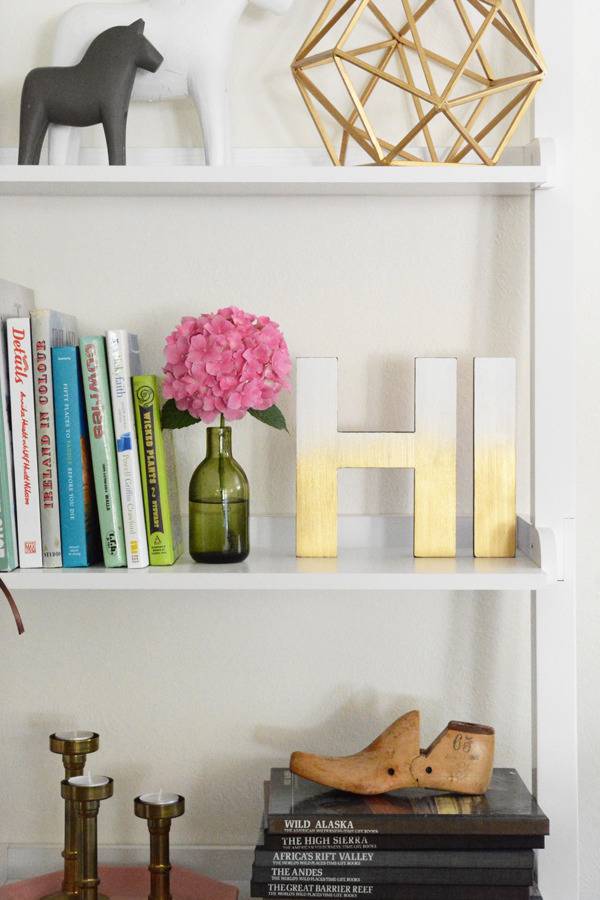
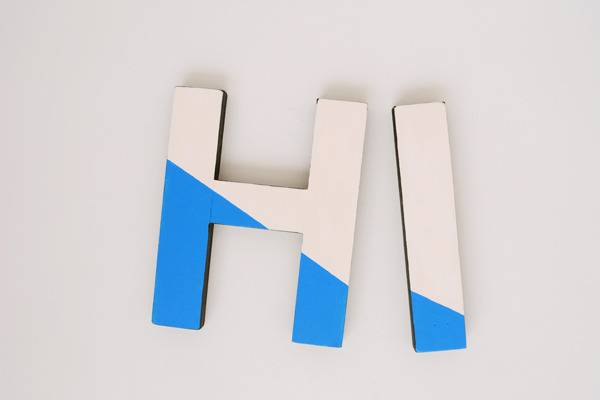
I love changing my decor, I’m not talking about replacing all the furniture, just switching up the accessories. Usually my home decor stays more on the neutral side of things. But, this summer, I’m wanting more and more color in my life and home. I may have commitment issues though, so I made this cute reversible ‘HI” shelf sign. Now, when I’m tired of color, I can flip these around and go back to my usual boring neutral self.
Click through for the full how-to.
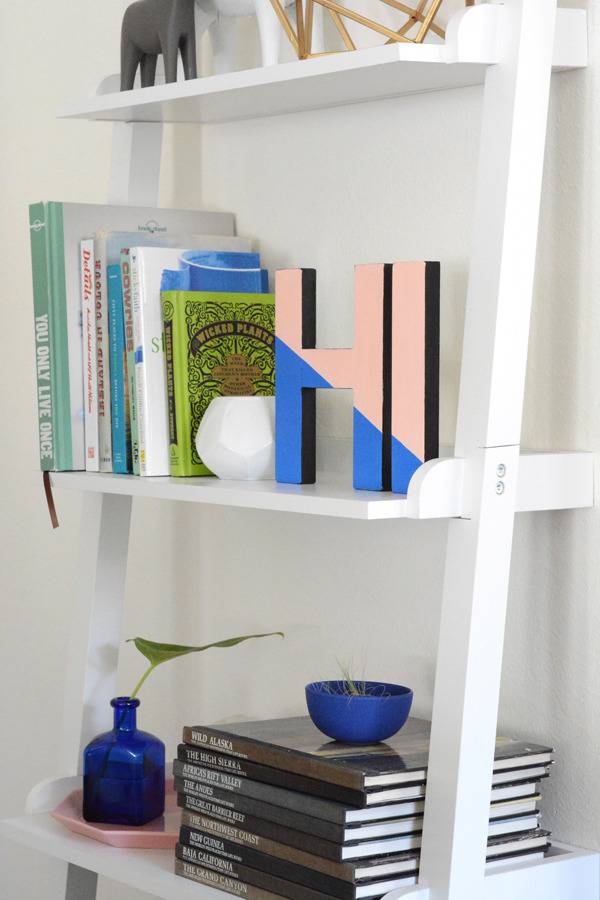
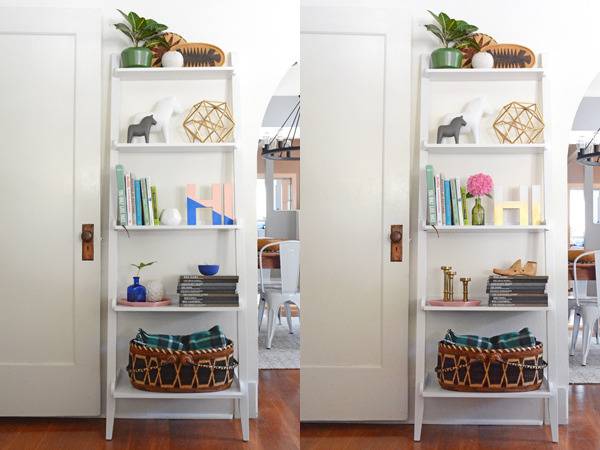
I recently added this little leaning bookcase to our living room and I’m having so much fun displaying all my favorite things. Now I can bright and colorful on left or subtle and classy on the right.
Materials:
- 6 inch wooden letters (I found these in Target’s new craft section)
- craft paint (I used white, black, blue and peach)
- gold spray paint
- paint brush
- masking tape
Instructions:
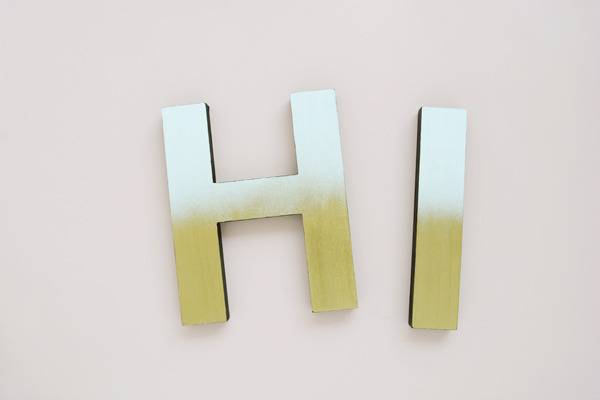
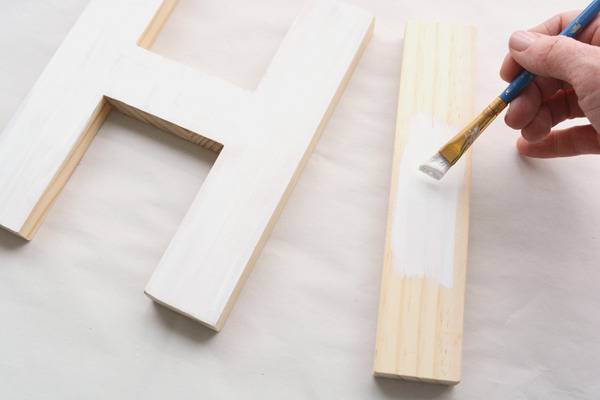
1. Start by painting one side white. This might take a couple of coats. Do not worry about the paint getting on the sides of the letters.
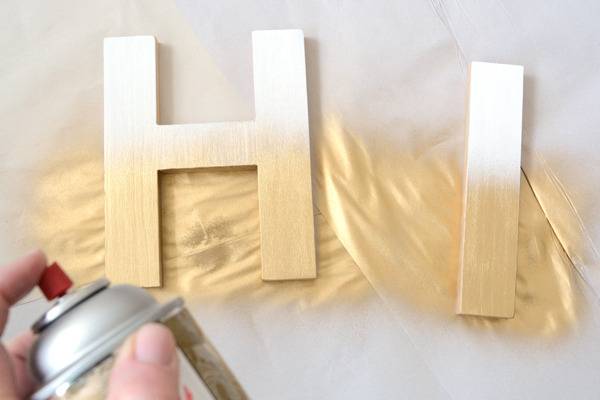
2. When the white paint is completely dry, spray the bottom half of the letters with gold spray paint. Apply the paint to the bottom first and let it fade towards the middle to achieve an ombre effect.
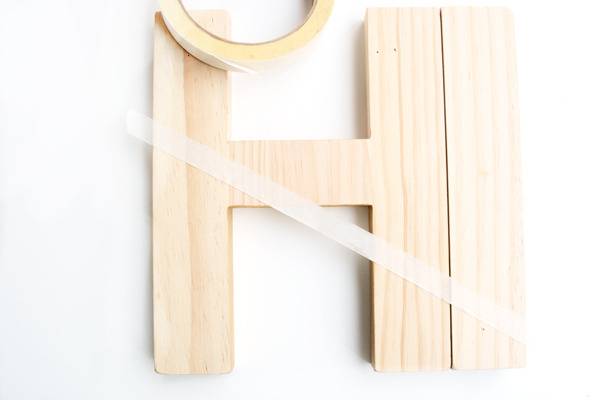
3. When the gold paint is completely dry, flip over the letters and place them side by side. Then, tape a diagonal line across both letters.
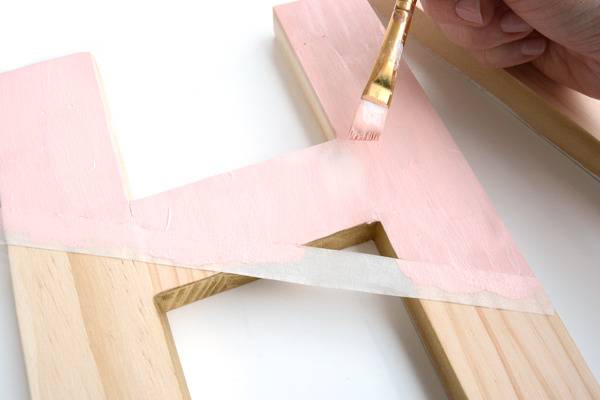
4. Paint the top half of the letters with the peach colored paint. Paint away from the tape line to insure that the paint doesn’t seep under.
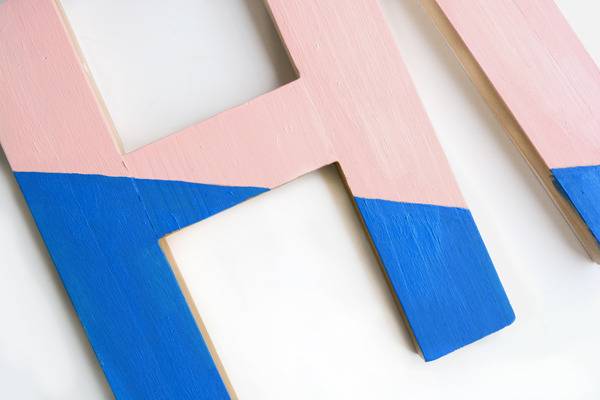
5. When the peach paint is dry, repeat the steps from above to paint the blue half of the letters.
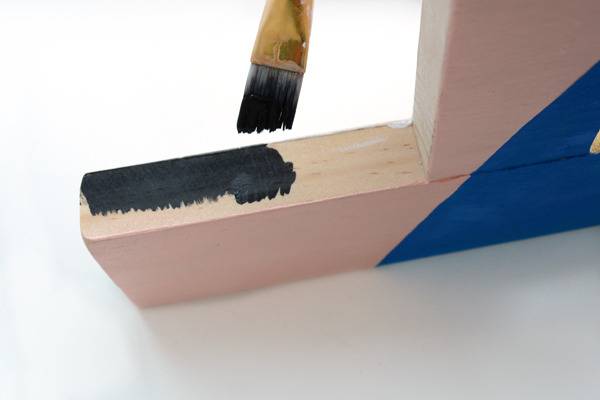
6. When the color blocked side is completely dry, you can paint the sides of the letters black. This can be a bit tricky because you don’t want the black paint to be brushed onto the front of the letter. So, with your brush flat against the surface, paint from the center out to the sides.
The black sides give these letters contrast and definition. Painting the sides is the most tedious job for this project, but it’s totally worth it.

Now to decide which side you want to display first. Right now I’ve had the color blocked side up for a few days. Come fall, however, I’ll be ready for something more subtle and the ombre gold will be perfect.
You could paint these any combination of colors to go with your home decor. Which one is your favorite?