Making your own puppet is easier than it seems and it really fun. Watch our video below or subscribe to iTunes for the latest in how to’s projects for your indie films.
Shopping List
- A good-sized piece of Styro Foam or soft Foam.
(This is going to be used to make the all important puppet head. So keep that in mind when deciding on a size. They usually come in blocks or spheres) - One yard of stretchy fleece.
(Color of your choice, this is going to be the puppet skin.) - Some children’s clothes.
(I know it feels creepy, but go to good will and buy your puppet some clothes.) - Something to make the eyes.
(I’ve used white plastic bottle caps, construction paper, chap stick caps, and those stick on googly eyes. Be creative!) - Some black and red felt.
- Something for the hair.
(This could be a cheap wig, pieces of felt cut into strips, or just a hat!) - Hot glue gun, or spray adhesive.
- A needle and thread.
Building the head
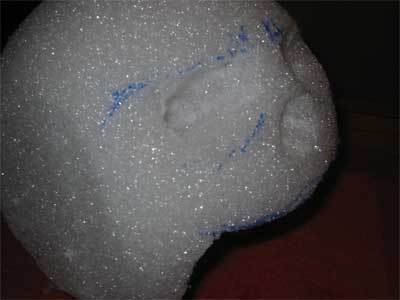
While this is the most important part of the puppet, it is not terribly complicated. If your using soft foam you’ll have to get your hands on an electric turkey carver. If you have styro foam a turkey carver or a steak knife will work. First cut the basic shape of your puppet head out of your block or sphere of foam. Start small and make incremented cuts. Eventually a new puppet skull will emerge. Much like people, puppets come in all shapes and sizes. So don’t be afraid to use wacky forms!

Once you have the basic shape you can start cutting out eye sockets and a mouth. For this particular puppet (Gary) I chose to cut out where the lower jaw would be and add it later using cardboard. Giving Gary that “flappy” mouth look. Don’t forget to cut a hole for your hand to go. I like to cut a little groove for my thumb and fingers to slip into. This makes manipulating the mouth much easier.
Next comes the puppet skin. You can use hot glue or spray adhesive. The latter provides a stronger bond, but is harder to work with. Cut a piece of fleece that is big enough to cover your puppet head and start gluing it to the middle of the face. Make sure you glue the fleece deep into the eye sockets. Moving out from the center, keep readjusting, stretching and gluing until you have cover the face evenly and securely.
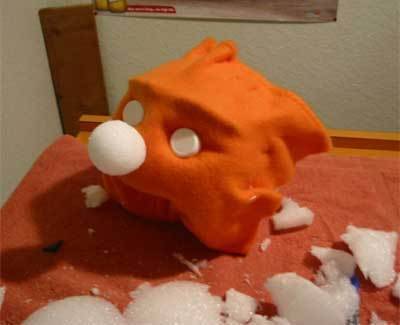
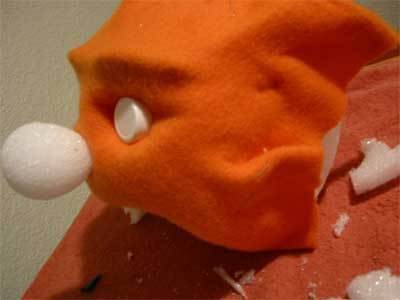
For Gary I chose to give him a big nose. So the next step was to carefully cover that egg shaped shnoz with fleece. This was a huge pain, so with future puppets I would glue a piece of scrap foam as a nose BEFORE I started applying the fleece. This method is easier, but makes for a much less prominent nose.
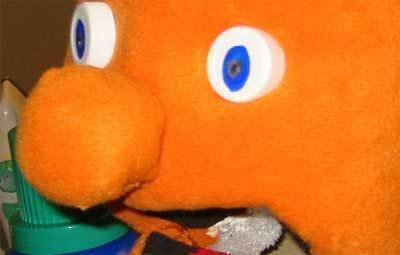
Next came the eyes and the bottom jaw. All done with hot glue, felt, fleece, some cardboard, plastic water bottle caps and a lot of love.
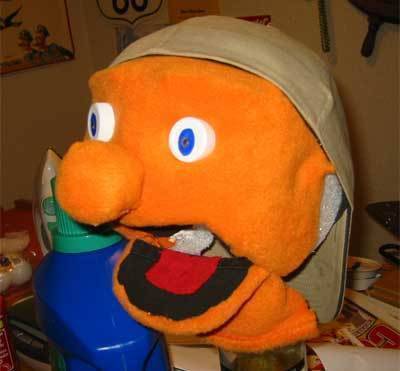
As you can see I also added some black felt for the inside of the mouth and a red felt tongue. I was too lazy to deal with hair on this puppet. So like many other bald men in Hollywood, Gary will be donning the baseball cap in place of hair. Using some more fleece I created a neck and covered up any patches where foam was still visible.
Next Add ears, eyebrows, mustache or anything else you want your puppet to have. Maybe an eye patch!?
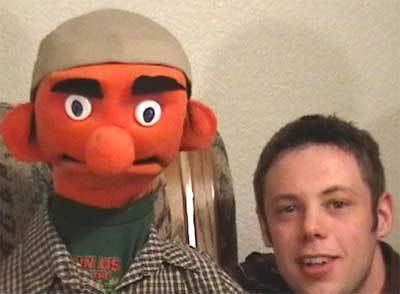
Next comes the clothes and puppet body. I found that a t-shirt and a button up shirt work great for boy puppets. I glued the puppet neck to the collar of the T-shirt, and then just buttoned up the outer shirt like normal. To give your puppet body some “meat” crumple up newspaper or use some extra foam and stuff it into the T-shirt.
Hands (optional)
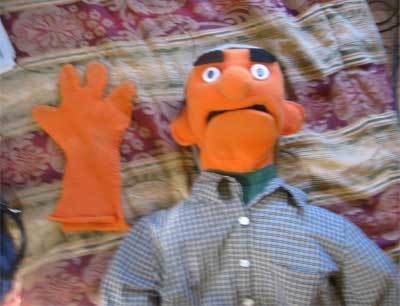
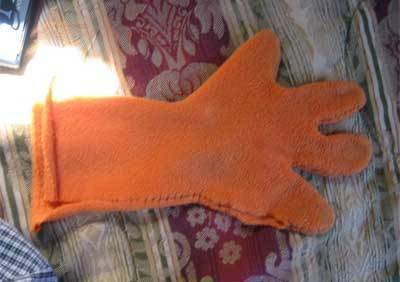
Now if your puppet doesn’t need to hold anything or use their hands, then you’re done! However, adding a puppet hand is really easy and will make your puppet much more convincing. Lay your hand on a piece of the fleece we used for skin. Rest you middle and ring finger close together and all other fingers spread apart. Using a pen trace around your hand to make the outline of a 3 fingered hand. Cut that out and set it over another piece of fleece, trace and cut. Now using a simple stitch sew around the edges. For tips on sewing check out ThreadBanger.com. Turn it inside out and like magic you have a puppet hand you can wear like a glove.
Congratulations you’re the next Jim Hensen! For tips on framing for puppets re-watch episode #2. The easiest way is to use a table or windowsill to hide the puppeteer.
Questions and comments are always welcome. Thanks everybody!