
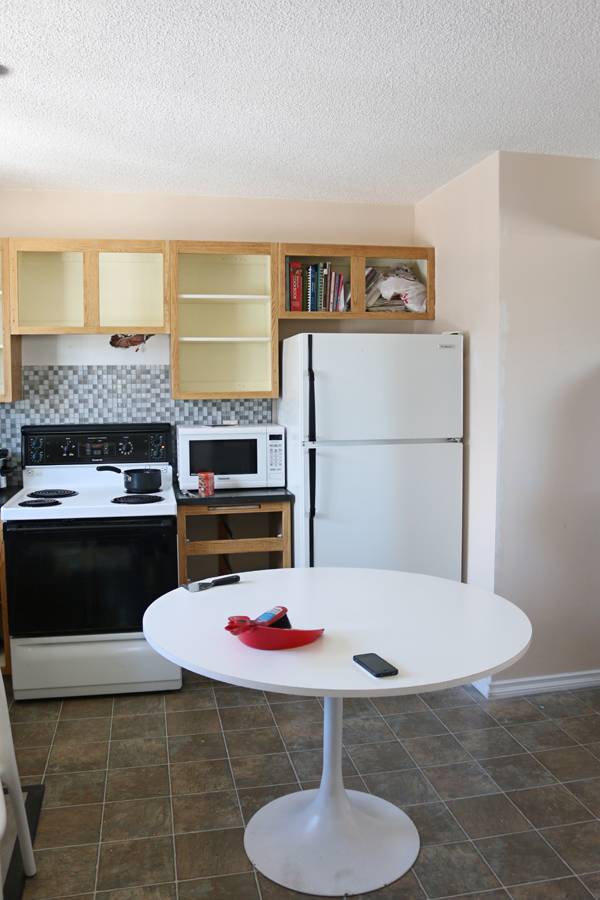
We’d had enough of our dated kitchen, so we decided to give it a full-on facelift, while staying on a budget. Follow along with our whole series: Lidy’s Kitchen Makeover.
So, you’re tired of your outdated kitchen and you have a small budget? No problem! We can totally relate to those familiar feelings. Our kitchen truly is the heart of our home, so we wanted to find a way to make it the our favorite room in the house without spending a lot of money.
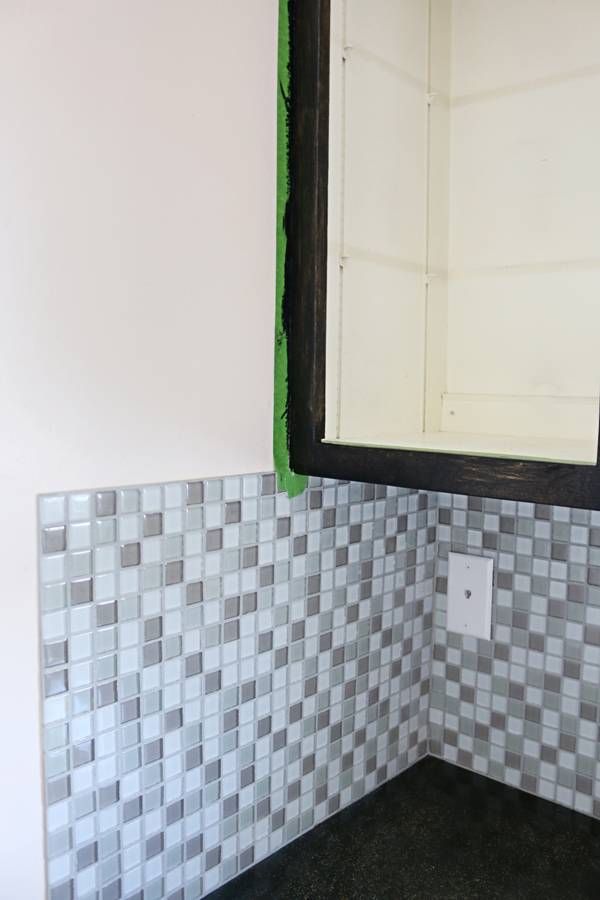
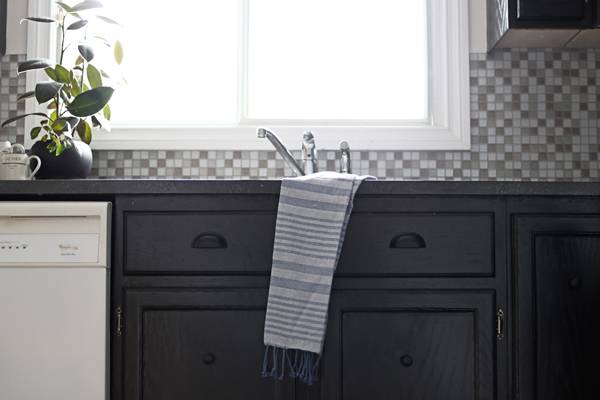
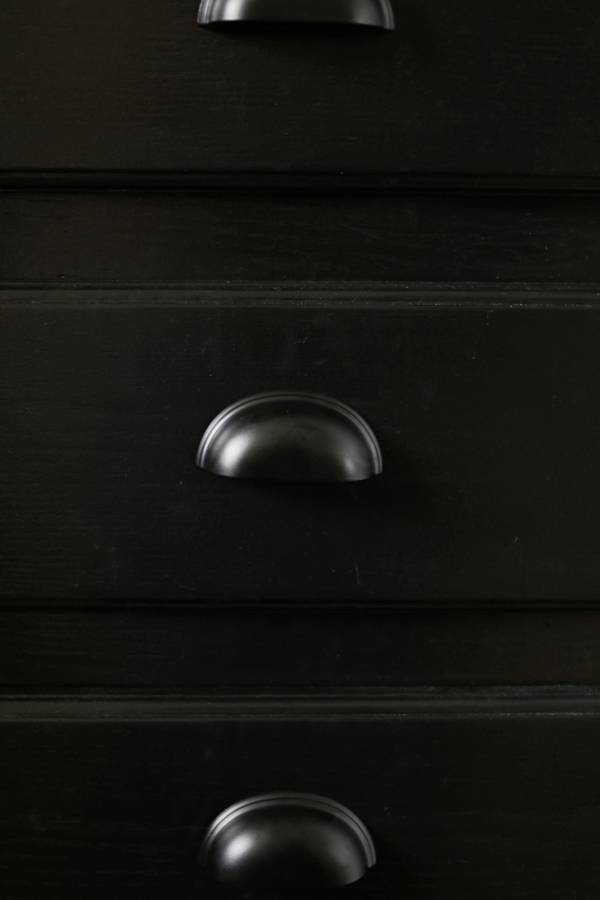
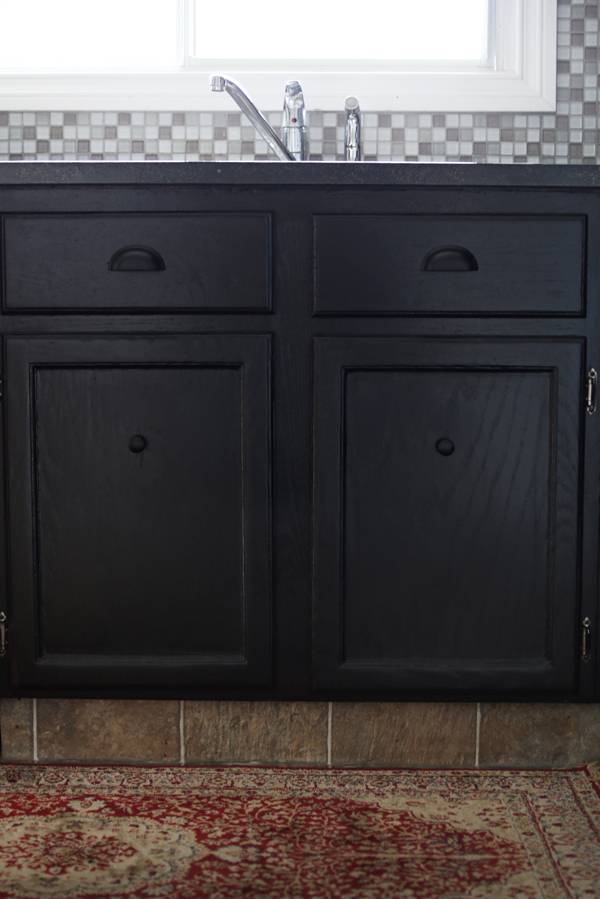
Anyone can do this quick-fix on the cheap and in a short amount of time. Let’s start with the biggest and most obvious problem: the contractor-grade oak cabinets. It was cool in the 90s (or was it?!), but it’s time to move on. We wanted a kitchen with a modern look, something sleek and simple. The easiest and most inexpensive solution is to paint your existing cabinets and add new hardware. We went with a bold, dramatic palette, which is a great backdrop for any design style.
For more kitchen remodel ideas, check out the kitchen makeovers section.
Materials
- Paint (in your preferred color and finish)
- Paint brush
- Mini roller and accessories
- New handles and pulls
- sandpaper and sanding block or power sander
- Tack cloth
Step
Start with giving your cabinets a good clean using warm soapy water to get rid of any dirt or grease. You want to start with a nice clean surface, so scrub hard! Remove all the cabinet doors, drawers and any contents in your cupboards, as they will be covered in dust in no time. Avoid making more work for yourself.
Step
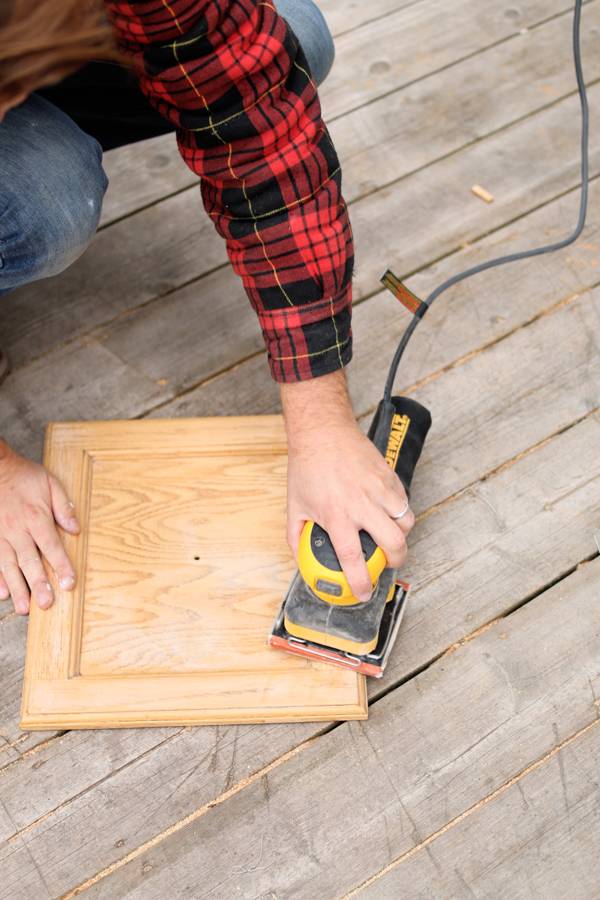
Begin sanding the surface of your cupboards, doors and drawers. You can use an electric sander to really rough up the surface and to speed this process up.
Step
If your doors and drawers have little details, use a sanding block to get into the hard to reach places.
Step
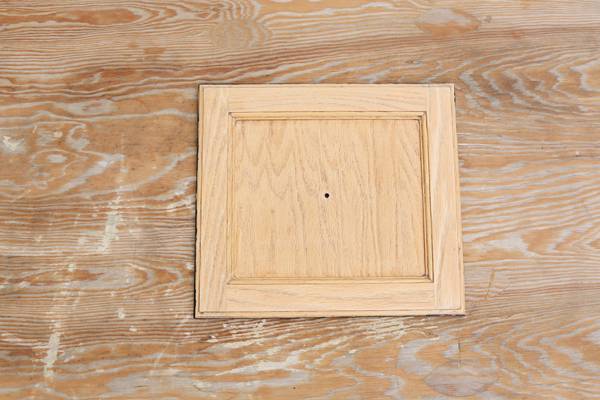
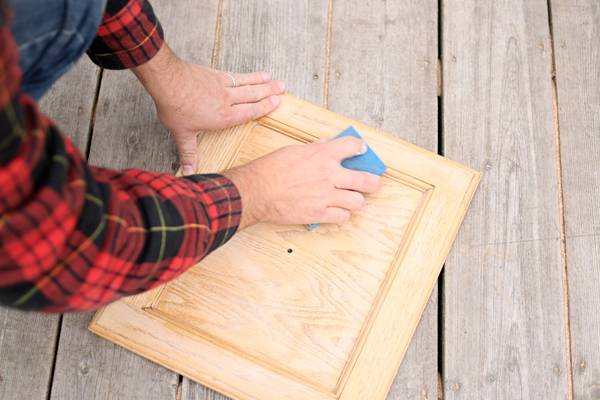
Wipe all surfaces clean with tack cloth to get rid of any dust.
Step
Place painters tape around the cupboards to avoid getting black paint on the walls. Paint your first coat on the cupboards and allow to dry.
Step
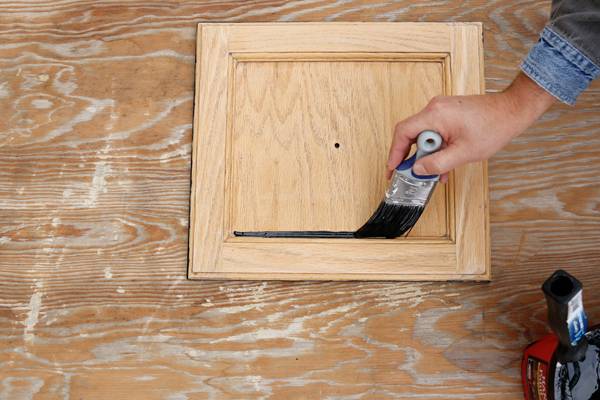
Meanwhile, begin your first coat of paint on your doors and drawers. Use a brush to get into all the grooves and a roller for the flat surfaces. Allow to dry completely in between coats. Tip: Place doors on blocks to keep off the floor in case dirt sticks to paint while drying.
Step
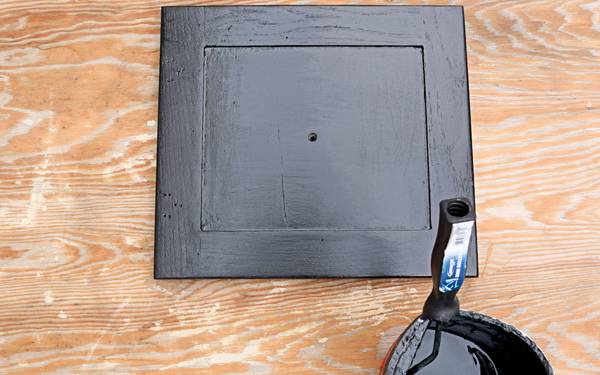
When the paint has dried, begin your second coat. For the doors, flip over and repeat process on the other side.
Step
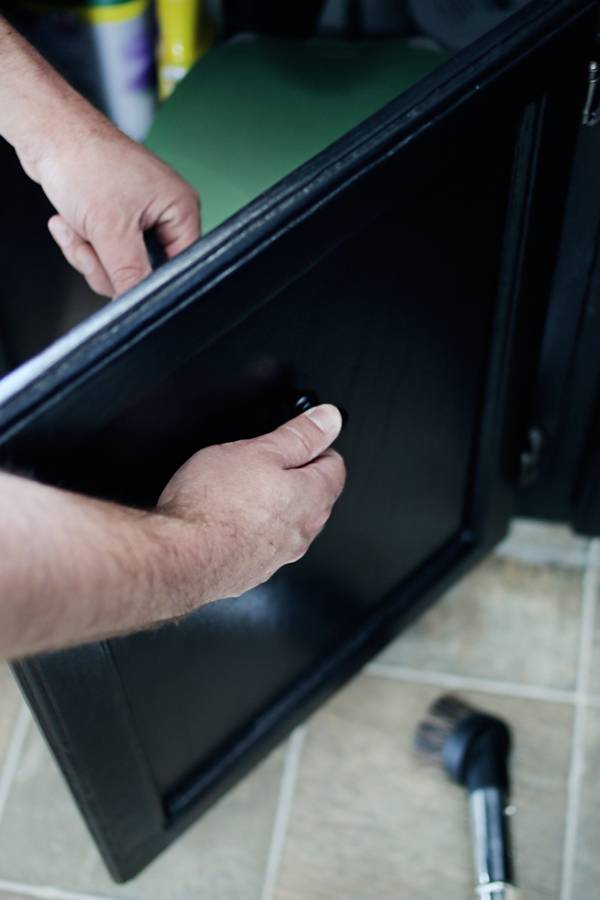
Once everything looks fully covered, you can begin piecing back your kitchen, one door and drawer at a time! Place new hardware on your door and drawer fronts. We went with black hardware on black cabinets and drawers for a clean and modern finish. The cabinets alone will make your whole kitchen feel fresh and updated. But there’s more, so stay tuned!
For another take on how to paint your cabinets (this time we went with a bright white finish), check out Capree’s step-by-step guide.

I never post but I had to in this case.
I have been painting cabinets for people for years and following these instructions will ruin your kitchen. Quality and good workmanship take time so no rushing.
Here are the issues I have with this article:
Cabinets should be cleaned but with a proper degreaser like TSP. Soap does nothing for grease.
Doors are delicate and they need a proper finish. Never use electric or orbital sanders on your doors. Everything should be sanded by hand. Starting with 80grit and going up to 220 grit or higher with each stage.
Before painting anything you should use a proper primer that sticks to grease. There are some great products out there but they cost money.
Reason you need to do this is to make sure you have a proper base for your paint to stick even if you cleaned them before.
Finally I wouldn’t use any regular paint but a good quality cabinet paint. Some are actually are a self leveling paint so your finished product does not show any marks. Light coats and many of them. Don’t roll on paint for your cabinets, you want the finish product to look like furniture not drywall.
Take your time. Do all the steps. Do it right. Or spend the money to get a professional cabinet finisher to do it.
My two cents.
Hi @Frank!
Thank you so much for sharing your thoughts and expertise! You can find a similar tutorial here on Curbly that follow the same exact steps you have listed. Link is provided above.
With all do respect, I don’t want to belittle your comment or knowledge of how to paint cabinets properly! But this tutorial was created for individuals who want a quick and easy fix, and perhaps one day, will have the money to pay a professional cabinet finisher or do it the recommended way as you have shared. We have refinished many spaces in many homes and have never ruined a kitchen by following this simple step-by-step DIY to date. We certainly did not rush through our steps, but definitely saved time where we could, since we do run a busy household. I do realize that this may come as highly unprofessional, but most people aren’t your everyday experienced cabinet expert. We just wanted to leave a little inspiration for those who are seeking a quick kitchen makeover and can realistically get it done with a small budget and in little time with more than satisfactory results. I certainly hope our cabinets look like proper furniture and not drywall 😉
Again, I so do appreciate your concern and hope can see my small point of view.
Sincerely,
Lidy
This is so cool! Painting really makes a big difference. This is what I always do if I’ve got a little budget for a makeover. Thumbs up Lidy!