
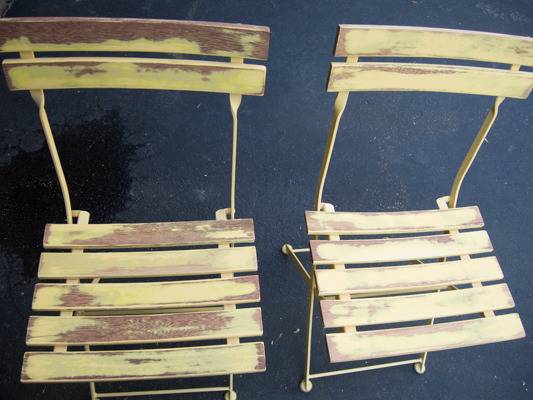
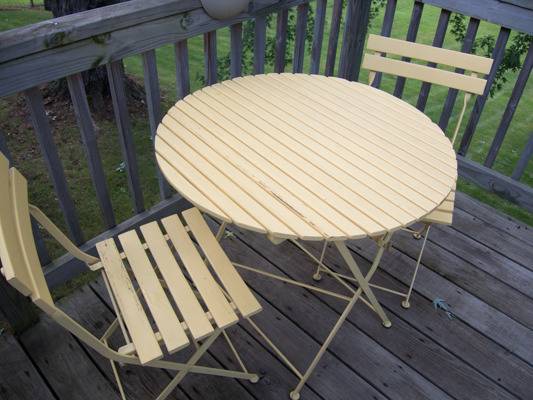
When I bought this sweet little yellow bistro table a couple years back, I loved it. It was the perfect size for romantic meals under the sky. Then, after the first season, the paint on all three pieces started peeling. See?
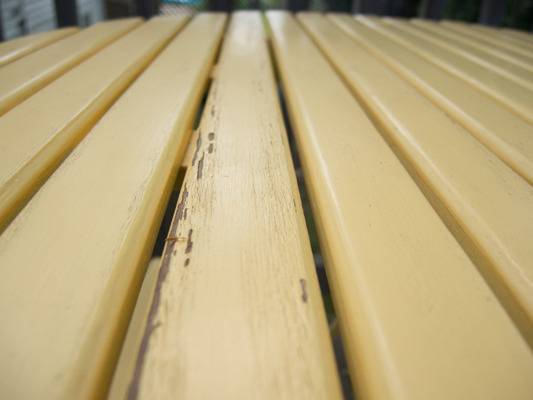
I touched it up, with yellow, but I couldn’t keep up with the weathering. By the end of the second season, the cheery yellow had turned sickly, powdery yellow. When this spring rolled around I considered replacing the set with something new. That notion lasted about a minute, because, really, it was the perfect project to undergo a makeover.
BEFORE WE START: If you’re planning to makeover any painted surface, it’s wise to keep in mind the age of the paint. If the paint was applied BEFORE 1978, it may contain lead. Visit this EPA page concerning lead in the home and its dangers. If your project does have lead paint, there are precautions to take. Visit 3MDIY.com![]() to find all the 3M Tekk products that are available to help keep you safe.
to find all the 3M Tekk products that are available to help keep you safe.
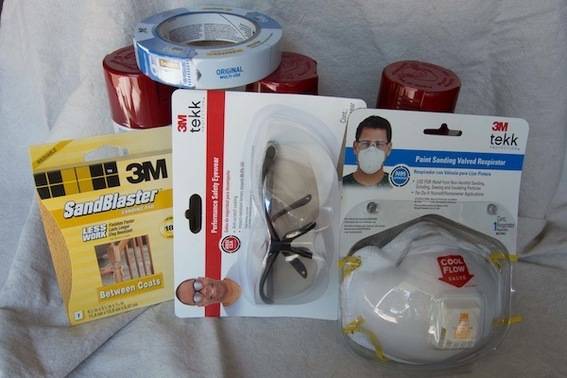 To get started on my makeover, I assembled my supplies. They included
- 3 cans of 2 in 1 paint & primer spray paint in glossy Colonial Red
- orbital sander and 3M Advanced Abrasives
 120-grit sandpaper
 - cloth for tack cloth
- drop cloths & large pieces of cardboard (cardboard optional)
-
ScotchBlue™ Painter’s Tape

-
3M Advanced Abrasives
 SandBlaster Sanding Pad–180 grit
 -
3M Tekk Protection
 Performance Safety Eyewear
 -
3M Tekk Protection
 Paint Sanding Valved Respirator
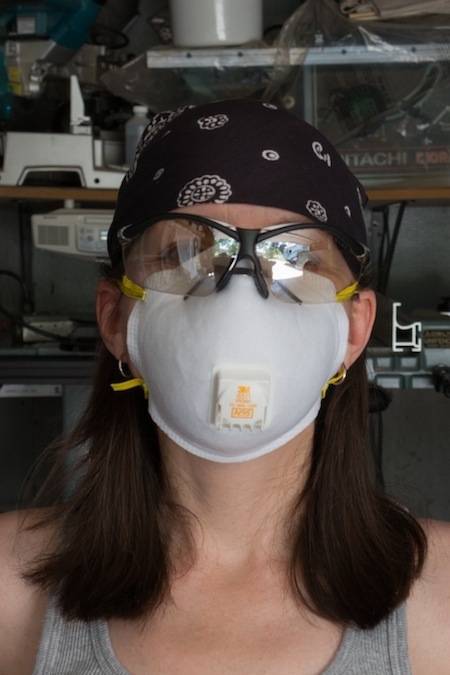
Before beginning, I geared up. Okay, not the prettiest girl at the dance, but certainly the most prepared for sanding and paint prep!
To sand wood parts of the bistro set, I used an orbital sander
The paint was in such bad shape, sanding the wood slats with the orbital sander took about a half hour. Tops. For the metal legs, I used the sanding pad to give the paint more teeth. I highly recommend using Sandblaster pad to tackle these types of small and spindly surfaces. The pads bend the way you need them to and they don’t rip, like traditional sandpaper. It made the job MUCH easier and less tedious.
I dampened my cloth and tacked off the sanding dust and then got down to painting.
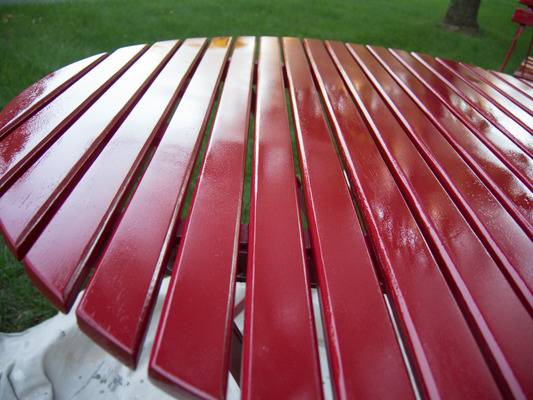
I started by shooting the undersides of the pieces first. I set them on large pieces of cardboard I had on hand to spare my drop cloths. (Yeah, I’m one of those people who try not to get my drop cloths unnecessarily painty.) Within 20 minutes of spraying, I gave them another coat. When they were dry, I flipped them over, set them on the drop cloth and shot the top side with two coats as well.
Shiny!
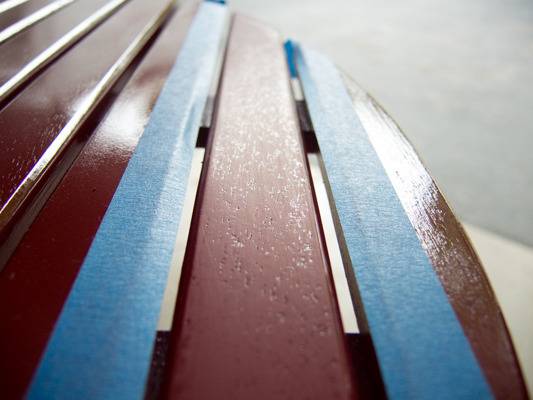
The finish turned out lovely, EXCEPT for one slat. The paint really lifted the grain and made it look and feel fuzzy, which you can actually see in this photo:
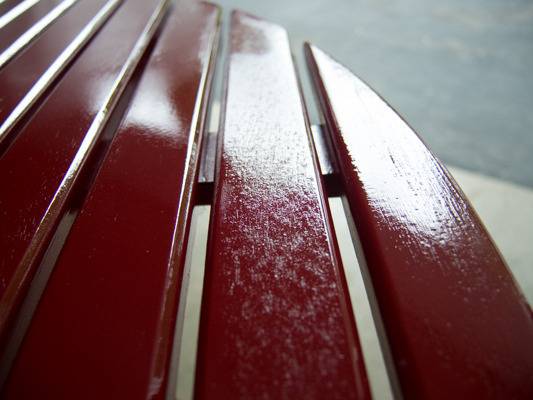
To fix the problem, I taped off the flanking slats to protect the surrounding surfaces,

and then smoothed out the fuzz with my trusty sanding pad.

After I was done sanding, I tacked off the dust again and re-sprayed the slat.
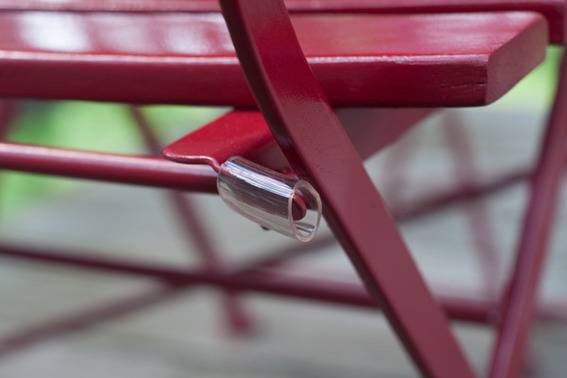
Because both the chairs and the table are collapsible, I assessed places where metal might rub against metal when I folded them. The most concerning was this spot on the back of the chairs. To assuage my worries, I cut short lengths of tubing I had on hand and slipped them over the protruding tabs.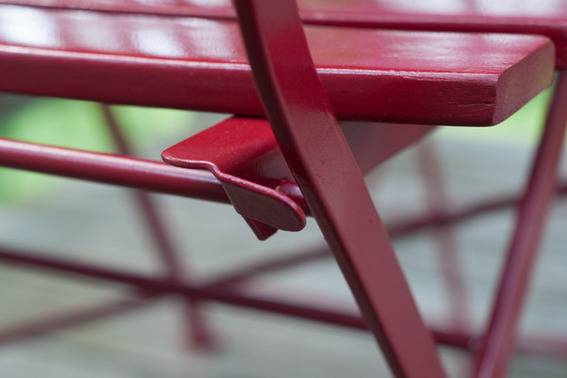
Like so:
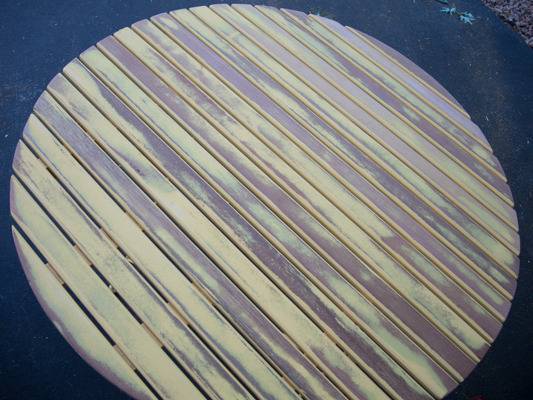
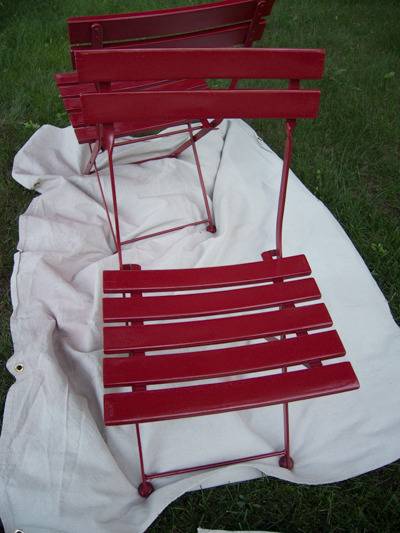
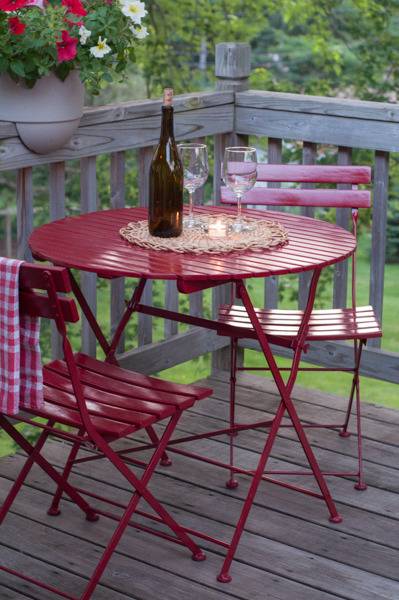
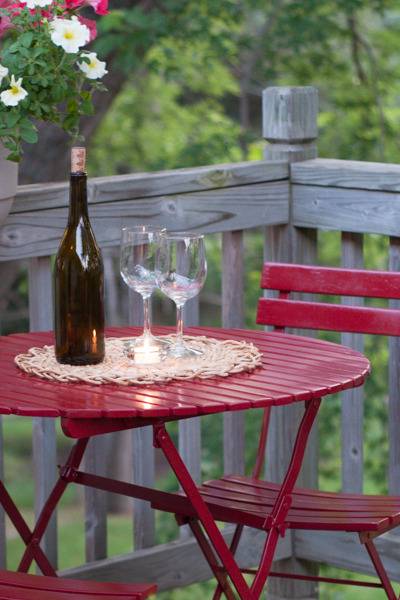
So what does the sad, yellow bistro table look like now? This!
And, again, a “before” for comparison.
Honestly, I wasn’t sure about the color I chose, or the fact that it was so shiny, but now that it’s done, it’s perfect!! I love my bistro table all over again.

![]()
This post is a collaboration with 3M DIY. To keep up-to-date on projects, products and sampling visit 3MDIY.com.
All I want to say is you did an awesome job can I come over and share wine and thoughts with you? lol. I purchase a set of 4 bistro chairs for children from a second-hand store called the Hidden Cupboard (Finley Lake, NY) and I have a good friend who owns a car collision place he is going to sandblast the chairs for me (at least 4 coats of paint) on them and then the fun begins. I don’t have a preference on color I love all colors, it just a matter of which one to do this time and do I make the chairs in one color and the table in another oh well I just want to make it awesome. Thanks for sharing and keep up the great work Ms. Maven