
I have far too many would-be-awesome-if-they-were-pieced-together panorama photos. I’ve done a few great treks and when I’m standing in front of an amazing vista, I can’t help myself – despite knowing that these have always ended up hidden away, not put together, and unappreciated. They’re difficult to frame and not terribly attractive due to the odd shape of the final product.
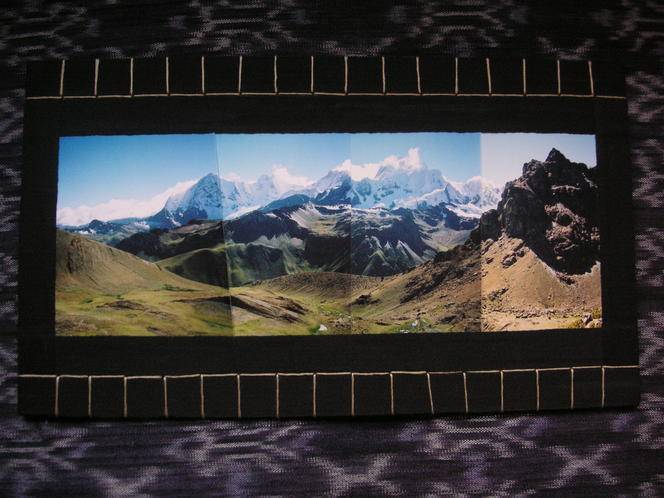
After some contemplation and planning, I framed these panoramic wonderments to look streamlined and orderly using cotton twill tape, which has such a beautiful grosgrain ribbon look yet is incredibly cheap. The overall shape recalls an old film reel, while the texture of the cotton twill and embroidery thread screams handmade-with-love. To me, it’s the perfect marriage of form and function for capturing epic memories. Frequent enjoyment will ensue.
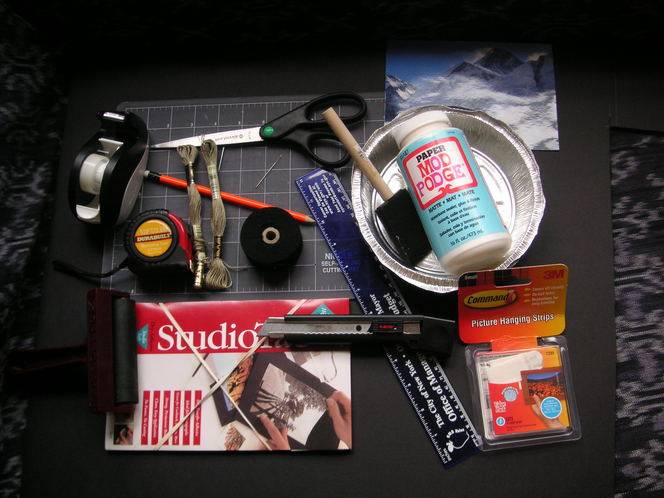
Materials and tools:
- Panorama of photos
- Black foam core board (a cutting mat doesn’t hurt but isn’t mandatory)
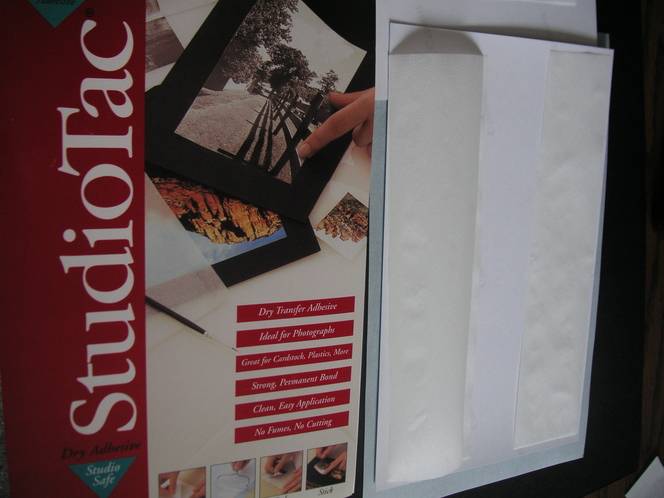
- Dry adhesive, double-sided tape, & brayer (or spray adhesive)
- Black cotton twill tape – 1” wide
- Mod Podge & application brush
- Embroidery thread & needle
- Xacto knife & scissors
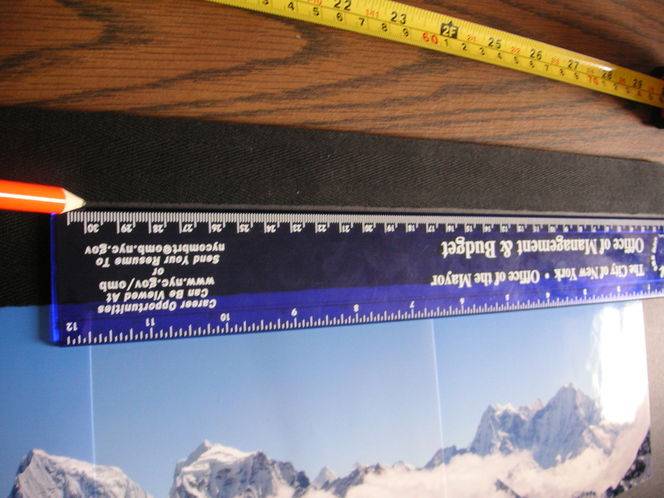
- Ruler & measuring tape
- Nail
- Pencil
- 3M’s Picture Hanging Strips (or something similar) for easy wall mounting
Costs = <$37 (purchased materials can accommodate more than one frame):
- Black foam core board = $3.25
- Dry adhesive, double-sided tape, & brayer = $11.24+$5.49+$7.75 (or $8.99 for spray adhesive)
- Black cotton twill tape – 1” wide = $4.75
- Mod Podge = $2.60
- Embroidery thread & needle = $1.50 + $1.29
- 3M’s Picture Hanging Strips = $2.68
- Everything else = free or readily available around the house
Steps:
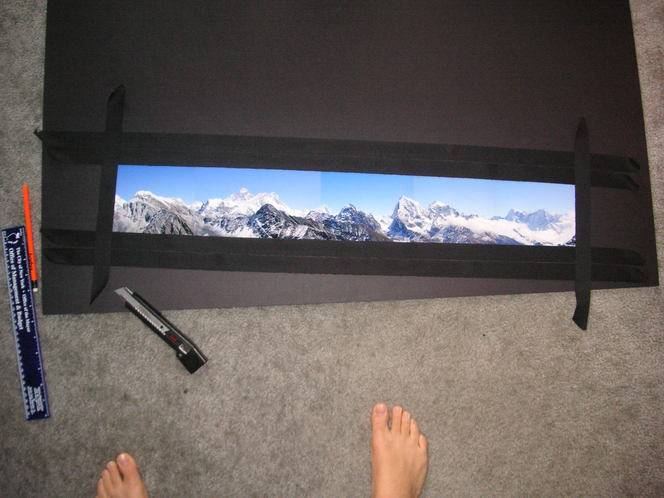
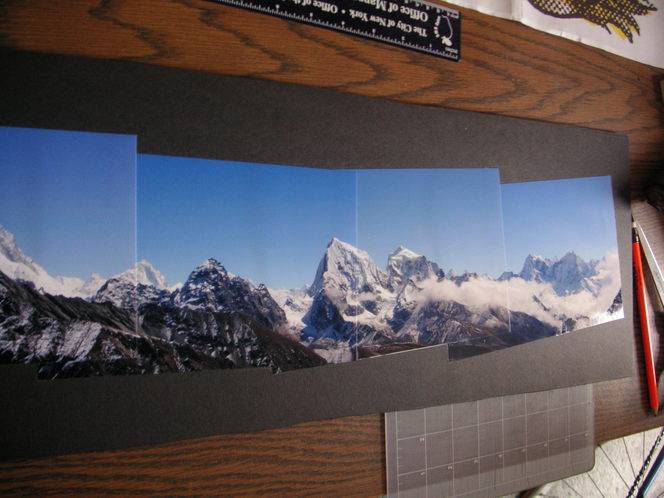
- Arrange your pics on foam core board and test how you will lay the cotton tape (cut tape to give yourself at least an inch or two to secure around the back). Manipulate the photos and tape to make the length of your board divisible by an inch – that way you can make one-inch stitches evenly across the length.
- This is truly the most difficult part: you must make sure that the cotton tape, when laid, will successfully cover all the mismatched jagged photo edges and meet the edges of the foam core board. As you can see below, you may need to set your pics at an odd angle in order to make the finished product straight. Note: I made three of these, this panorama was the only one that required such slanted high jinks.
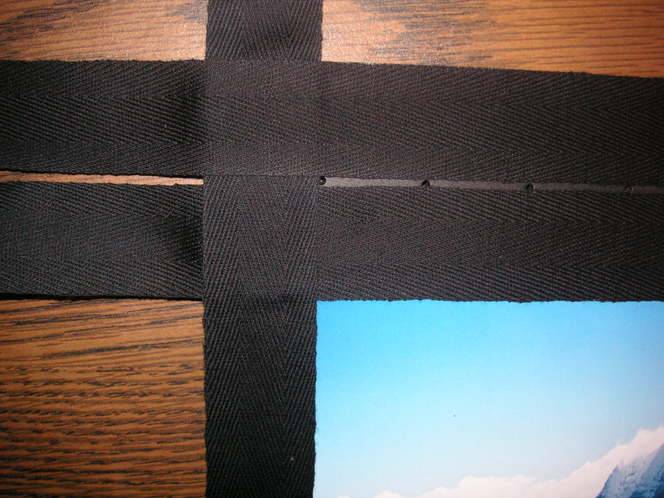
- With a pencil (and using the loosely laid cotton tape as your guide), mark the boundaries of the frame. I chose to put two horizontal strands of tape top and bottom, and one vertical right and left. Leave a small strip of space in between the two top and bottom strands – just wide enough to accommodate a row of nail holes for you to stitch through.
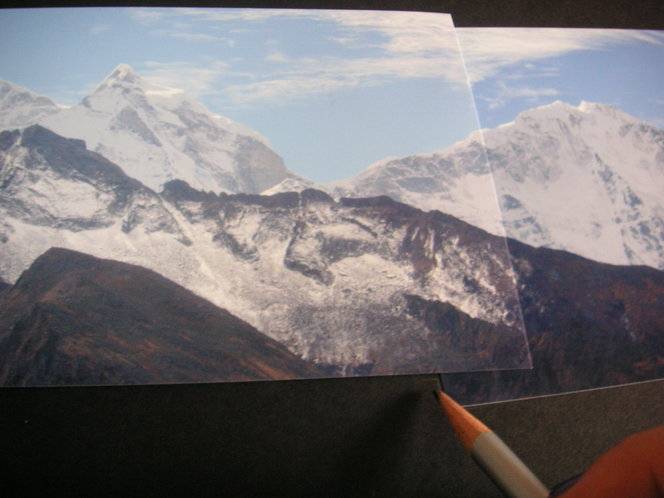
- Pull away the cotton tape. Mark the edges of the photos.
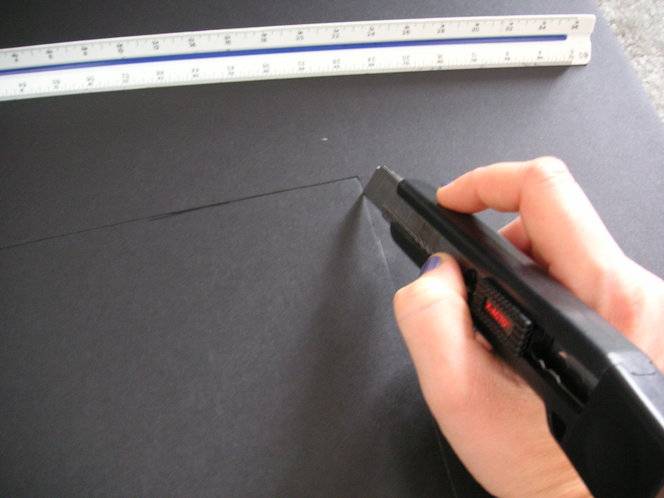
- Cut the foam core board to your earlier markings.
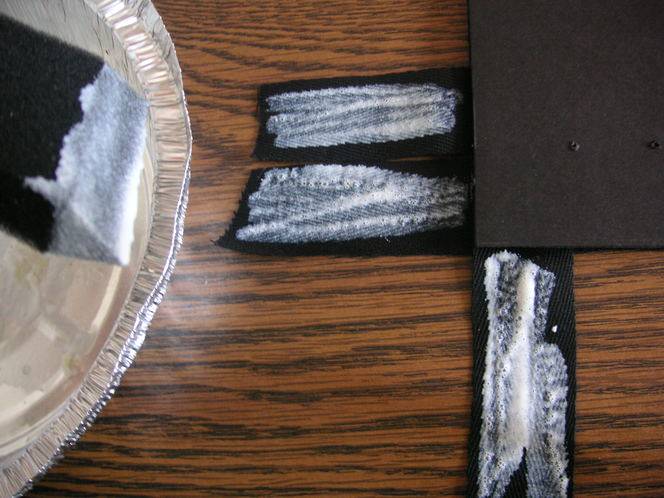
- I opted to use a combo of dry adhesive strips and double-sided tape, but spray adhesive would also be great. I pre-cut the dry adhesive sheets to suit the length of my photos.
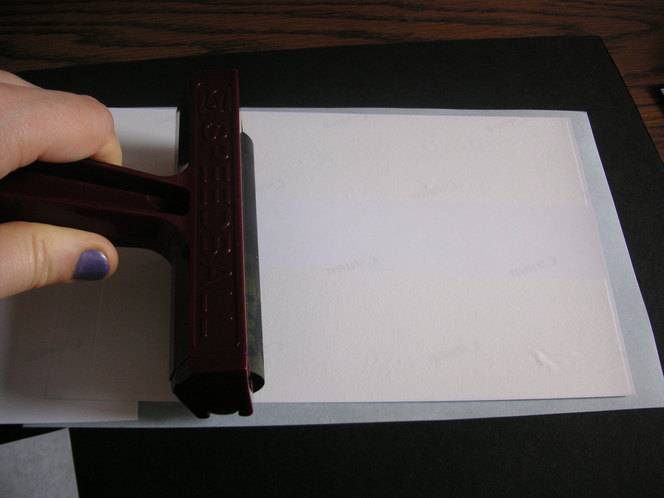
- Using a brayer ensures that the adhesive transfers evenly to the back of your photos.
- I added permanent double-sided tape at key corners just for good measure (to quell my crafter’s existential paranoia of impermanence).
- Carefully line up and secure your panorama.
- Using a pencil, draw yourself a guide line where you will be making holes for the embroidery thread. It should be between the two horizontal rows of cotton twill. At this point, reaffirm that your cotton tape, when laid, will successfully cover all the mismatched jagged photo edges and meet the edge of the foam core board. If you must make some adjustments (cutting off a little more foam core board), now is the time.
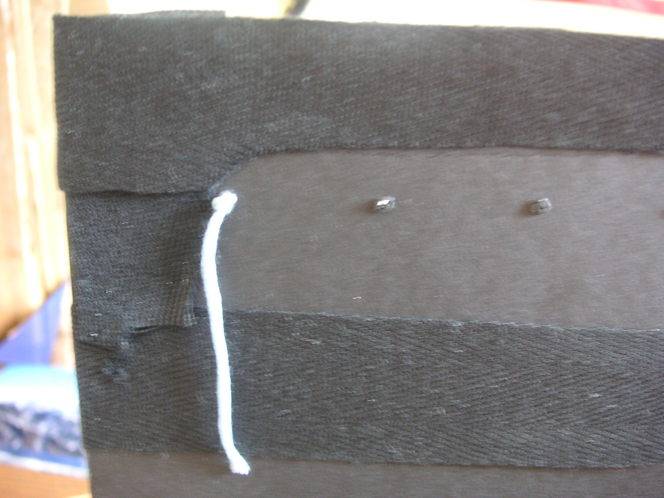
- Mark a dot every inch where you will be making a hole for the thread. Push a nail through at your marked dots. If you’re using a thread thicker than embroidery thread, use a correspondingly thicker nail.
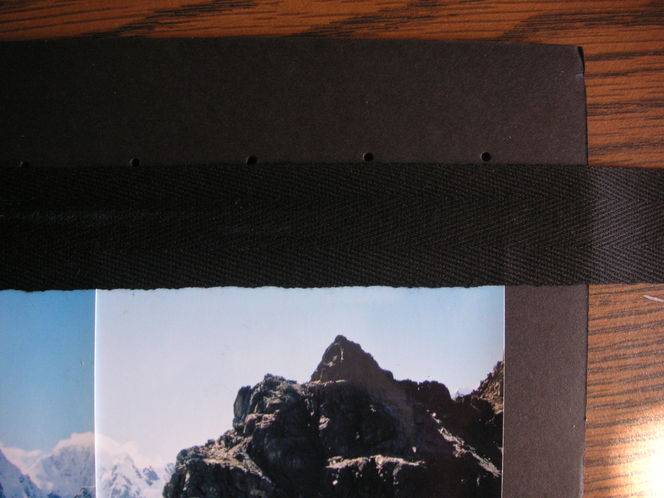
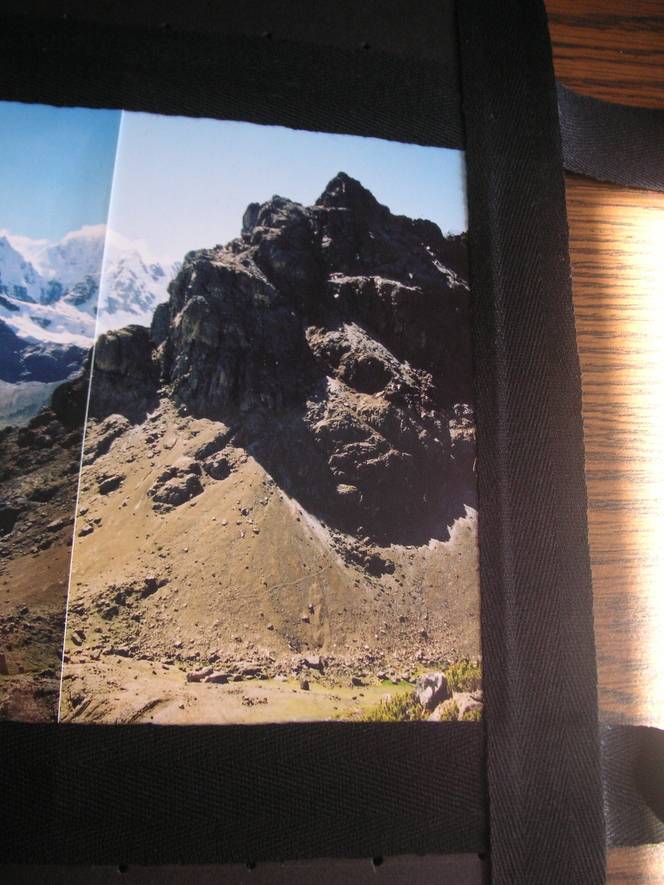
- When gluing your cotton tape, start with the tape that will most closely bound your photos horizontally, top and bottom – the “interior” frame. Brush on some Mod Podge (a foam brush works great) and lay your tape, being careful to smooth it from the center outward towards either sides.
- After laying down the horizontal tape on the top and bottom of your photo, glue the cotton tape to both vertically-oriented sides.
- Now adhere the top-most and bottom-most cotton tape – the “exterior” horizontal frame. This orderly layering makes your corners look sharp.
- Flip your board and secure the loose ends to the back, being careful not to cover over any holes.
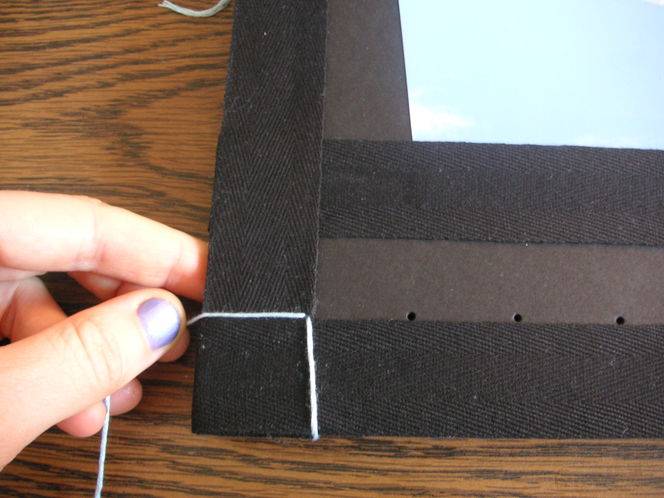
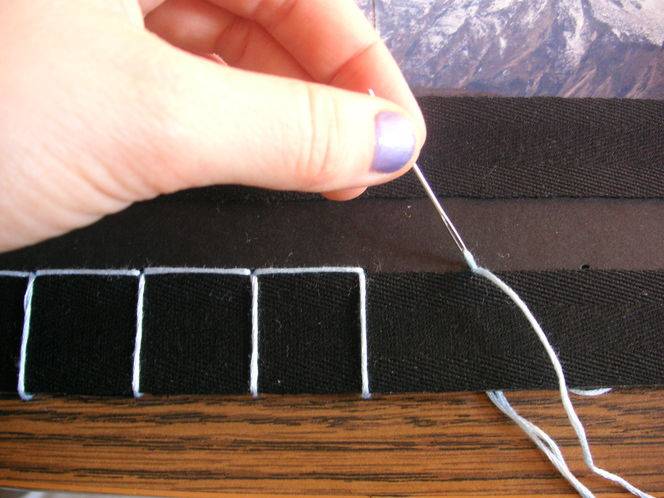
- Now you’re ready for stitching. Inspired by a post on Curious Doodles and referencing their tutorial by Maeve Rogers of Charm School Press, I opted to use a Japanese stab stitch. According to my calculations, you need roughly 6.25” of twill tape for every 1” in length – give yourself 7” just to be sure. Note: Working with long lengths of thread is difficult, and I found that working with shorter lengths and simply knotting together another length in the back when needed made my life easier.
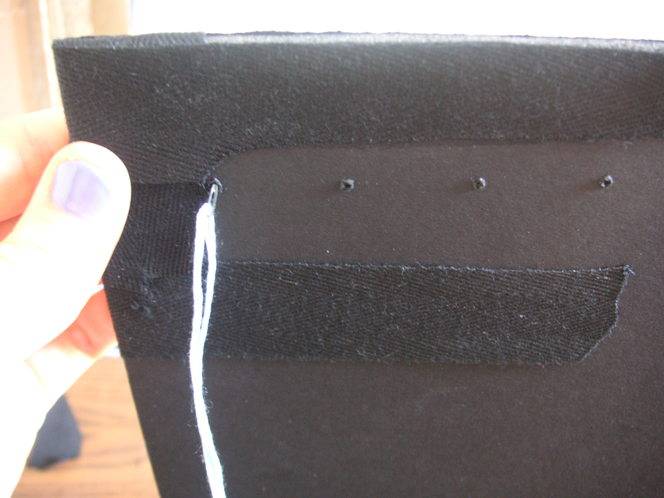
- Once you’ve threaded your embroidery/cross-stitch needle, start from back to front on the bottom left corner of your board. Tie a healthy knot at the end and pull all the way through. Note: The following stitching photos are from a panorama in which I left an inch between “interior” and “exterior” frame, so don’t be confused by the sudden appearance of a gap. The framed panoramas without the gap between horizontal lengths of cotton twill tape look better, so the earlier steps reflect this.
- Pull your needle back through the same hole, the same way (back to front) – so you’ve made a vertical stitch that binds the bottom edge of the board.
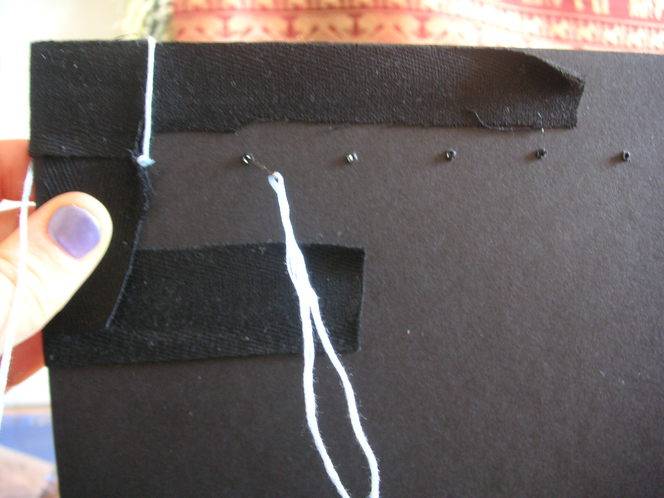
- Pull the thread all the way through the front. Then pull it to the left, over the left edge of the board.
- Moving to the back of the board again, push the needle through the hole one to the right of where you started.
- After pulling the thread all the way through the front, double-back through the same hole (from back to front).
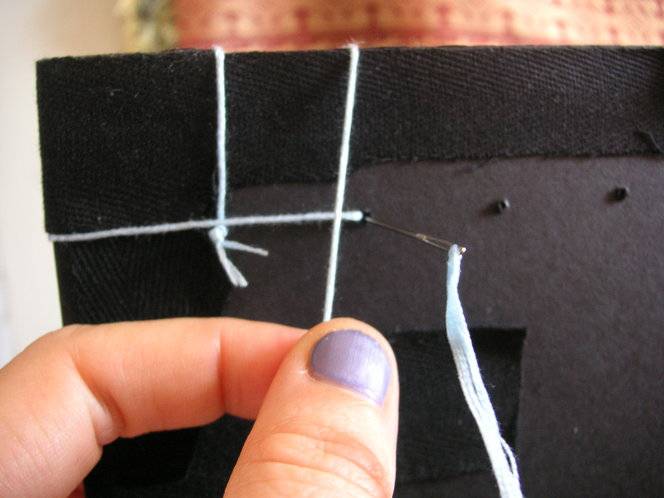
- Once you get that thread pulled all the way through (in the front), stitch to the left.
- Repeat this process. First make the vertical stitch, then follow with the horizontal stitch (backwards towards the left) – all the way across the length. Finishing at the far end is no different. Tie a knot after the final stitch. Add 3M Picture Hanging Strips and afix to your wall.

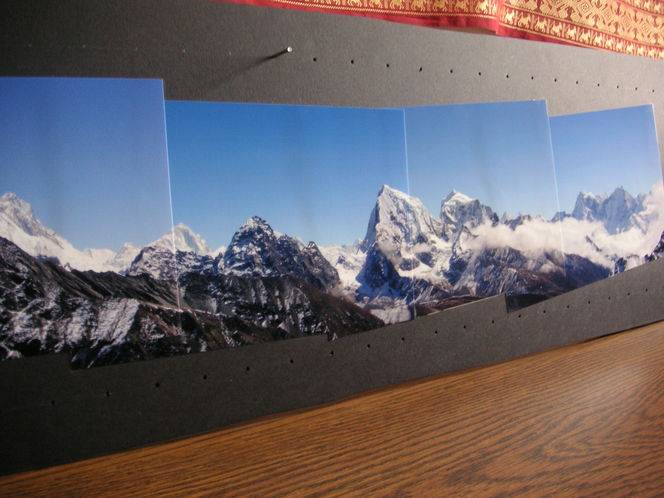

Here’s what my wall looks like with the addition of my panoramas:
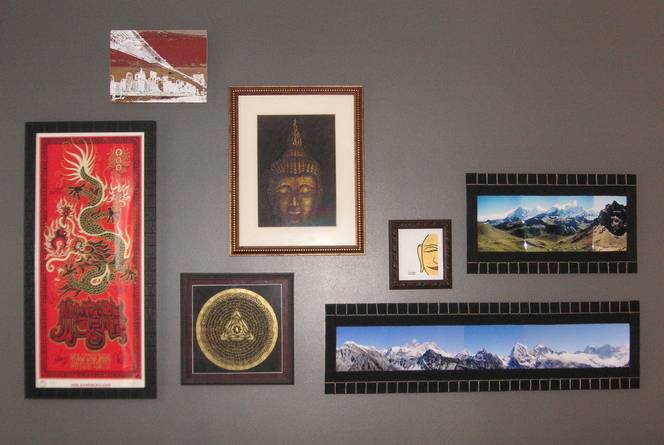
Just in case you’re wondering, the top right panorama was taken in the Huayhuash region of Peru and the bottom right was taken from the viewpoint at Gokyo Ri in the Solu Khombu region of Nepal (Everest is the tall one left of center).
I hope this inspires you to unearth and DIY frame your panoramas!
And check out this happy accident – my film reel hand-stitch look mirrors the frame of the red Umphreys poster on the left:
I would be lying if I passed this similarity off as pre-meditated. One more great victory for my subconscious autopilot.
ABOUT ME
 I’m Lynn, the (benevolent) mastermind behind Constitutionally Modern DIY. I make modern, funky craft/DIY creations that are affordable and accomplishable. Any average Jane/Joe can make these things, which are particularly well-suited towards urbanites lacking power tools or even a kitchen table.
I’m an Urban Planner by training, and a maker of random items by vocational calling. My eclectic sense of style derives from constantly coming up with budget solutions to design quandaries or gift giving.
Follow me at http://constitutionallymoderndiy.tumblr.com/