The DIY paper ornaments have been a hit at our family gatherings for years. They’re quick, simple, and practically free to make. Read on to find out how!

Having completed yards of modern paper holiday garland, I wanted to create some more paper decorations to maintain the look and colors throughout my home. I tried making paper snowflakes from the colored cardstock, but they didn’t really work. Then I recalled an old trick I learned in Sunday school as a kid which we called “onion bulbs” and put all over the Chrismas trees. We used paper strips to create the shape of teardrops and hearts, and made them from white paper. We glued so many globs of gold glitter that they would stick to the coats and fancy outfits of the old church ladies that would brush up against them.
So, I experimented a bit with different sizes, and came up with a more polished decoration with a mid-century vibe. They’re inexpensive enough to remake each year, but sturdy enough that they can be stored and reused for holiday seasons to come.
Materials for Paper Ornaments
- 12 x 12″ cardstock (in the scrapbooking aisle at the craft store)
- Paper cutter or scissors and ruler
- Binder clips
- 1/4″ hole punch
- 1/4″ metal eyelet kit (in the sewing notions section, might be called grommets) and hammer or white glue
Curbly Tip:
Hot glue guns are great another great option for making strong, sturdy ornaments. Check out our glue gun review!

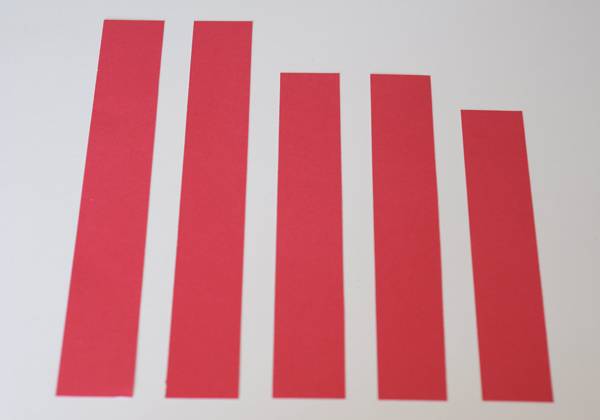
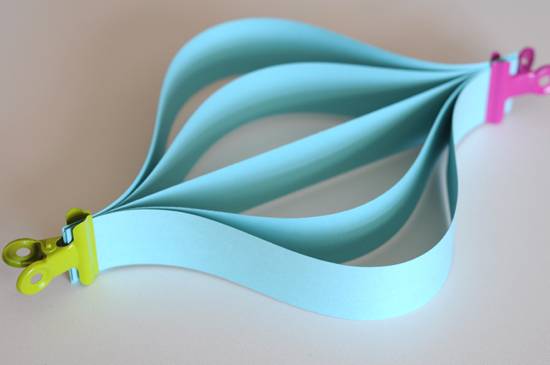
1. Cut the paper into 1 1/2″ strips. Keep two at the 12″ length, then cut two at 10″ and one at 8 3/4″.
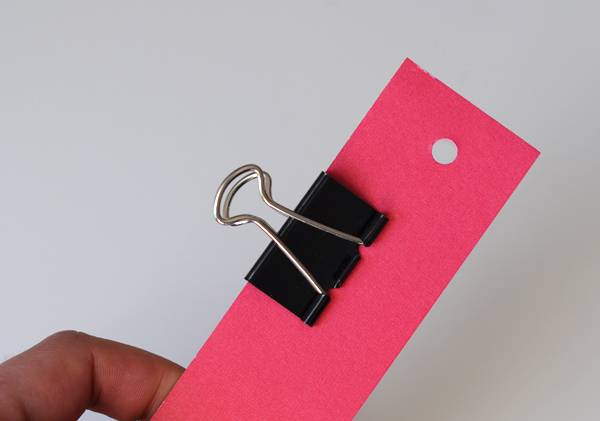
2. Sandwich the strips like this: 12″ – 10″ – 8 3/4″ – 10″ – 12″, or long-medium-short-medium-long. Create one flush end, and hold in place with a binder clip. Use the hole punch to create a hole through all five strips, about 1/2″ from the end.
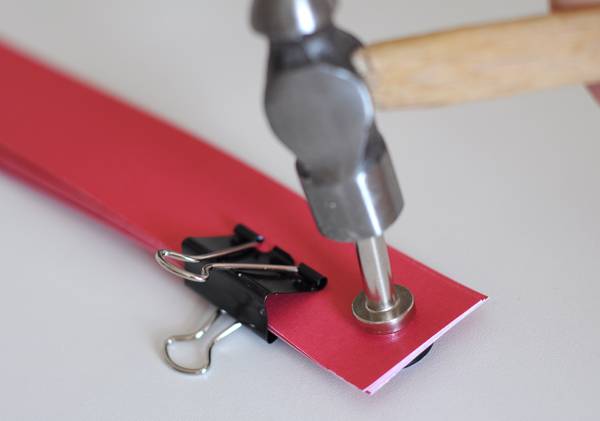
3. Place the two complimentary pieces of the eyelet on either side, and hammer into place using the included hardware.
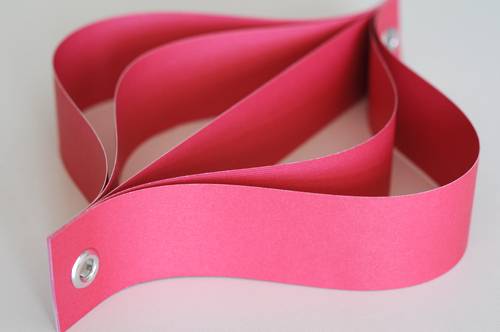
4. Repeat the process by lining up the opposite ends, bending everything into the balanced shape. Clamp with the binder clip, and set with another eyelet.
The eyelets create the perfect space from which to hang the paper ornaments. You could, of course, use a heavy duty stapler, but I think the extra five cents is worth the finished look it creates. You could also use a bit of white glue, secured with the binder clips while it dries, as we did for this smaller version:
It was created using 1″ strips, cut to 10″, 8″, and 6 3/4″. The eyelets would be a bit too heavy for this size, so the glue worked just fine. This size is also great if you’re using standard 8 1/2 x 11″ paper.
To hang, just slip some white thread or monofilament (fishing line) through the eyelet or under one edge. Use a few complimentary colors and hang at varying heights for some visual interest.
Do you remember some holiday crafts from your childhood that still work for adults today? Please let us know in the comments below!
Season’s Greetings!
Read It!
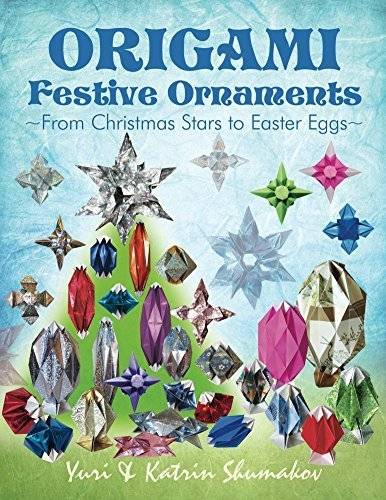
Origami Festive Ornaments has more great ideas for paper ornaments for every holiday throughout the year.
Looking for more seasonal DIY projects and ideas?
We’ve been using your DIY for a fun project for our Montessori school students. They hang them in our shared garden and watch the effect of wind direction on them. So fun! Thanks for sharing this.
I’m making these out of stiff felt and using buttons to secure the ends. They will look wonderful hanging in our picture window. First did these in the 60’s – a good thing never dies.
We just made these for our class party craft. We used staplers instead of grommets or glue. Much easier for our students, and faster for our time slot. Everyone really liked them! Thank you! 🙂
Does this not have where I can print without wasting paper on ads?
i love all of these ideas
Cute! I have a Christmas crafts book from the 60’s with instructions for similar ornaments, but they didn’t have the eyelets added.