The best way to learn to use your specific sewing machine is to READ THE MANUAL. If you fall into the male stereotype of one whom doesn’t ask for directions, and won’t read the instructions… get over it.
Anatomy of a Sewing Machine

1) Bobbin winder
2) Spool pin
3) Thread guide
4) Tension Knob
5) Foot and needle
6) Bobbin housing
7) Reverse stitch button
8) Stitch length adjustment
9) Stitch selection knob
10) Manual knob
11) Bobbin winding fence
Step One: Winding the Bobbin
A sewing machine is cool, because it’s sorta like two machines: a stitch maker, and a bobbin winder. A sewing machine requires two threads: one comes from the original spool, and the other is wound around a bobbin. I’ve seen pre-wound bobbins, but any good DIYster should be able to do one’s own. This way, you’re not limited by color availability.
To wind a bobbin, after reading your manual, switch the machine to “Wind” mode by flipping the bobbin winder (1, looks like a radio antenna) towards the winding fence (11). Insert the thread through the middle of the bobbin, and pull in through the hole in the top.
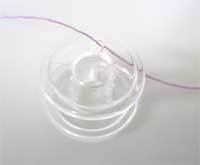
Place the bobbin on the winder, then run the other end of the thread (attached to the spool) around the top part of the thread guide (3). (Your machine may have a separate winder tension stud). Then place the spool on the spool pin(2). With the machine on, press down on the foot pedal, full blast, and fill ‘er up.
Step Two: Readying your threads.
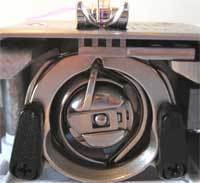
Snip the bobbin away, and insert it into the bobbin case, so that the thread runs clockwise. Pull the thread through the slit, as directed by your manual. Insert the bobbin case back into the shuttle.
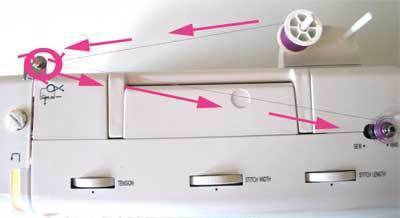
Using the manual knob, raise the needle to its highest point. Then, place the spool on the spool pin (2) (using a felt slipmat, if you have one). Take the thread from the spool and wrap it around the thread guide (3). Run the thread down the right channel and up the left channel of the tension apparatus. (There’s probably a diagram on the machine) Then, run it through the slot of take up lever and down to the needle. Pass through a horizontal thread guide, and then thread the needle from the front, and pull for six inches of slack.
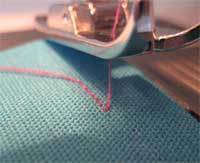
Next, to raise the bobbin thread, turn the hand wheel, lowering and then raising the needle. Pull the thread to bring up the bobbin thread…you’ll see a small loop.
Pull the bobbin thread for six inches of slack, and lay it next to the spool thread, towards the back corner of the machine.

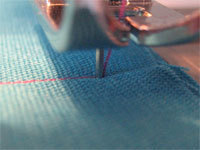
Step Three: Forming a Seam
Determine where you’d like your seam, and then iron your fold line. Pin the seam at regular intervals, with the pins perpendicular to the seam. When sewing, remove the pins as you go, so as not to break or dull your needles. If the seam is complex, you may want to hand (or machine) baste your seam, which means to make long, sparse stitches next to where you’ll sew your seam. Many times, the pins are adequate, and basting unnecessary.
Step Four: Starting to stitch
To secure a seam, press down (gently) on the pedal and sew a few stitches forward.
Then press down the reverse switch (7) and sew a few stitches in reverse.
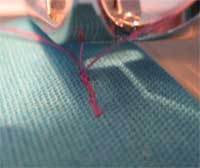
Release the switch, and sew for the length of your seam. Sew close to, but not on top of, the basting stitch. When finished, backstitch again by sewing in reverse at the end of the seam. Snip the threads close to the stitch, then remove the basting stitch.
Step Five: Adjusting the Tension
This will forever be the most difficult and frustrating element of using a sewing machine: selecting the right thread tension for particular fabric/thread combinations. The best advice is to follow your manual’s suggestions. It’s always helpful to test the tension on a scrap piece of fabric.
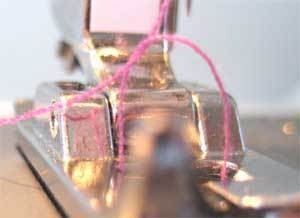
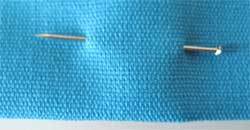
If the tension is too tight, your bobbin thread will be pulled to the top of your fabric, and will be visible. If the tension is too loose, the needle thread will be visible on the underside of your fabric. With correct tension, the stitch will lock in the middle, halfway between the top and bottom of your fabric. To figure this out on a new machine, or when you’re just getting started, using two differently colored threads will provide a better visual guide.
Tip: Keeping Seams Straight
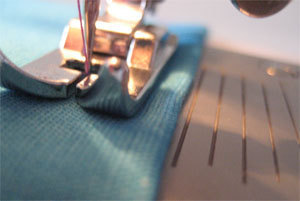
There are straight lines etched into the foot plate of your machine, usually at 1/8” intervals. Line up the fabric edge with these guidelines for the length of the stitch. If you need a guideline farther from the needle, create one from masking tape, using a square to insure the orientation.
Tip: Cornered Seams
When sewing geometric shapes, like a pillow or perhaps some DIY fuzzy dice, you can sew all the side seams without starting a new stitch. Begin with a new seam, and sew it towards the corner, then release the pedal. Use the manual knob to assure the needle is pressed into the fabric. Lift the presser foot, then turn the fabric in the desired direction (most likely counter clockwise), then press the foot down again, and resume sewing.
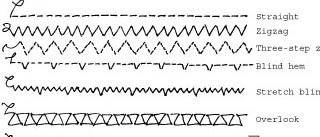
Stitch Types
Most of the feet that come stock with sewing machines can do two basic stitches: the straight stitch and the zig-zag. These will do for 80% of male-oriented sewing projects. Other stitches require specialized feet. I suggest your first after-market foot upgrade be a zipper foot, which is useful for attaching zippers as well as piping for upholstery and pillow edges.
Most machines include stitch length adjustment, and some include stitch width adjustment. These can be important for specific types of fabrics, but sometimes the choice is simply aesthetic (within reason). Follow your manuals suggestions for best results.
How cn i get dis machine.