B E F O R E
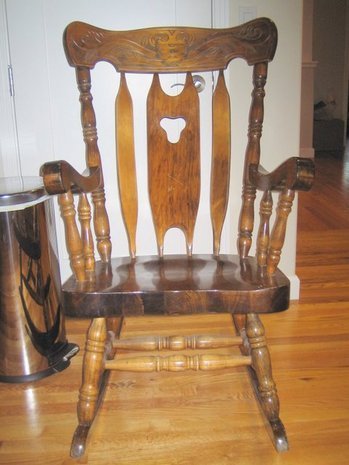
This past weekend, I decided to experiment with modernizing an old traditional rocking chair. Here’s the chair that I found at a garage sale for $25! The style of the chair – early American – was not to my typical liking. Then, I started envisioning ways of revitalizing its original heritage with a contemporary color treatment – glossy herbal green – to be exact. For $25 I was sold. I handed the seller my money and off to Home Depot happily I went.
I N P R O G R E S S
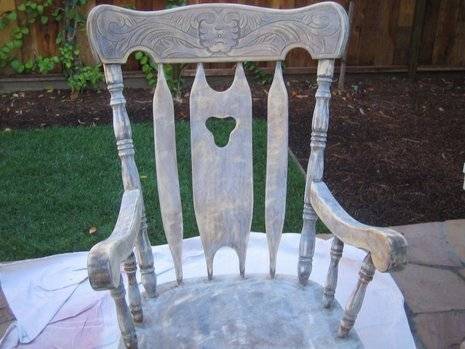
At Home Depot, I invested in an orbital sander which was $30 (with my coupon). I figured having a little “help” would not be a bad idea and could save hours of manual labor. Here’s a picture after I stripped its original skin. This took about 1 1/2 hours to complete. All the curved areas required manually sanding and some good old fashion s-w-e-a-t. A word of caution, whenever you use a sander, you should wear googles and a mask! I learned the hard way with a severely irritated eye and hacking cough that took a day to get rid of. (No worries…I’m feeling better now).
The photo on the right (above) is a picture with my first coat of tinted primer. Alas, the light is at the end of the tunnel. Now for the final coat of paint.
A F T E R
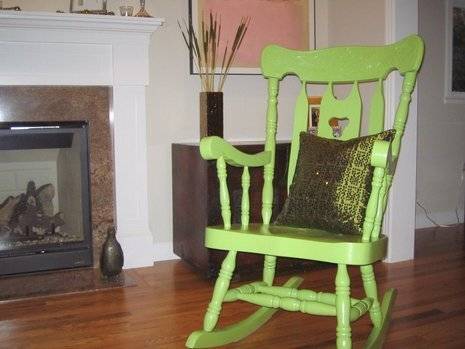
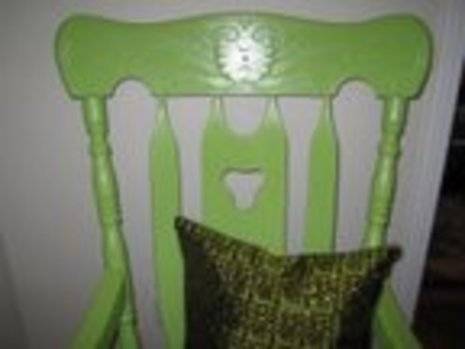
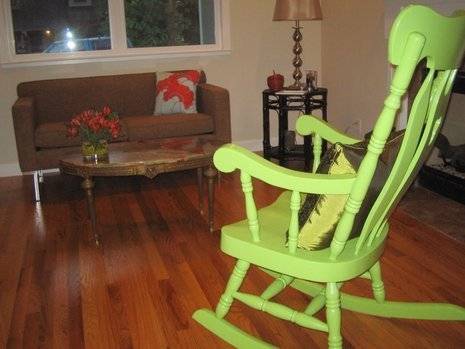
I applied the last coat of paint yesterday. Now, she graces the floor of my living room! The final color is more vibrant than the primed color.
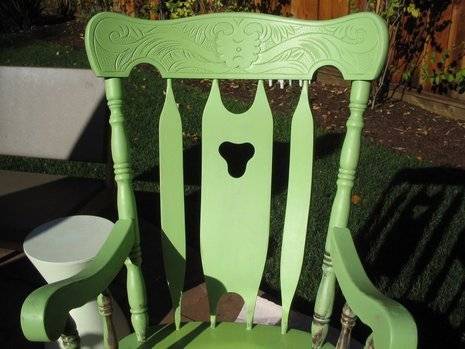
Here’s an overview of all the action that took place. I applied my first coat of Herbal Green, but soon realized that I should have been more diligent of ensuring a smooth sanded surface. If you didn’t know, it’s vital to use a tack cloth or lint-free rag to remove ALL tiny little particles after you complete your initial sanding. This will ensure that you have a smooth surface when you paint. I used a 320 grade sand paper which is great to remove dust spots or marks between finish coats. Some of the color stripped off, so another coat of paint was needed.
Now, I am debating on spraying on a coat of lacquer for additional shine. But, for now, I’m happy with my end result, especially for the original cost of $25!