Brittni Mehlhoff

Artwork can take a room from good to great in a matter of minutes. But, if you’re on a tight budget, it’s not always a practical investment. So, while you’re saving up for the pieces you really want, but can’t yet afford, you can make your own large-scale artwork for just a few bucks. And you don’t even need to have any skills in the art department to do it, although I’m sure you do.
This DIY art project cost me less than $10 to make ($28 total, if you include the cost of the frame) and you can easily customize the colors and stamp shapes to fit any space. Here’s how to make your own…
 Brittni Mehlhoff
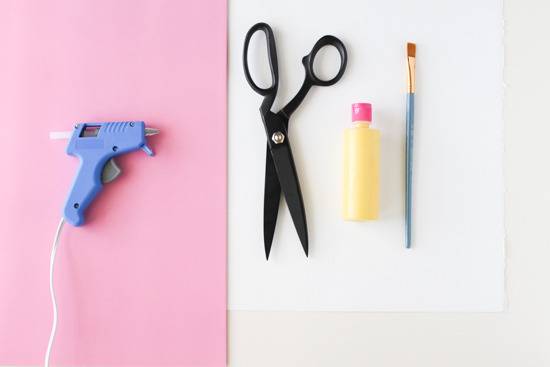
Materials:
- Reeves BFK (or another type of paper of your choosing)
- Acrylic Paint
- Foam Craft Sheet
- Scissors
- Glue Gun
- Paint Brush
- Small Paint Tray or Paper Plate
- Painter’s Tape
 Brittni Mehlhoff
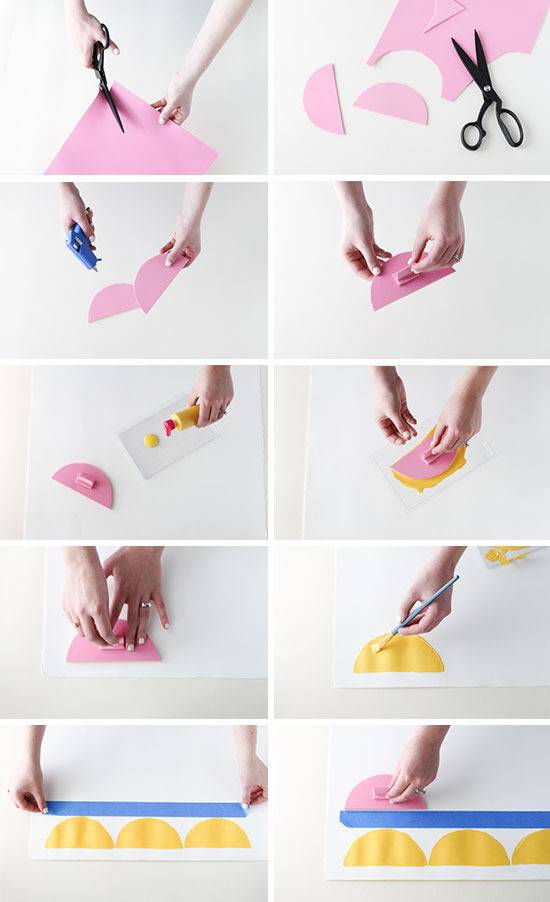
How-To:
1. First, you’ll need to create a stamp. Do this by cutting a half-circle from a sheet of foam. Then, cut out a second half-circle that is the exact same size.
2. Glue the two half-circles together with a glue gun to create a more sturdy stamp that’s easier to manage.
3. Next, create a small handle for the stamp out of leftover foam scraps; glue that to the top of the half-circles.
4. Pour paint into a shallow tray and dip the stamp into the paint, making sure to get an even coat on the entire stamp.
5. Then, place the stamp down onto the paper and press down firmly before lifting the stamp straight up. *Lifting straight up will help avoid paint smearing.
6. Use your paint brush to fill in any areas where the coverage is uneven.
7. Repeat steps 5 and 6 until the bottom row has been stamped, being sure to reapply paint in between stampings.
8. To make sure the next row is straight, place a piece of painter’s tape down right under the first row of scallop shapes (to act as a guide for the next row).
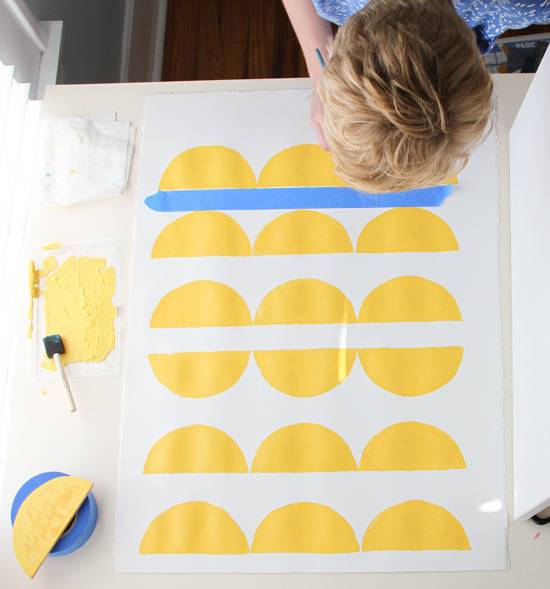
9. Repeat steps 5 through 8 until the entire paper has been covered. Wait for the paint to dry, frame and hang.
 Brittni Mehlhoff
 Brittni Mehlhoff
Note: You’ll notice that for one row, I decided to change the direction of the stamp to switch things up a little bit and add a little more interest. This is completely optional.
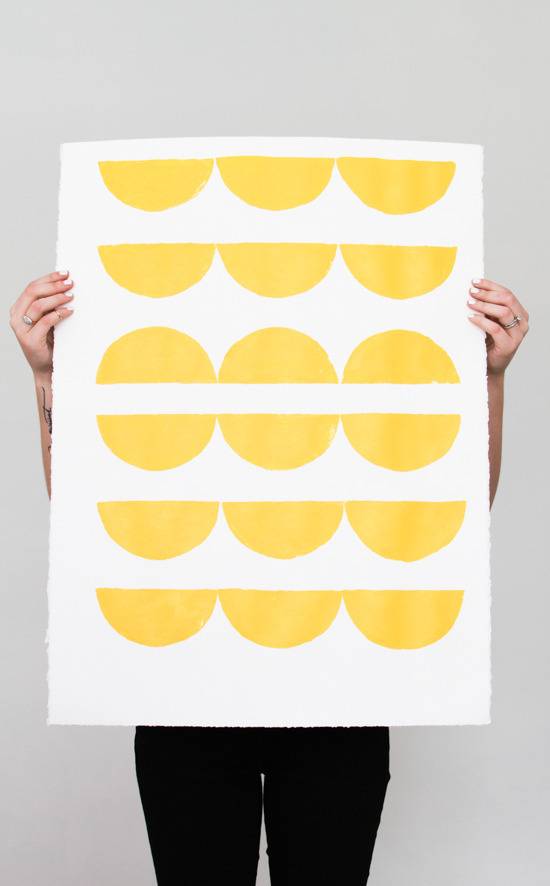
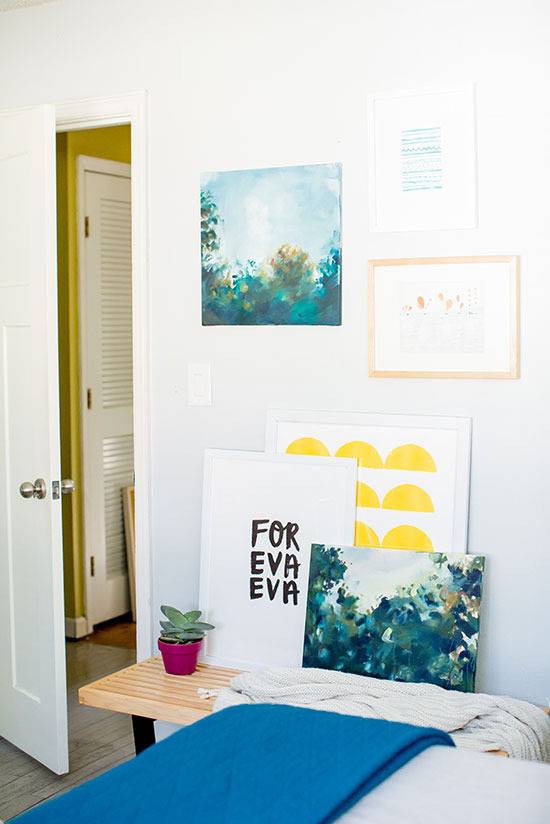
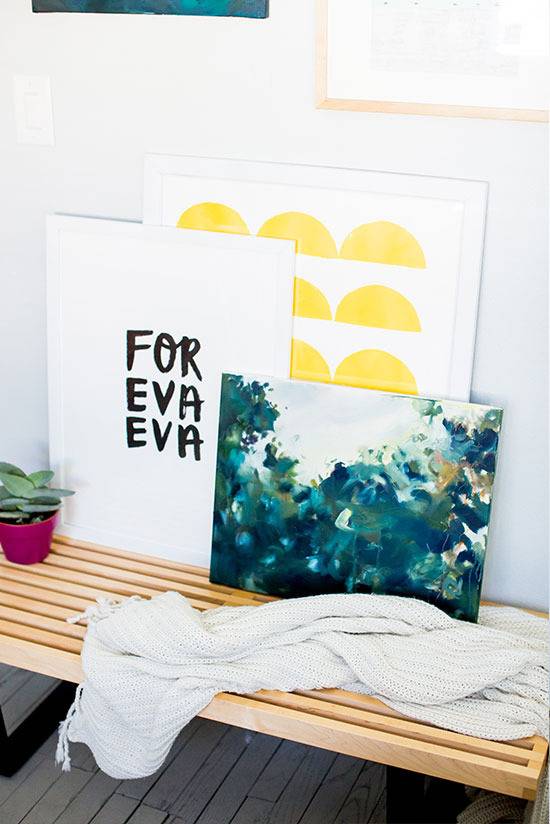
Here’s how the finished piece looks in the room.
 Sarahdipity Photos
 Sarahdipity Photos
Styled room photographs by Sarahdipity Photo for Curbly