
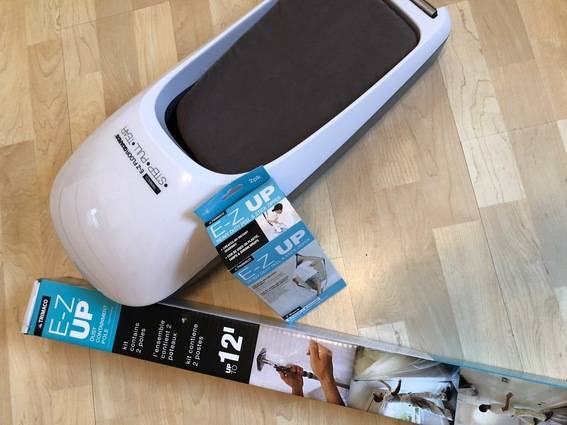
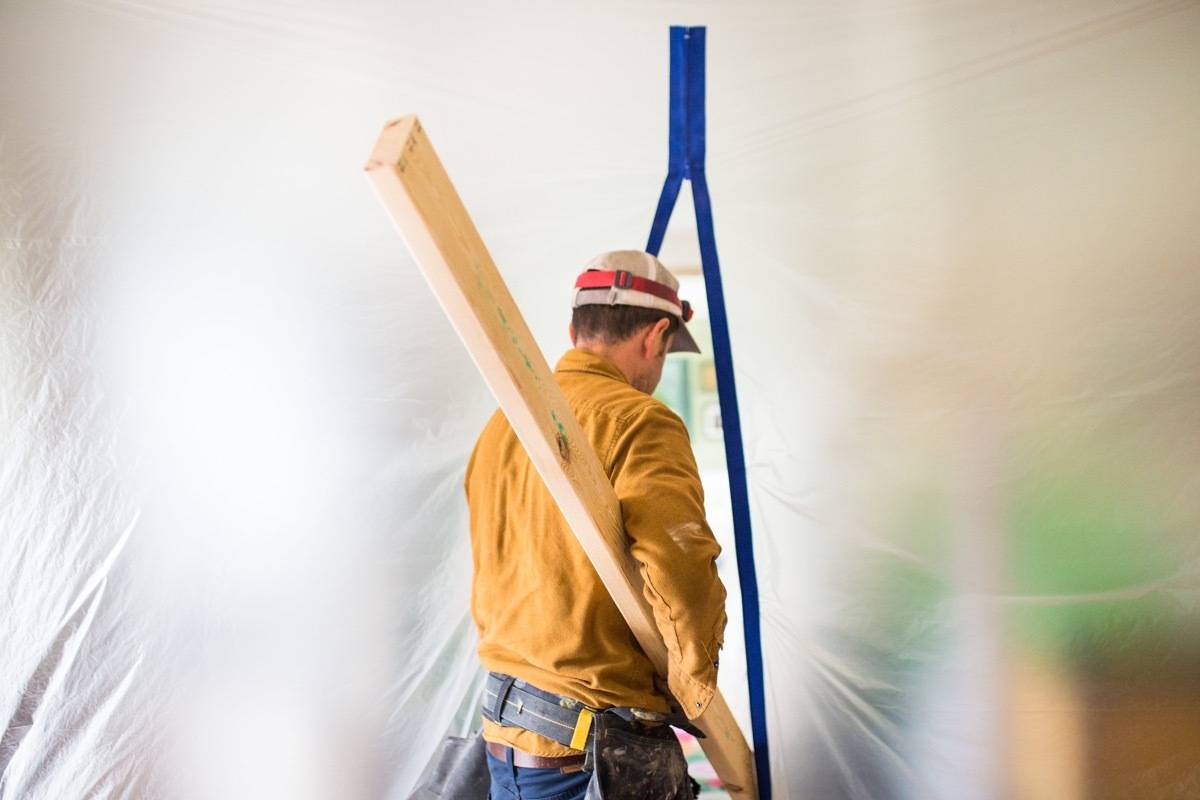
When working on a remodel project, there’s nothing worse than construction dust falling on every surface in the house. One of my current kitchen remodel clients is interested in being eco-friendly – and has several pets – so it’s important to her that the dust is contained to the construction zone. We knew we needed something better than just taped-up plastic, so we were thrilled when we found the Trimaco E-Z UP dust containment system, with floor guards and surface protector. Problem solved!

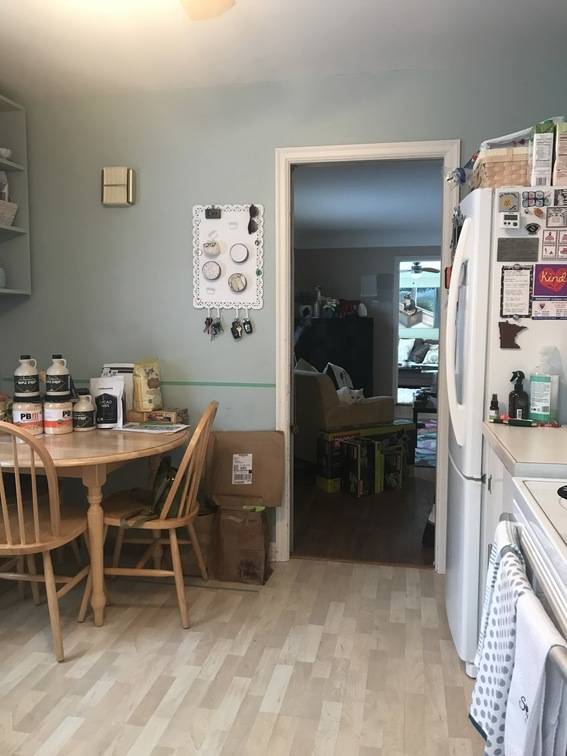
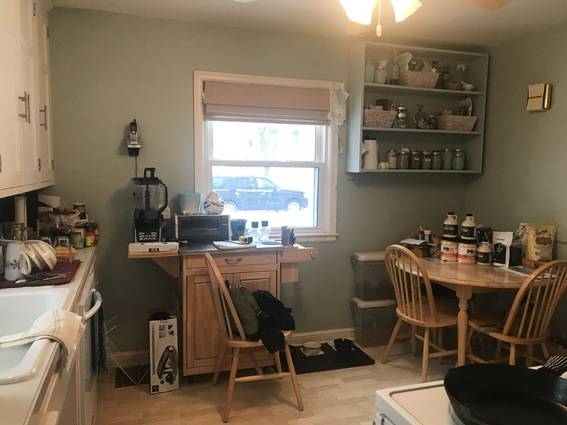
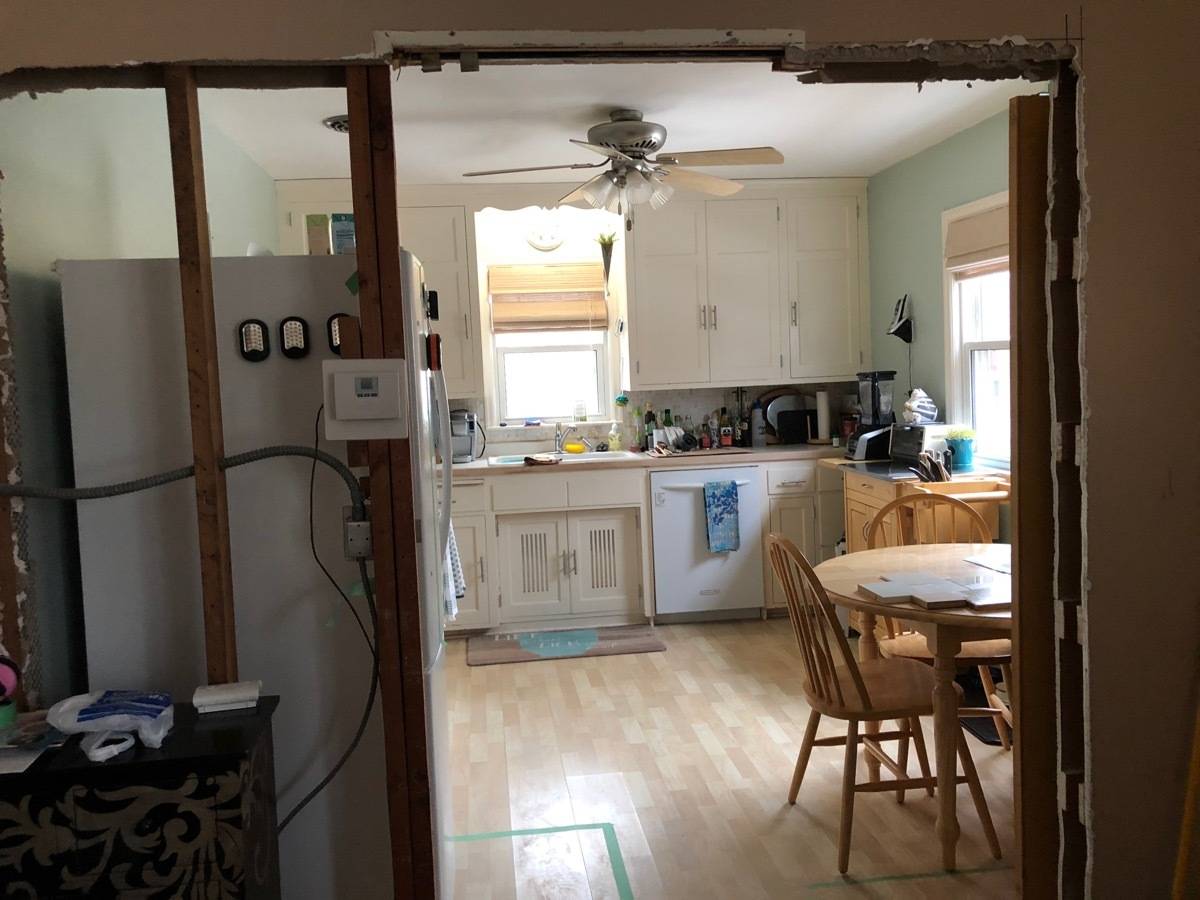
Check out some before shots of the kitchen. We’ll be opening up the wall where you see that doorway in the picture below. Just past this opening is where we put up the Trimaco dust containment system.

Projects like this one include several dust-producing phases: the initial demolition, drywall mud sanding, and floor sanding. A common approach to containing the mess is to tape up plastic. That’s cheap and pretty easy, but it fails when you need to go in and out of a space frequently during the course of a multi-week project.
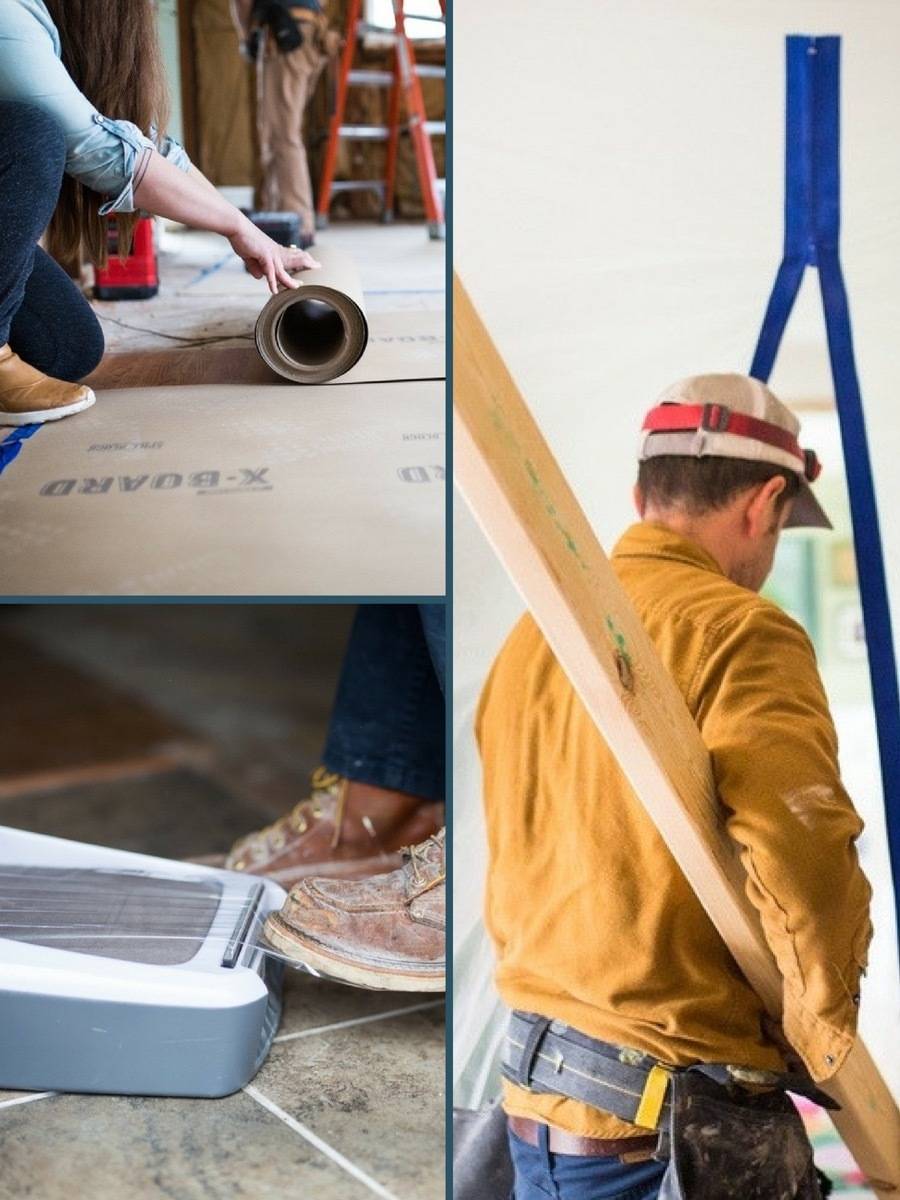
The Trimaco EZ Up dust containment system stays put with two adjustable poles you place on either side of the room. These go from floor to ceiling and are really easy to install. They keep the plastic wall tight and sturdy, and allow you to place a zippered opening wherever you want the access point to be. I can’t tell you how many projects we’ve worked on where the entire plastic dust containment apparatus falls on you as you’re walking into the space. It’s great to know that isn’t going to happen on this job!
Here’s how to install the dust containment barrier

Step 1: Cut the plastic sheeting to match the length of your space, then hold it up with the two poles on opposite sides of the room. The poles adjust to the height of your ceilings.
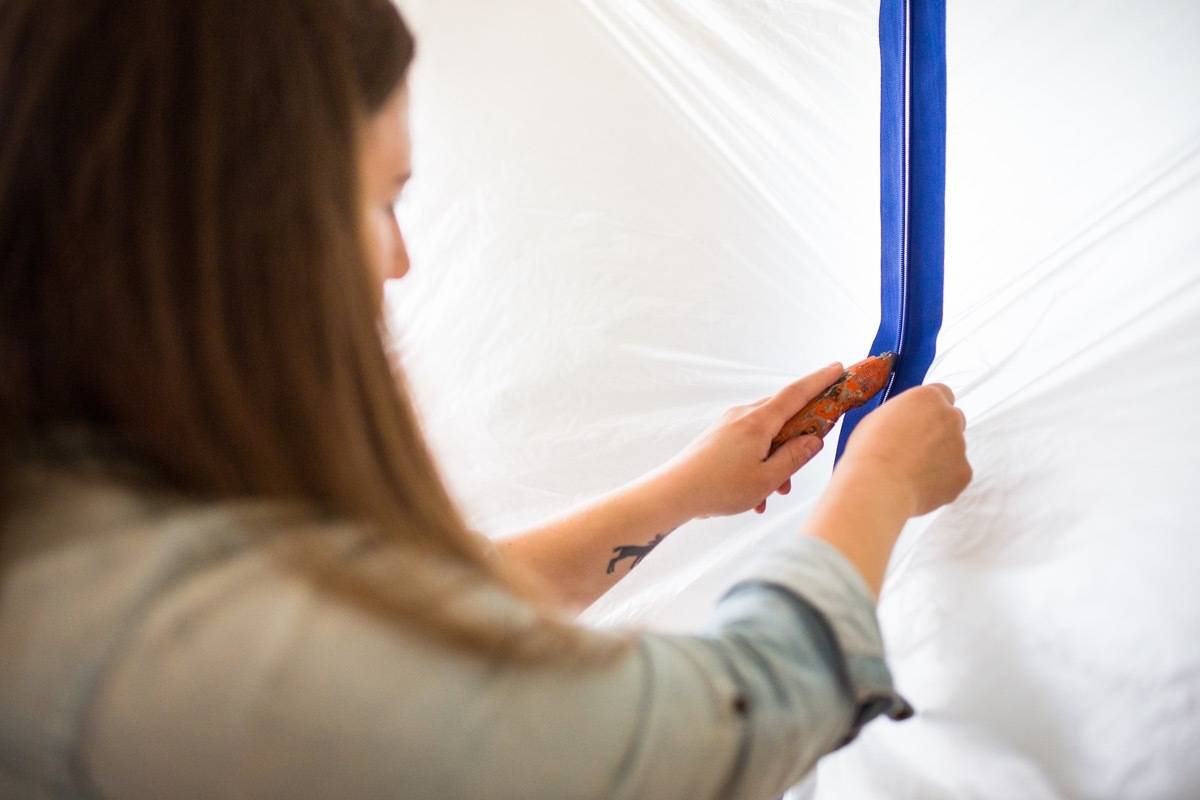
Step 2: Peel away the zipper backing, then place the zipper wherever you want the opening to be. Unzip it, then cut the plastic behind with a utility knife. So slick!

Step 3: Enjoy proper dust and debris containment throughout the project!
Bonus! How to keep your feet clean in a construction zone…
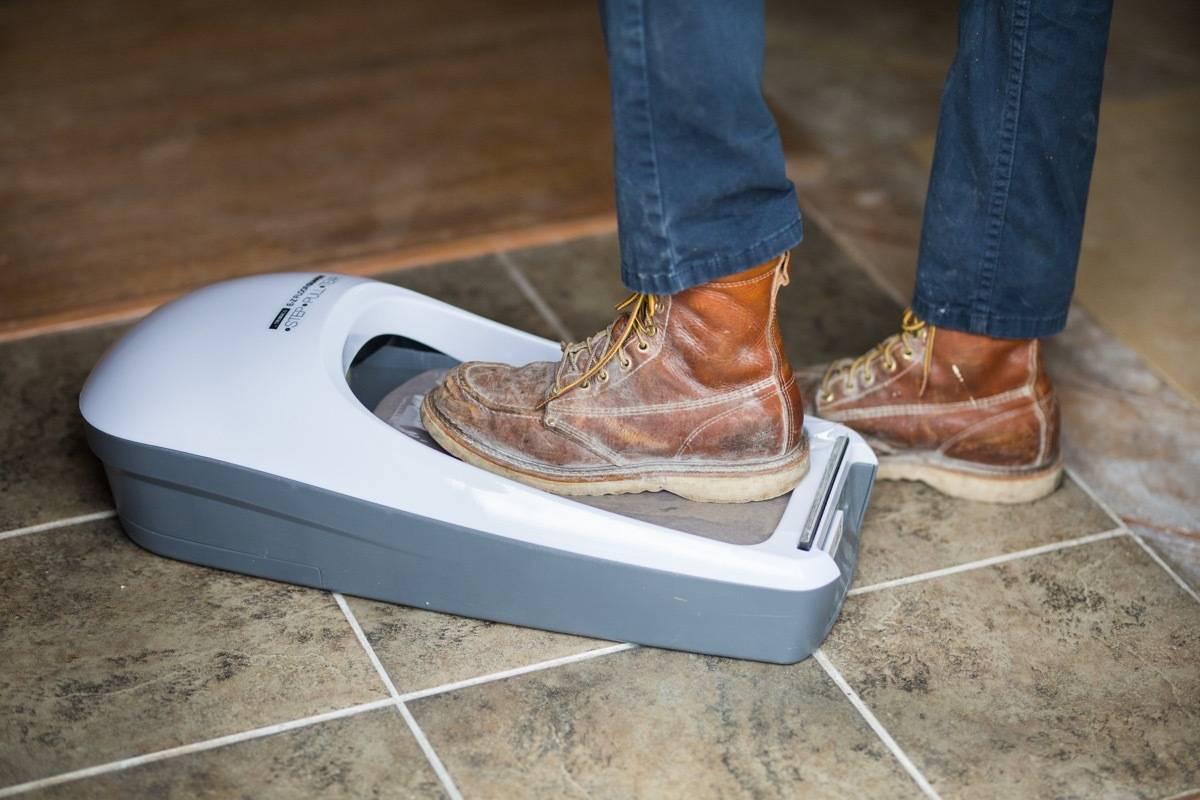
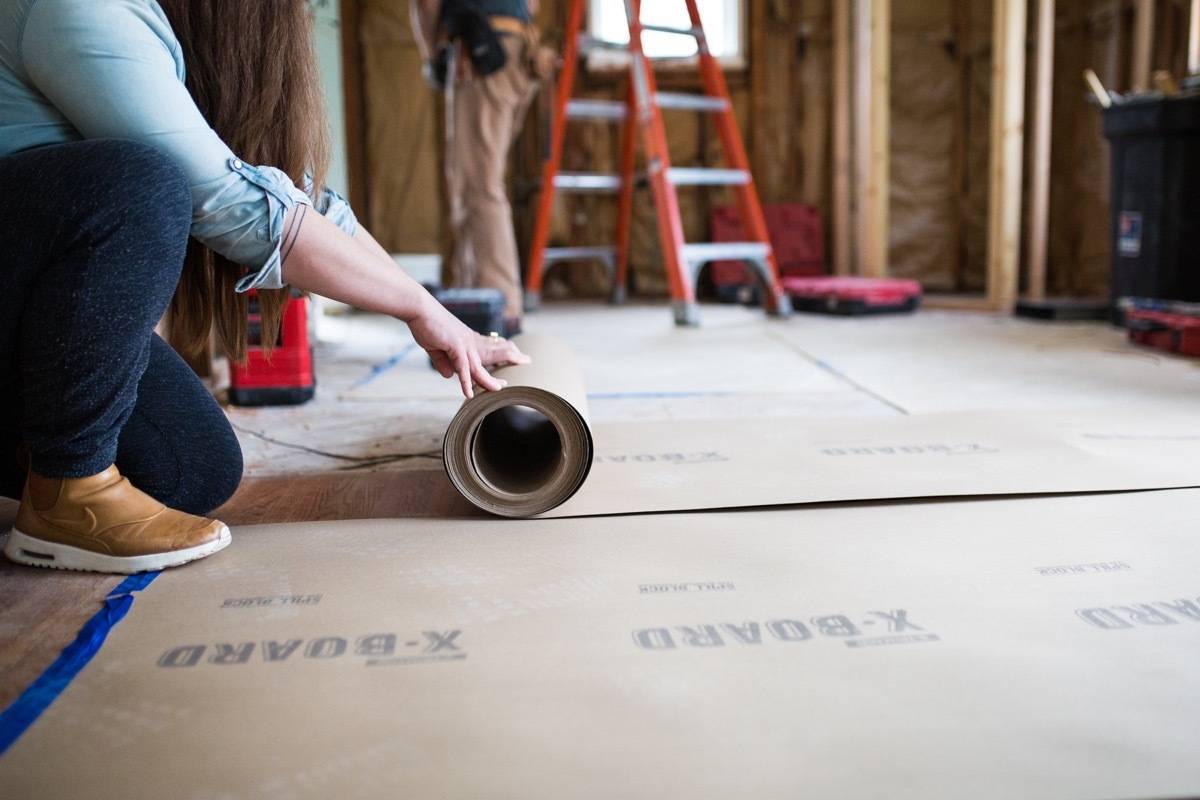
For this project, we’ll also be refinishing the floors throughout the entire home, so it’s important we don’t transfer dirt or dust from the construction zone into other areas. That’s why we picked up the Trimaco floor guards and X-board surface protector. The X-board is lightweight and breathable, so it lets the floors continue to cure while covered. The floor guards wrap the bottom of your boots or shoes in adhesive plastic film to avoid tracking dirt and debris around the house. Just what we need to protect those newly refinished floors!

A little bit about the design for this client’s kitchen…
I always begin a project by asking clients to send me some examples of spaces they like. This client was really fun, because she loved two very different styles: clean/modern, and warm/eclectic. I knew it would be a fun design challenge to marry these two styles!
For her modern side, we chose flat-panel cabinetry. But then we warmed it up with an earthy green on the bottom and white on top. To give even more warmth to the space, we’re installing custom open shelving and cubbies in a natural wood tone, keeping her design simple and modern.
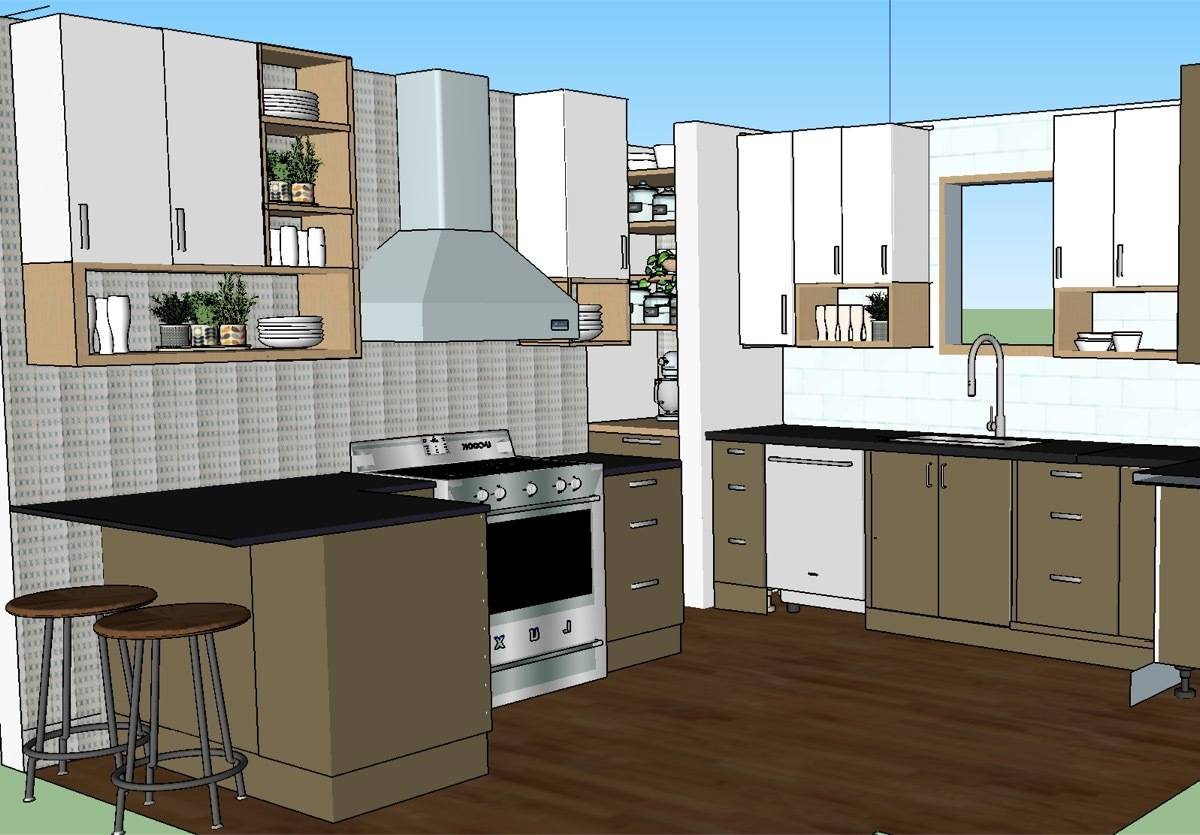
I always make sure to have one focal point in a room that serves as a “wow-factor.” In this space we chose a handmade tile for the entire stove wall. This will bring in that eclectic vibe my client loves.
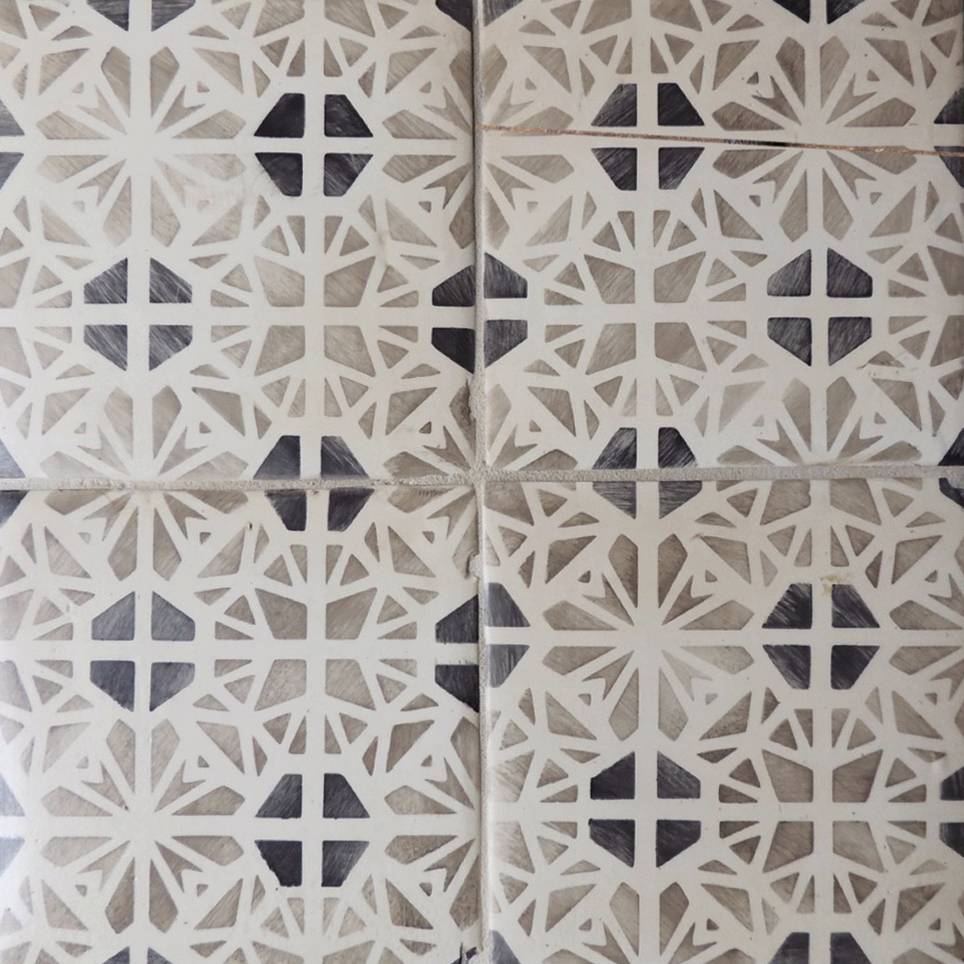
We’re opening up the wall between the kitchen and living space so that we can create a peninsula to comfortably seat 2-3 people. This will also make the impressive stove wall the first thing you see when you walk into the house. We chose a warm white porcelain matte finish for the rest of the tile in the kitchen so as to not detract from the feature wall.
Finally, we’ll finish off the design with brushed nickel hardware for the cabinetry and faucet, and stainless steel appliances.
I can’t wait for you to see the finished project! Make sure to check back for lots of progress updates and ‘after’ pictures. Here’s a sneak peek of the opened-up kitchen wall:
MATERIALS
- Trimaco E-Z UP dust containment pole
- Trimaco E-Z UP heavy duty peel and stick zipper
- Trimaco E-Z floor guards
- Trimaco X-Board Paint + Remodel Lightweight Breathable Surface Protector
To follow along with this remodel in real time, follow Olliepop Design on Instagram or check out the website: http://www.olliepopdesign.com, where we’re passionate about helping you #loveyourhouseforless!
All photos by Belu Photography
Share this post on Pinterest!
This post is sponsored by Trimaco. Thanks to them, and thanks to our readers for supporting the brands that make Curbly possible! All opinions are mine alone.