For a while now, I’ve been trying to figure out how to make the kitchen in my apartment more user-friendly. It’s tiny house small. It’s a classic galley, only instead of countertops and cupboards flanking both sides of a narrow passage, everything is shoved on one side, facing a blank wall.
Because the rental kitchen is so narrow, it hasn’t made much sense to put anything on the adjacent wall, save for a trash can and recycling bin. But my kitchen seriously lacks counter space, and I figured if my garbage receptacles were going to take up precious square footage, they might as well do double-duty. Enter this cabinet hack:
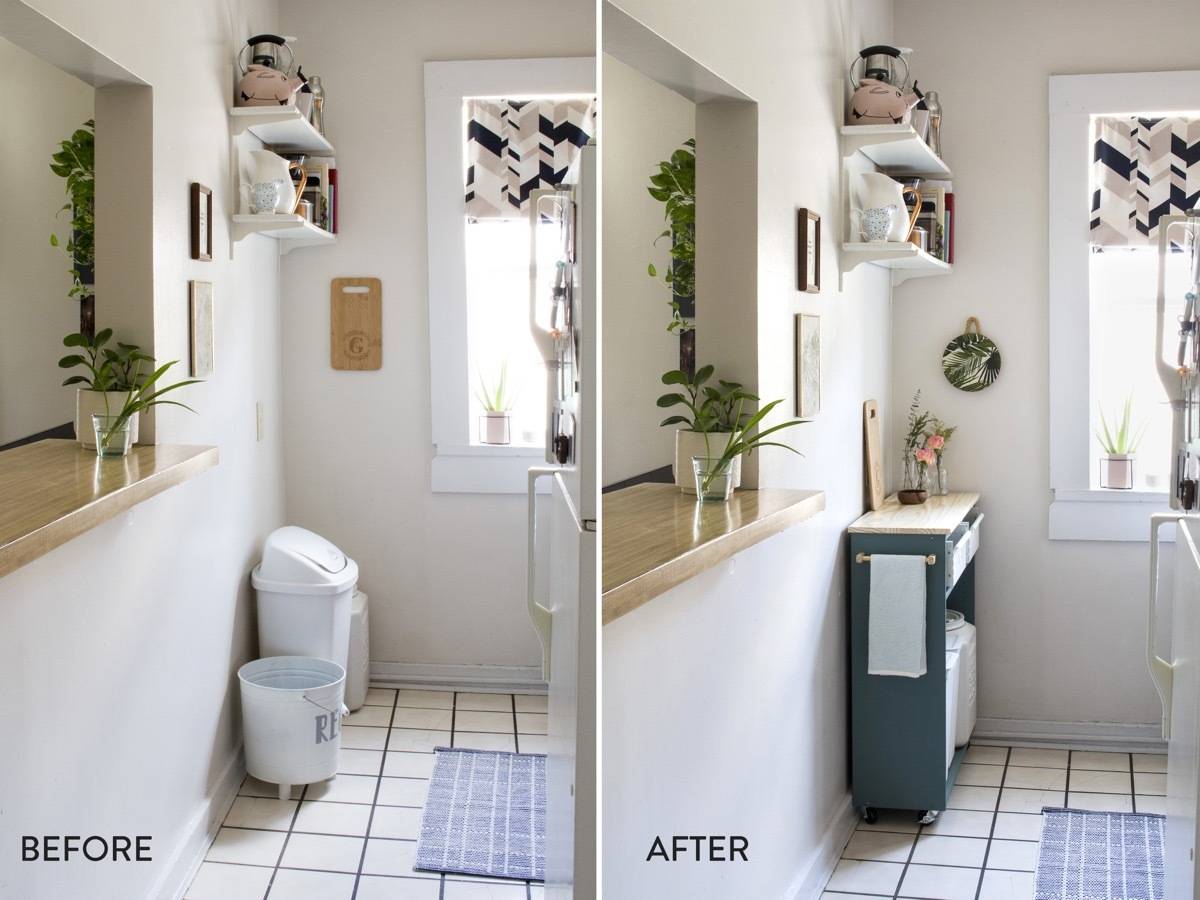
To maximize the already limited space in my rental kitchen, I took a narrow IKEA IVAR cabinet and turned it into a corner workspace. Now I have a little more room to set a bowl down or blend a smoothie, and my trash and recycling are hidden away.
This IKEA IVAR cabinet cabinet doesn’t come with a countertop, so I had to get crafty and make my own. And, as you’ll see, I didn’t have to buy any extra materials to do so!
This type of cabinet is usually used as a wall-mounted kitchen cupboard, but the 12″ depth was the perfect size for my galley kitchen. All I needed to do was remove the doors, then transform one of them into a sleek countertop for the cupboard.
Materials
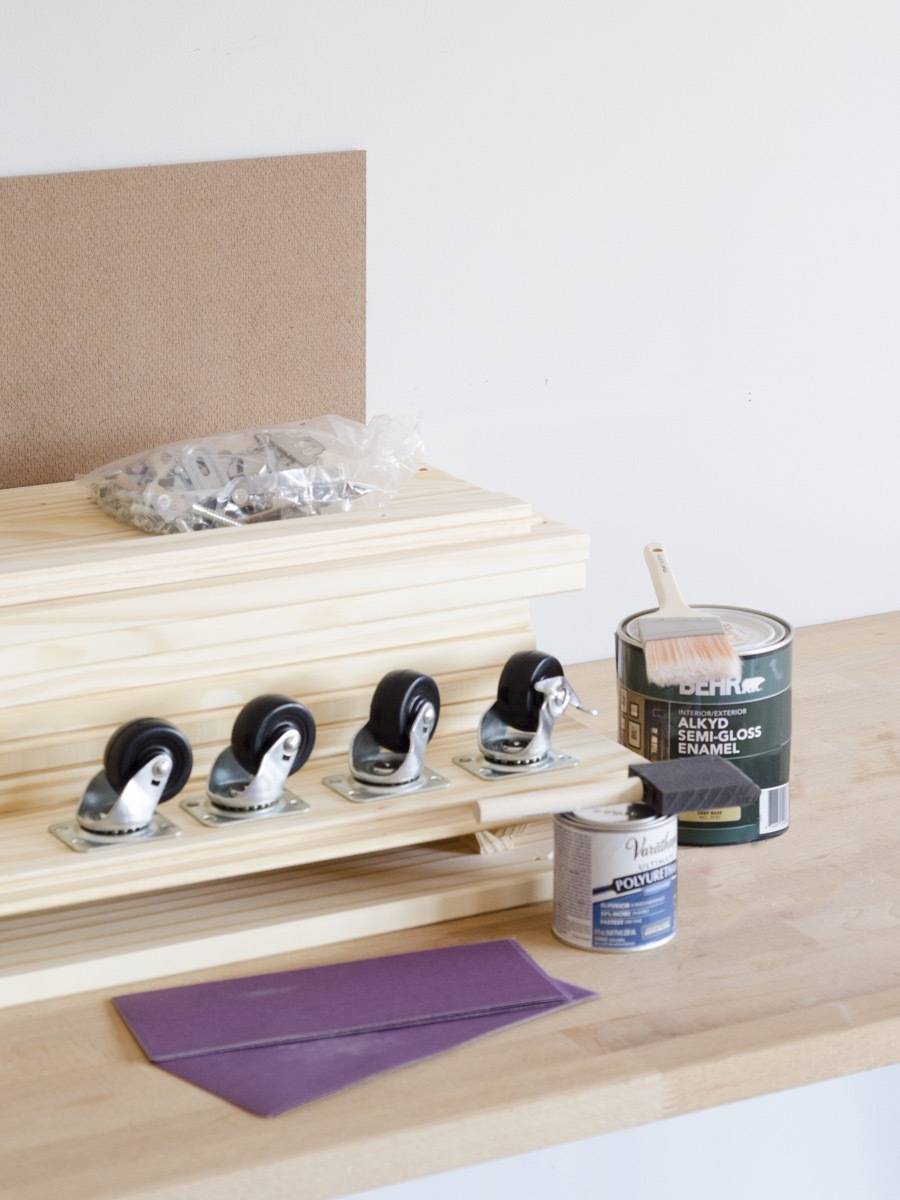
- IKEA IVAR cabinet with 12″ depth
- Four casters, one with locking mechanism
- Paint and paintbrush (I’m currently obsessed with this alkyd enamel from Behr – it barely has an odor, is durable, and dries in no time)
- Polyurethane top coat and a foam brush
- Sandpaper in grits ranging from 120-400
Step 1
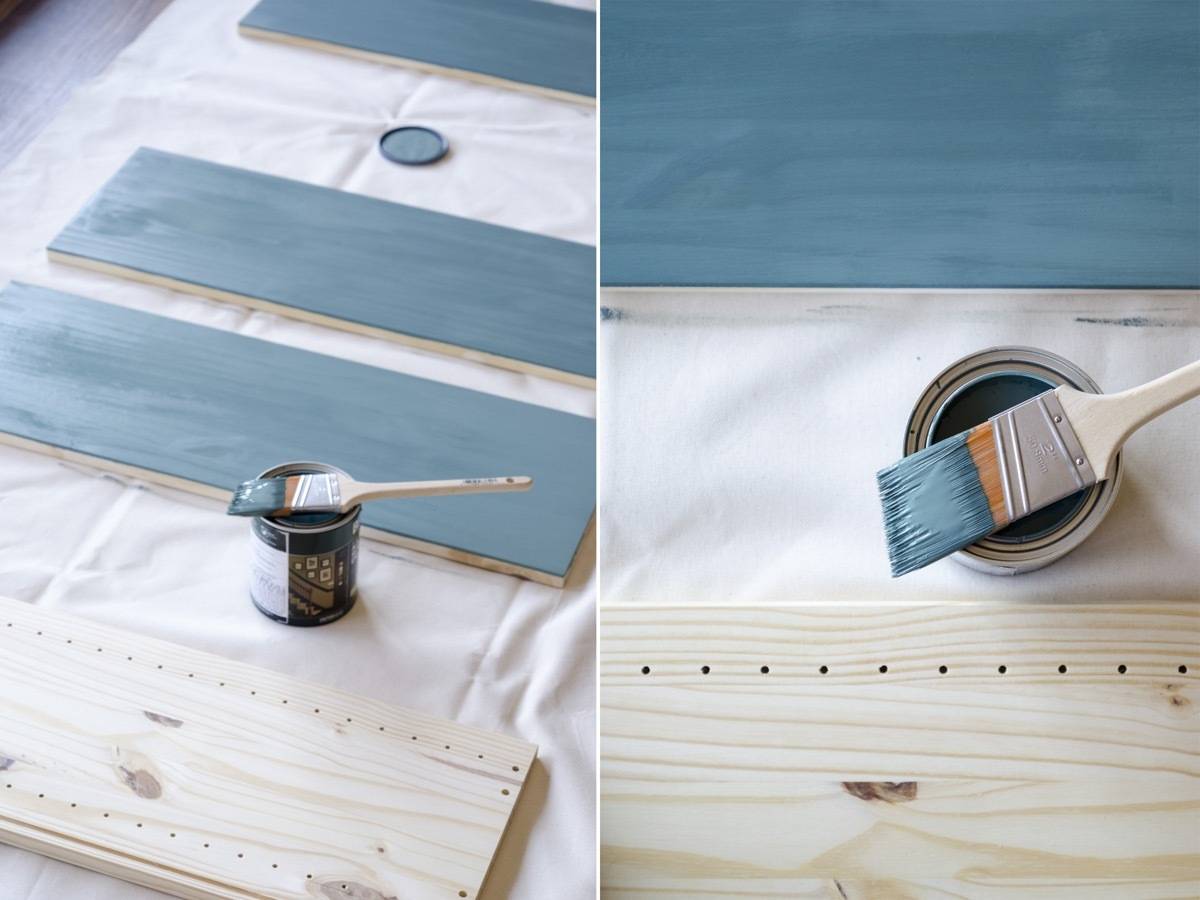
The very first thing I did was paint the IKEA IVAR cabinet itself, before assembling. This made the painting much easier. I only painted the pieces I needed; since I knew I wanted to turn one of the doors into the tabletop, I left that piece unpainted.
After the paint dried, I assembled the cabinet according to the directions (leaving off the doors, of course).
Step 2
Next, I needed a countertop. Rather than going out and buying a separate piece of wood for the top, I decided early on I was going to make it from one of the existing doors.
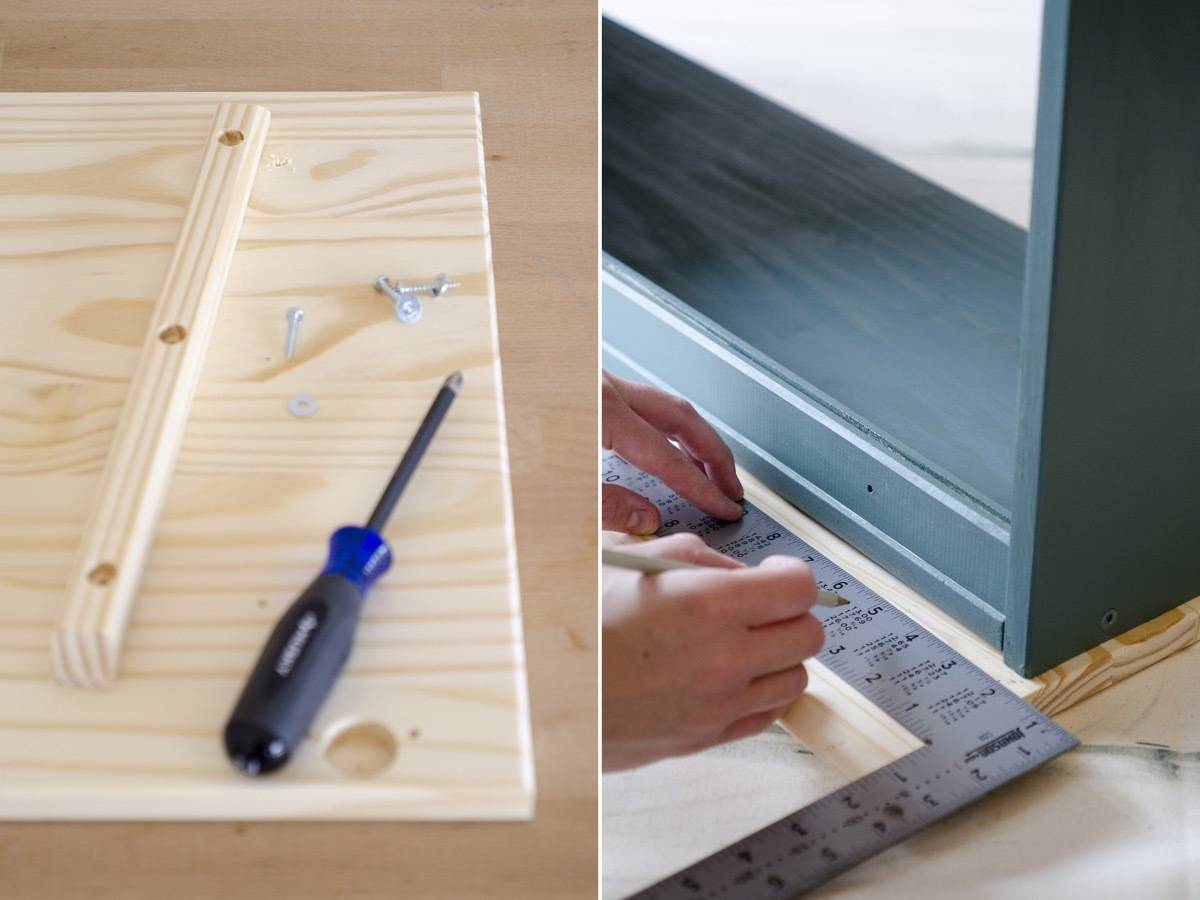
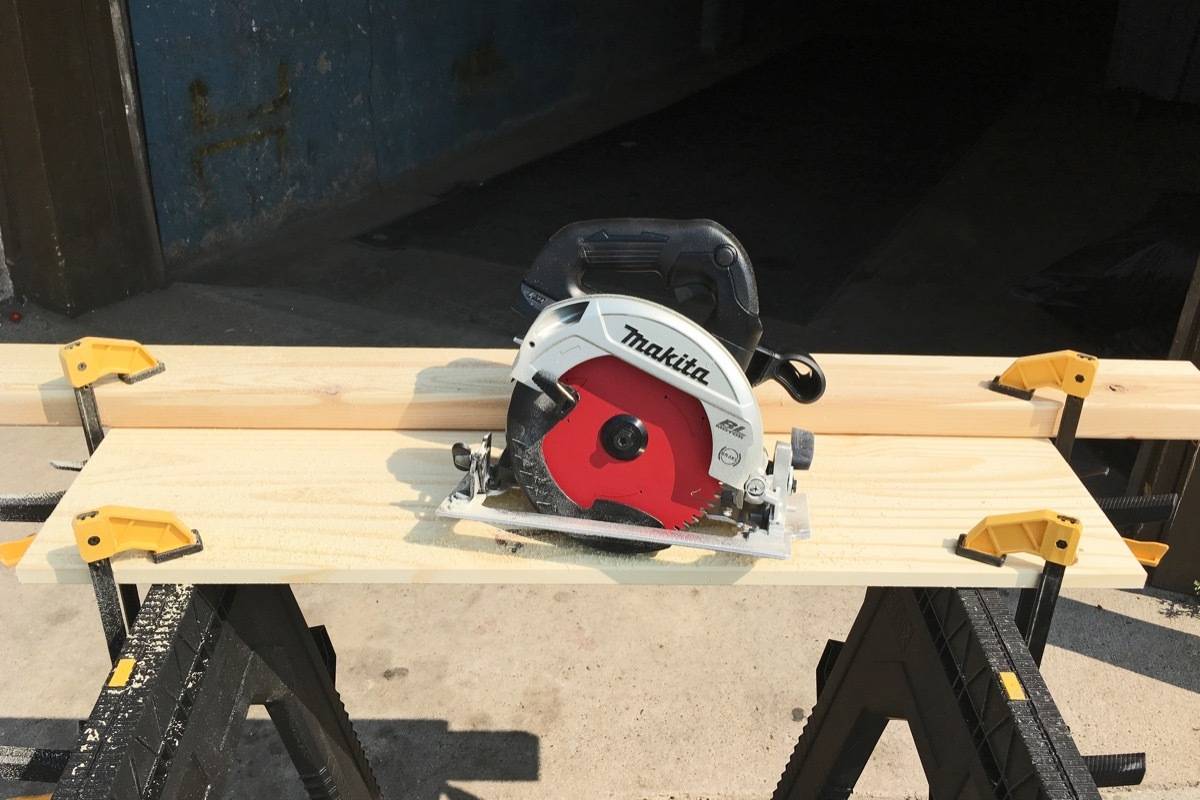
I removed the bumper wood from the back of one of the doors, and after flipping the cabinet upside down, determined how much I needed to cut from the door to make it fit the slim cabinet top.
Luckily for me, I only needed to make one cut. The length of the door wasn’t a problem – there was even a nice 1/2 lip on either side. The width, however, was off by at least five extra inches. Even though it was just one cut, I needed it to be a good one.
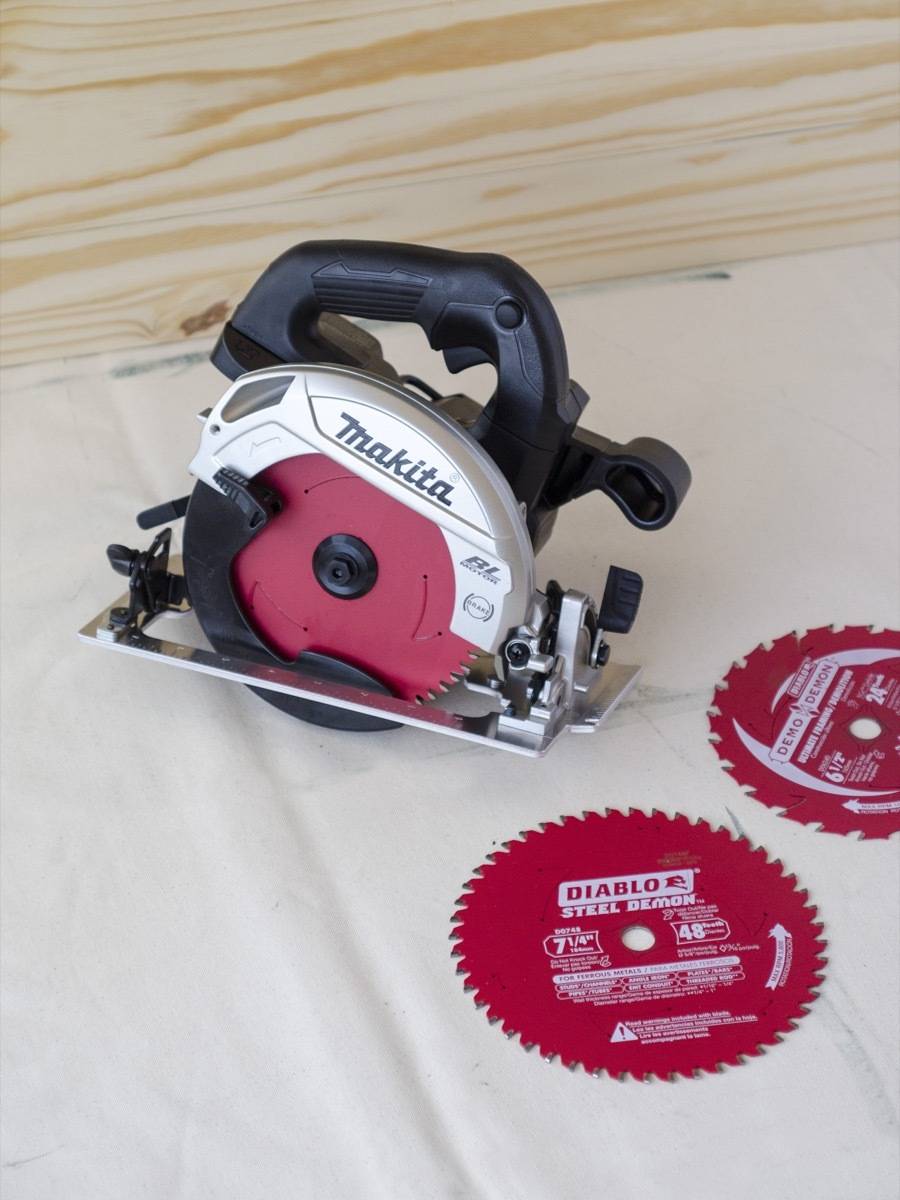
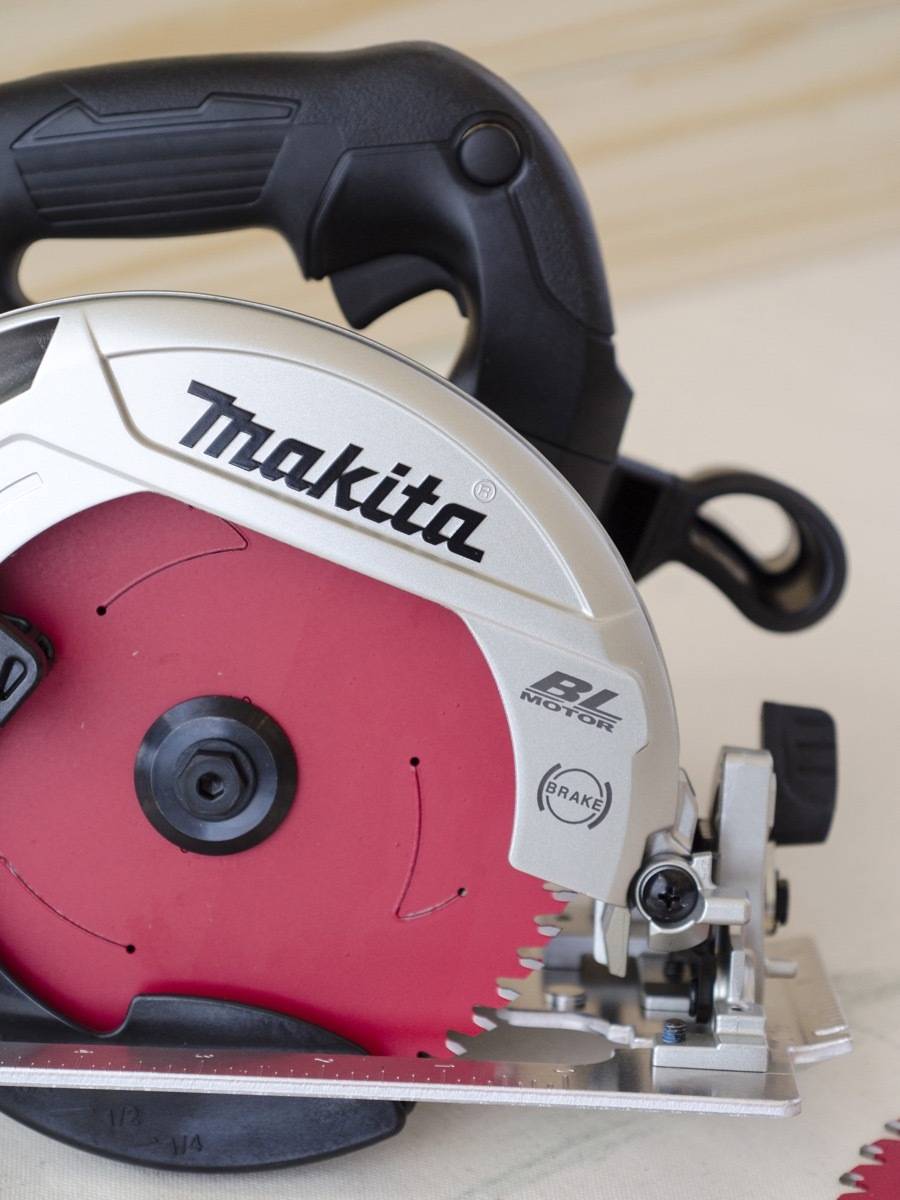
To make my cut, I reached for the Makita 18-volt cordless circular saw. As someone who doesn’t use power tools regularly, let me just tell you how comforting is is that this circular saw has no cord. There’s nothing to get tangled up in, and no risk of accidentally sawing into and nicking the cord. I just popped in an 18-volt battery and was ready to go (quick note about the Makita battery charger: this is one of the few I’ve seen that comes with a built-in fan to prevent overheating while charging – genius!)
This was actually my first (!) time using a circular saw, so I was a little nervous about it. A healthy amount of fear around power tools is a good thing, but a great way to reduce that fear is to invest in good power tools. Not only do I love the cordless aspect of this tool, but it’s also lightweight (6.4 pounds with the battery on), and because it’s brushless, that means it can run longer while remaining cool, thus increasing its lifespan.
The Home Depot kindly sent us three awesome saw blades from Diablo to pair with this circular saw: an Ultra Finish Saw blade, a Demo Demon blade (best name ever), and the Steel Demon Ferrous Metal blade (okay, that’s the best name ever). The Demo Demon is meant for making repetitive cuts, like you would if you were building a wall, while the Ferrous Metal blade is built for cutting materials like steel. I chose to use the Ultra Finish blade, as I wanted the cleanest, neatest cut for this countertop.
I used some scrap wood to create a straightedge fence, clamped everything in place, and set the blade depth for the material. Then I powered it on, and had my one cut done in no time.
Step 3
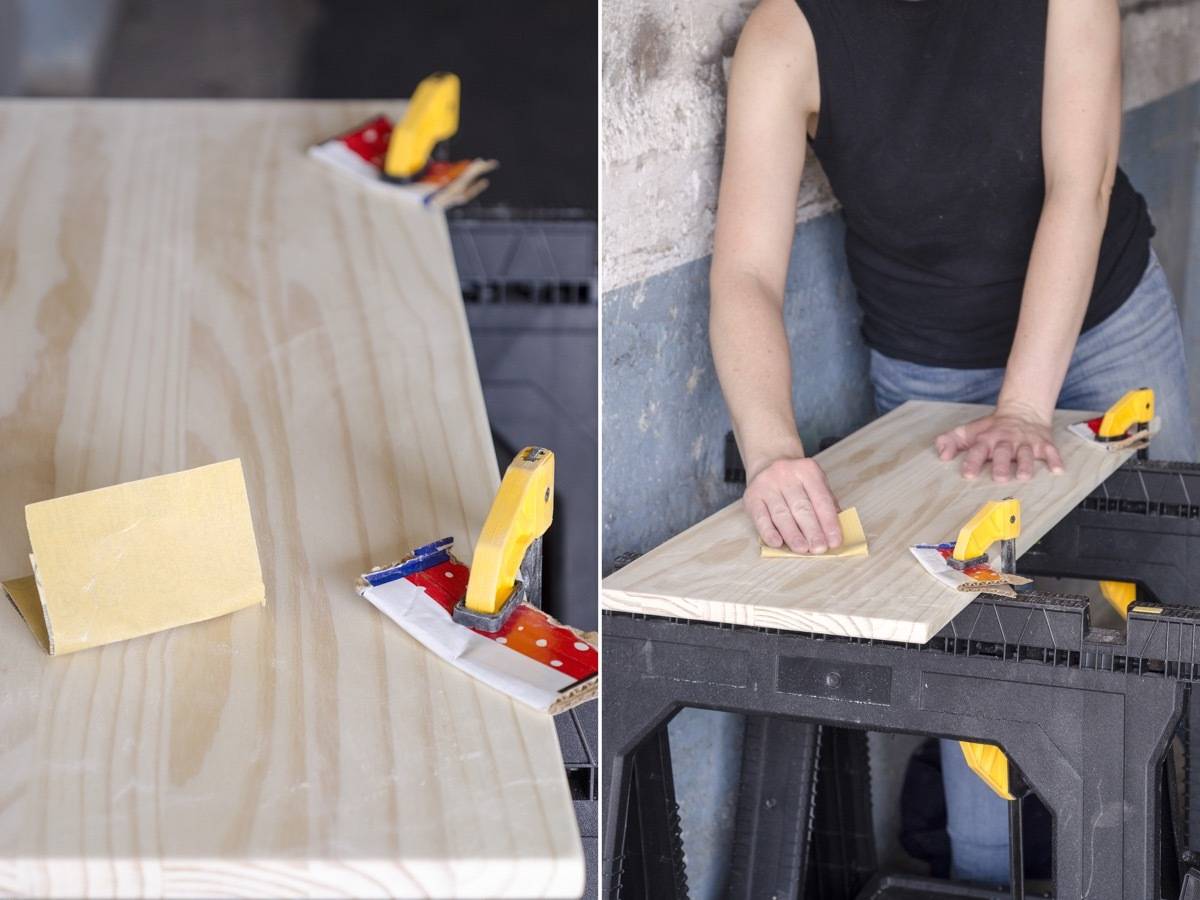
After the cut, I started sanding. I wanted the countertop to be super smooth and sealed well enough for kitchen use. I started by sanding the corners, evening out any sharp edges. For the top surface, I worked my way from a lower grit up to 400 grit sandpaper.
Step 4
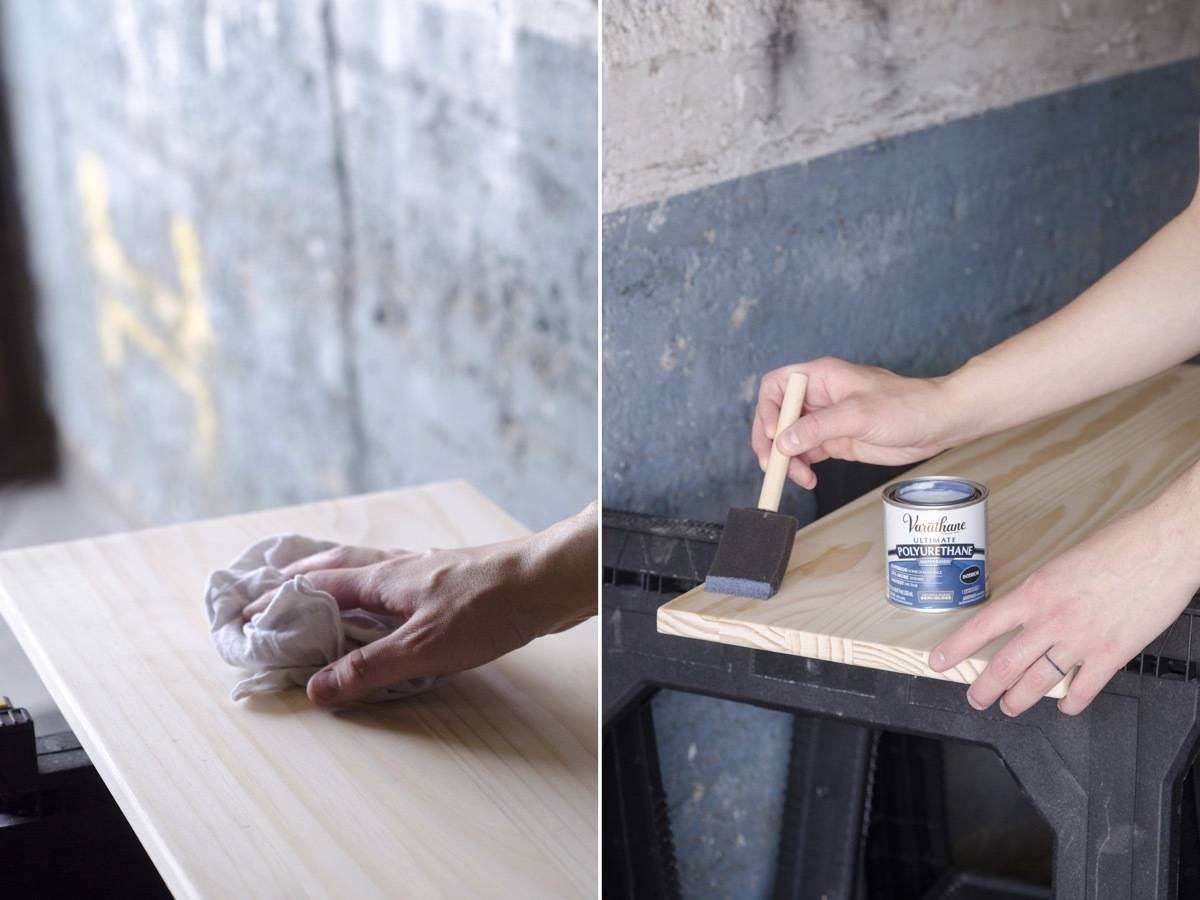
After wiping the board clean, I started the long (but weirdly relaxing!) process of applying polyurethane. The water-based poly dries very fast, so I was able to do it all in one day. I applied 8-9 coats, sanding in between each coat with 400 grit sandpaper. This baby is smooth as butter.
Step 5

In between waiting for the coats of polyurethane to dry, I attached casters to the bottom of my assembled cabinet. Using the Milwaukee drill, I drilled pilot holes first, then attached the casters in place.
Step 6

Once my countertop was completely dry, I laid it face down on a soft surface to protect it from scratches. Then I lined the cabinet upside down on top. Once it was all squared up, I drilled pilot holes, and screwed the cabinet to the tabletop.
Step 7
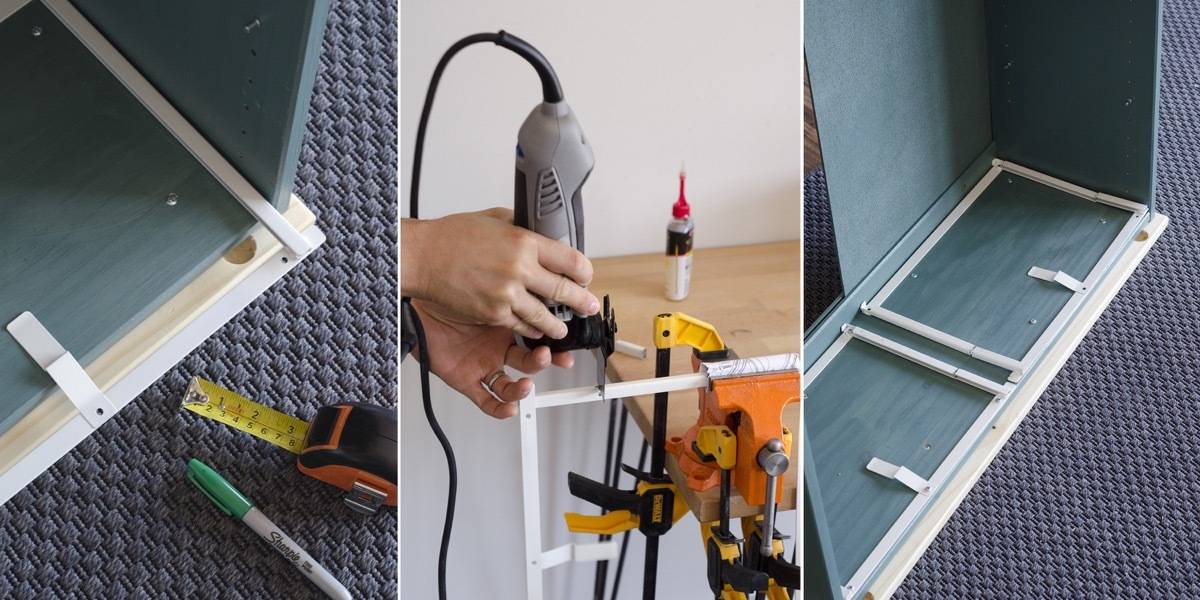
Because this rolling storage needed to be multi-functional, I wanted to add some drawers, too. I bought two sliding drawers, but made some incorrect assumptions. These drawers are meant to be compatible with the IVAR system… just not my narrow cabinet.
I decided there wasn’t much I could do about the length of the drawers themselves, but I could alter the track that the drawers slid on. Using a Dremel Multi-Max tool, I cut a small section from each side of the track. Then, I mounted them into the top of my cabinet. The disruption in the track didn’t affect the sliding of the drawer at all, thank goodness!
Step 8
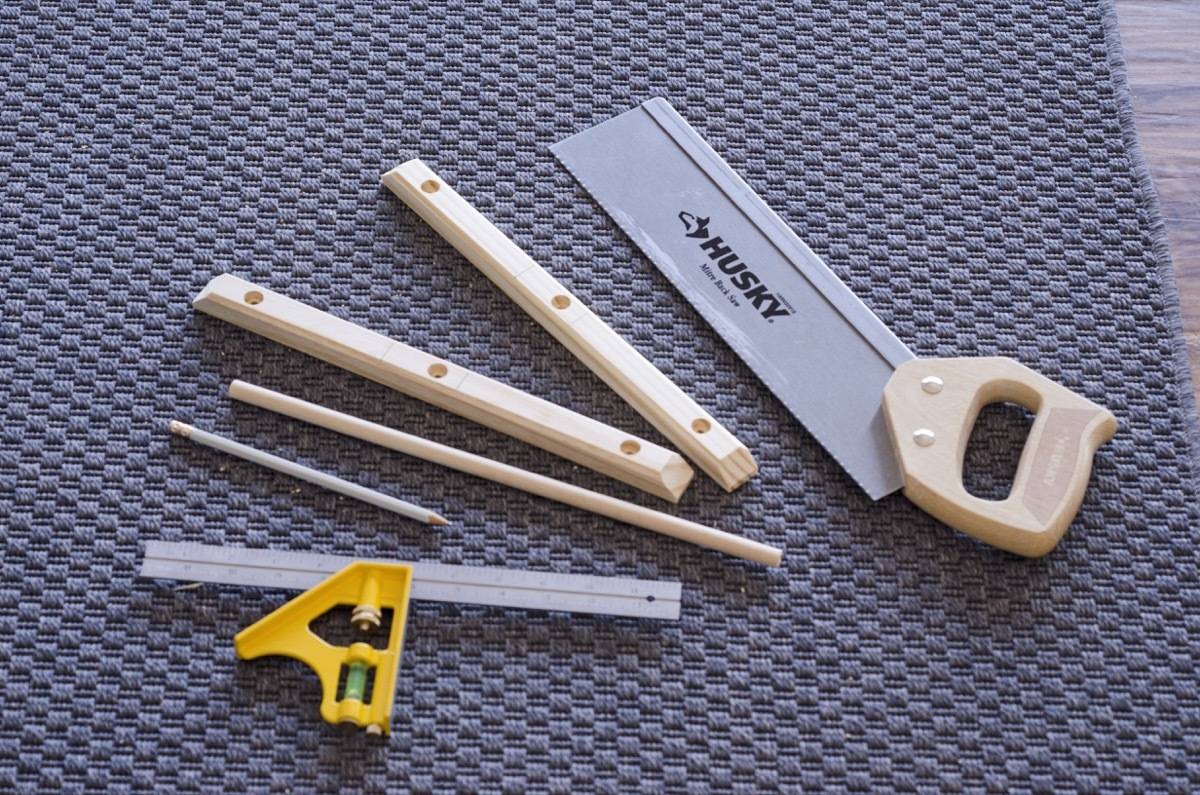
I also knew I wanted a towel bar on the side, because – why not? To make a simple towel bar, I took the bumper pieces from the inside of the door that I removed in step 2, and cut them down to two pieces, about 2 inches in length. I then drilled clean through each piece, and attached the two pieces to either end of a dowel rod. A little sanding and polyurethane, and I had myself a nice, simple place to hang a towel.
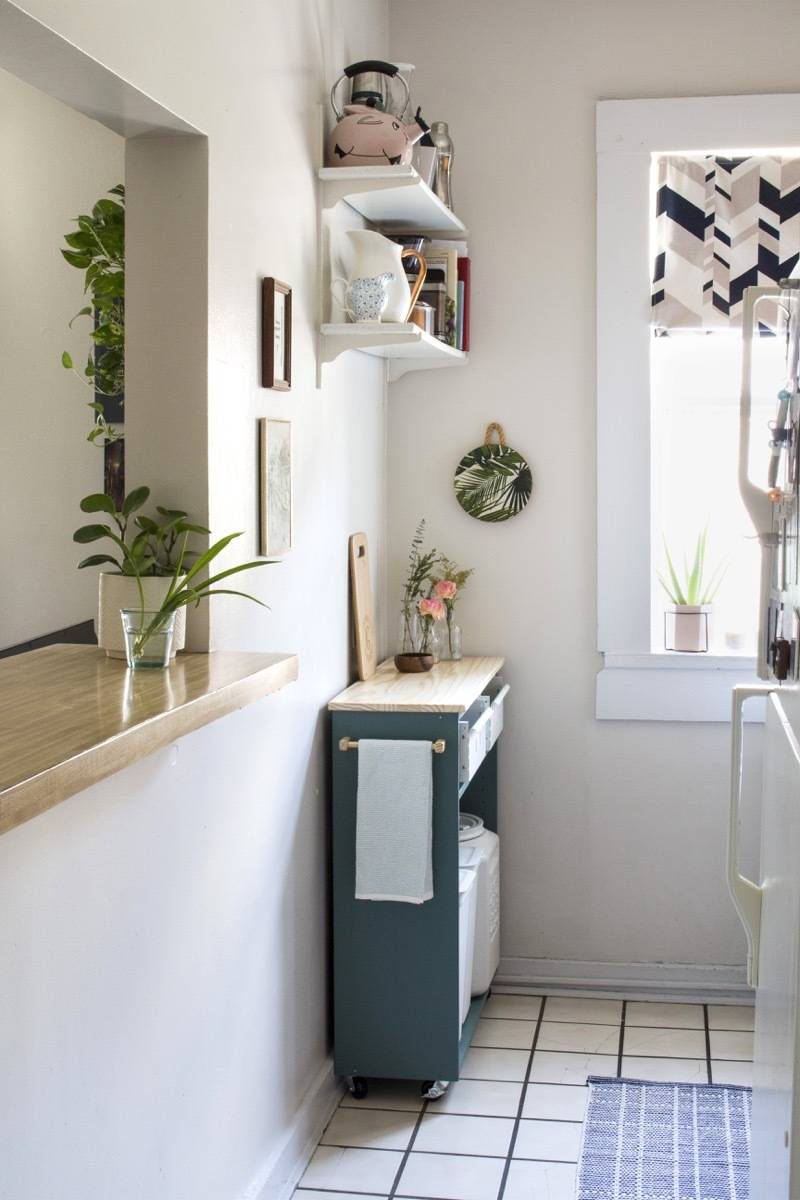
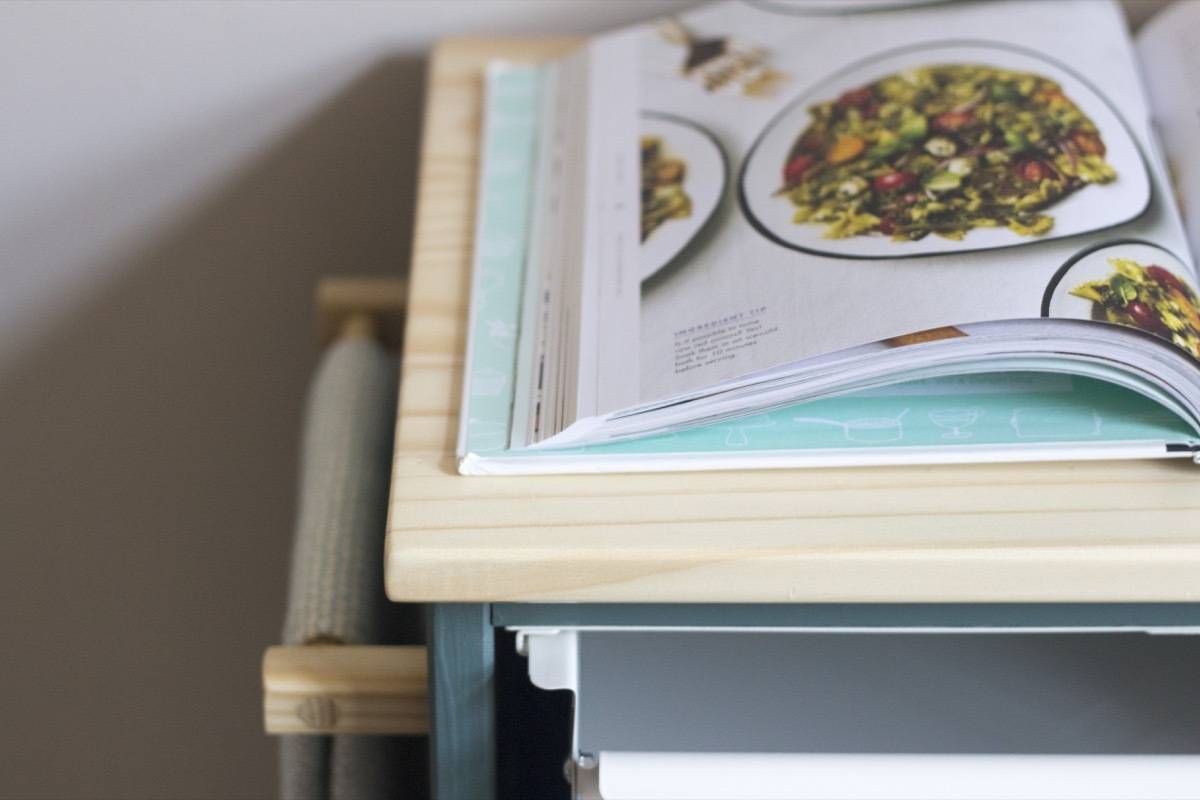
It may not seem like much, but having that extra little bit of space in my kitchen is such an improvement. I haven’t cut veggies on it yet or anything, but it’s the perfect place to grind up some coffee or set a cookbook.

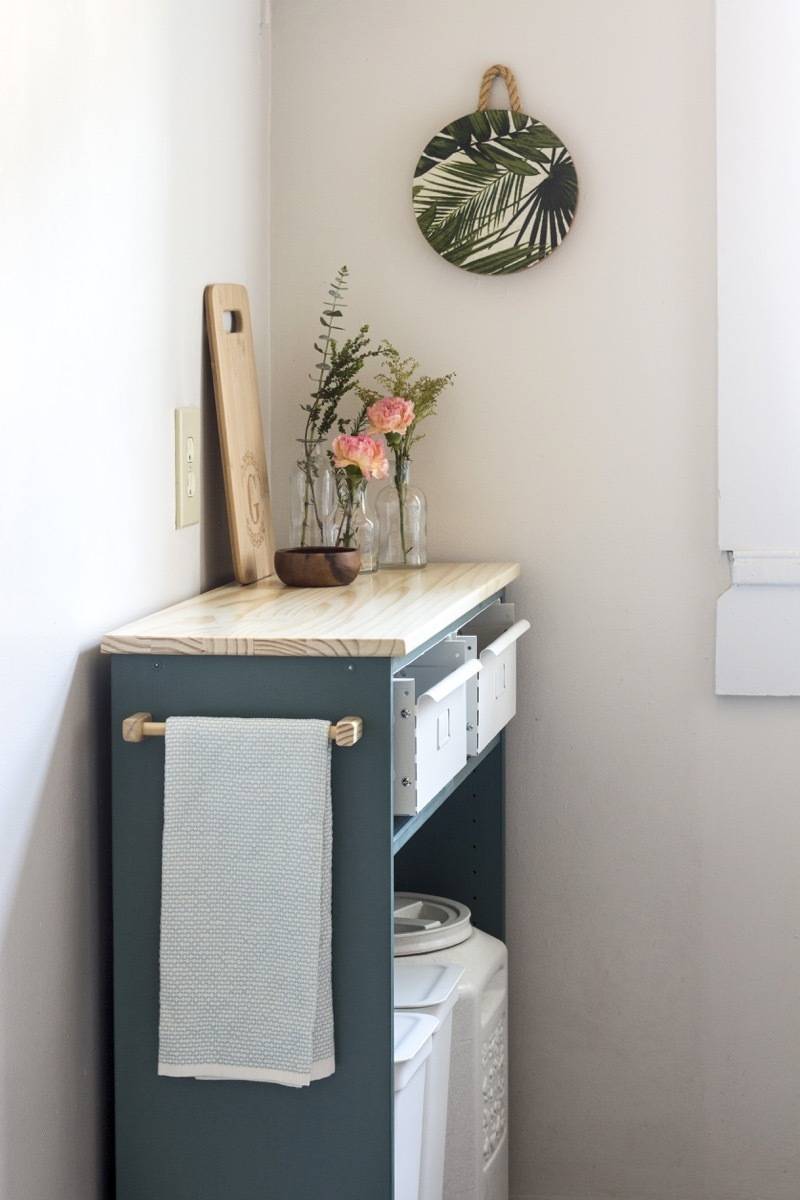
If you’re wondering about my trash situation, I ended up ditching our traditional 13-gallon one for a much smaller 12-liter can. Truthfully, we don’t produce a lot of trash in our home, and what we do create, we try to recycle. The drawers in this rolling kitchen station are actually to sort our recycling, too. We keep trash and mixed recycling in the two bins on the bottom, dog food to the right, and the drawers are for plastic store drop-off and terracycling, respectively.
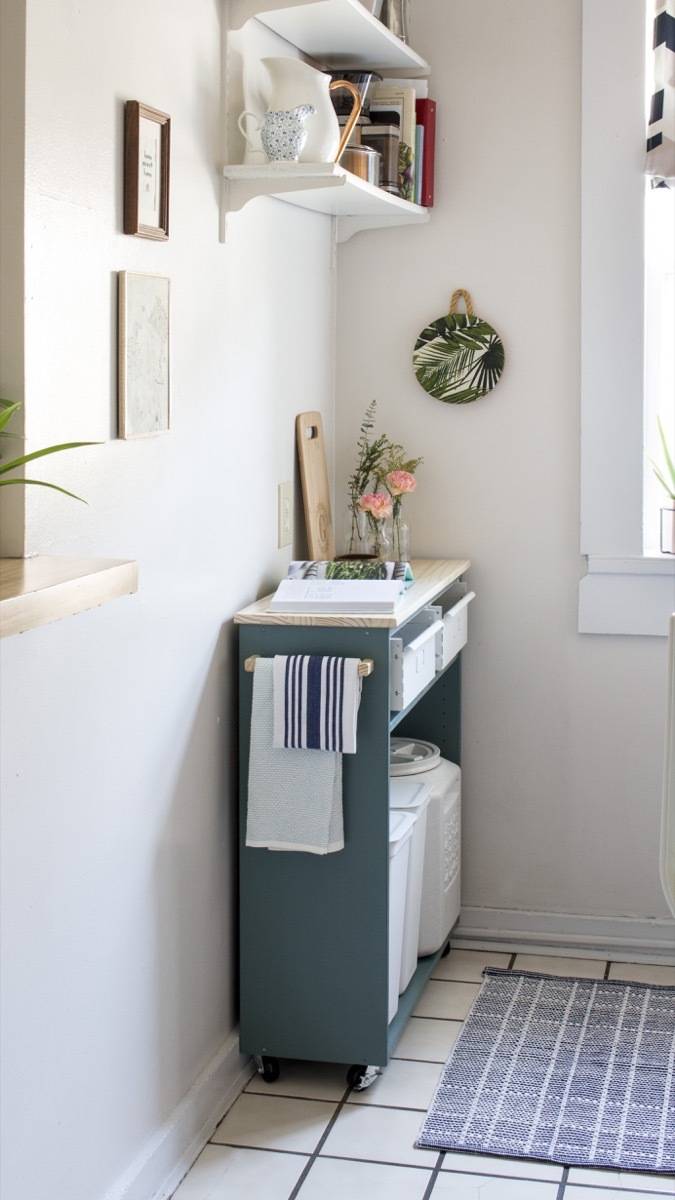
Now whenever I open my front door and walk into my kitchen, I get seriously excited about how organized it is. It’s the simple things in life, right?
This post is sponsored by The Home Depot. All opinions are mine alone. Thanks for reading, and for supporting the brands that make Curbly possible.
I acknowledge that The Home Depot is partnering with me to participate in the ProSpective2018 Campaign. As a part of the Program, I am receiving compensation in the form of products and services, for the purpose of promoting The Home Depot. All expressed opinions and experiences are my own words. My post complies with the Word Of Mouth Marketing Association (WOMMA) Ethics Code and applicable Federal Trade Commission guidelines.