
My home is practically filled with ottomans and poufs. I used them as side tables, foot rests, extra seating and so much more. They’re also very kid friendly, cozy, and comfortable. So when I found an old white leather ottoman at an estate sale, I decided to see if I could change it up using leather dye. Read on to see how how it turned out.
Dyeing leather is an often-overlooked method for bringing old leather pieces, like poufs, sofas, and even leather jackets, back to life. It’s a bit of an inexact science; every piece of leather material is different, and that means you have to work the dye into the leather carefully, avoiding streaks and unevenness.
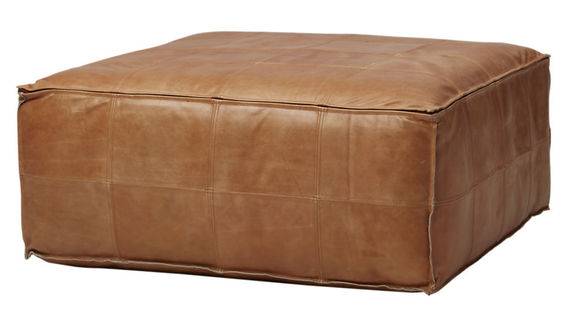
Here’s the look I was going for (these are some of my favorite leather ottomans):

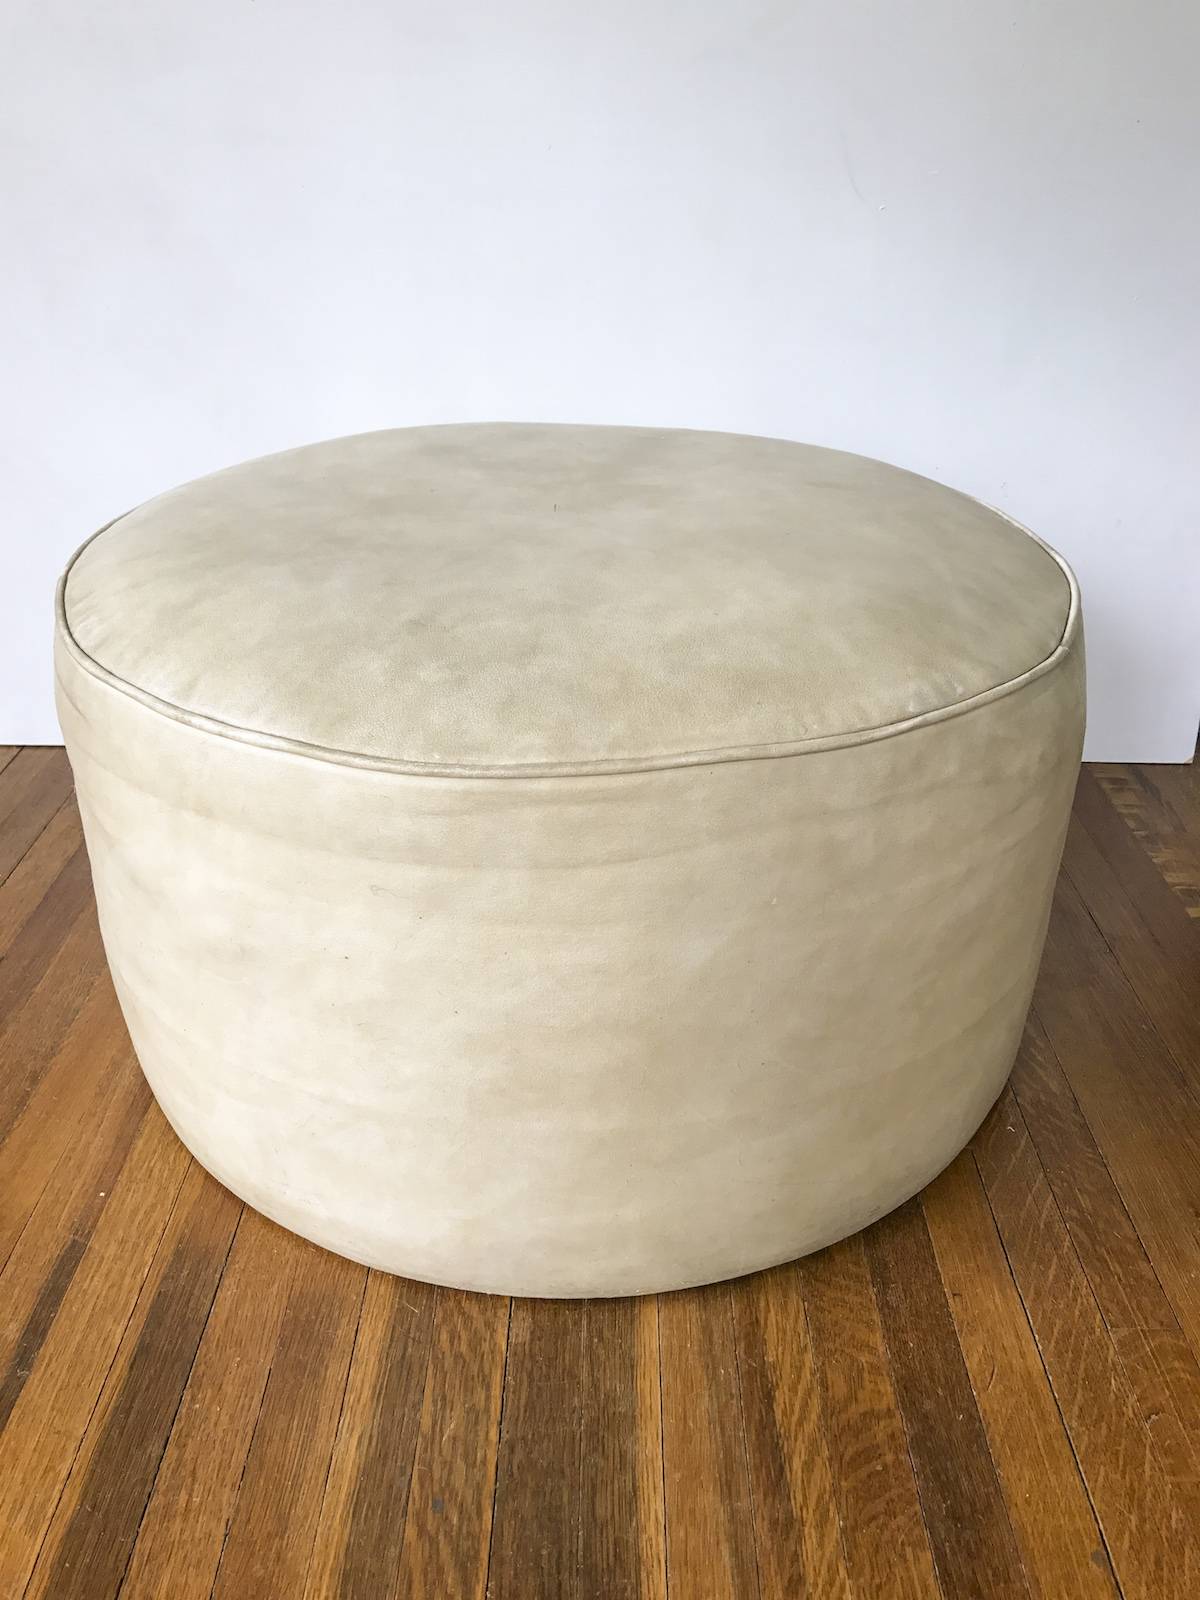
Here’s the white leather ottoman I started with. I found it at an estate sale, and my initial plan was to reupholster it. The ottoman itself is in excellent condition, but white leather just isn’t my thing, so I wanted to find a way to change up the look. The piece is actually a bit larger than it looks in the picture (25 inches in diameter and a foot tall).
I was researching how to restore a different leather vintage mid century chair when I came across multiple videos on how to restore and re-color leather using stain. I knew this wasn’t right for my original mid century piece, but with an inexpensive piece like the ottoman, I figured, why not?! If it didn’t work out, I could fall back to my plan to reupholster it.
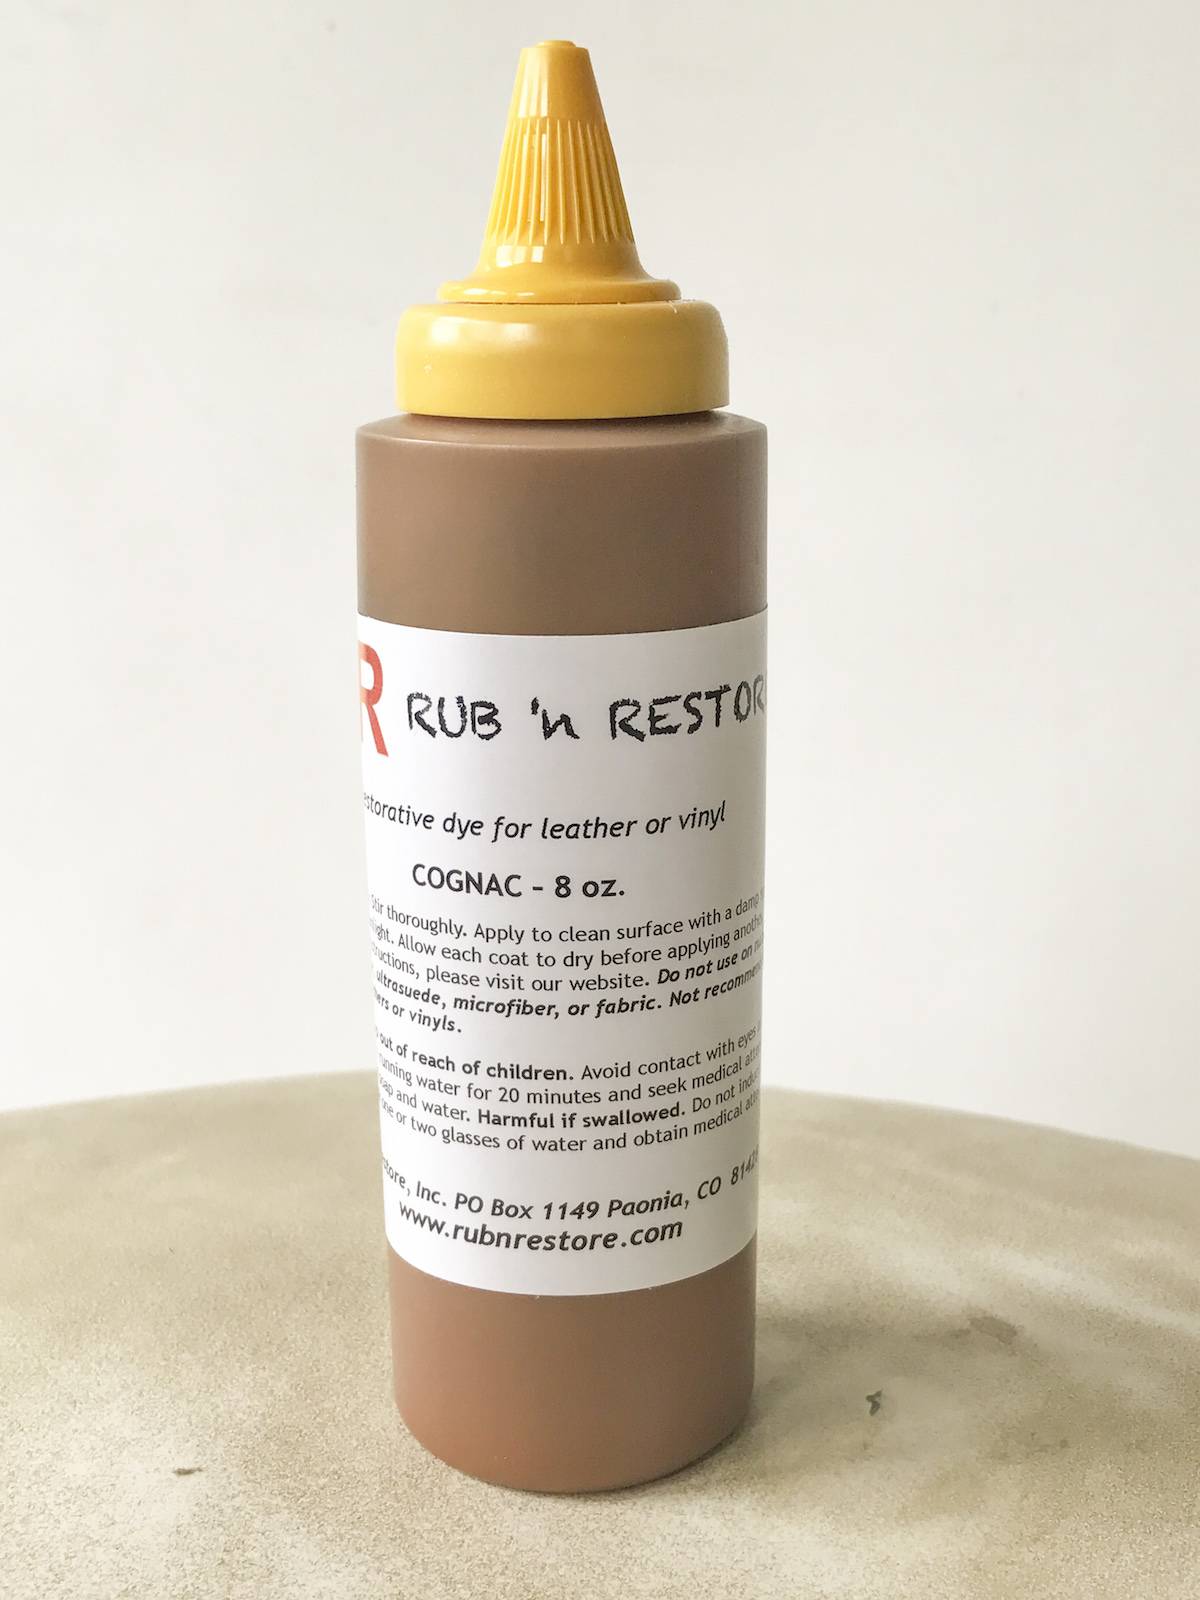
I spent a little while figuring out which brand of leather stain was the best, and finally settled on Rub N Restore. I chose Rub N Restore because I liked their instructional videos, prep and cleaning could be done with products I had on hand, and the dye was a reasonable price. Most importantly, they had great reviews and had answers for all the concerns I had. As a bonus, they have the largest variety of colors, and I was excited to see they had one in Cognac.
Let’s get to the process. Here’s what you need:
MATERIALS
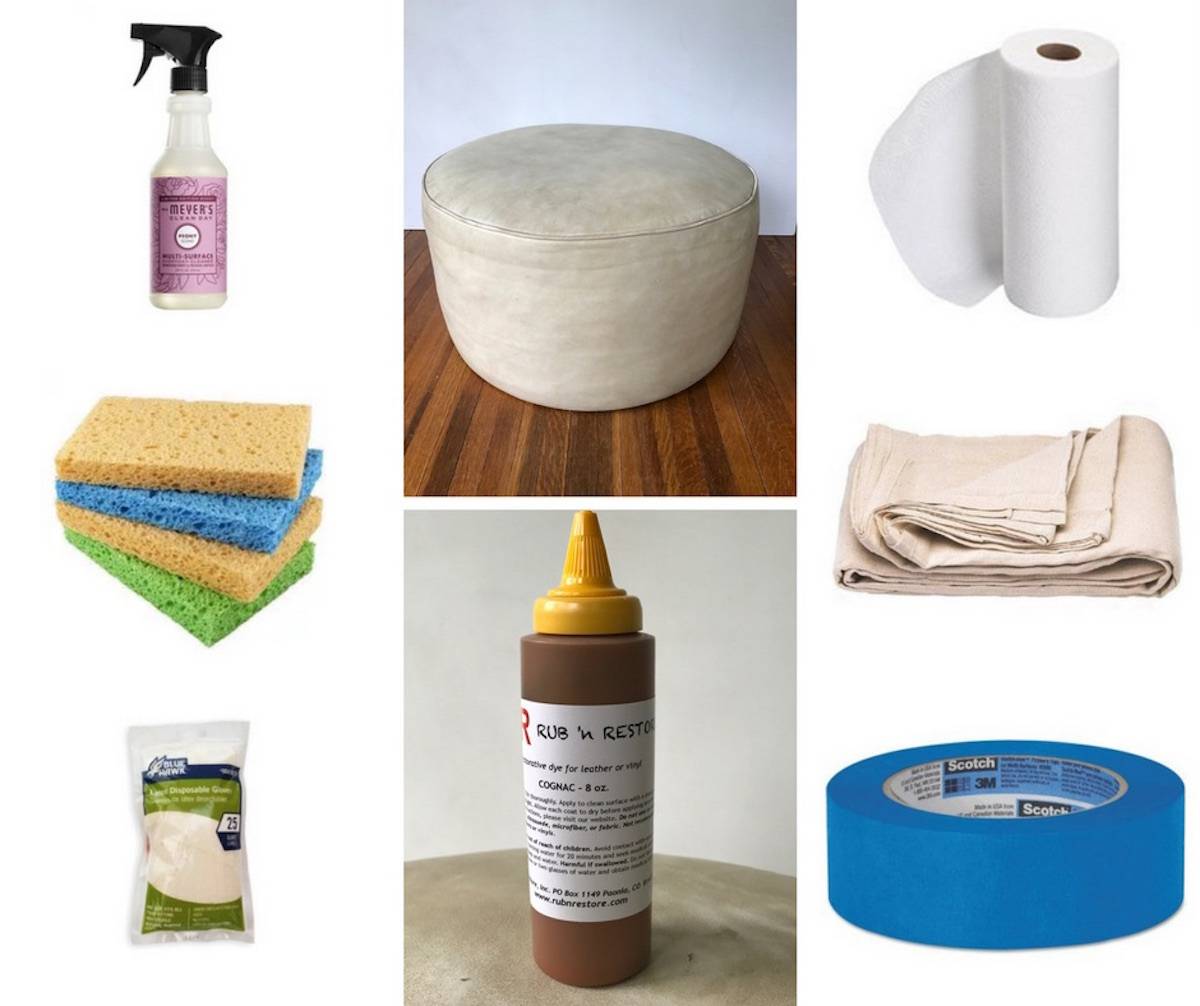
- Old leather piece of furniture you want to dye
- Leather Stain/Dye. I bought the 8oz bottle at Rub N Restore
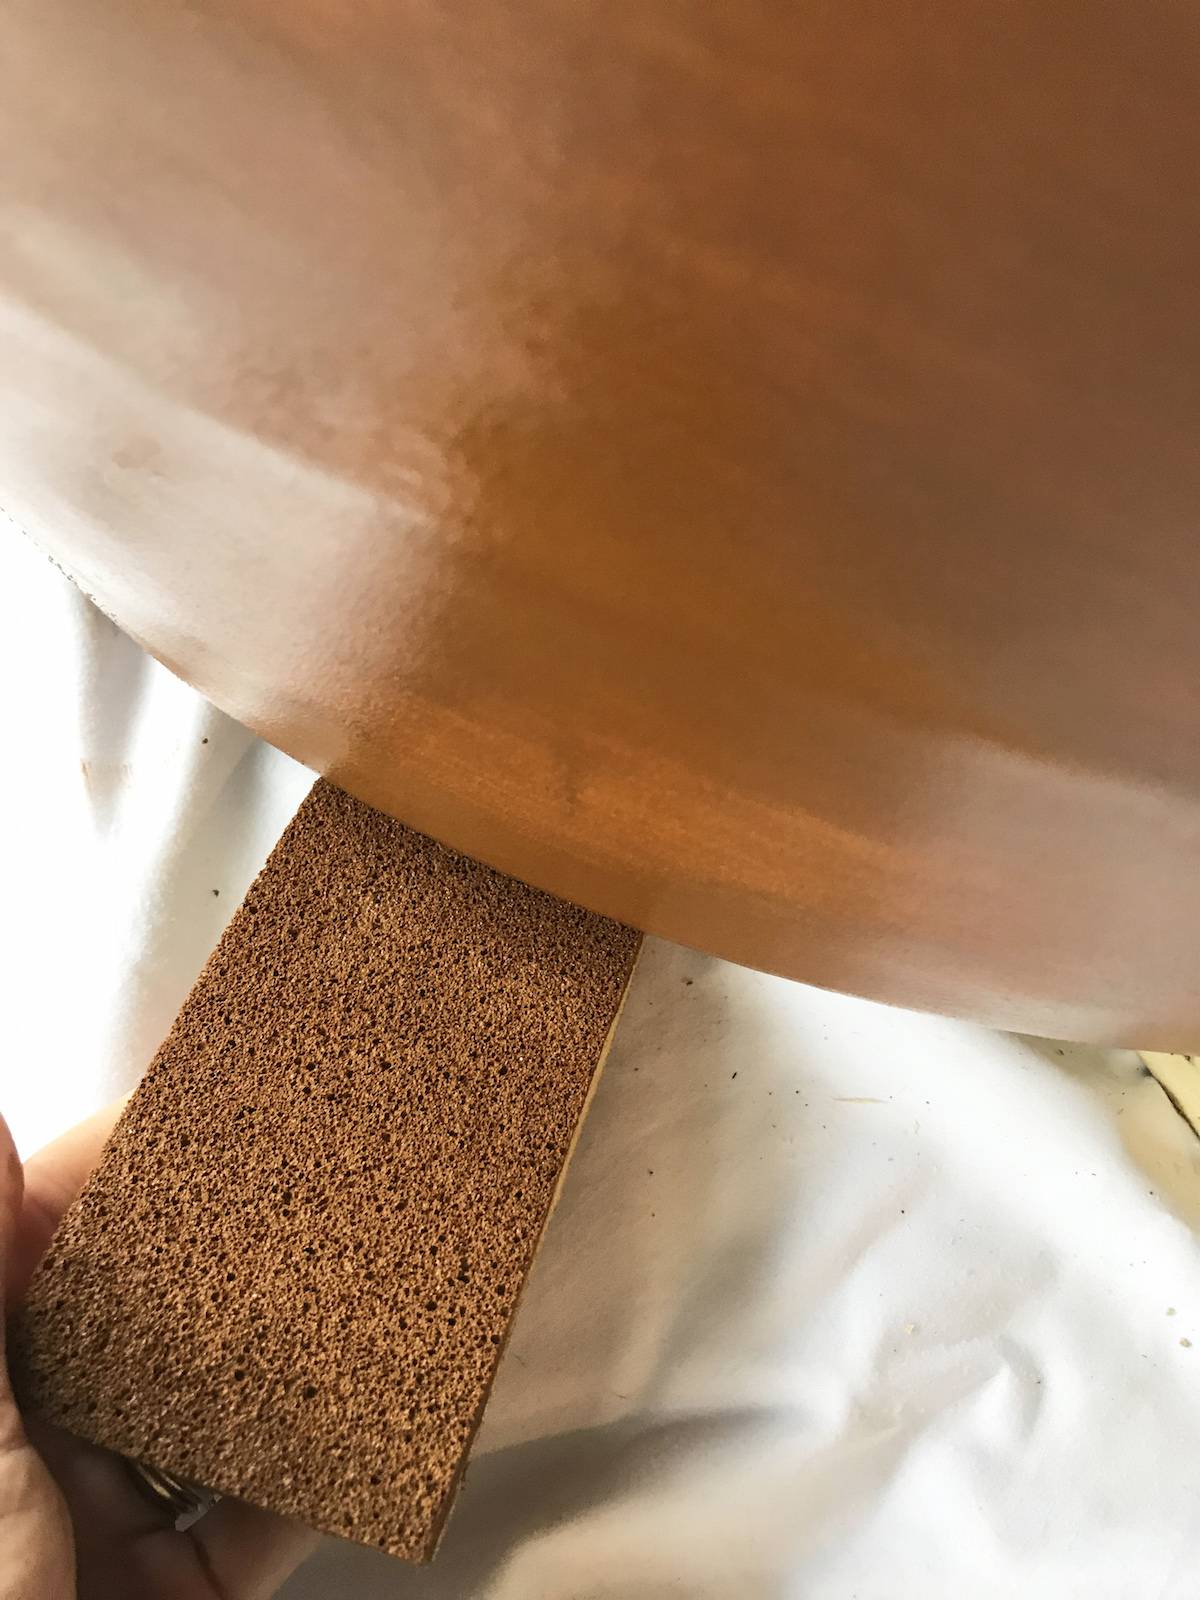
- Unused cleaning sponge (the cheapest kind will work)
- Drop cloth or old sheet folded for double protection
- Cleaning solution
TSP or mineral spirits are best if you have oily grime on your furniture. My piece was pretty clean so I used some Meyers multi-purpose cleaner that I had on hand. - Gloves to protect your hands
- Painters tape or masking tape
- Damp paper towel
- Wood boards to prop up your piece for staining
Step
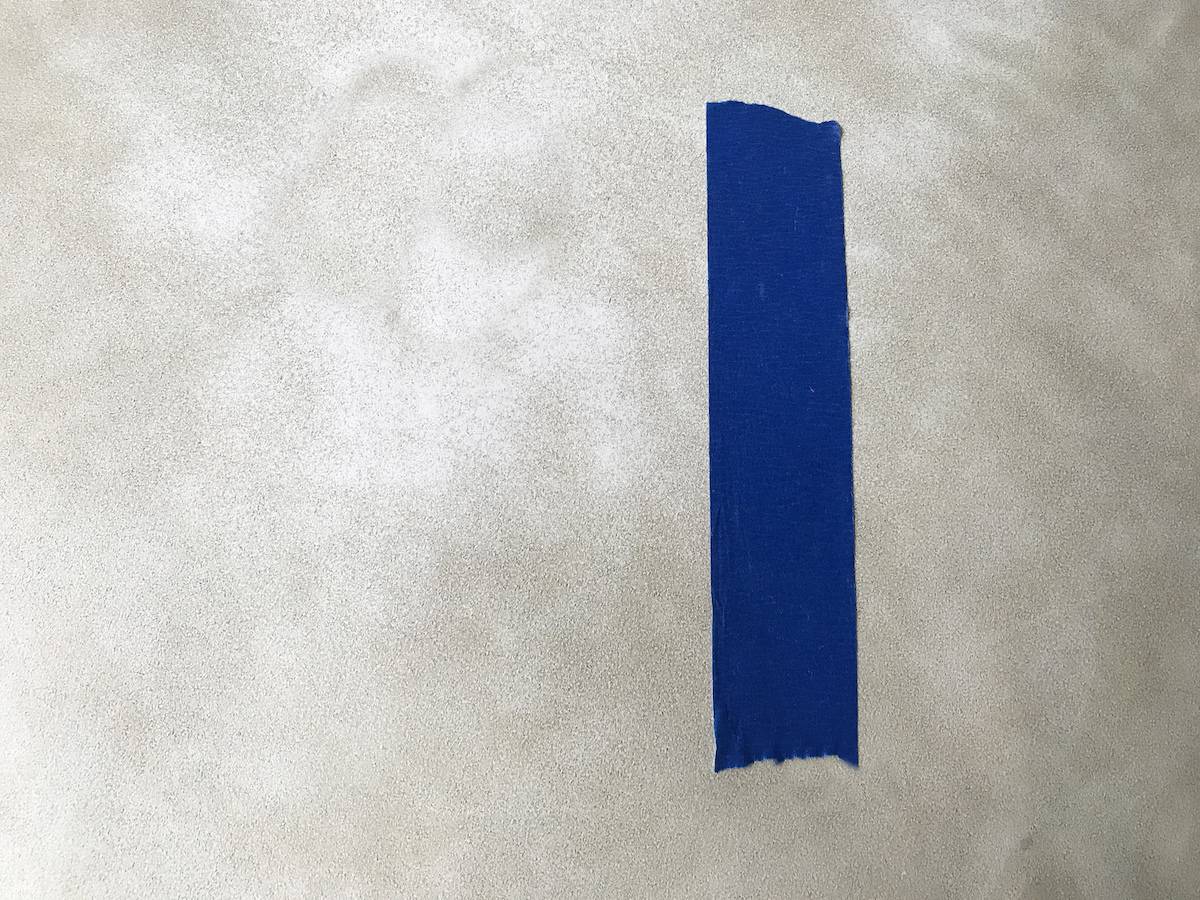
First, test to see if your piece can be dyed! Start by placing a piece of tape on the surface. If it sticks and doesn’t peel away at the top your piece is good to dye. If not, the peeling of the tape is probably due to oils in the material. Most tutorials suggest cleaning your piece with mineral spirits to get rid of the oily residue.
Step
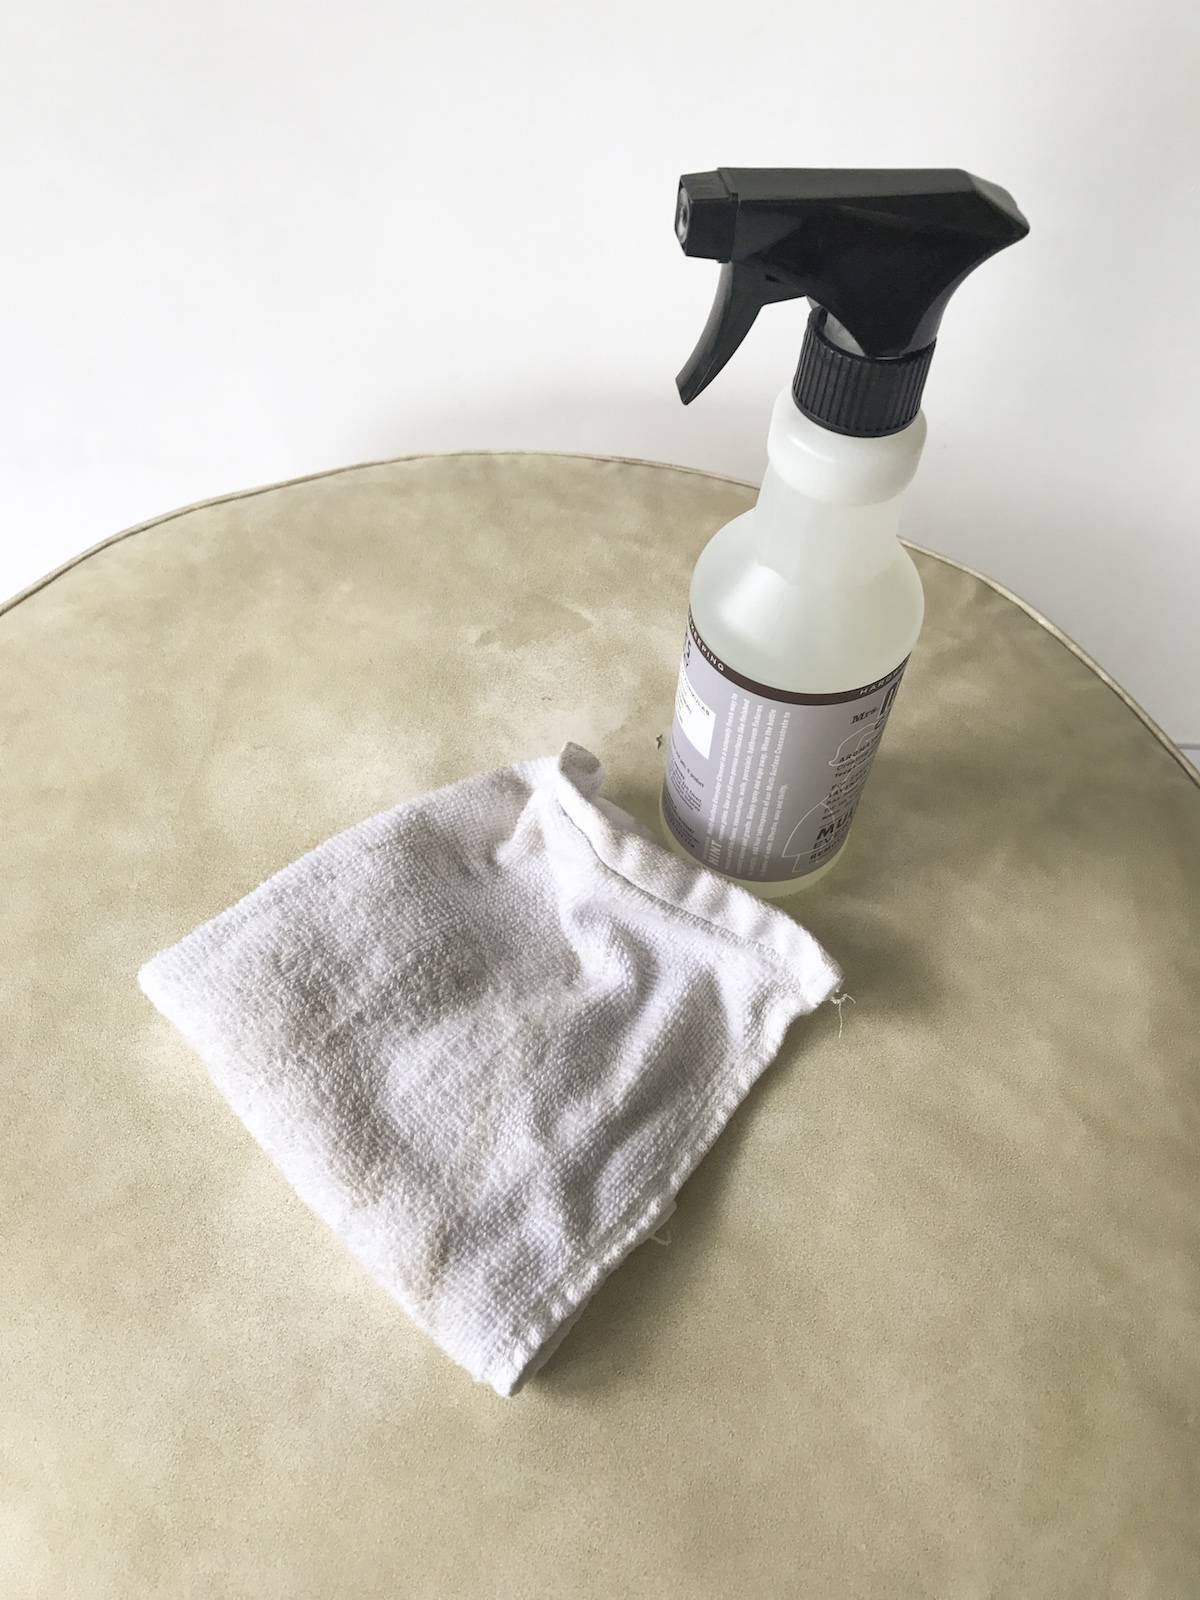
Clean the surface with multi-purpose cleaner or TSP.
Step
Protect your floor or dying surface with a drop cloth or sheet. On my first round of dying I didn’t place two boards underneath my ottoman, but I wish I had! This makes it much easier to get at the bottom edge of the ottoman. If you’re working on a larger piece, two saw horses could work.
Step
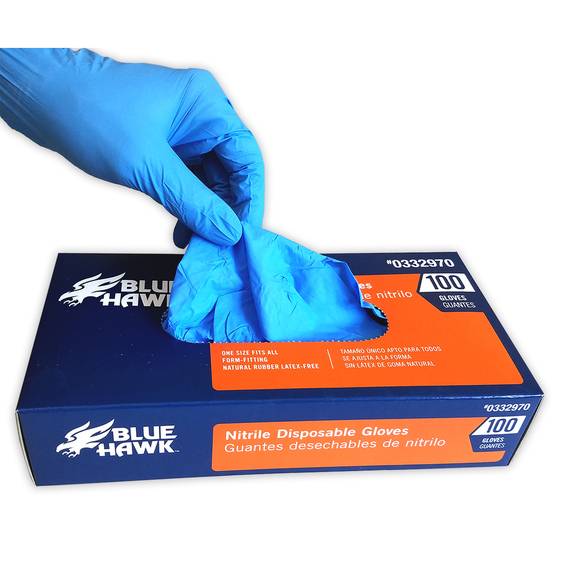

Protect your hands. The dye does exactly what it says it does: it stains things. It will come off your skin but not without a lot of effort. You will notice that I am not wearing gloves in the photo below, but that’s because I use a little painter’s trick that I want to share with you. I simply rub dish soap on my hands like lotion before I do any painting/staining project. The dish soap creates a layer on your skin so the paint/stain won’t adhere to it. It worked like a charm with this dye.
Step
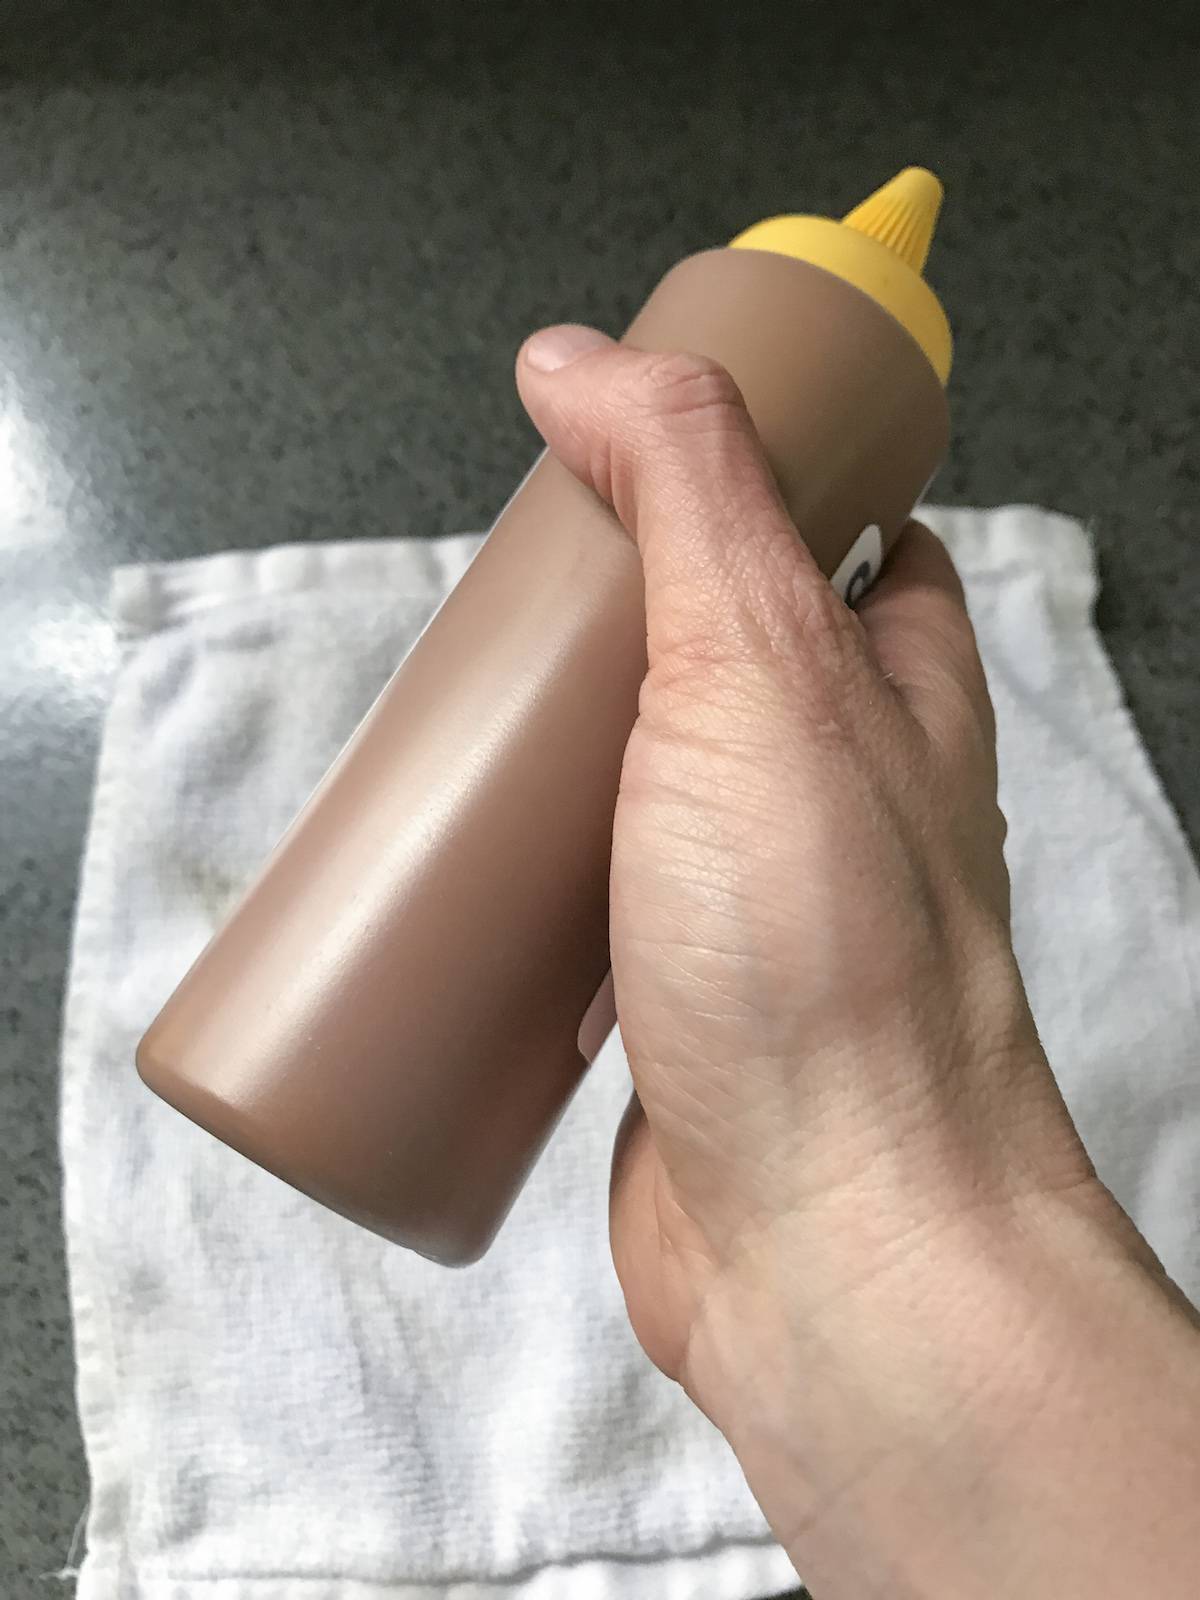
Shake up your dye really well. I shook my bottle for about a minute.
Step
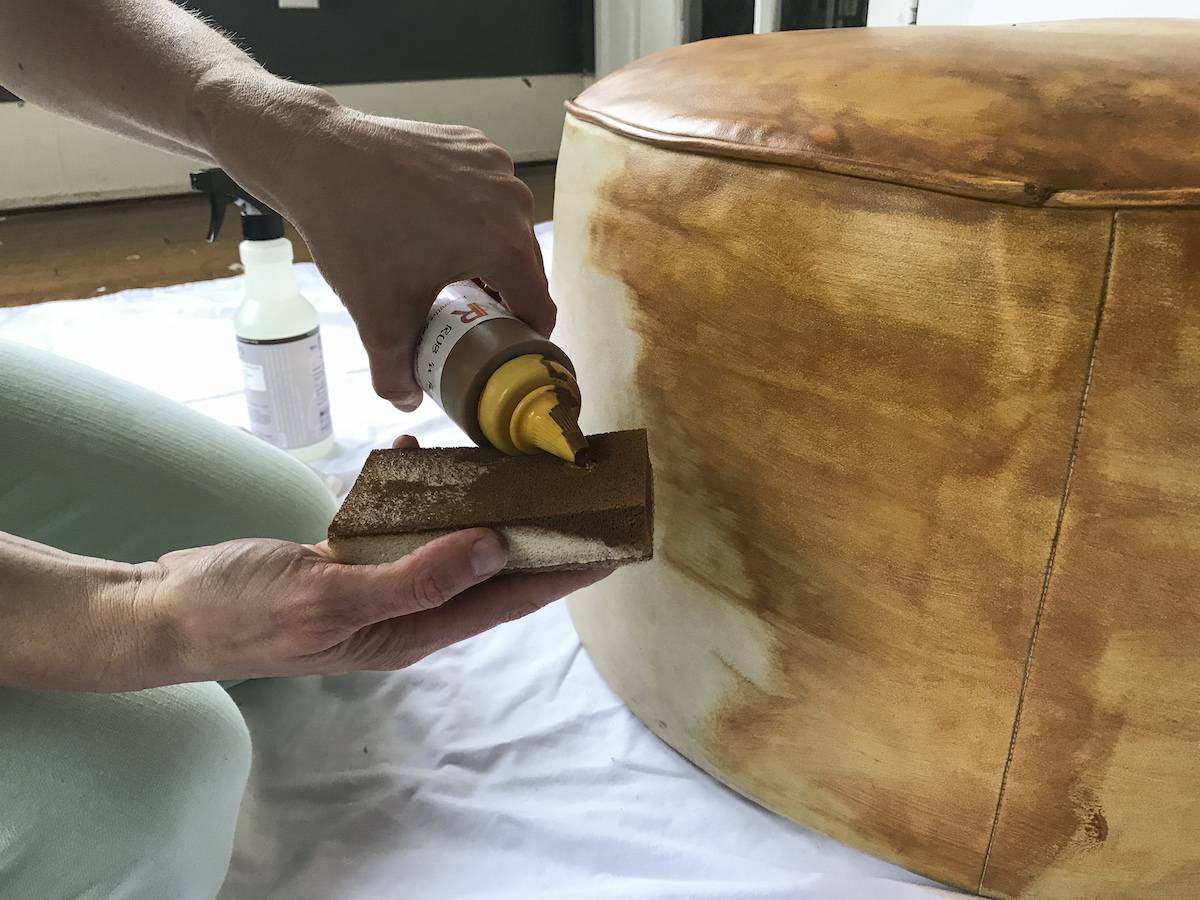
Place a little dab of dye on your sponge and spread it over the piece of furniture. Thin layers work best.
I was really worried about the streaks at first but don’t sweat it, they fade over time. I pushed the dye into the creases and evened out the excess.
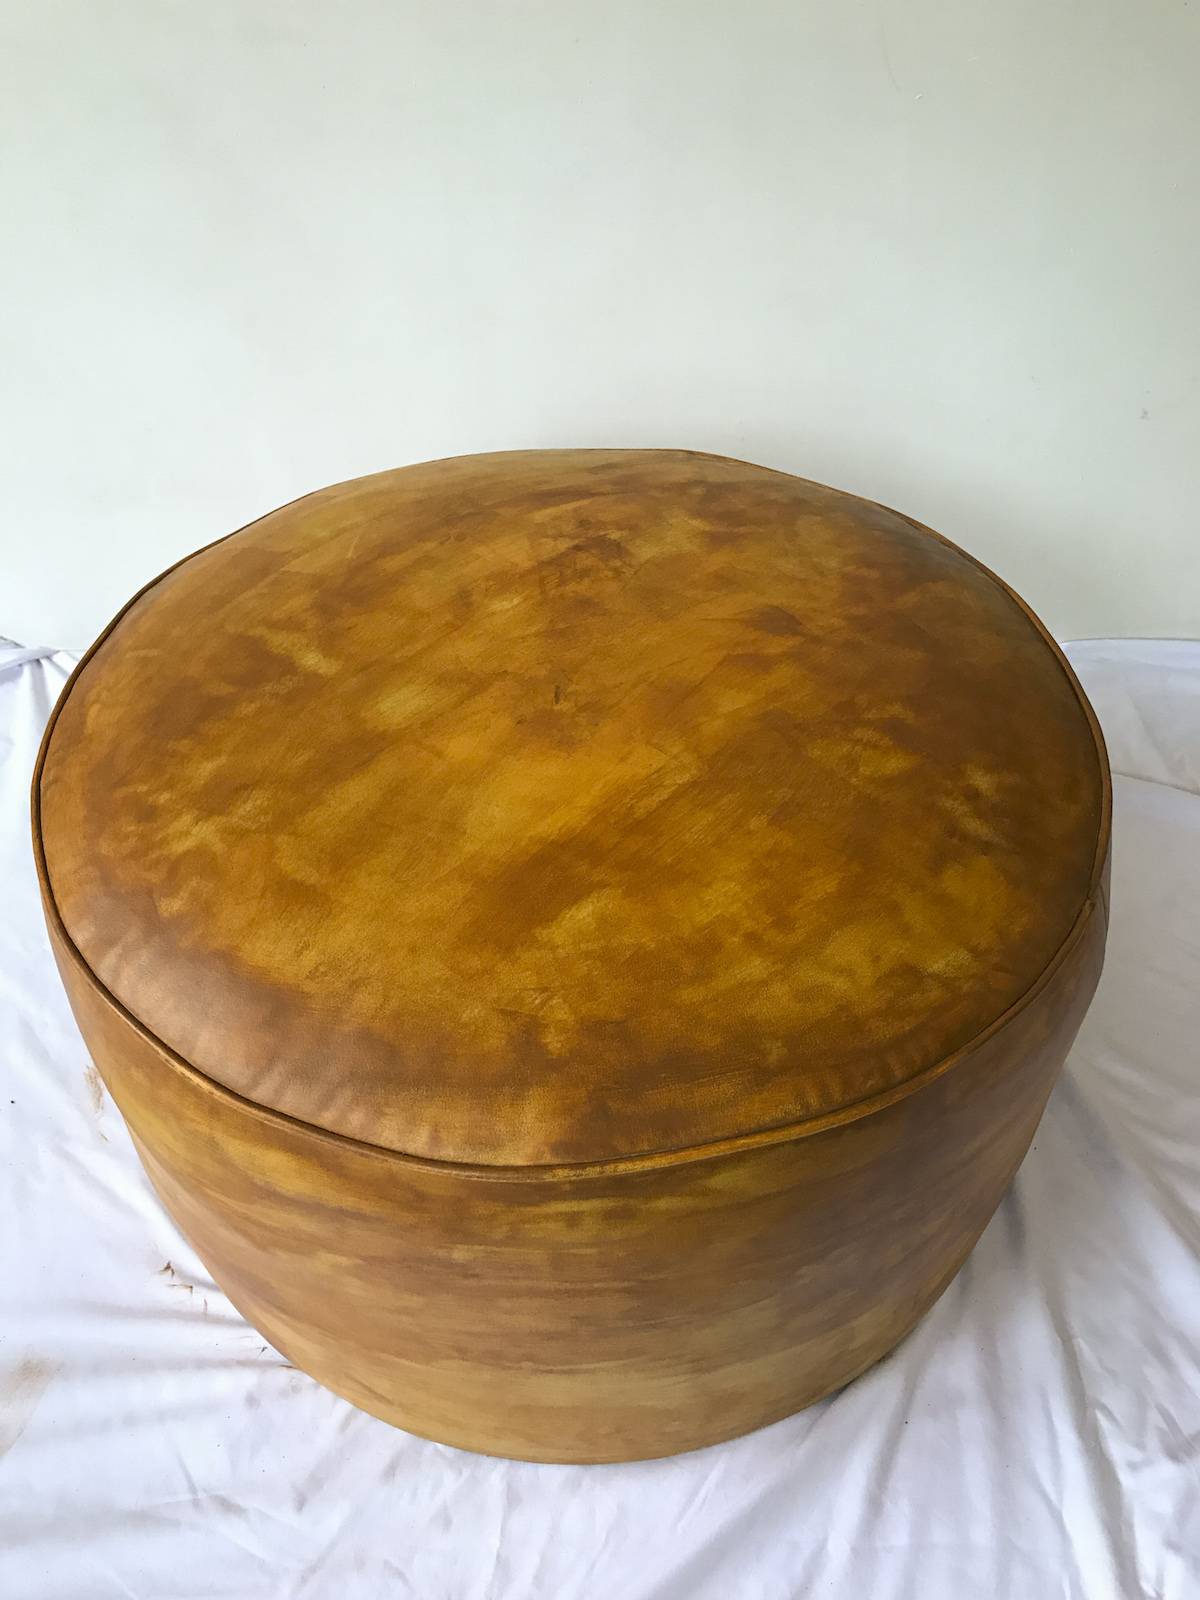
This is what my ottoman looked like after the first coat. The first coat was streaky but I trusted in the video advice that thin coats are best.
Step
After the first coat is dry, apply your second coat.
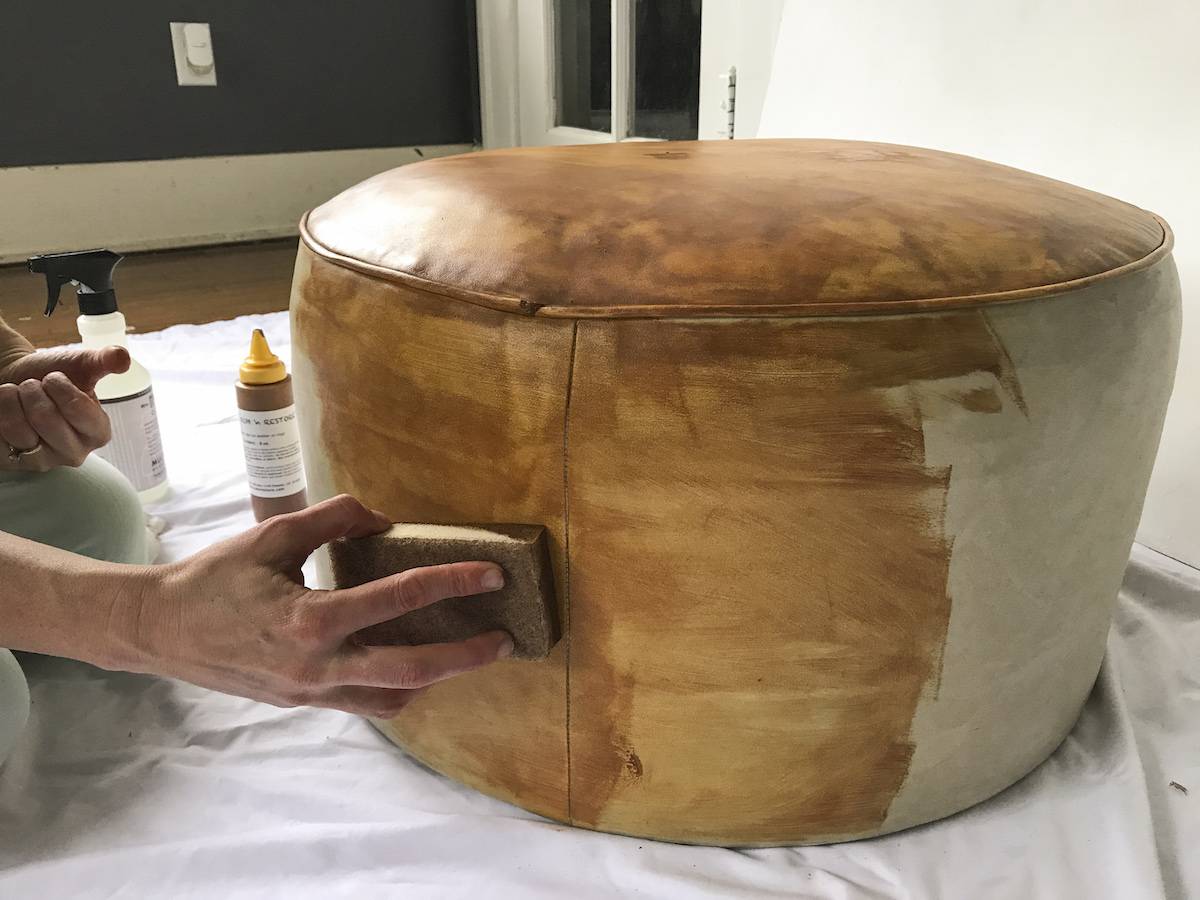
My ottoman was dry to the touch in 20 minutes and I made the mistake of dying the second coat after 20 minutes. Oops! The dye wasn’t really dry. You can see the lighter streaks on top of the ottoman. I tried to dye over those but because it wasn’t dry the dye was just pushed around on the surface. The same thing would happen if you painted another coat on furniture when the first coat wasn’t dry. I would suggest allowing your piece to dry at least an hour. The videos say you can use a hair dryer to make it go faster, but I had plenty of time so I just let each coat dry naturally.
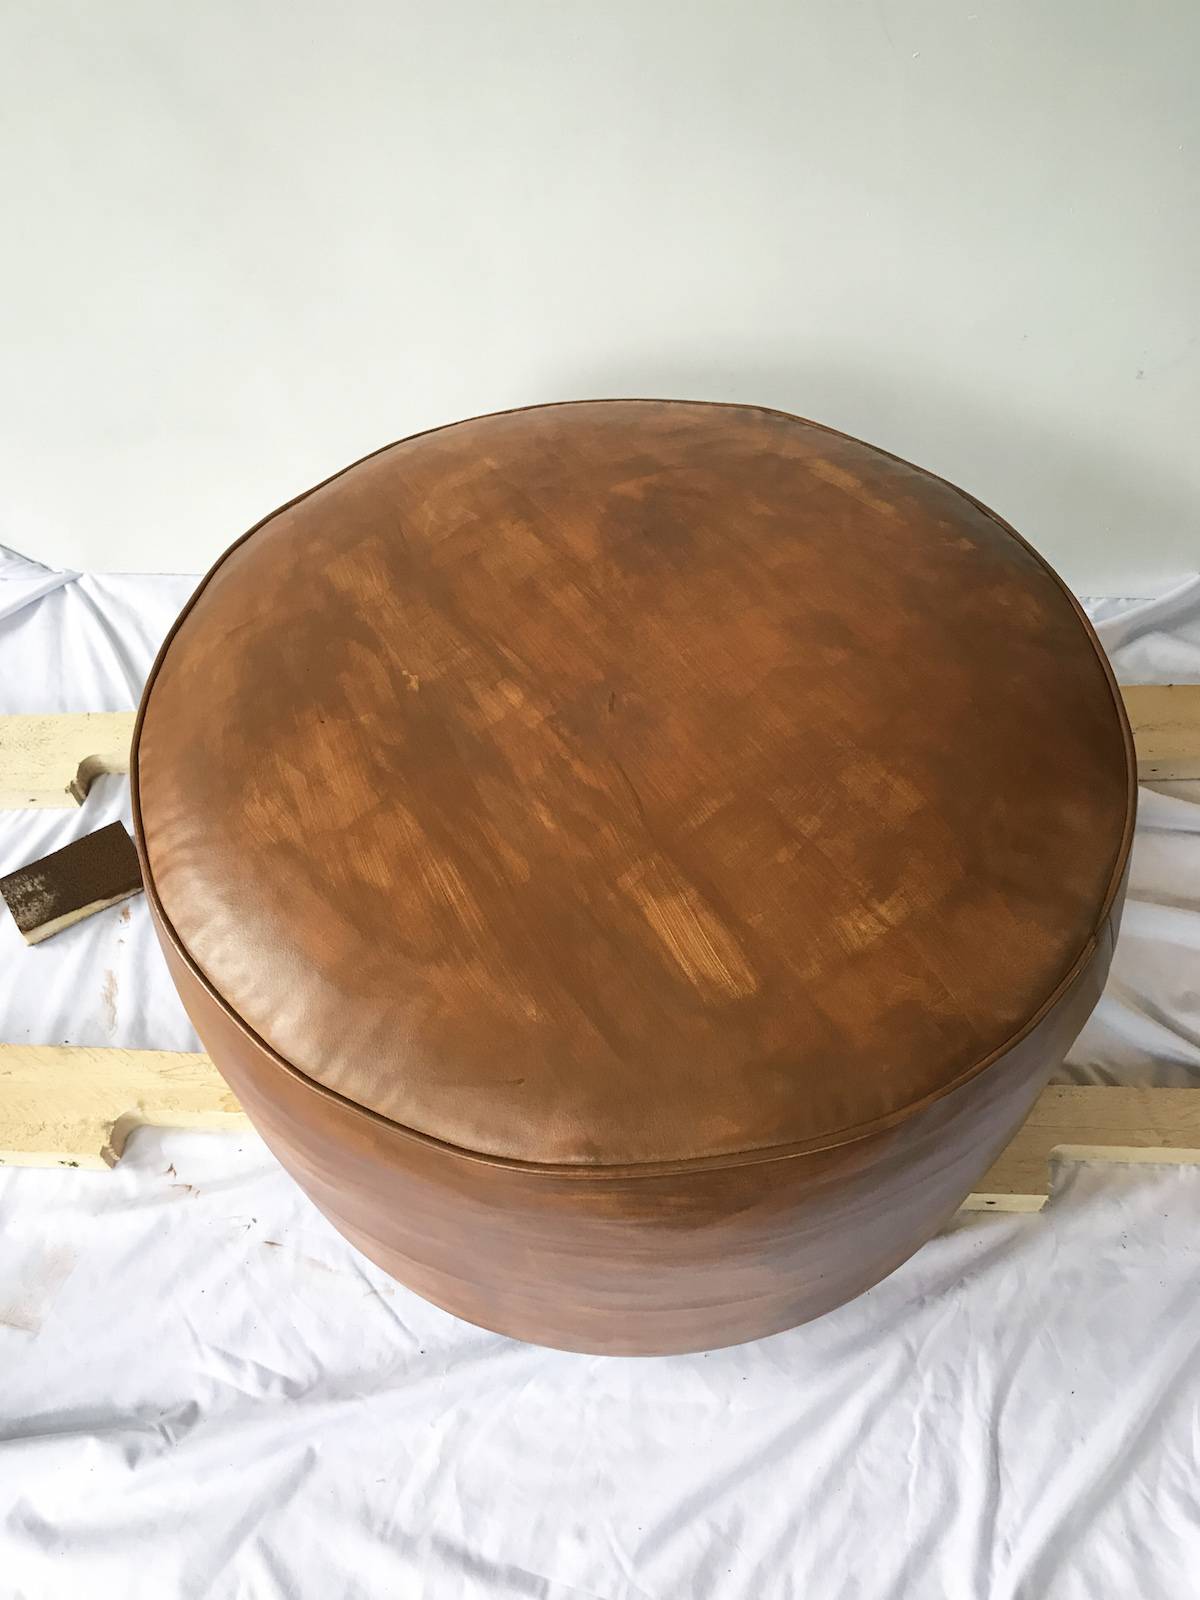
Staining the bottom of the ottoman was easier when I propped it up on two boards.
Step
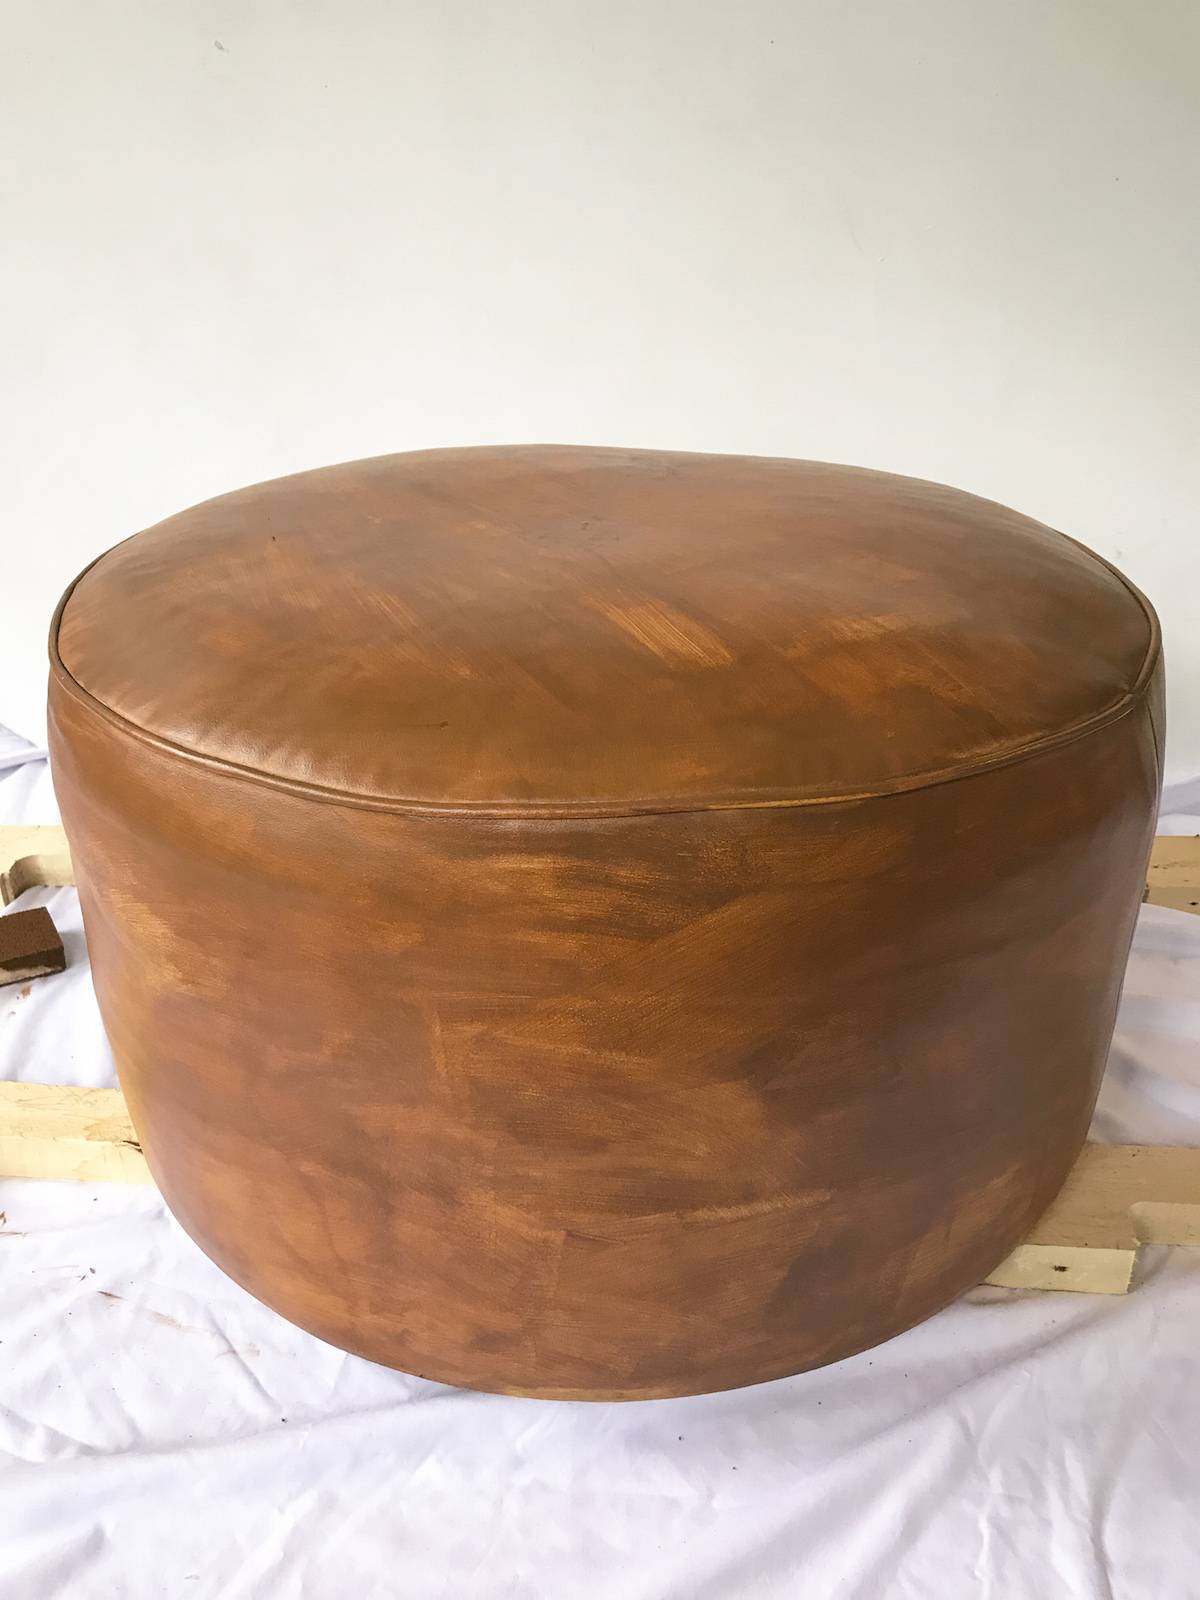
Apply coat three. You can see the streaks are slowly starting to blend with each coat. Many of my lighter spots could have been covered up in my second coat if I just would have let it dry. After the third coat I spot touched the bigger ones with a thin layer of dye and let the touch ups dry for an hour. I left some of them because it was starting to look distressed and I like that look in leather.
Step
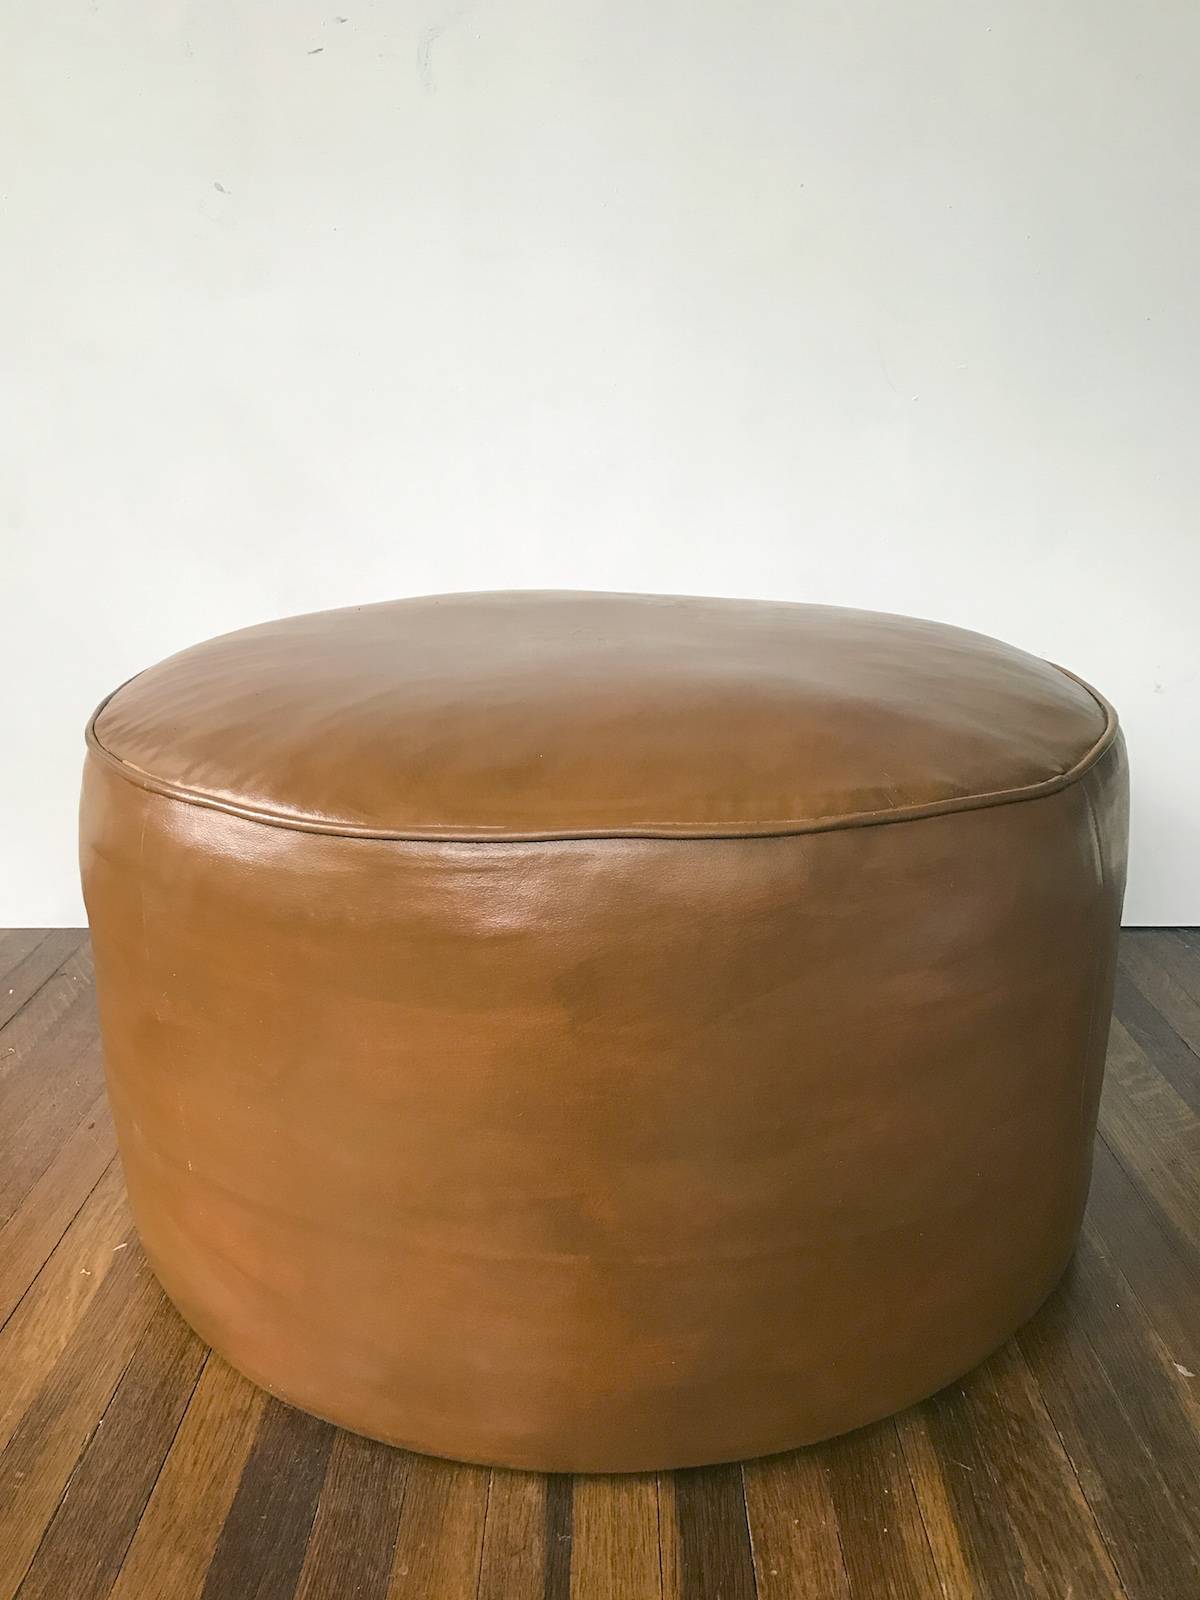
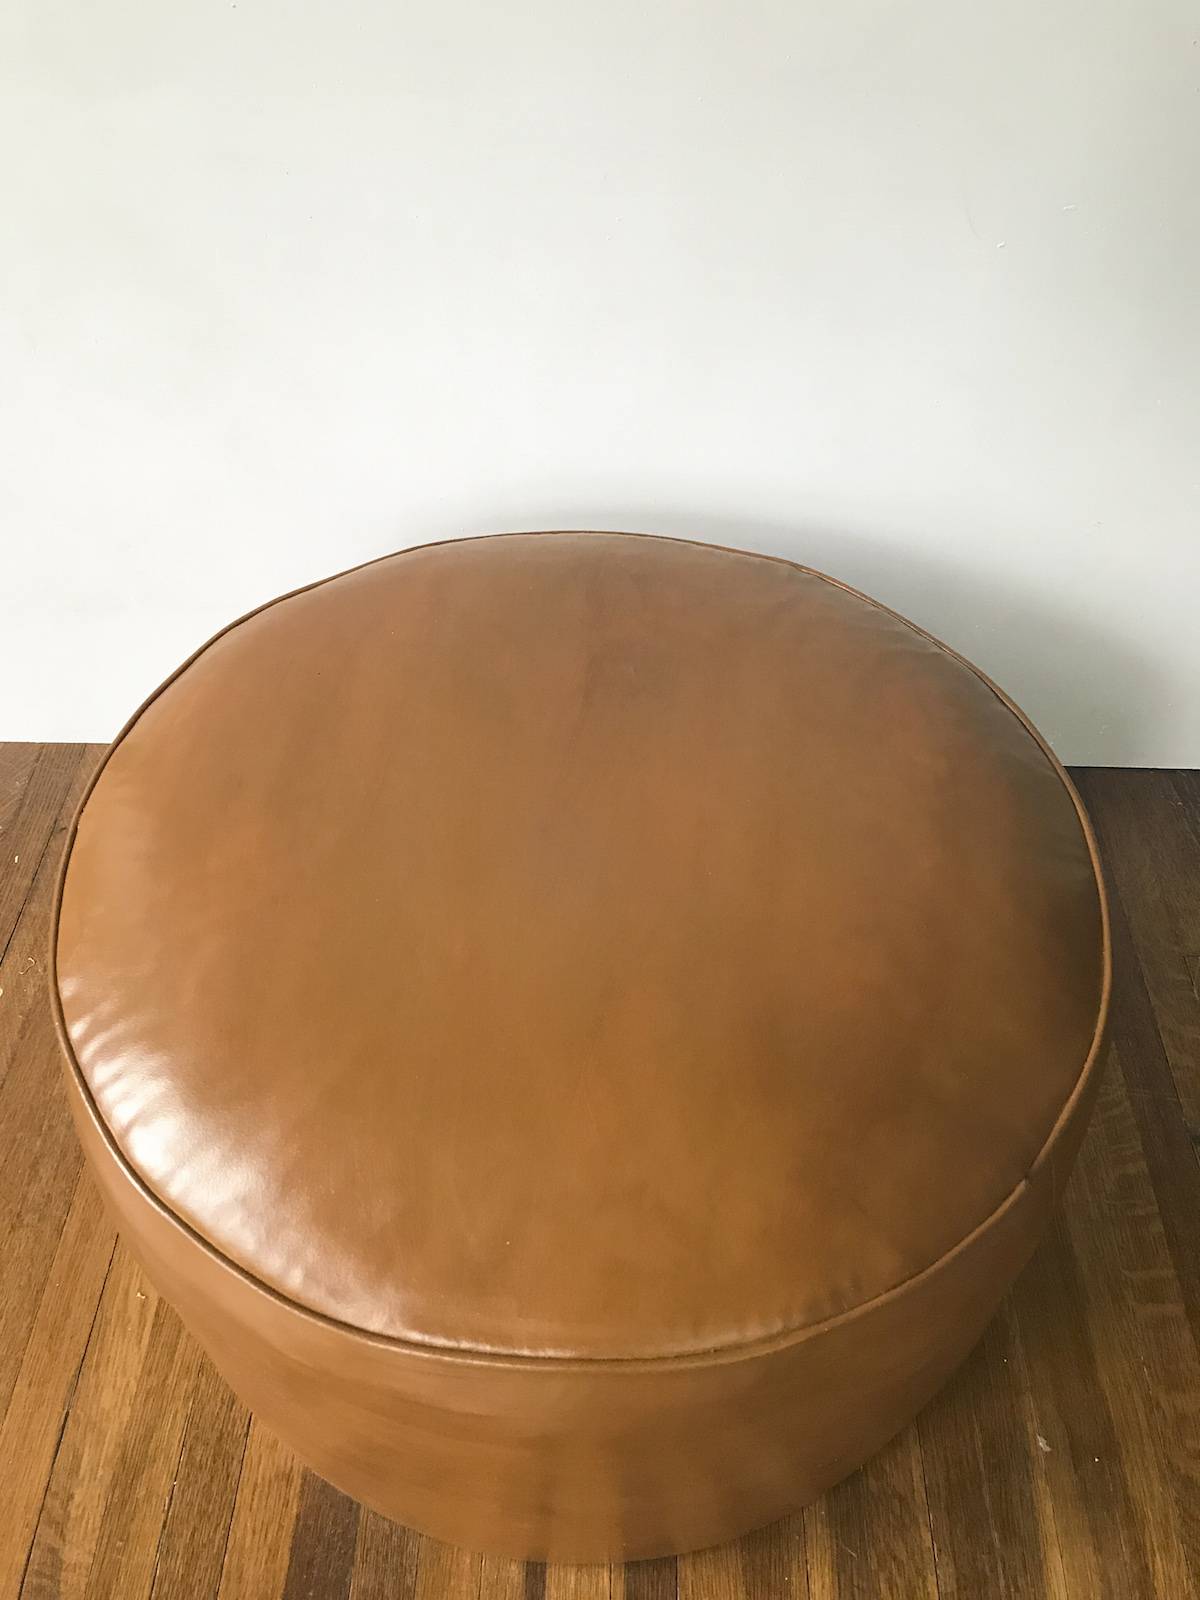
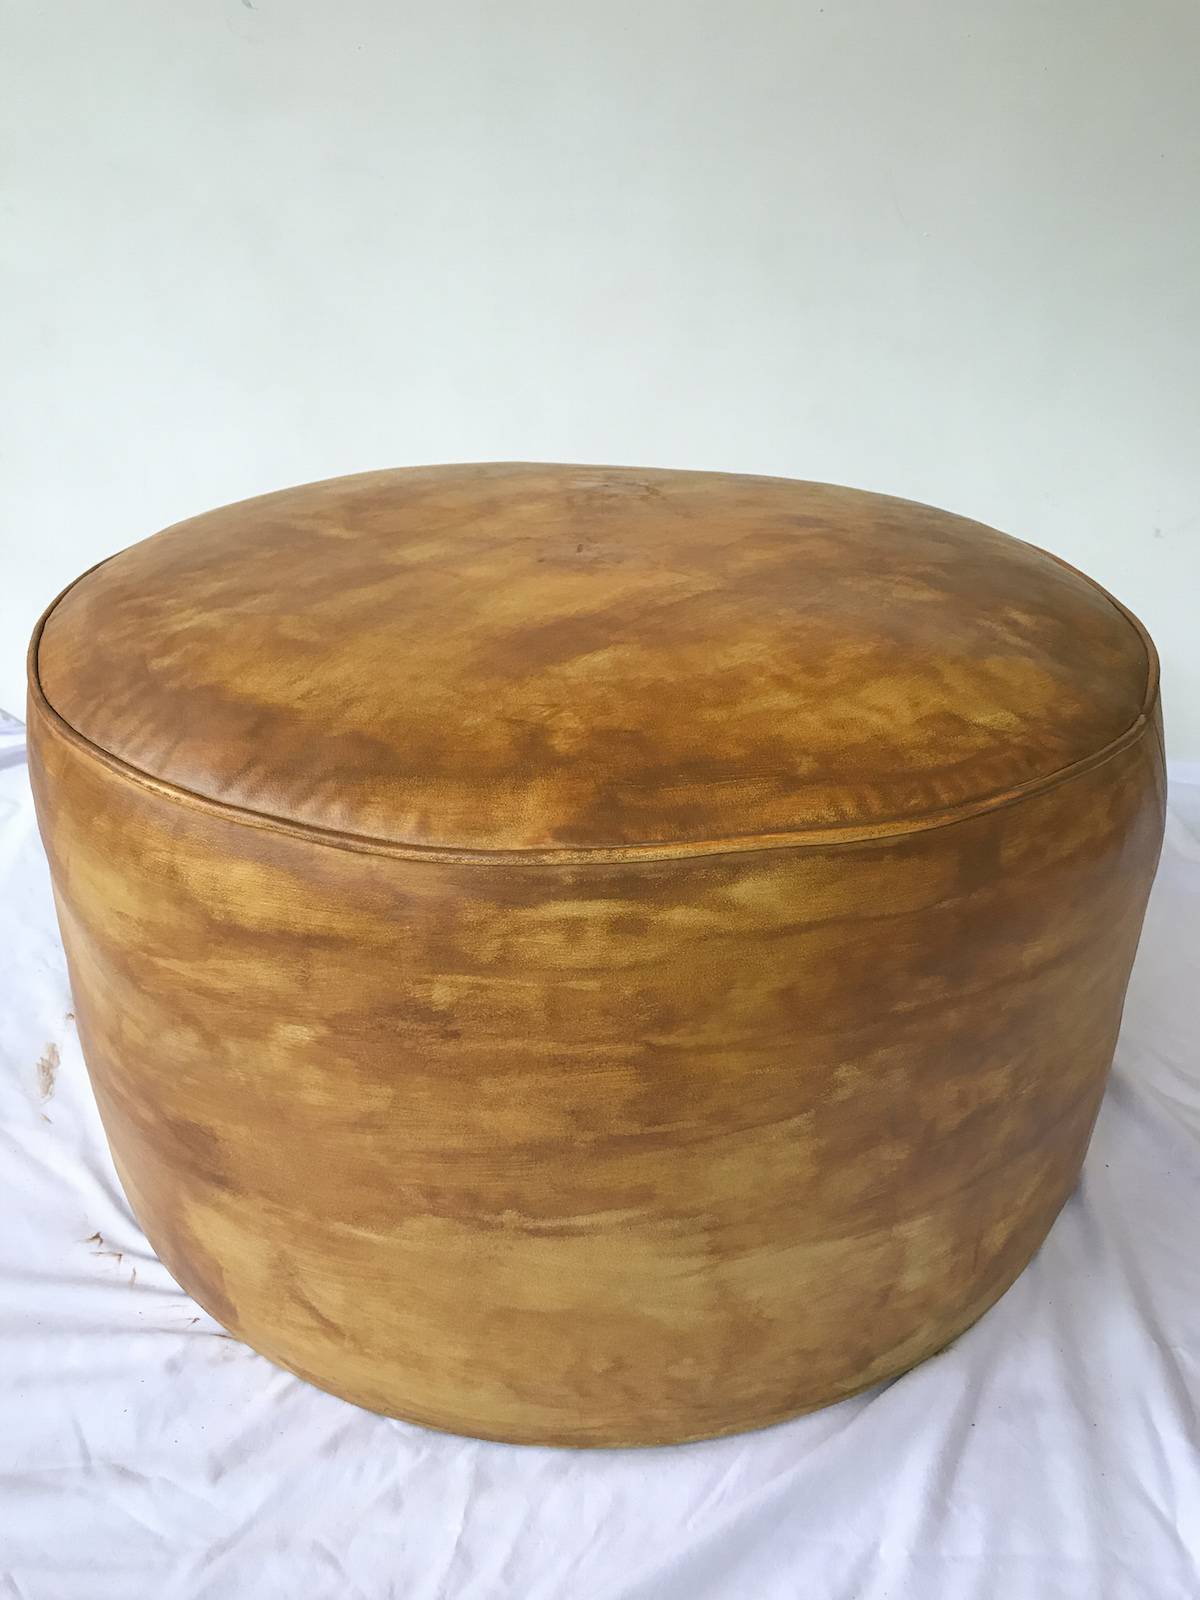
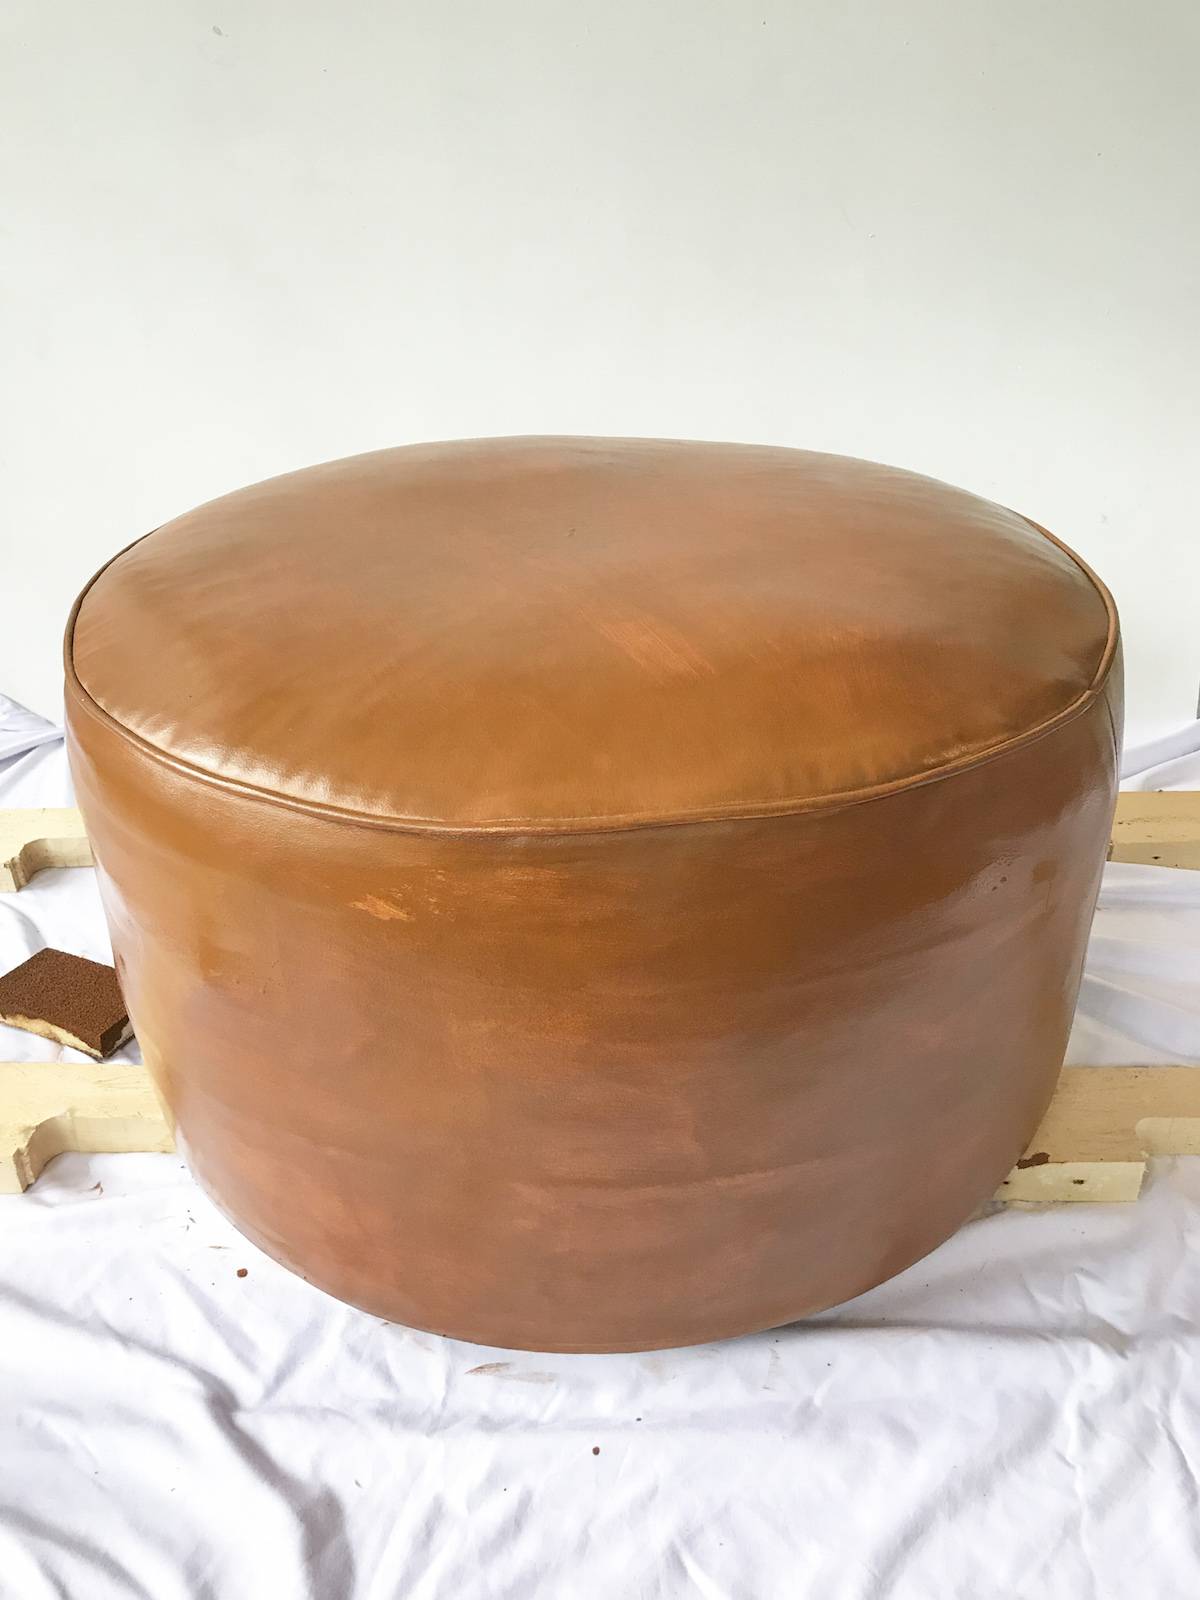
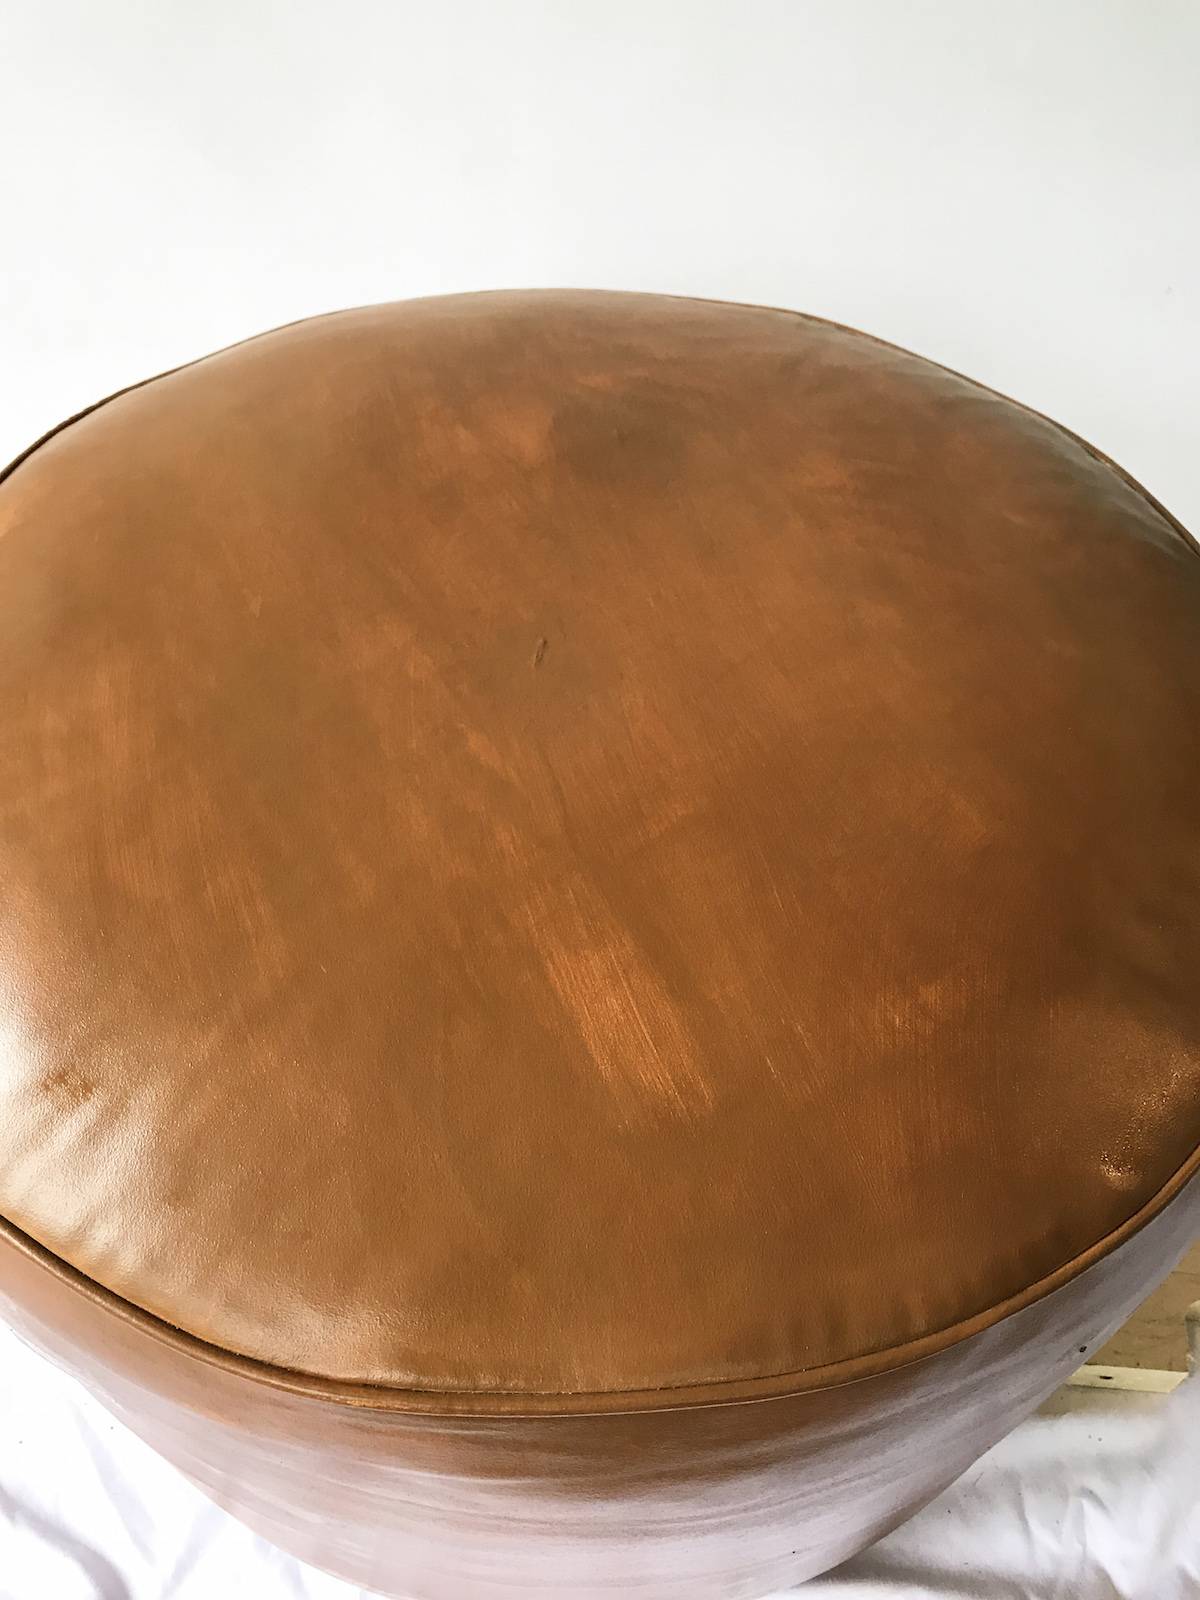
Apply your final coat. Since I was dying a light leather, it only took 4 coats. My guess is you would have to do at least three more coats if you were dying a dark leather. I only used less than 1/4 of my bottle for this pouf. A little goes a long way! Needless to say I am STOKED at the results. My husband, who was very skeptical of the results project, walked in an was floored how good it looks. I am not sure if I would dye a large piece of furniture such as a sofa, but for small projects like a bench or chair, I would totally try it again.
Step
Allow 48 hours for your piece to dry complete before using it. It will be dry to the touch sooner than 48 hours, but don’t jump the gun! The piece needs to cure completely to keep from your clothes or rugs.
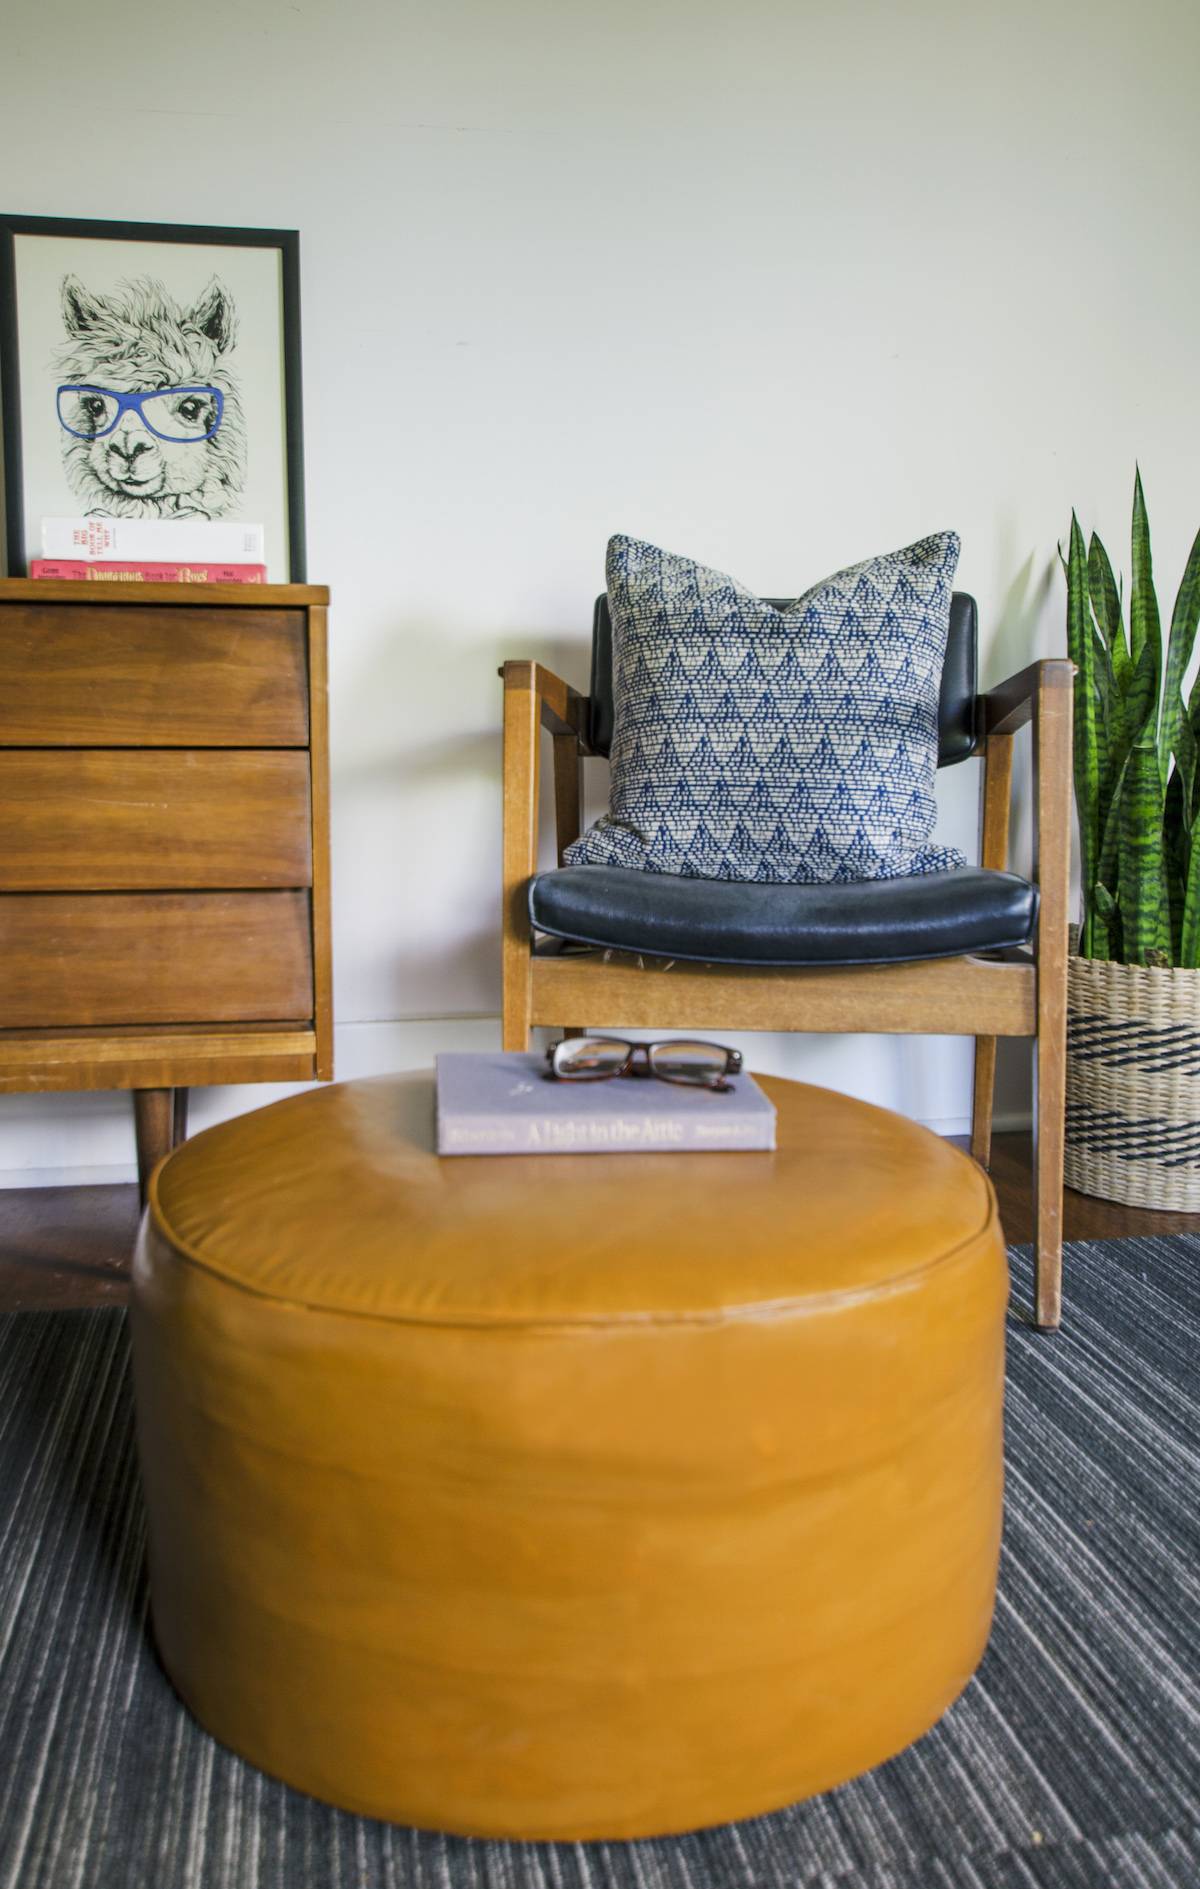
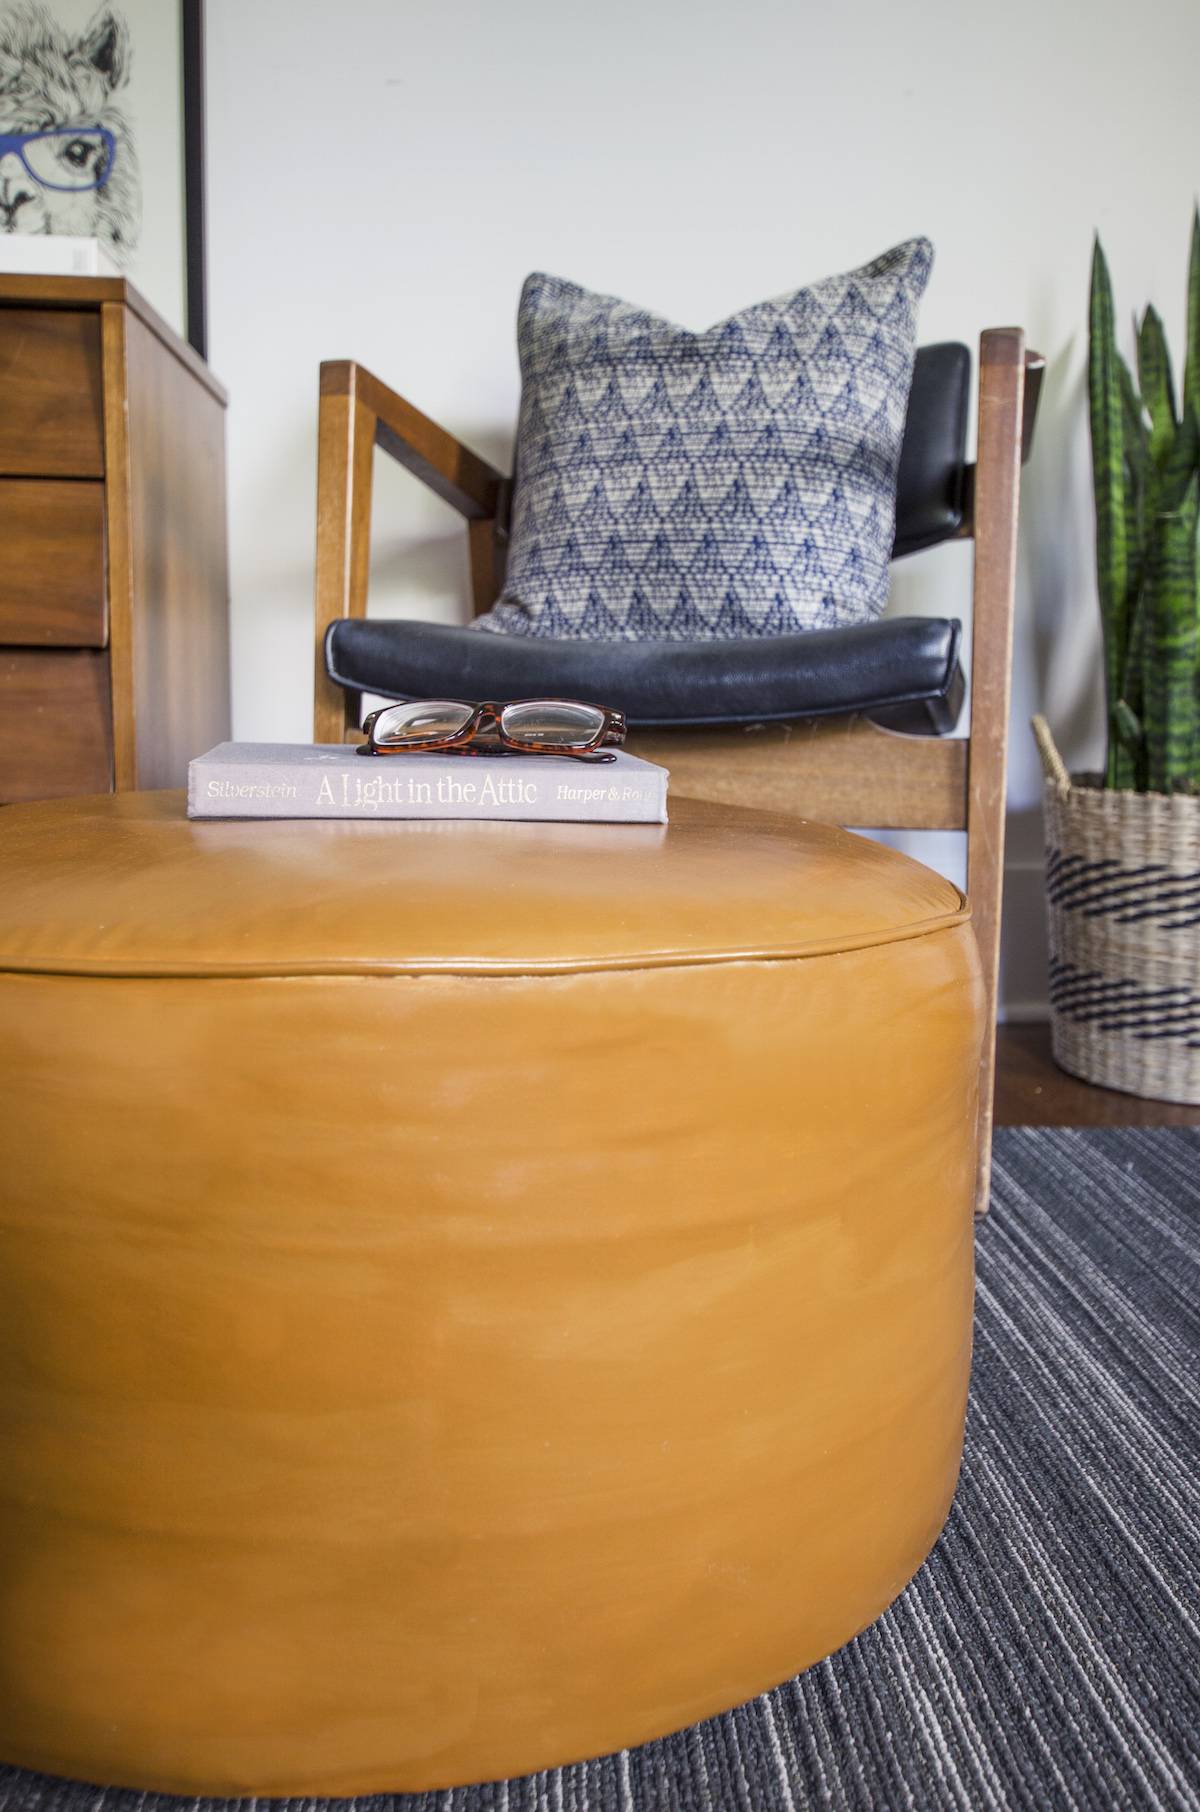
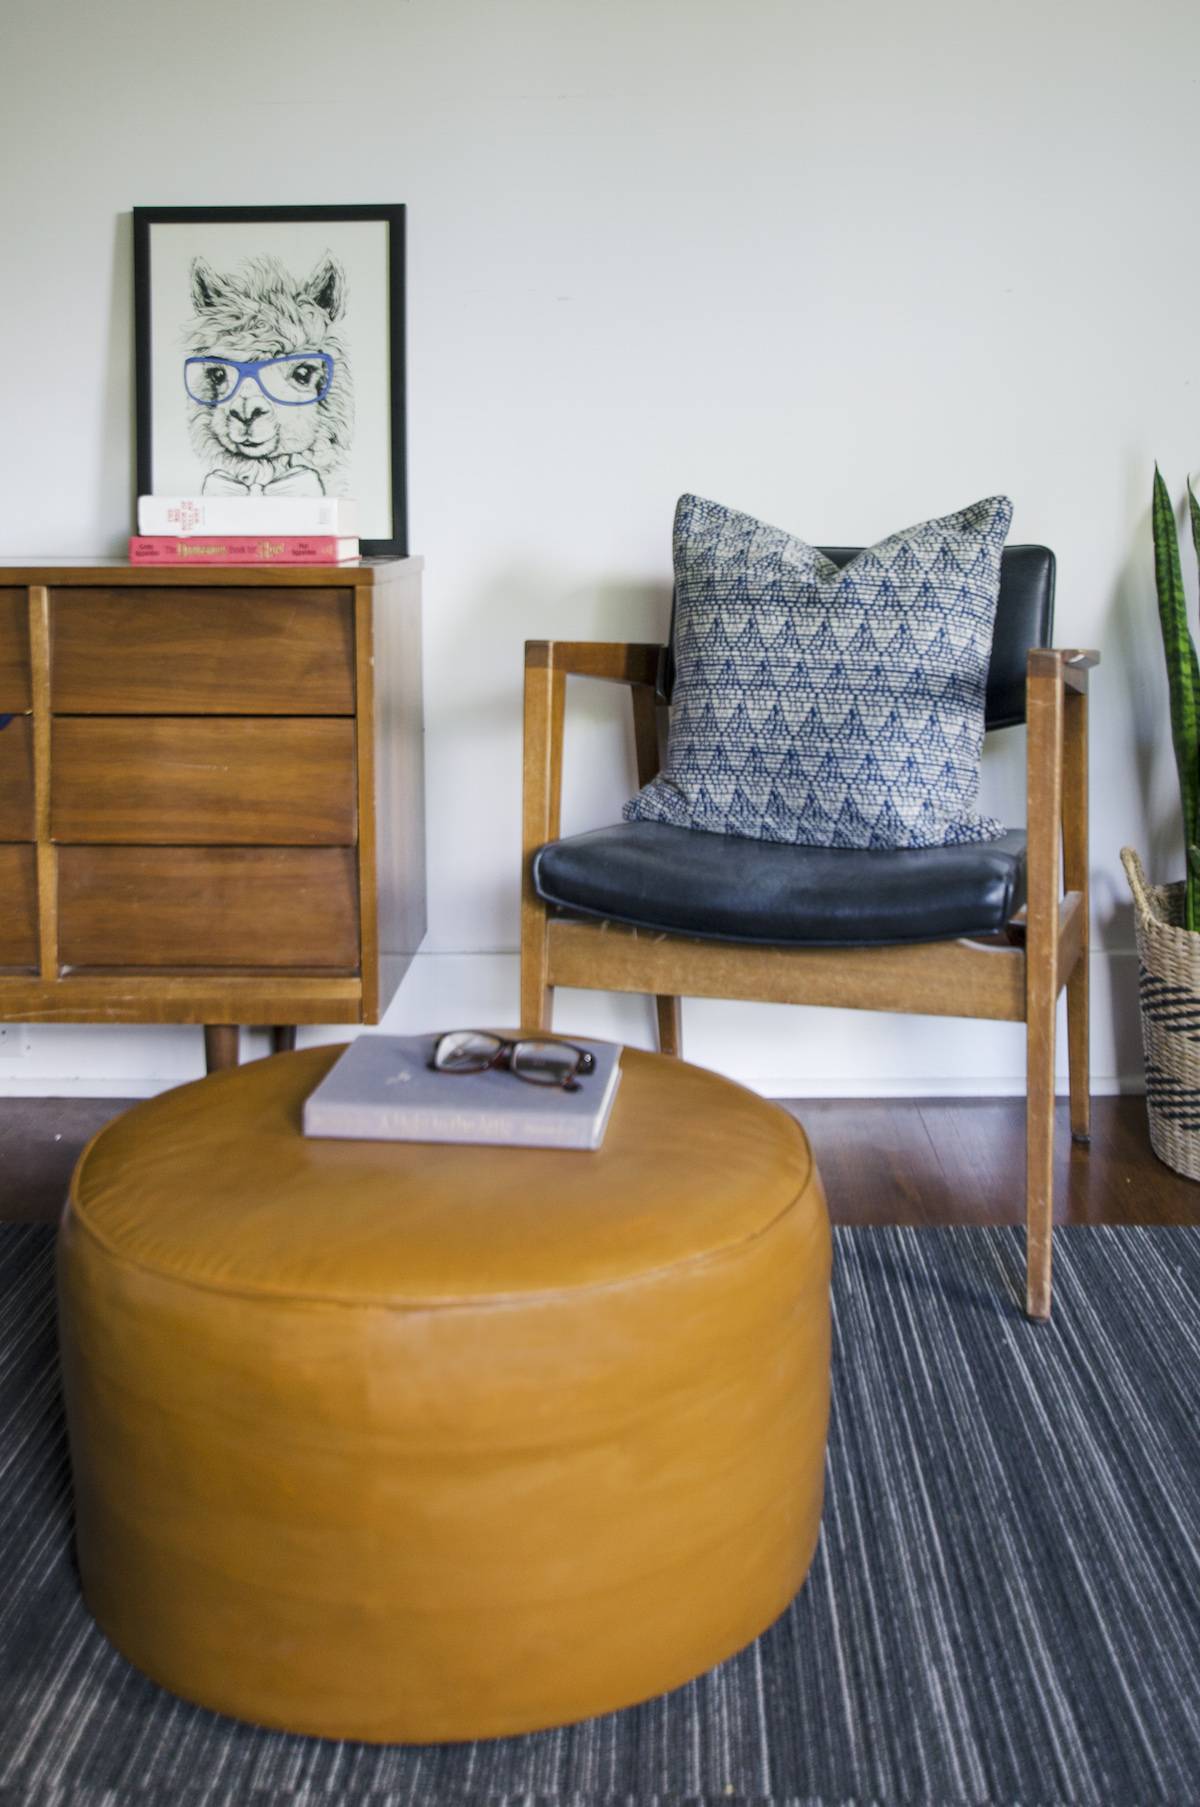
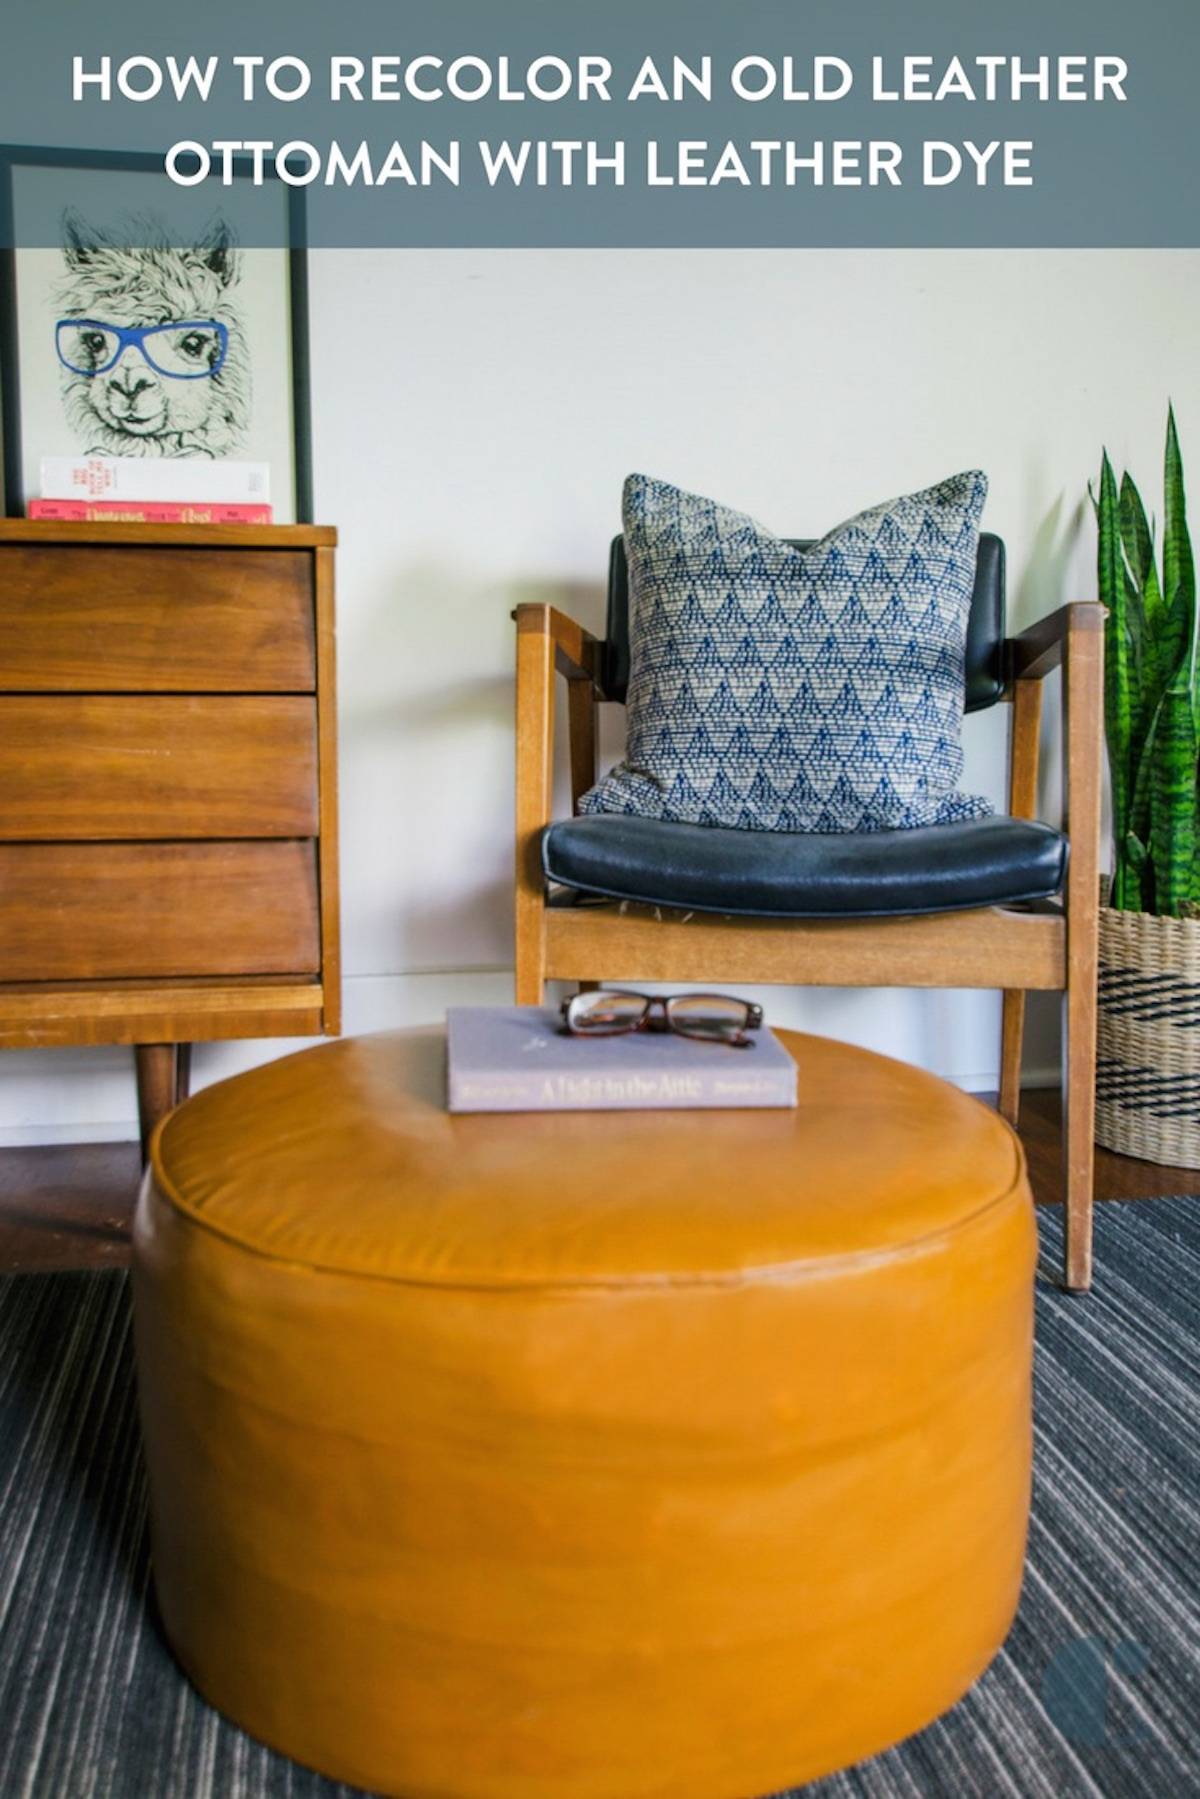
I love how it turned out, and we have already put this thing to good use in our house!
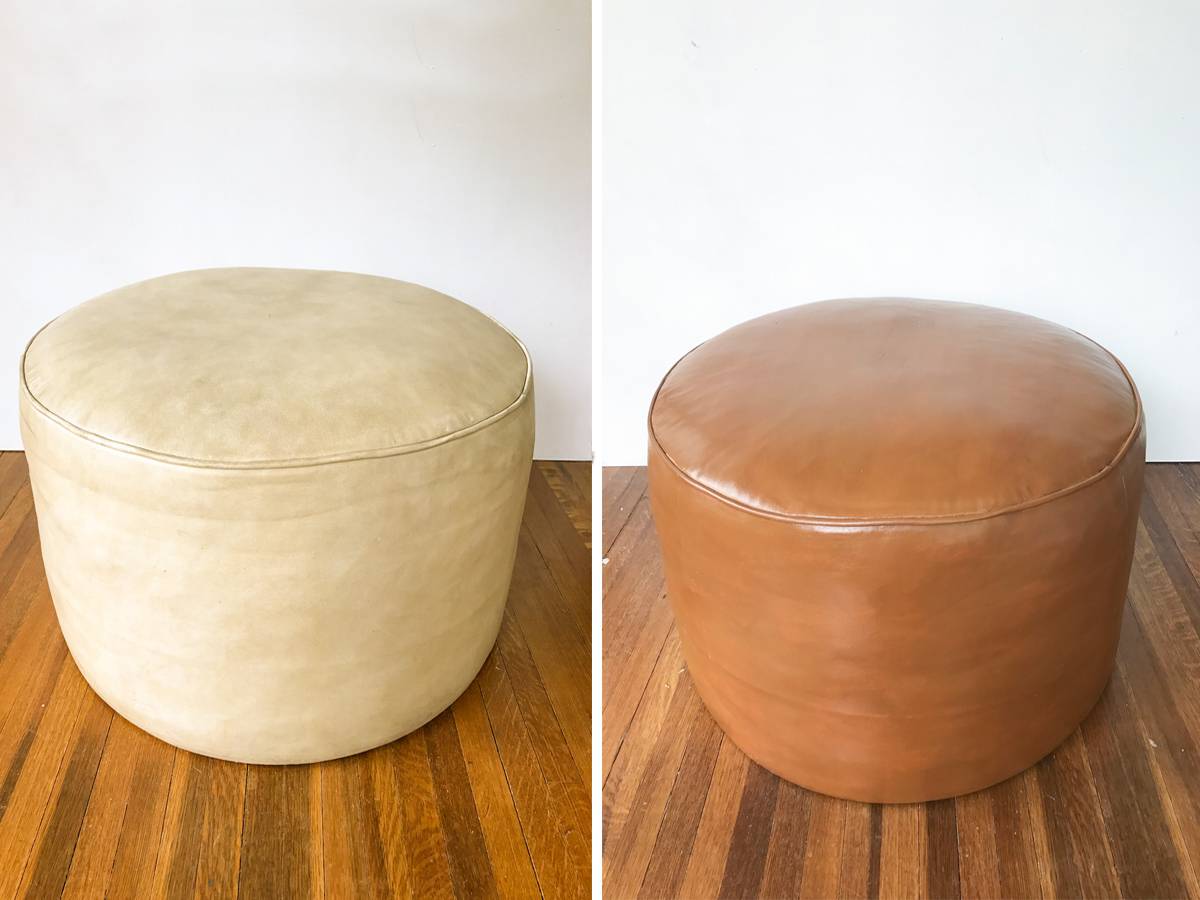
Just for fun, here’s a good before and after. Quite a difference right?
I’m excited to find another project to apply my new leather-dyeing skills to!
Nice job! It looks great!
Although you didn’t mention it, Rub ‘n Restore claims that they can use their product on vinyl or leather. How can RubNRestore be used to dye leather and vinyl? They seem like drastically different types of materials. Does Rub ‘n Restore “paint” the surface of the leather (rather than penetrating the leather)?
Hello! I am about to use this product and am looking for others’ experience. Your poof looks great; I’m curious why you wouldn’t use this product for a larger piece since I’m planning to use it for a loveseat. Also, I prefer to avoid too many chemicals and wonder if you used lacquer thinner to clean your pouf, as they recommend in the instructional videos. I really appreciate you sharing your experience! Julia