Here’s another project from my quest to re-use old ball point pens. (Here’s a first.)

Materials:
12 used ball-point pens
Three pieces of 1” hardwood: 11 1/2 x 4 1/4”; 11 1/2 x 3”; 11 1/2 x 1 3/4”
Wood glue
Bar clamps
Electric Drill and Masking Tape or Drill Press
1/8” Drill bit
3/8” Drill bit
Wire cutters
1. Cut (using a miter saw or miter box) or have the wood cut to size.
2. Disassemble the pens into their component parts: the ball point and ink insert, the cone-shaped tips, and the shaft and end cap. (A pair of taped needlenose pliers will help)
3. On the longest piece (11 1/2 x 4 1/4”) mark 8 evenly spaced holes 1 1/4” apart on the front (thickness) of the wood.
4. Using an 1/8 inch drill bit, drill the 8 holes 1/4” into the wood. If using a hand drill, use masking tape to indicate the appropriate depth.
5. On the top of the same larger piece, draw a line, parallel the edge, 5/8” from the end. Repeat for the medium sized piece (11 1/2 x 3”).
6. Drill six 3/8” holes 1 3/4” apart, evenly spaced from the ends, 3/16” deep.
7. On the smallest piece, drill four 3/8” holes 3 inches apart, 3/16” deep.
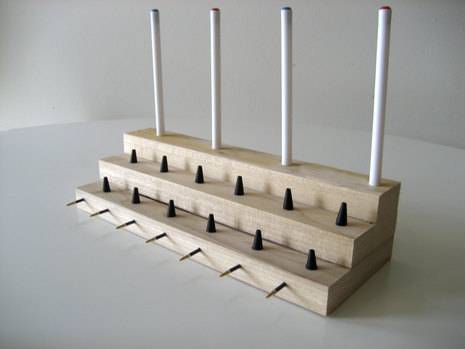
8. Stack the wood together, lining up the back edge, like stair steps.
9. Glue the pieces together, clamp, and let dry overnight.
10. Cut 8 ink inserts to 1” lengths. Make a pool of glue, and dip the ball points in glue to prevent any ink flow, and then dip the cut ends in glue. Insert the pen inserts into the 1/8” holes, and remove any excess glue.
11. Repeat the process, dipping 12 cone-shaped tips in glue and inserting them into the 3/8” holes of the two lower tiers.
12. Lastly, dip the pen shafts in glue, and insert them into the four holes of the top tier.