Making ice with an ice cube tray is easy enough, but, did you know that concrete objects is nearly as easy? With a single silicone ice cube mold, you can make a variety of useful objects for the home. Read on for step-by-step instructions on how to do it!
The six-cube tray used for the projects shown here makes everything easy; no need to build a box or or cube form, because it’s already done! Bbest of all, the pieces come out of the mold with an incredibly shiny, finished surface, as if they were cast on glass.
ShapeCrete is our material of choice here, because it’s no ordinary concrete. There are no chunky aggregates (rocks) in the mix, and yet it’s strong and durable with a 10,000 psi compressive strength (which is way more than you need for these cubes).
It also allows you to create different mixes depending on your needs. You can make it clay-like toi make it workable by hand, or mix it to a pourable “casting” consistency by simply adding more water. ShapeCrete, when used as a “casting” mix, minimizes air bubbles and results in a very tight surface.
Here are a few easy projects that will help jumpstart your own creativity!
Materials
- OXO or Similar Ice Cube Tray approximately 1-3/4” cubes
- 3 lbs. ShapeCrete Mix
- Rubber Gloves, Dust Mask, Eye Protection
- Mixing Tub, Mixing Stick or Trowel
- Water
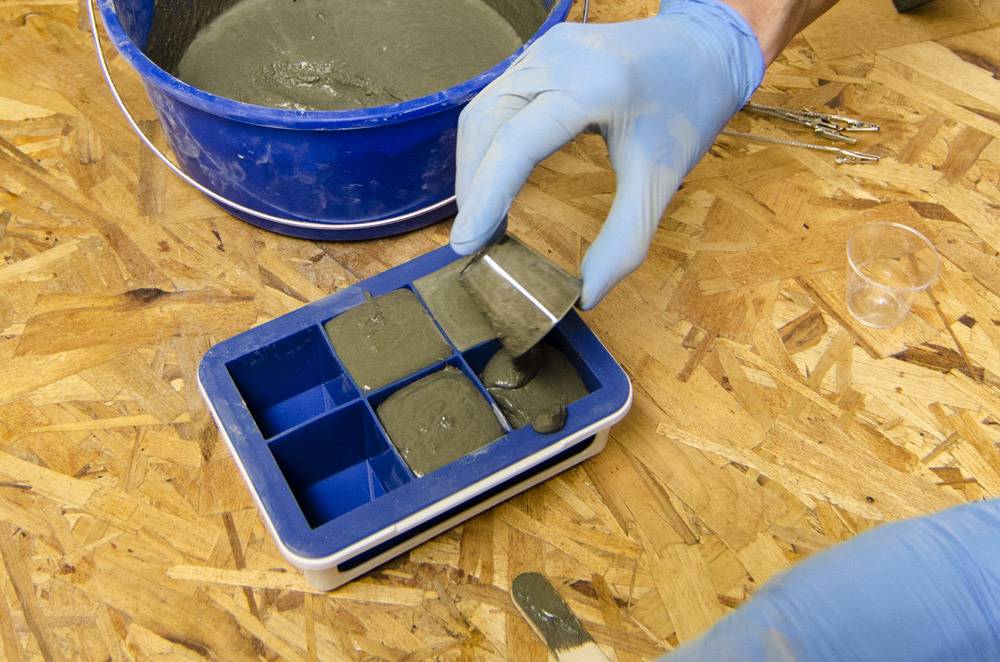
How to Make a ShapeCrete Casting Mix
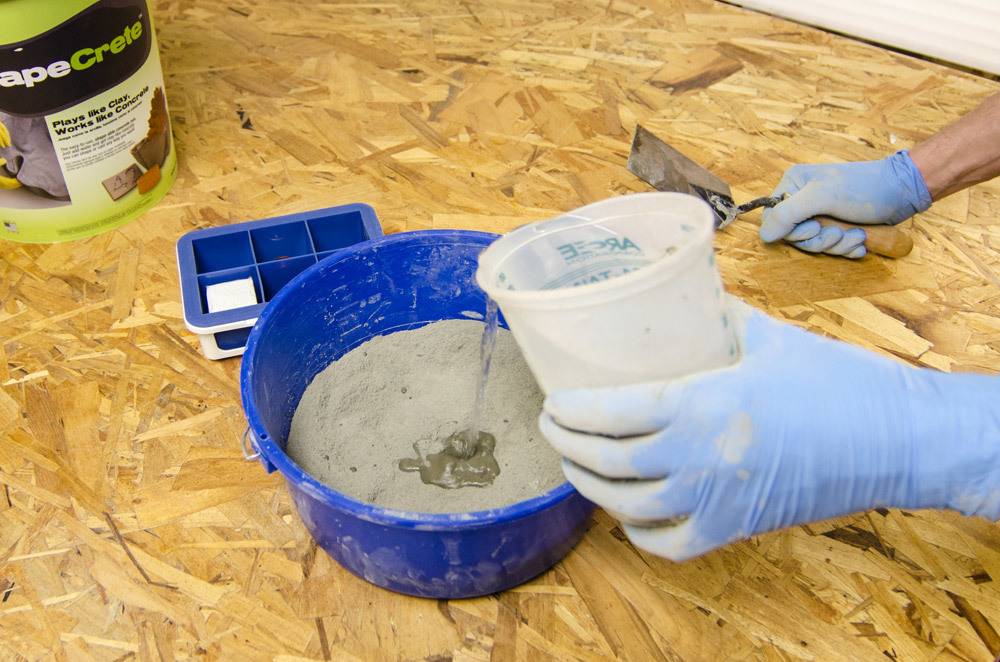

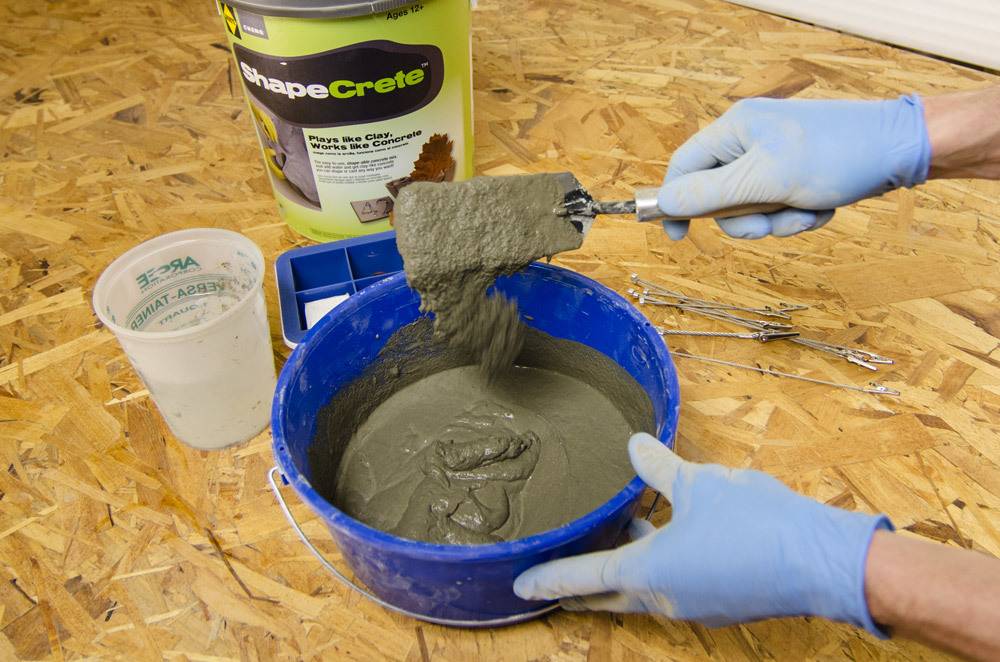
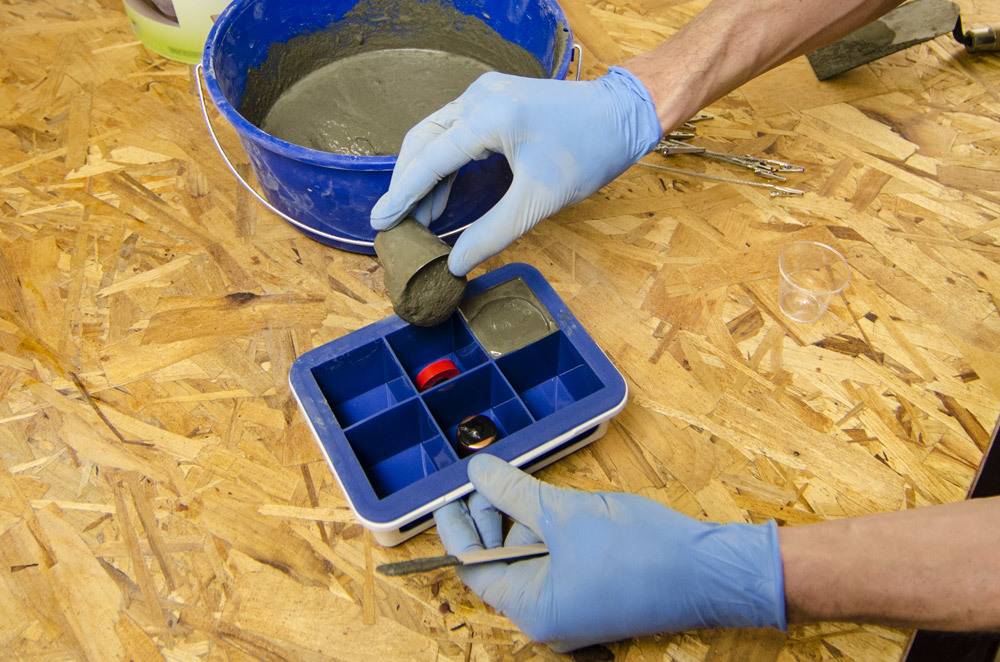
Weigh out three pounds of ShapeCrete mix. Add about 1/2 cup of water to the mixing tub, and then pour in ShapeCrete. Add water in small increments and blend with a trowel or mixing stick. Continue mixing and adding water in small amounts until the mix has a fluid consistency. Avoid adding too much water as this can weaken the mix. It should flow off the trowel as you scoop it up. Watch the How-To Make a Casting Mix video for more tips.
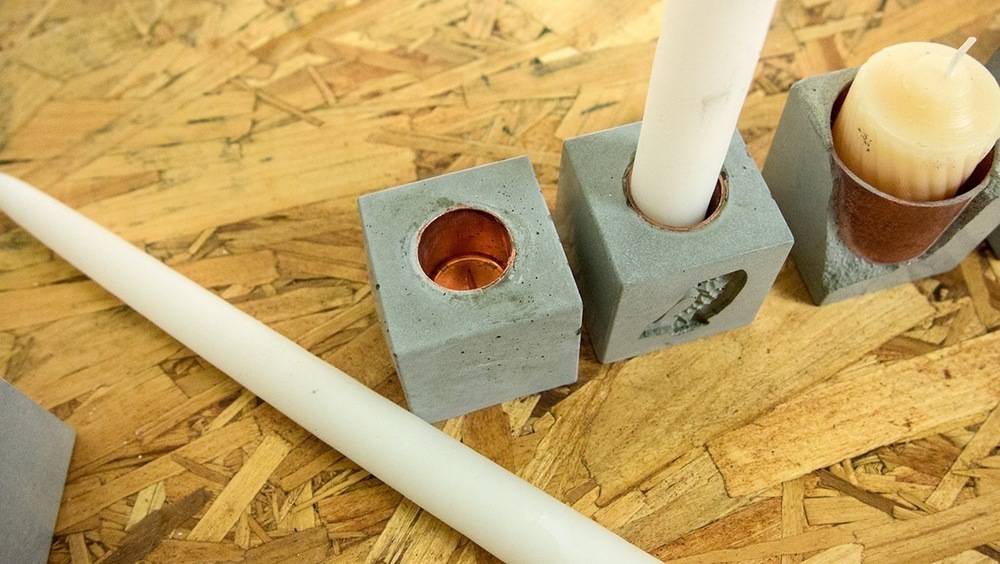
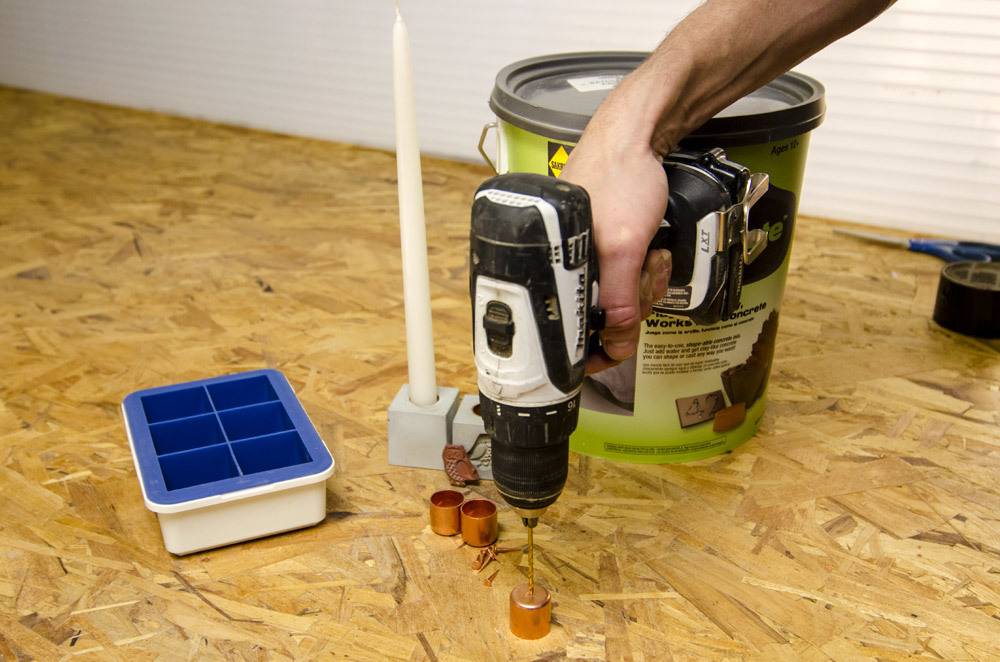
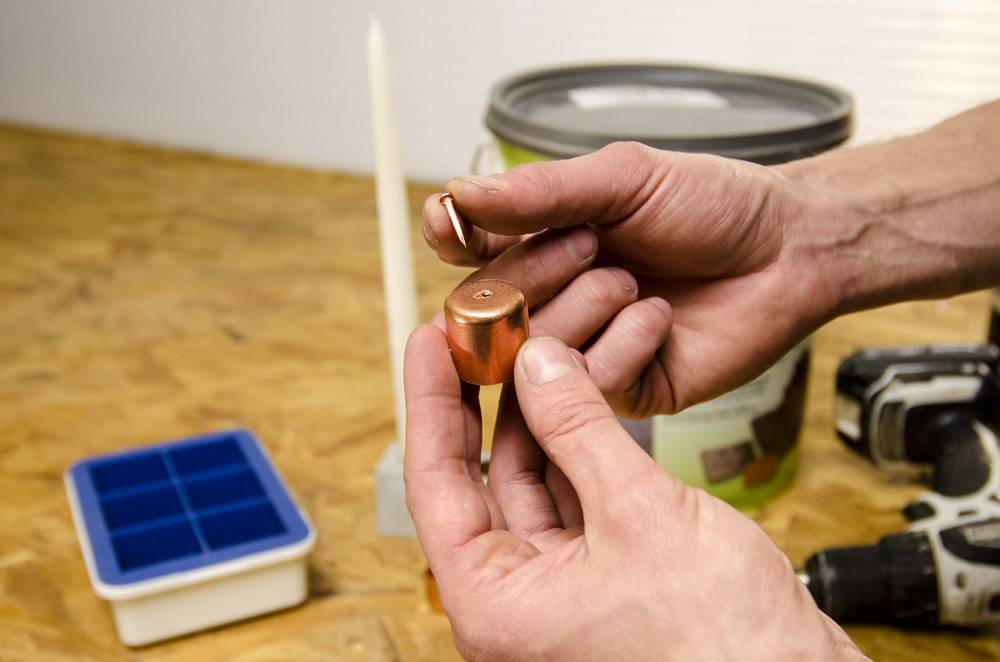
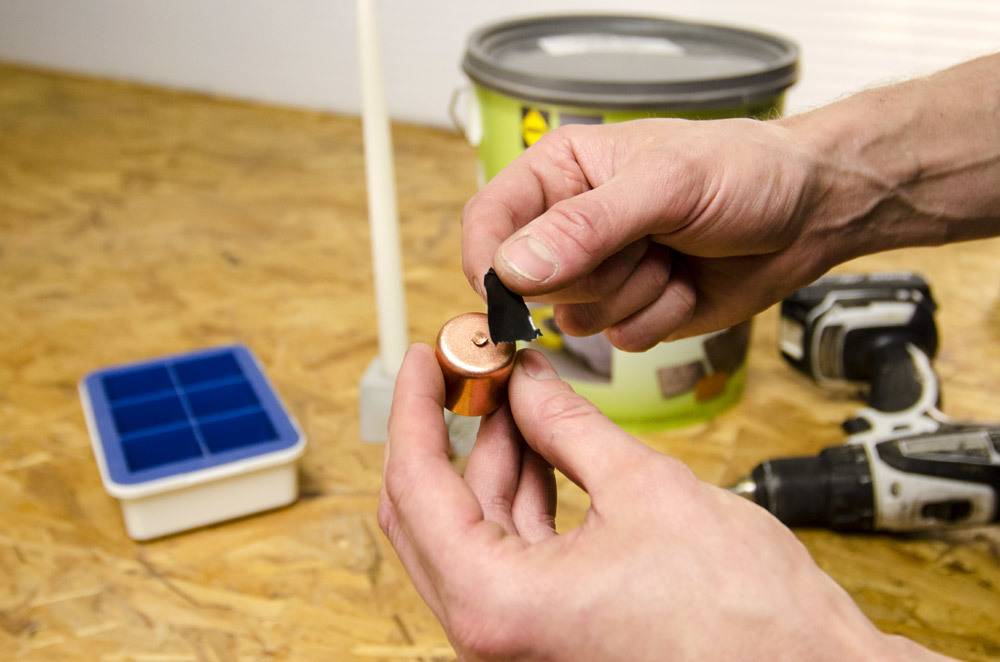
Candlestick Holder
Materials
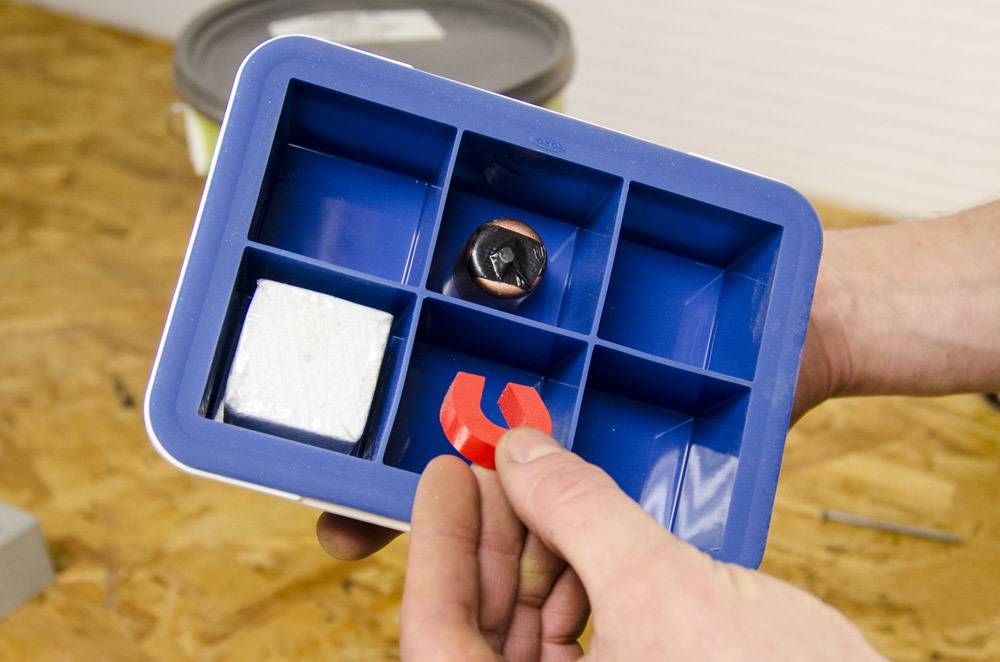
- 3/4” Copper Pipe End Cap
- Copper Cut Tacks
- 3/16” Drill Bit
- Cordless Drill
- Duct Tape
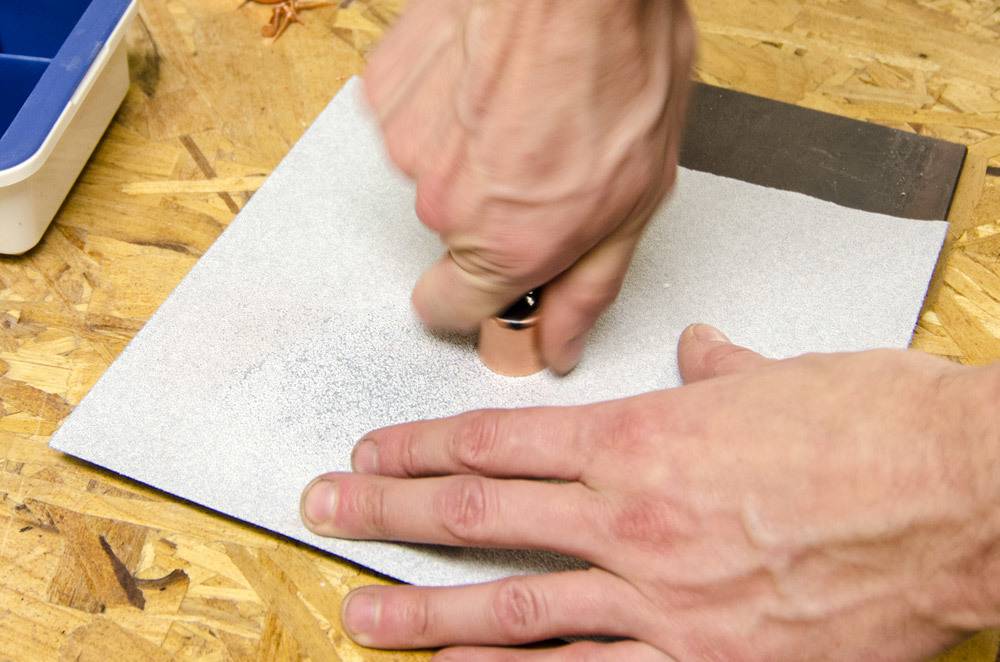
- Sandpaper
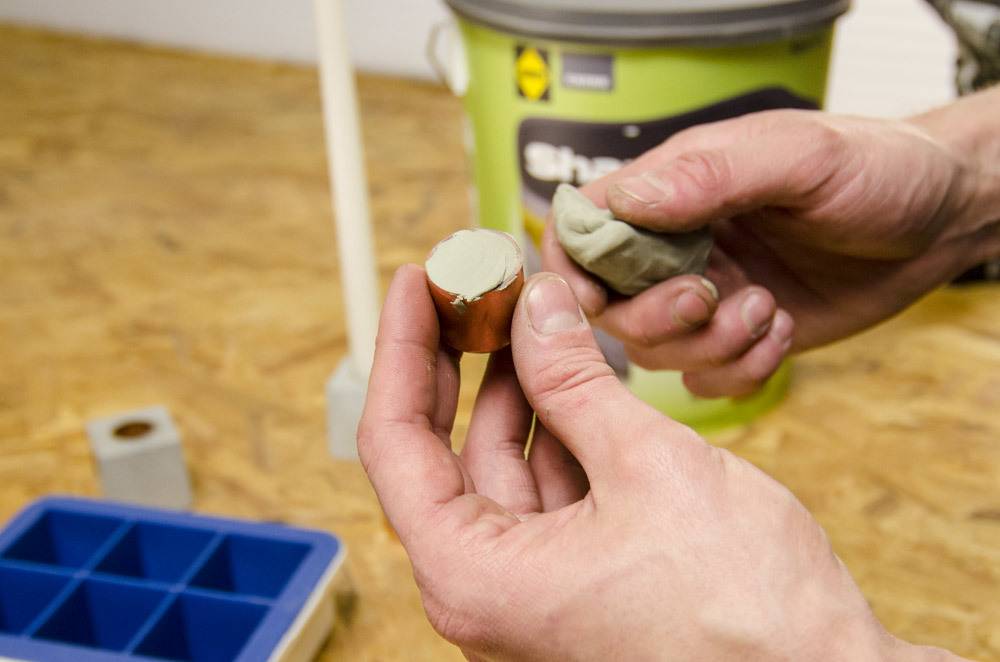
- Modeling Clay
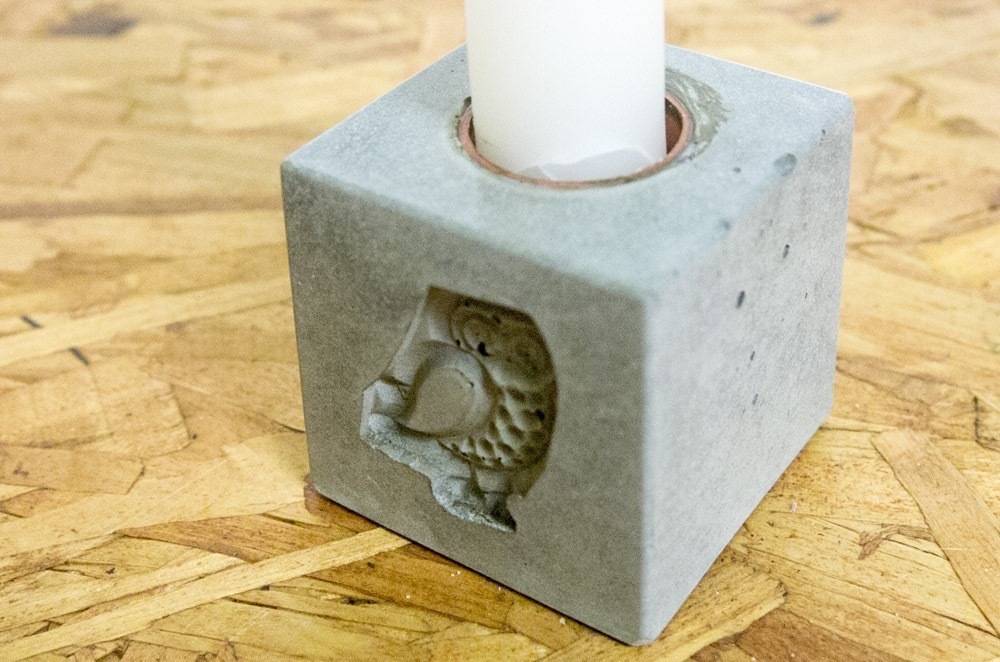
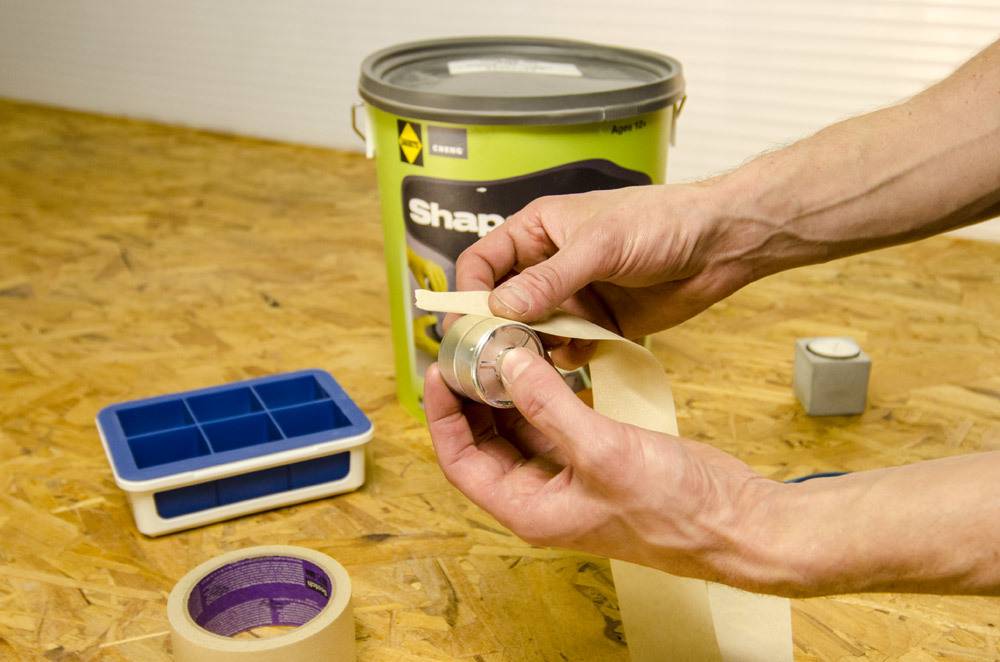
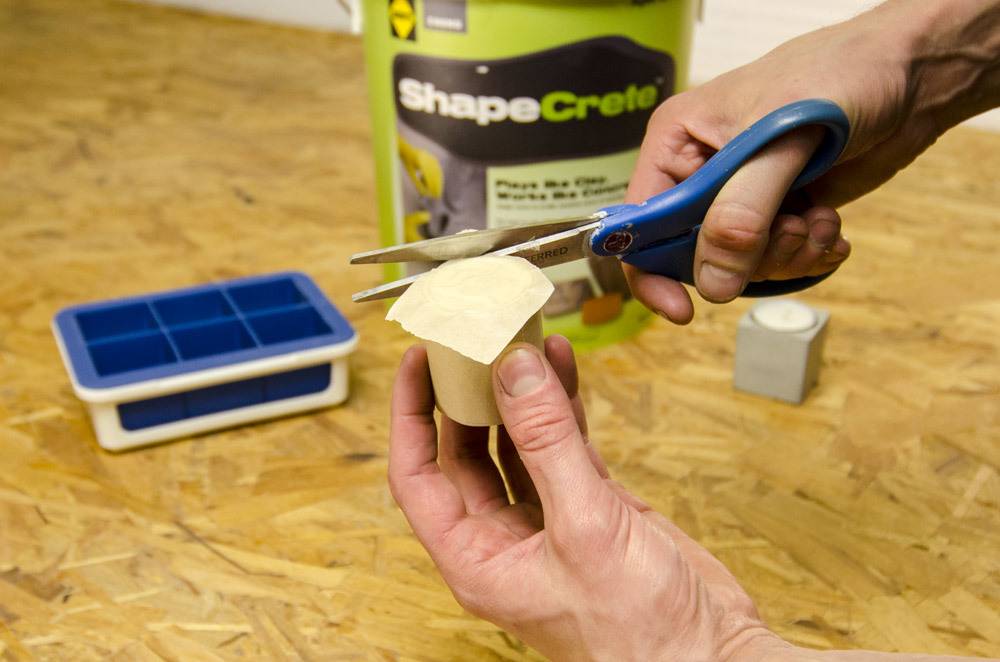
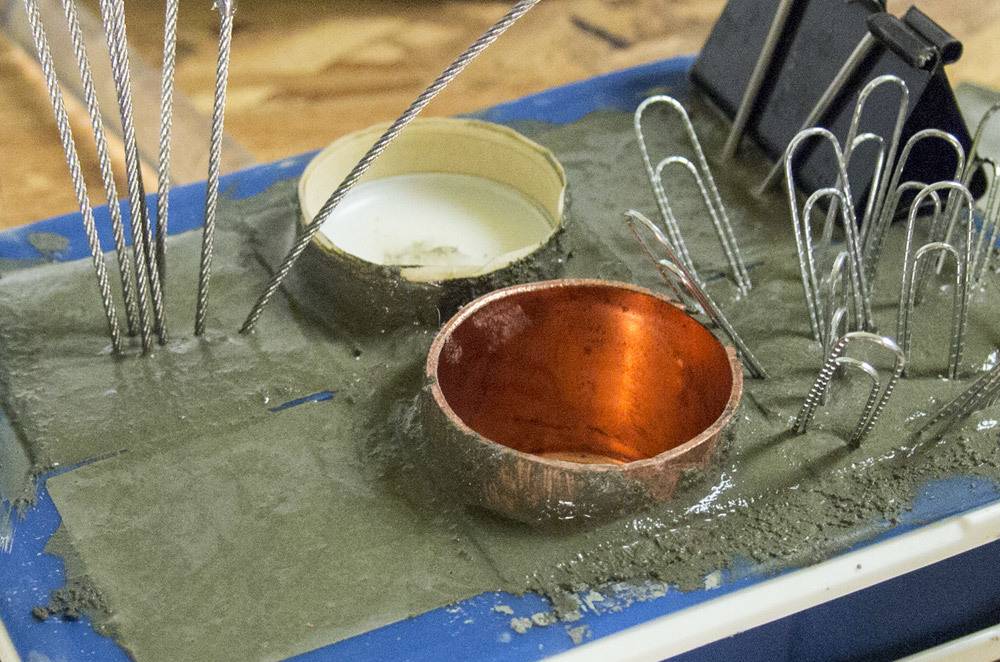
Drill a hole in the bottom of a copper pipe end cap and tape a cut tack in the hole. This will help keep the candle upright.
Sand the rim of the end cap to create a flat, smooth edge. Fill it with modeling clay, then stick it to the bottom of the form.
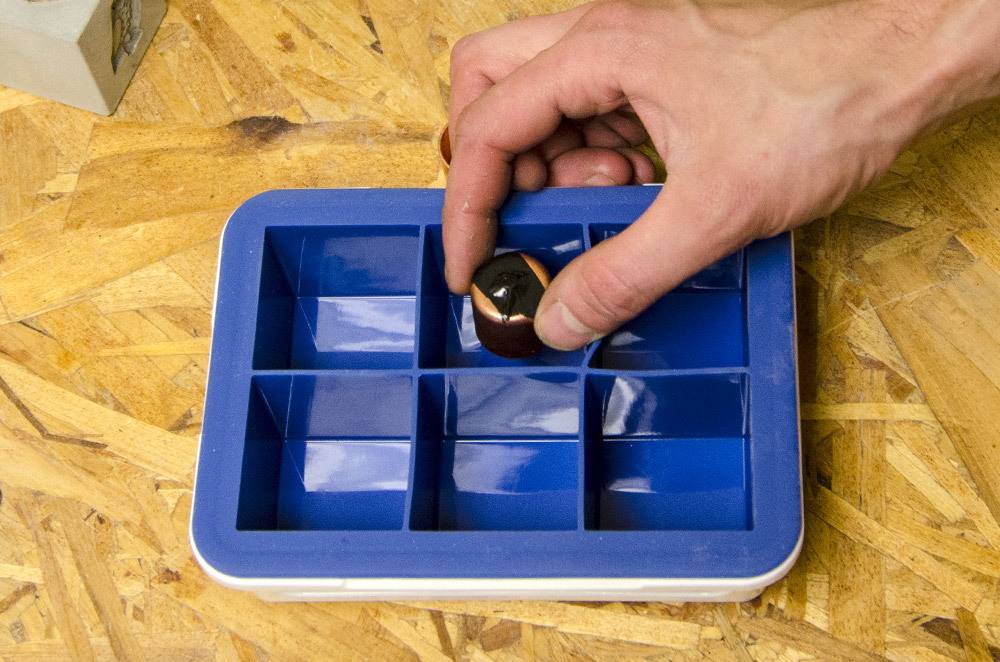
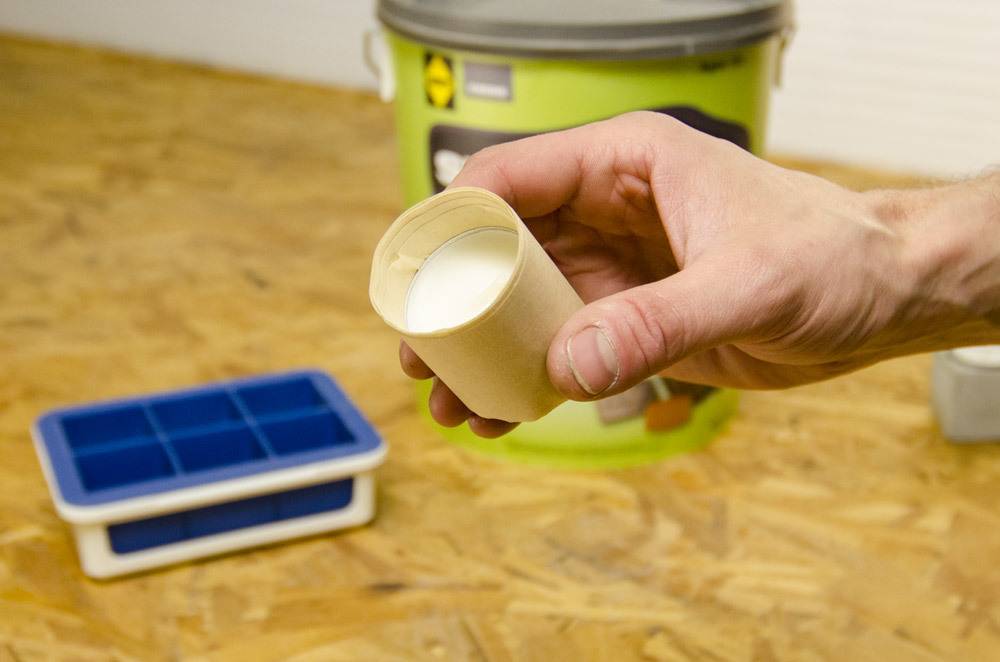
Pour in the ShapeCrete mix, filling it to the edge of the copper pipe. Allow the cube to cure for at least 48 hours. Remove your cube for the tray and presto you’ve made some cool concrete candlestick holders! Finish the surface to your desire. Makes great hostess gifts, especially if you monogram them!
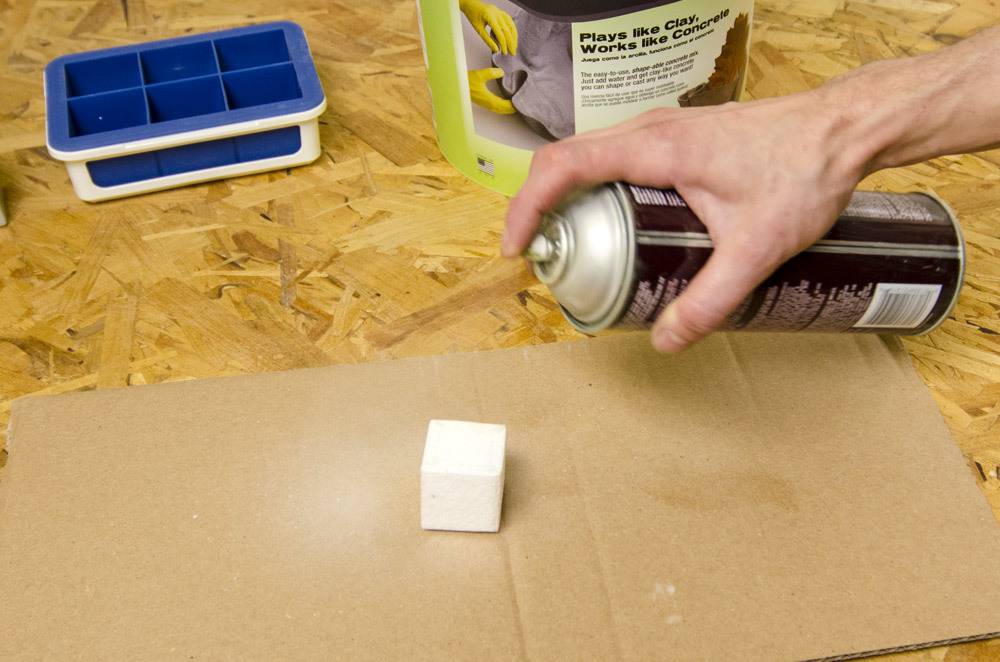
Tiny Cube Planter
Materials
- Styrofoam
- Clear Packing Tape
- Spray Adhesive
- Small Masonry Bit
- Cordless Drill
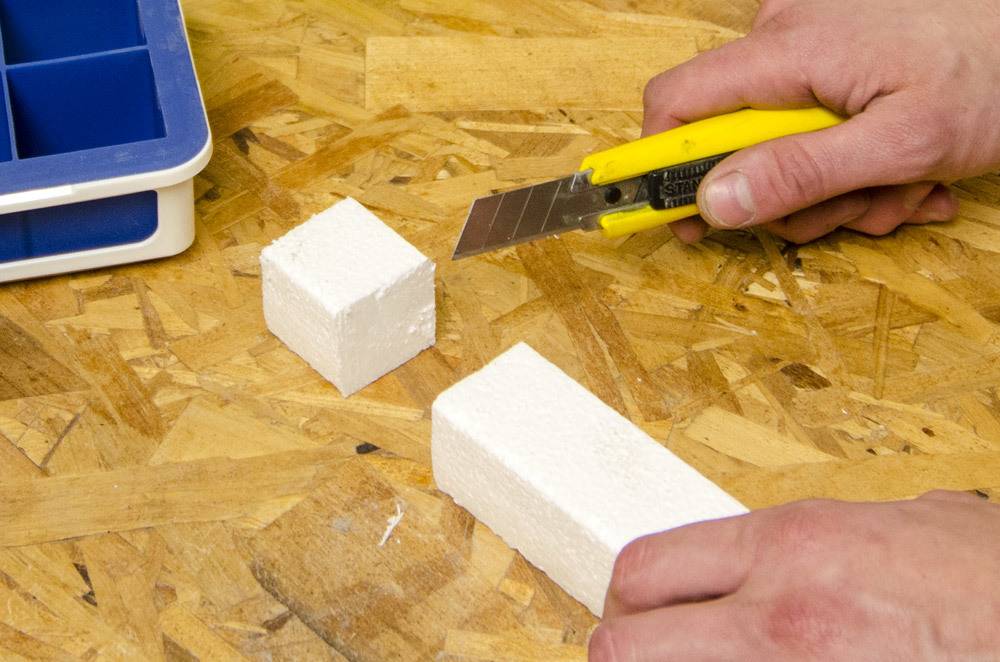
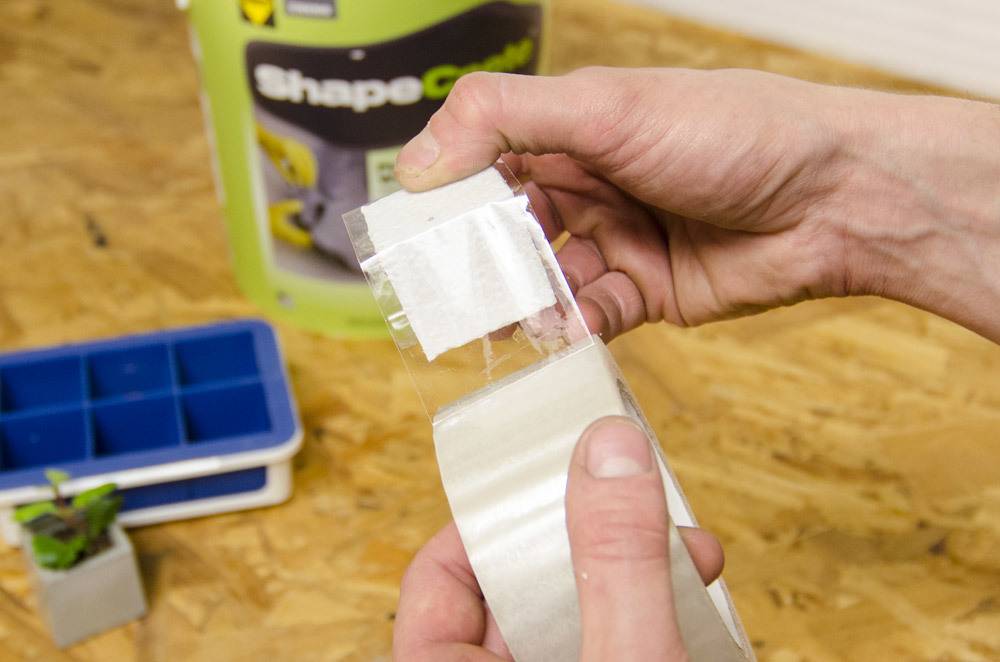
Cut a 1-1/2″ cube out of styrofoam. Tape around the sides and fold the tape over like wrapping a christmas present. Spray one of the open sides with spray adhesive and stick it to the bottom of the form. It’s important to keep it centered because the walls are very thin and could crack. It helps to hold the foam with a screw and then place it into the form.
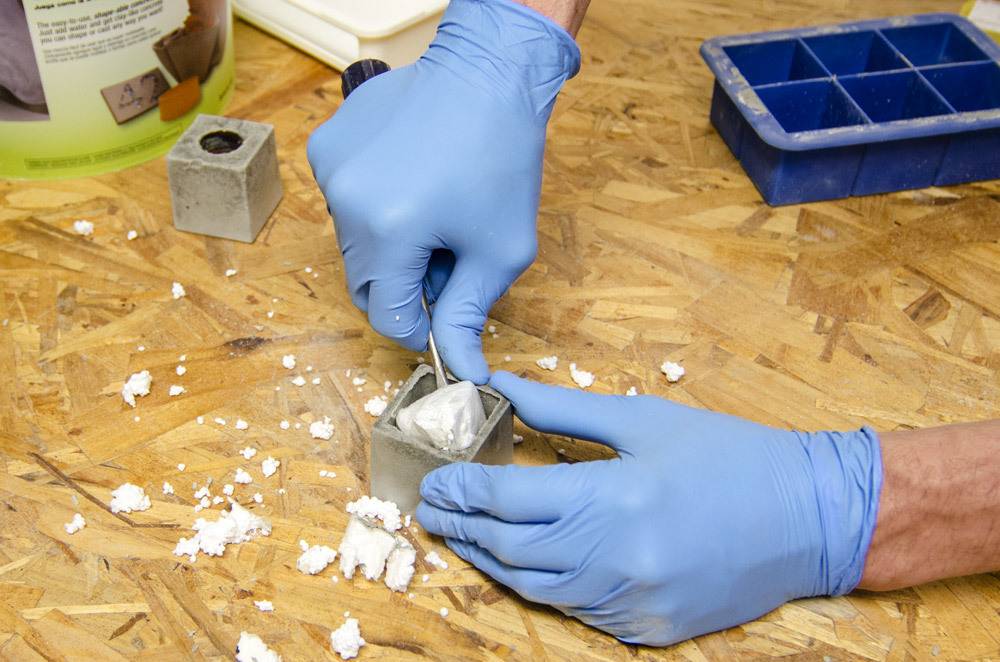
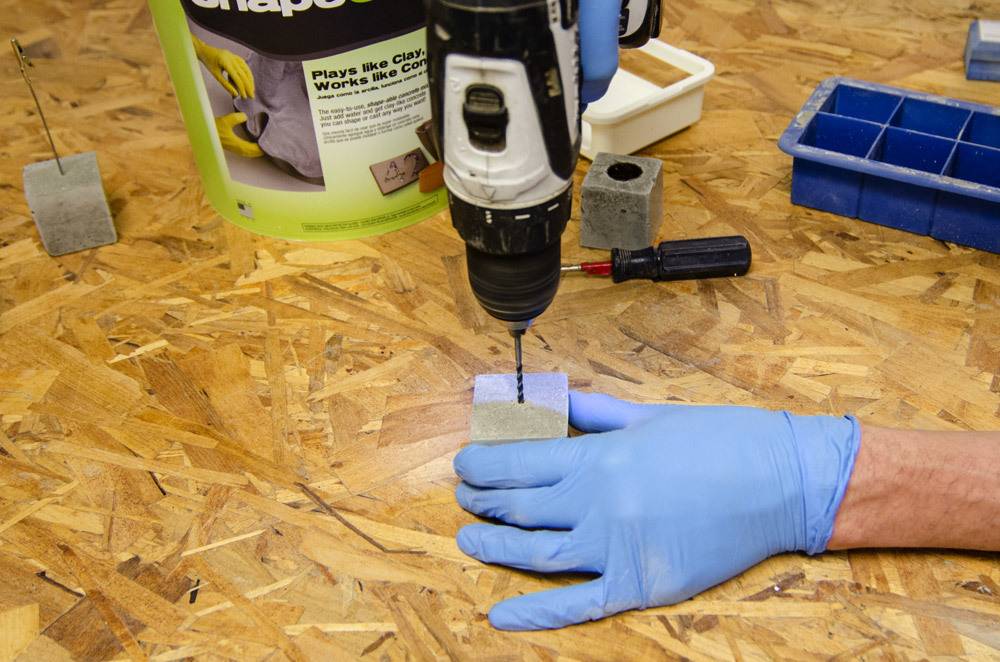
Pour the ShapeCrete mix around the styrofoam “knockout,” filling to just under the top of the ice cube tray. Allow the cube to cure for at least 48 hours. After removing the cube from the tray, carefully dig out the foam taking care not to crack the sides. You can drill a small hole for drainage with a 1/8” masonry bit.
Fill with soil and a tiny, sweet succulent and secretly gift a couple to your neighbors–brighten someone’s day! Or, create a tray full of them and make an outdoor or dining room centerpiece.

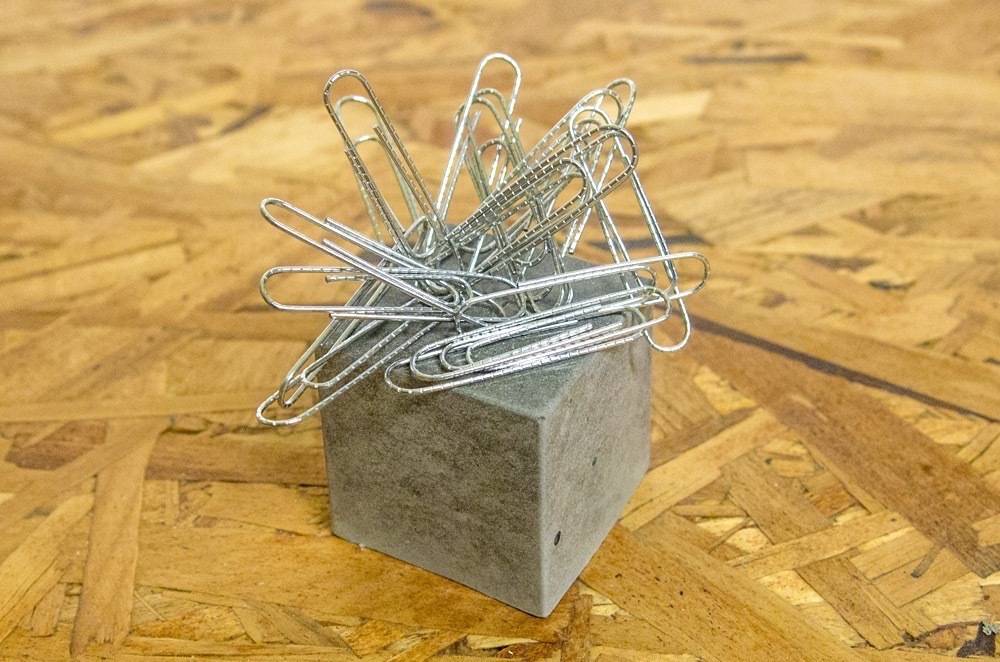
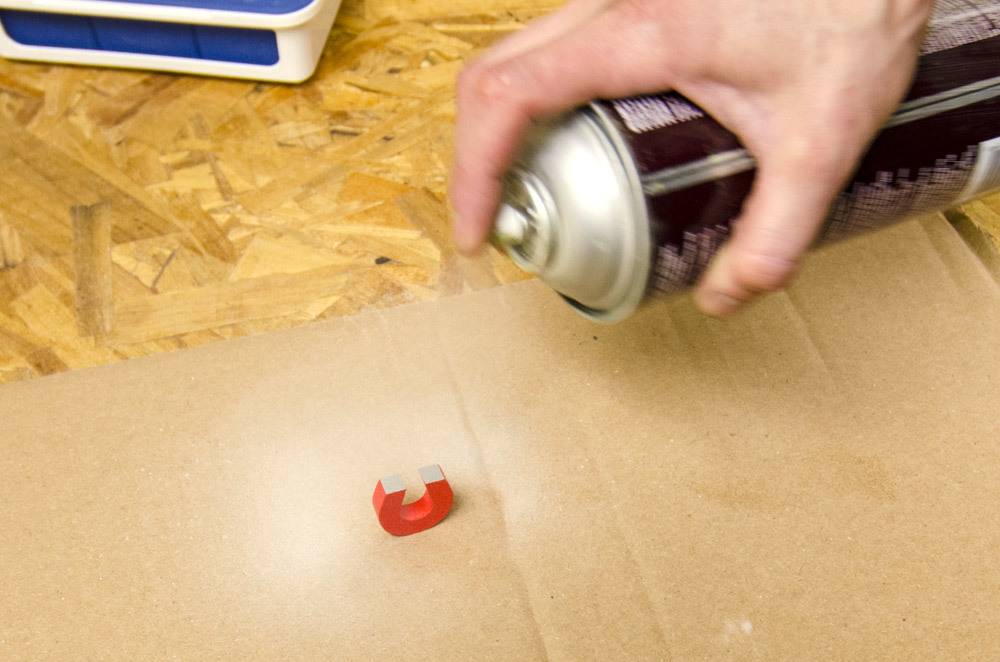
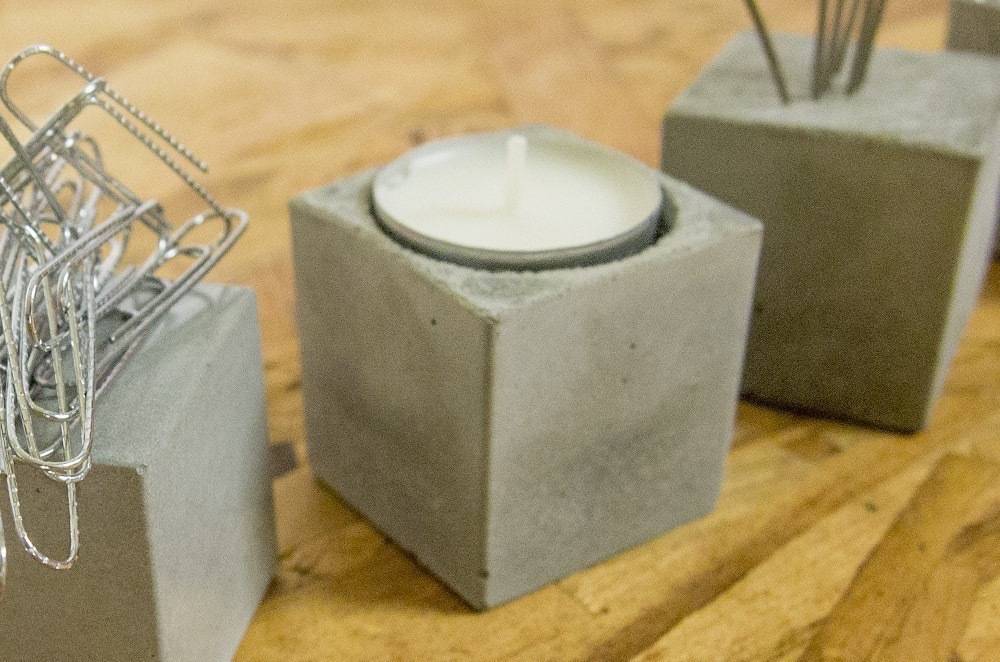
Paper Clip Magnet
Materials
- Horseshoe Magnet or Similar
- Spray Adhesive
You can use any magnet for this, but it should be fairly powerful. A horseshoe shaped magnet will stay locked in the concrete cube, while shallow or cylindrical magnets may not remain in place. Glue the two posts of the magnet and adhere it to the bottom of the ice cube form.

Pour the ShapeCrete mix around your super-strong magnet, filling to just under the top of the ice cube tray. Allow the cube to cure for at least 48 hours.
Remove your magnetic cubes from the tray and enjoy making paperclip sculptures. Make a bunch of them and create an architect-worthy collection of magnetized building blocks.
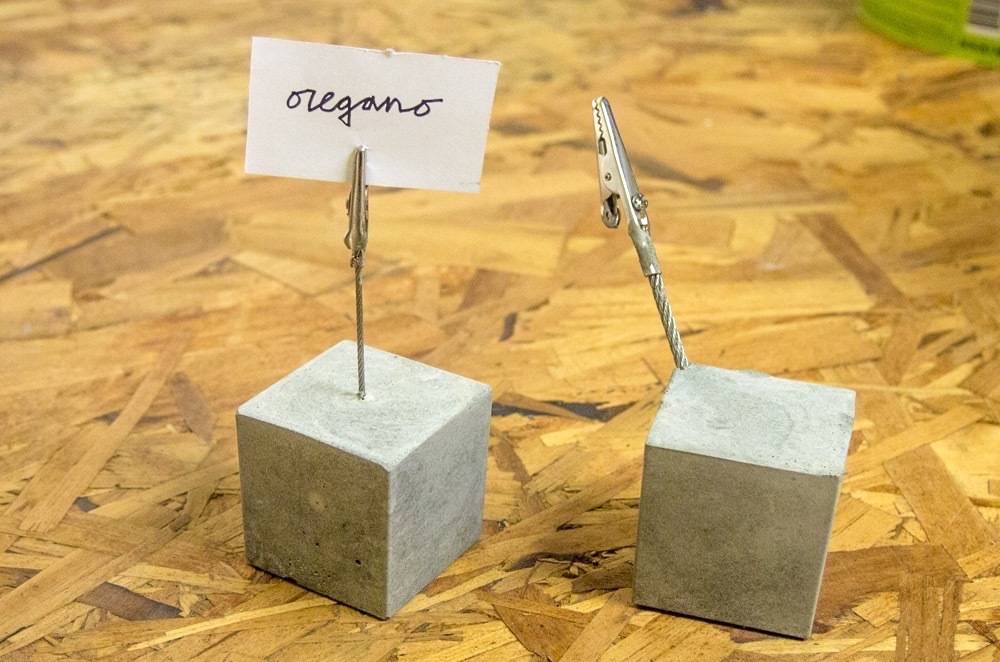
Herb Labels / Tablecloth Weights
Materials
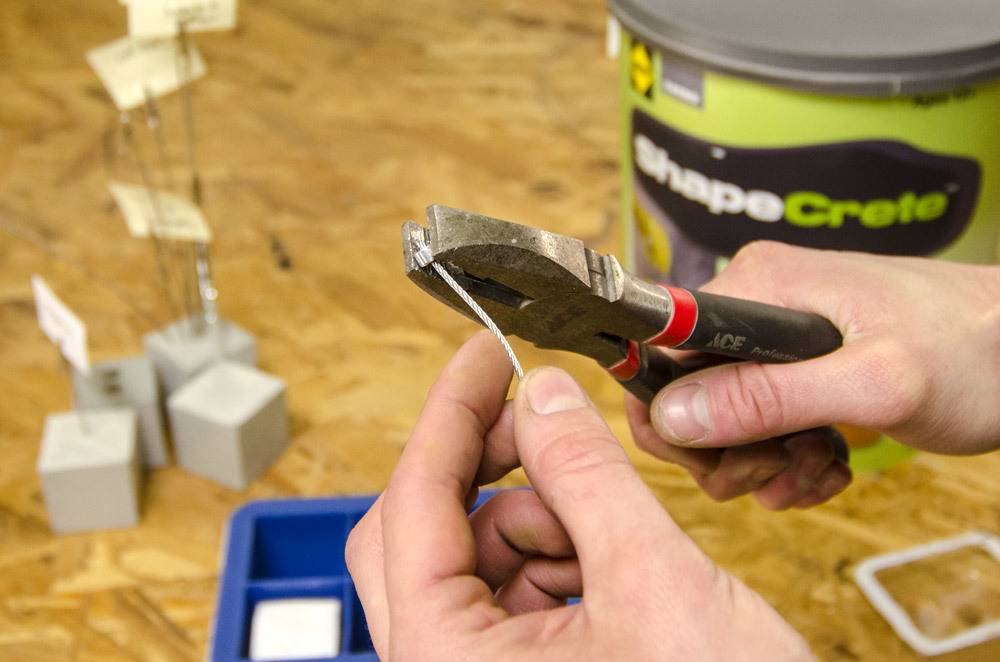
- 1/16” and 1/4” Stainless Steel Cable
- 1/16” and 1/4” Cable Ferrules
- Alligator Clips
- Wire Cutters
- Pliers
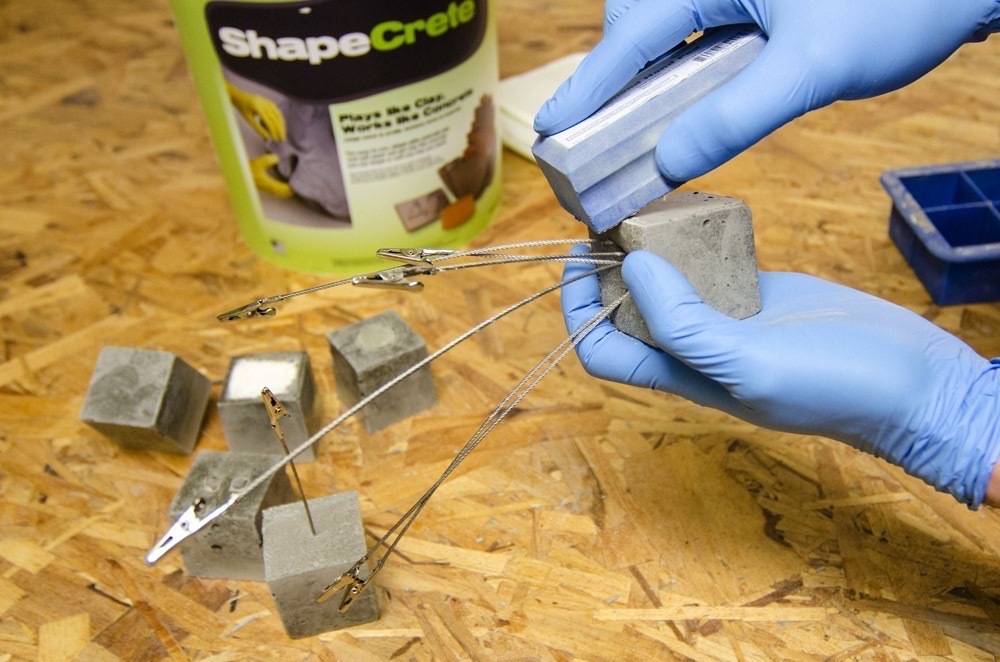
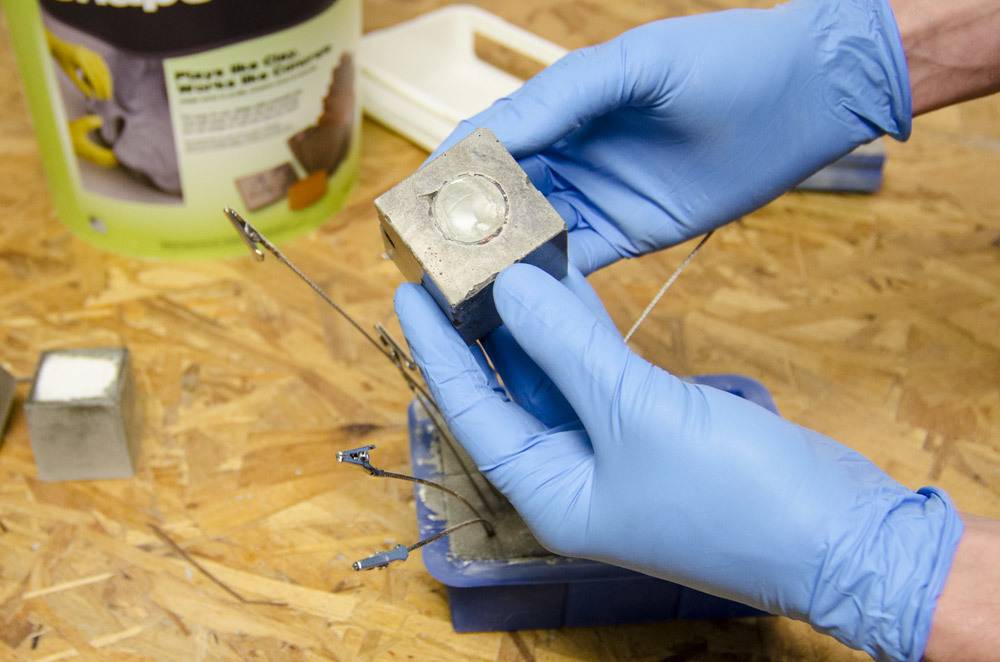
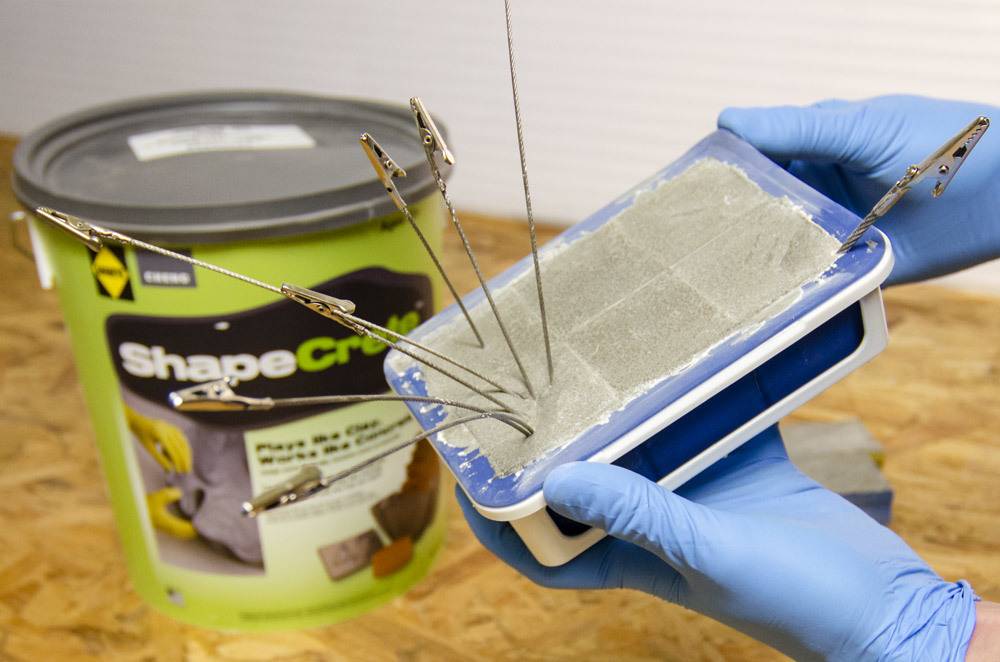
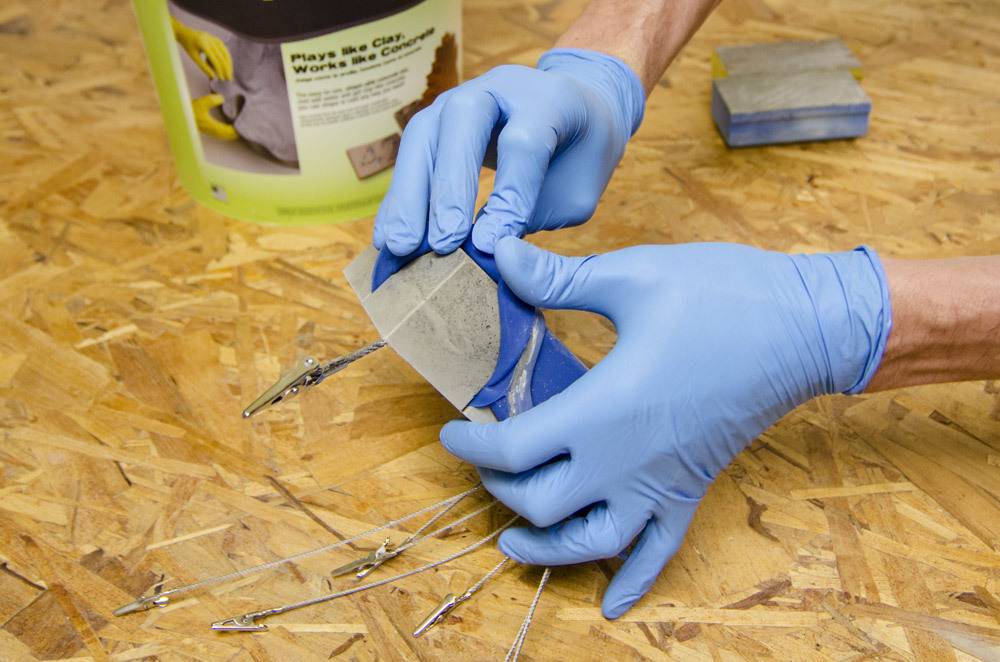
We’ve recently become obsessed with alligator clips. And, well, cables with alligator clips AND concrete are genius since they become quite the utilitarian object around the house.
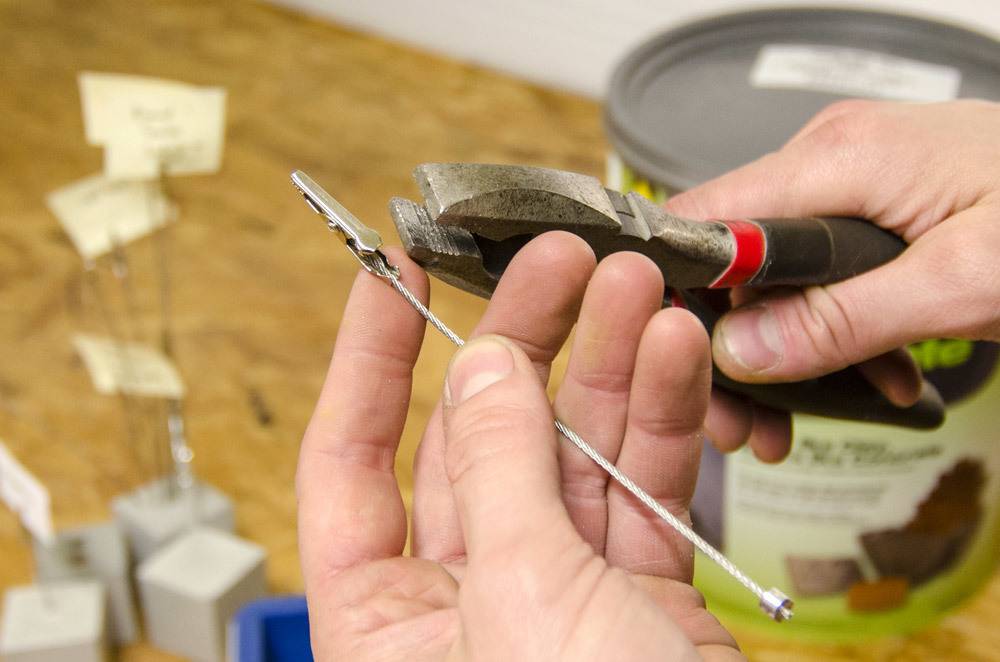
Here’s some key steps to making these nifty clips on cables. Start with a sharp pair of wire cutters and pliers. It’s easier to work with 1/16” cable compared to a thicker, 1/4” cable, which is more difficult to cut. In either case, it helps to tape the cable at the point where you plan to cut so it doesn’t unravel. Crimp a ferrule on one end, which will keep the cable from being pulled out of the cube.
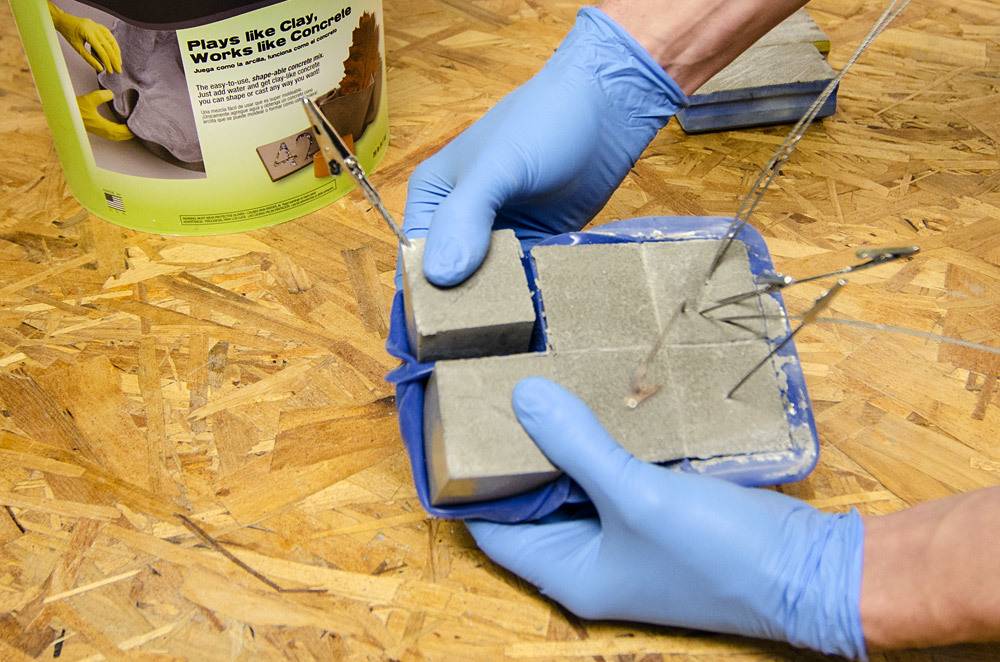
Use needle-nose pliers to crimp the alligator clip on the other end of the cable. Fill the mold with ShapeCrete casting mixture, wait a few minutes for it to firm up, and then sink the cables into the form. Position the cables to your liking and gently shake the mold, or smooth the top surface to even it out again.

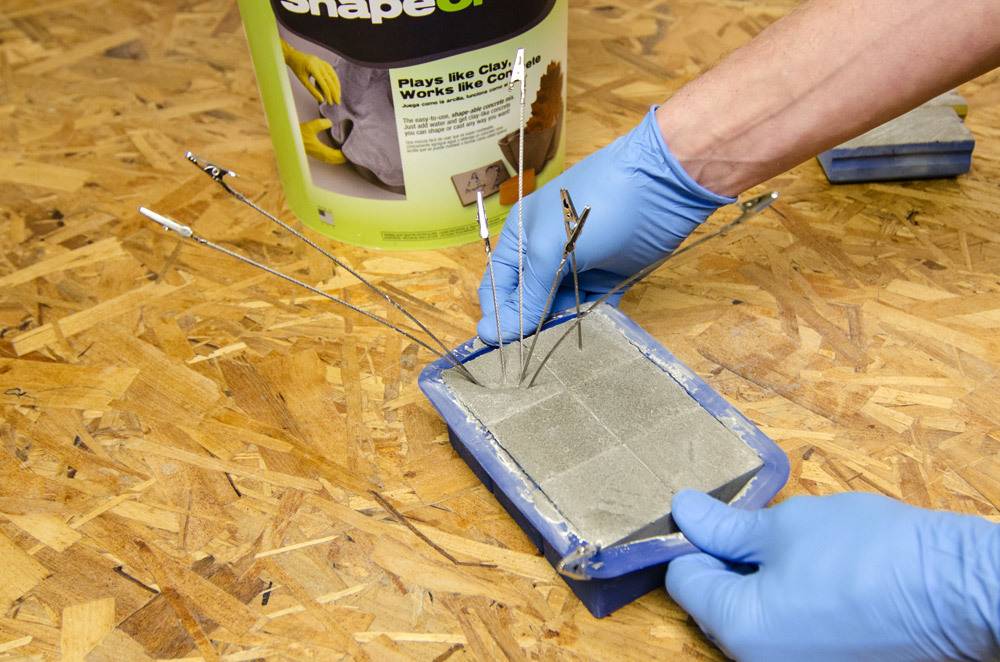
Instead of just one cable clip, grab a handful to make an array of them that emerge from the concrete cube. You can use a zip tie to hold a bunch of cables together, then just submerge them into one spot in the ice cube tray. Position the cables as you like. Gently vibrate the tray by shaking or tapping the tray which will settle most of the bubbles, or air pockets, in the mix and will smooth out the top surface.
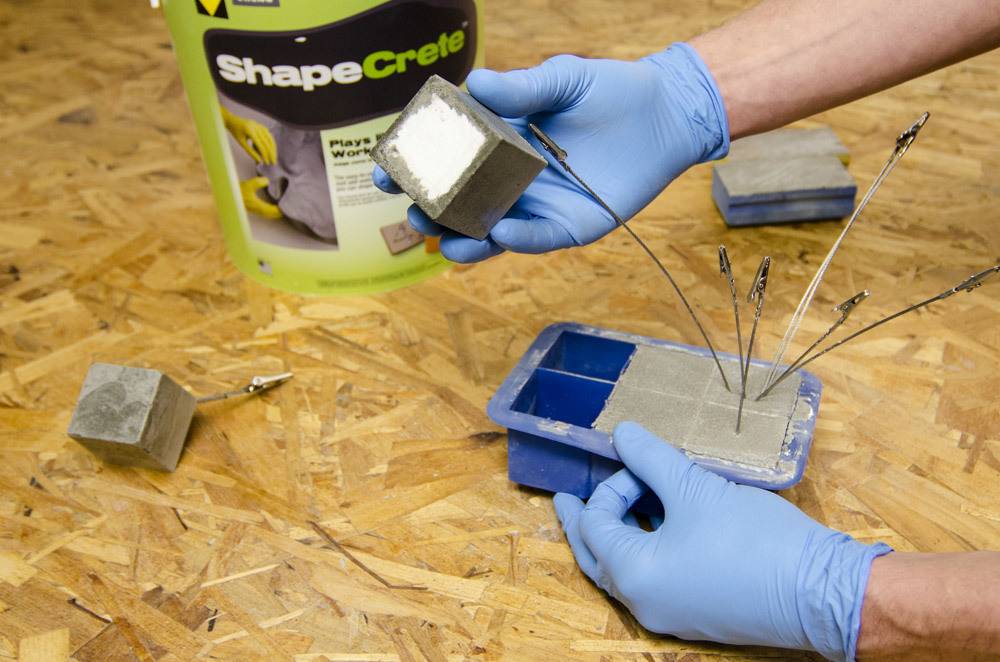
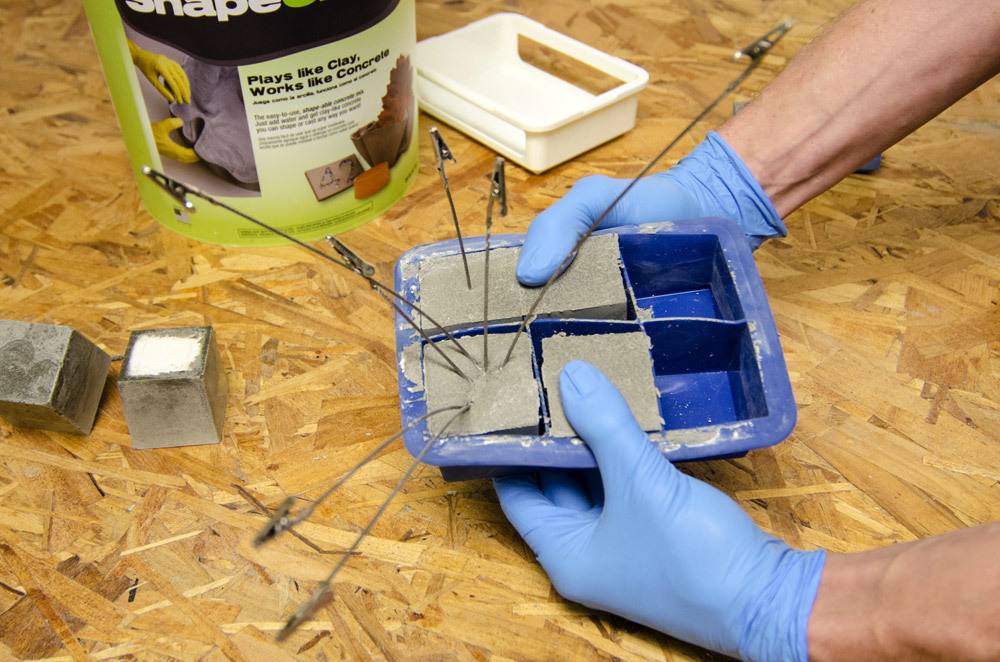
Allow the cube to cure for at least 48 hours. Remove your handy-dandy, alligator clip cubes from the tray and create spontaneous signage / labels wherever you might need them. Even better, create an ever-changing gallery of your favorite pics–great for the office or home.
Tea Light Holder
Materials
- Tea Light Candles
- Masking Tape
- Scissors
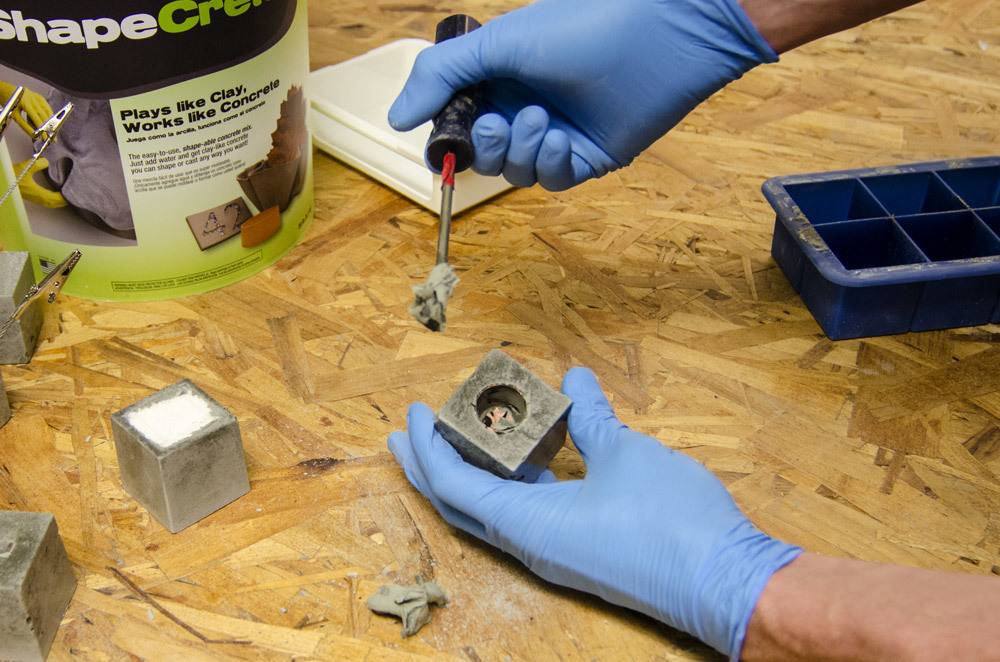
Ah, the ubiquitous tea light holder–here’s a simple solution to creating dramatic, albeit small, lighting for indoors or outside. We need to create a void in the concrete cube for the tea light to sit in. Simply put two tea lights together and tape around them with masking tape. Build up the masking tape until it’s about 1/16” wider than the tea light. Trim the tape on the bottom side and then put a piece of tape over the metal. Let the masking tape overhang on the top, this will keep concrete from getting into the “knockout” we’ve made.

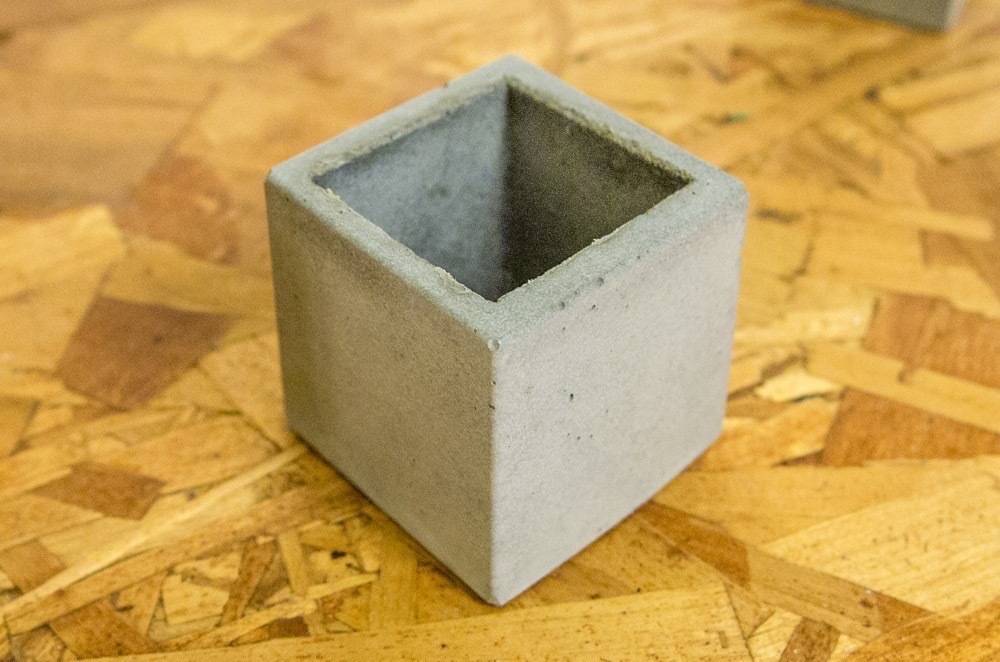
Fill the cube mold about 2/3 full with ShapeCrete, then push the taped tea lights into the center of the cube. Allow the cube to cure for at least 48 hours. After you’ve pulled the concrete cube from the mold, replace the taped placeholder tea lights with new ones and enjoy some ambiance!
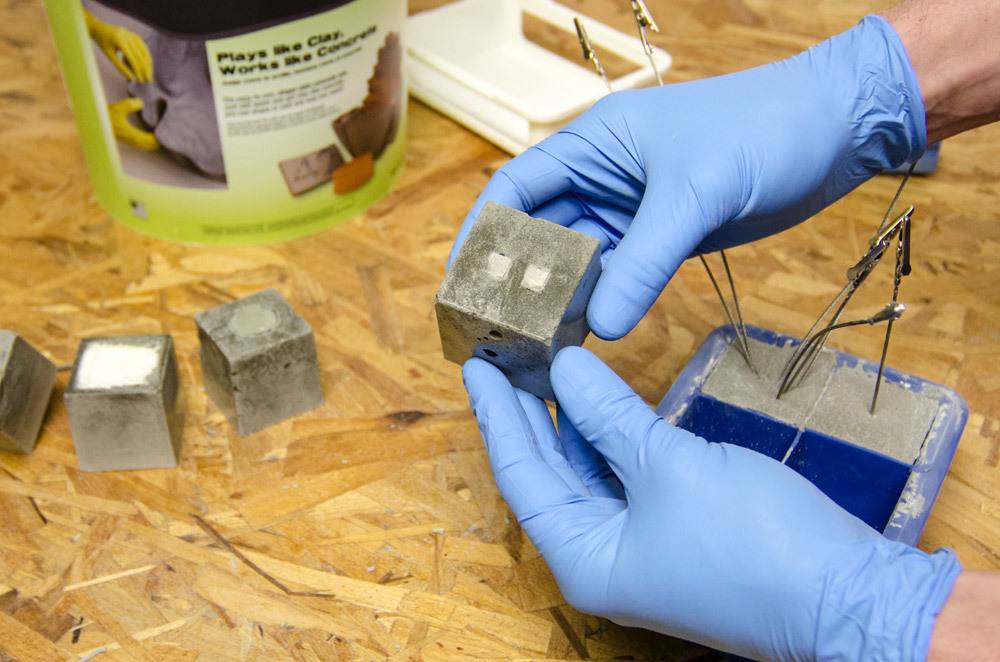
Casting and De-molding
(Removing from the Form)
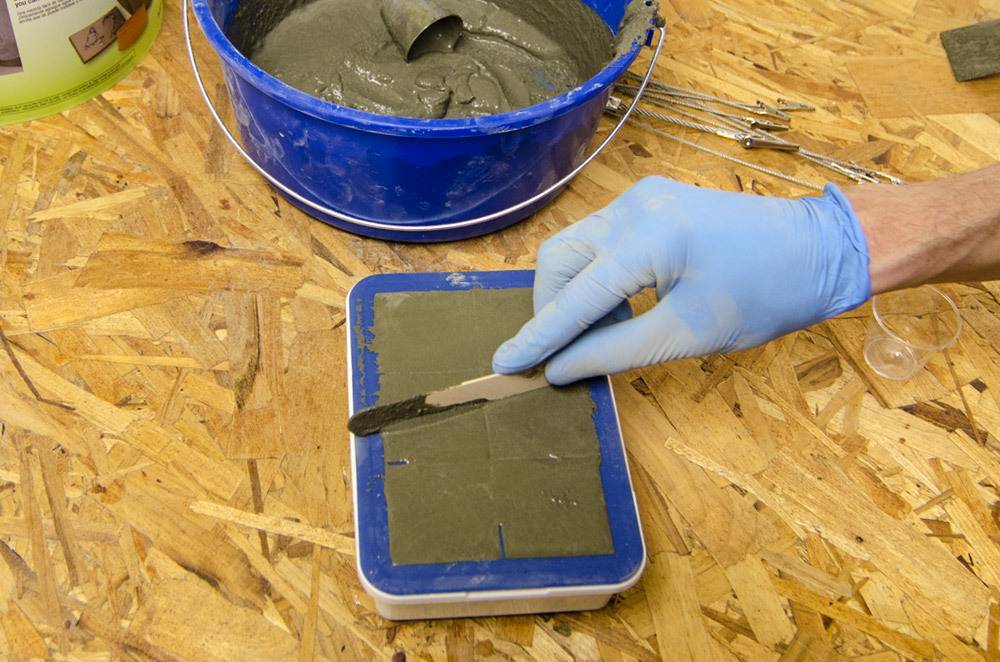
Fill a small plastic cup with ShapeCrete casting mix and begin filling the ice cube form. Vibrate, gently tapping or shaking, the mold while filling the form will help to compact the mix and eliminate air bubbles. When the mold is full you can “screed,” removing or smoothing excess concrete, from the top with something like a ruler or a wooden stick. Cover the piece with plastic and allow it to cure for 48 hours.
Removing the pieces from the mold is a piece of cake…or like a cube of ice in this case. Gently pull all sides of the silicone mold away from the concrete. Pull on the middle dividers to break the seal on the inside, and then peel back the mold. With a little bit of careful prying, the pieces will release from the silicone tray.
Finishing
Any sharp or uneven edges should be sanded with diamond hand pads, files, or sandpaper. The pieces can be left raw to develop a patina with age, or they can be sealed to help retain their smooth finish. Furniture bumpers or pieces of cork can be glued to the bottom of each cube to keep them from scratching other surfaces.
ShapeCrete can be colored with concrete pigment and concrete stain. It can also be painted, with a brush or a spray can. Rubber stamps can be used to create impressions on the surface, and you can even embed tile or stones to create a mosaic. The possibilities to add a textural element are endless. Check out ShapeCrete.com for tips on working with color, decorating your projects, and for new project ideas.