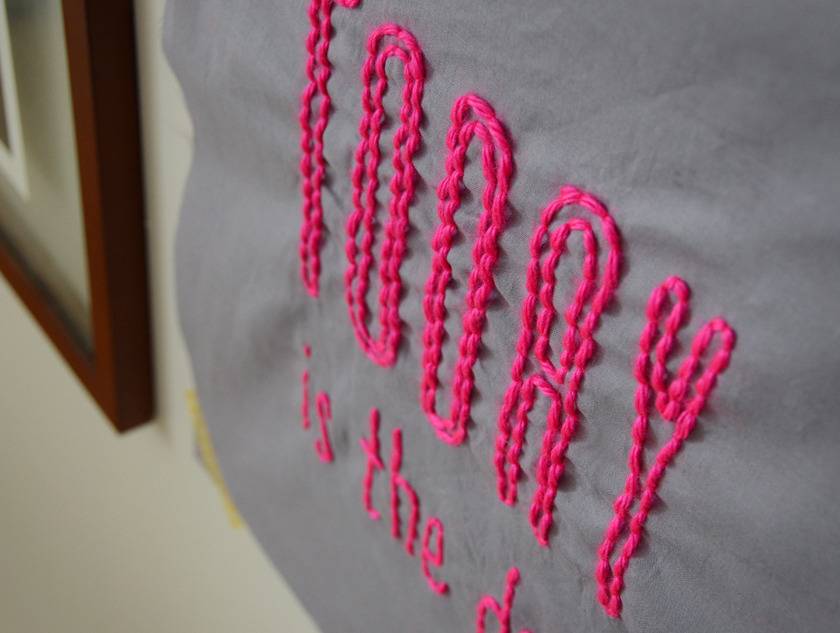
I have a ton of scrap fabric. And a huge bag full of leftover yarn. So the other day, I got to thinking… why not use up some of these extras to create a colorful piece of art? So I found an inspirational quote and got to work. Keep reading to find out how to make your own wall art using your favorite quote.


Fun, right? The great part about this project is that it’s completely customizable. You can choose your own quote, your own font, and any colors you like. Scroll down to find out how to make your own typographical fabric wall hanging.
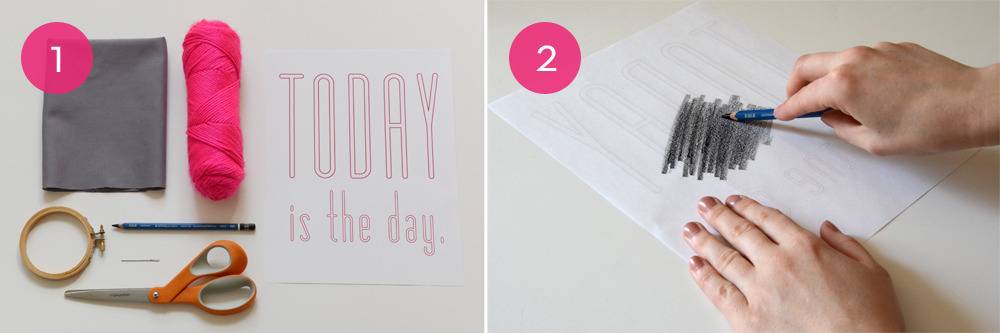
1. Here’s what you’ll need for the project:
- Scrap fabric, approximately 12×16 inches
- Scrap yarn
- Printed quote, in your favorite font
- Artist pencil, 6B or softer
- Embroidery hoop
- Needle
- Scissors
2. First, print out your quote. I used a free font called Matchbook, available here. Turn over your printout and begin sketching with your pencil. The softer the pencil, the darker it will be (6B-8B works best). Press down hard and sketch over the entire back of the printout.
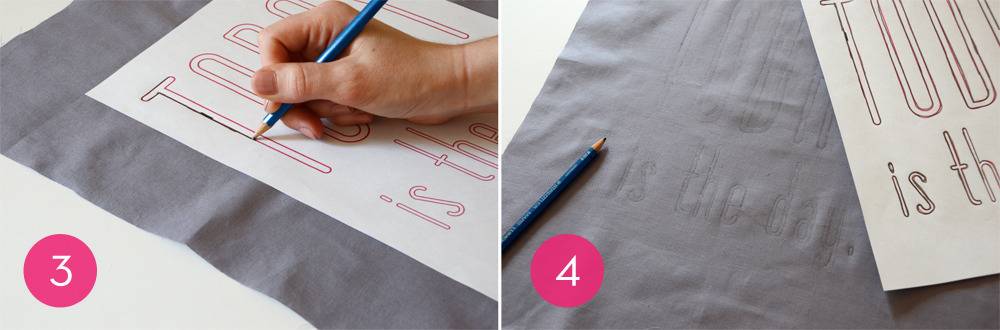
3. Next, turn it back over and center it on your fabric. Trace over the text. Press down as hard as you can, and be sure to keep the printout in the same spot on the fabric (tape it down if you have to).
4. Once you’ve traced each word, remove the quote. You’ll see that the words have been transferred onto the fabric.
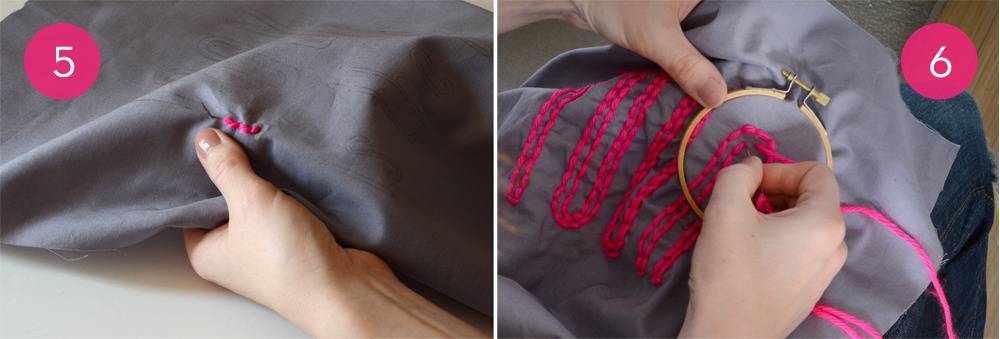
5. Thread the yarn through the needle and begin stitching the words using a basic backstitch. Here’s a quick video tutorial on how to backstitch if you’ve never done it.
6. An embroidery hoop is definitely helpful, but not required. As you continue to stitch, it should look like the photo above. Be sure to pull the fabric taut every now and then to ensure that everything lays fairly flat. If you run out of yarn, simply tie a knot on the back and thread the needle with another piece of yarn.
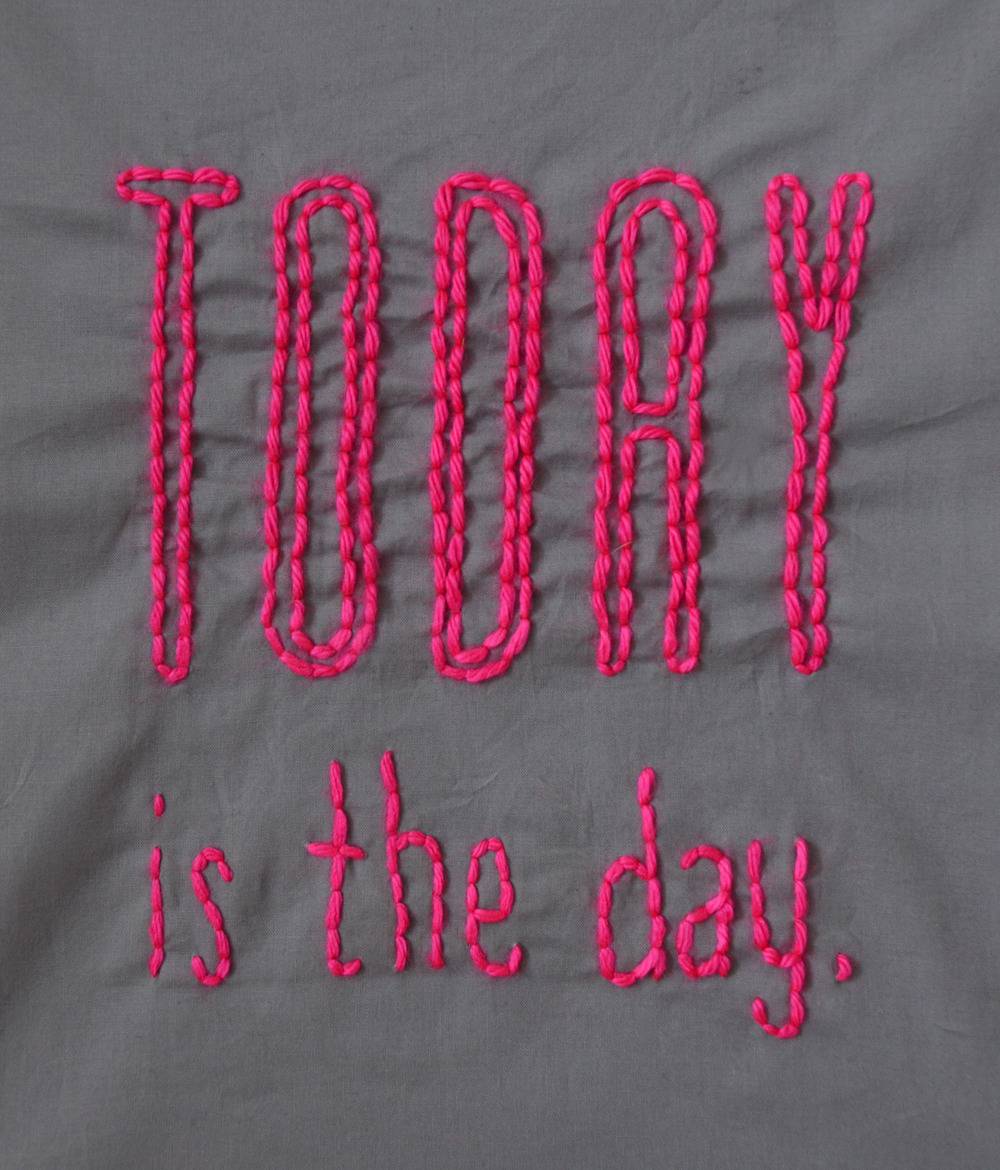
And that’s it – you’re finished! Feel free to frame it if you prefer a more polished look, or you can leave the edges raw like I did and adhere it to the wall with colorful Japanese Washi tape.