
![]() This fall, FabricDirect.com is sponsoring a series of fabric-based DIY projects on Curbly!
This fall, FabricDirect.com is sponsoring a series of fabric-based DIY projects on Curbly!
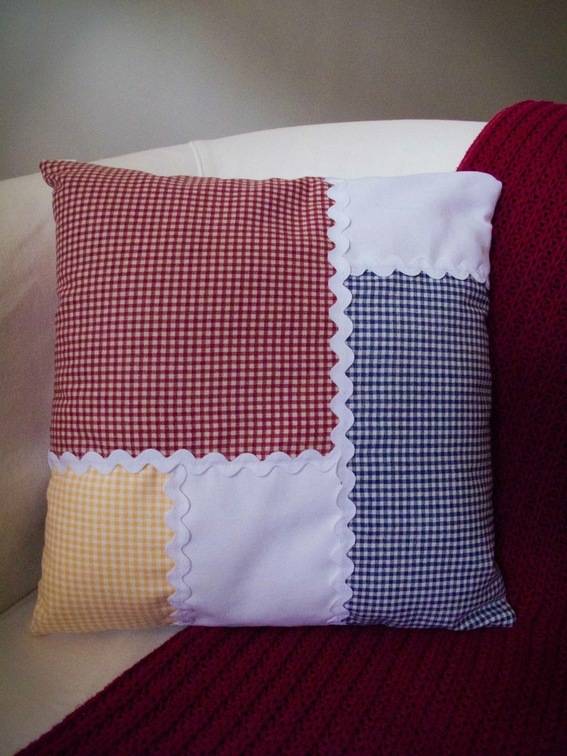
Did you hear that? Piet Mondrian just rolled over in his grave. (Either that or my cat fell off the chair on which she’s napping.) Some of you may remember that I made a pillow based on the artist’s iconic Composition II in Red, Blue and Yellow in the fabulous Curbly title, Make It! Midcentury Modern. That interpretation was a, more or less, one-for-one fabric reinterpretation. For this new version, I decided to go a bit more lighthearted with what might be called Patchwork in Red, Blue and Yellow.
Read on to find out how to make your own pillow, and get a special limited time discount on the fabrics I used here!
DISCOUNT CODE FOR CURBLY READERS
Now through November 15, 2011, you can get a 20% discount on the fabrics I used in this post at FabricDirect.com:
What you’ll need to make one:
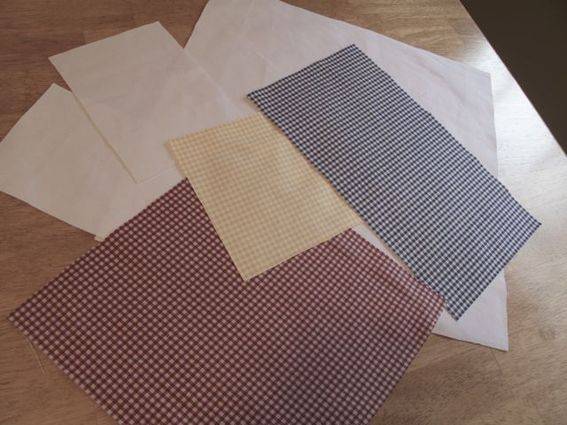
- 1/2 yard white denim
- 1/3 yard blue check from Fabric Direct’s Toile/Stripe/Check collection
- 1/3 yard yellow check, also from Fabric Direct
- 1/3 yard red check from, you guessed it, Fabric Direct
- 14″ inch pillow form
- 1-14″ white zipper
- one package of jumbo (5/8″) white rick rack
- white thread
- scissors, pinking shears, tape measure, pins, sewing machine, iron, ironing board etc.
Getting down to business:
First, cut the fabric to size.
White denim:
- 1 piece at 15″ x 15″ (this will be the back of the pillow)
- 2 pieces at 4 1/2″ x 6 1/2″
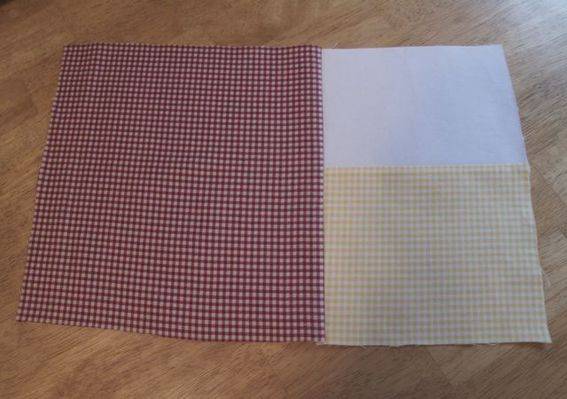
Red Check:
- 1 piece at 9 1/2″ x 9 1/2″
Blue Check:
- 1 piece at 6 1/2″ x 11 1/2″
Yellow Check:
- 1 piece at 5 1/2″ x 6 1/2″
Be sure to use 1/2″ seam allowances throughout.
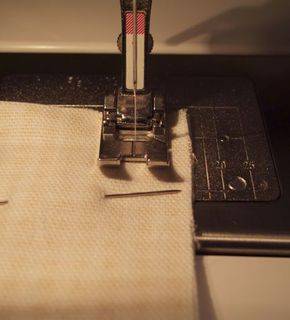
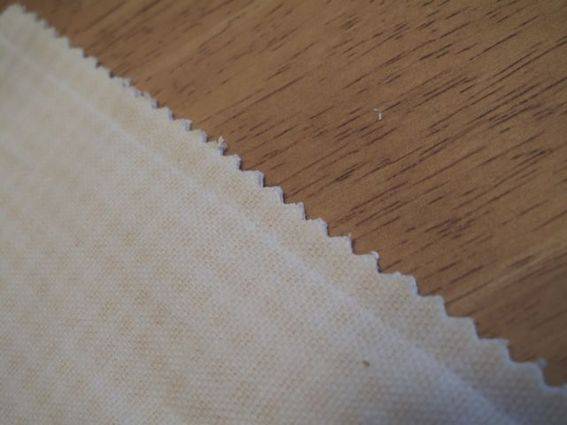
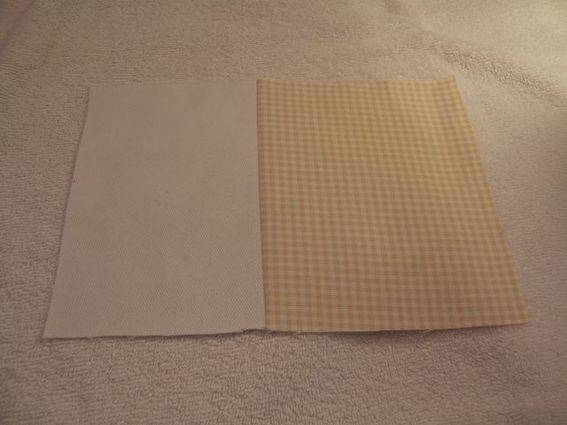
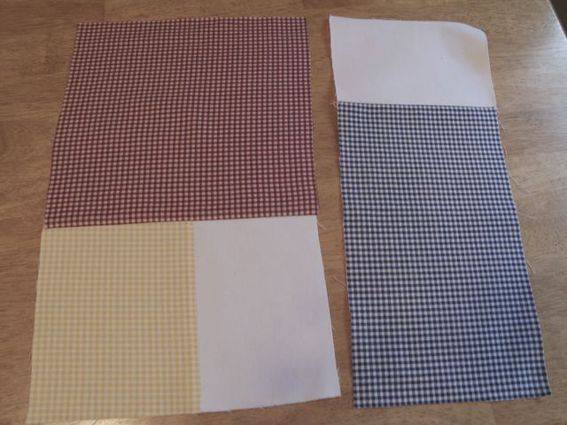
Begin by sewing one of the small white pieces to the yellow piece, 6 1/2″ sides together. Pink the seam and then, using a hot setting, press it flat.
Then sew this piece to the red square. Pink and press that seam as well.
Sew the blue piece to the remaining small white piece, 6 1/2″ sides together. Again, pink and press the seam.
Sew the two pannels together, long sides together. Then, yup, press and pink that seam.
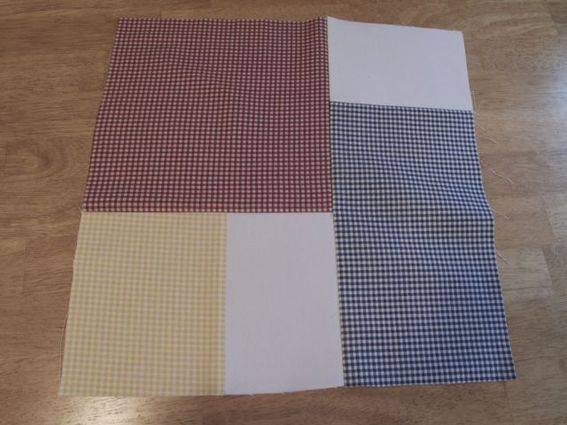
The pillow is shaping up and looks great as is. There was even some talk in the house at stopping right here, but I felt the individual blocks needed some deliniation, like Mondrian’s black lines but more cheeky. Enter the jumbo rick rack!
If you’ve never sewn on rick rack, don’t worry. It’s not rocket science; it’s just a matter of running a stitch down its center.
We’ll want to begin by sewing on two lengths at the joins of the blue and white and yellow and white squares, like so:
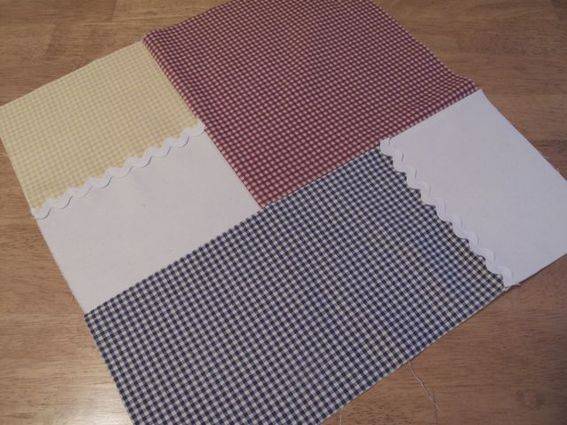
Then we’ll sew on the length between the red and yellow/white squares:
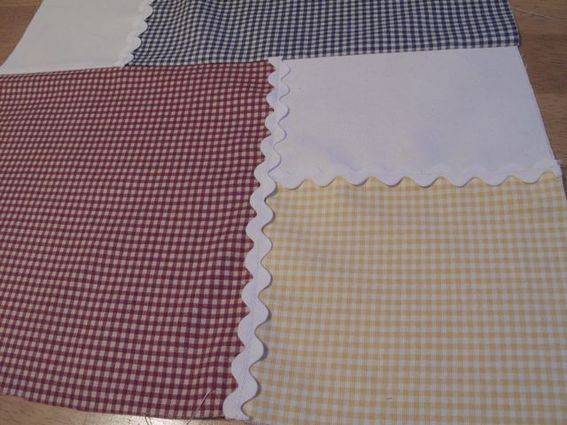
We’ll finish up with the long length between the red and blue/white squares:

(For those wondering about the order, if we sew the lengths of rick rack on in such a way, the ends of the preceeding cuts will be covered by the next lengths of rick rack.)
We finish up by sewing the front of our pillow to the back (front sides together) on 3 sides only. Pink the seams, clip the two sewn corners and then install our zipper as directed on package. (Or, if you’re like me, you just wing it. Seems to work fine!)
Squeeze the pillow form in, and we’re good to go.
P.S. Cat’s fine. Must have been Piet.
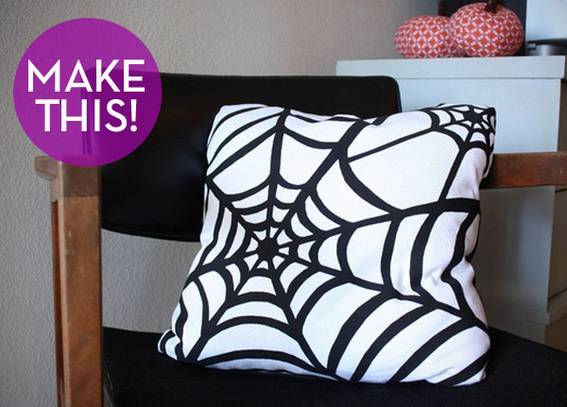
Wan’t to see another cool pillow project sponsored by FabricDirect? Check out Melanie’s Spider Web pillow tutorial!
DISCOUNT CODE FOR CURBLY READERS
Now through November 15, 2011, you can get a 20% discount on the fabrics I used in this post at FabricDirect.com: