One of the things we look forward to most come summertime are visits to our local beach. Lying back on a towel with our toes in the warm sand and the sound of waves in the background is pure bliss.
But once we head to the water for a dip and emerge from the ocean to stroll back to our towels, we often find ourselves looking around in confusion because our little bundle of belongings looks just like every other bundle on the beach!
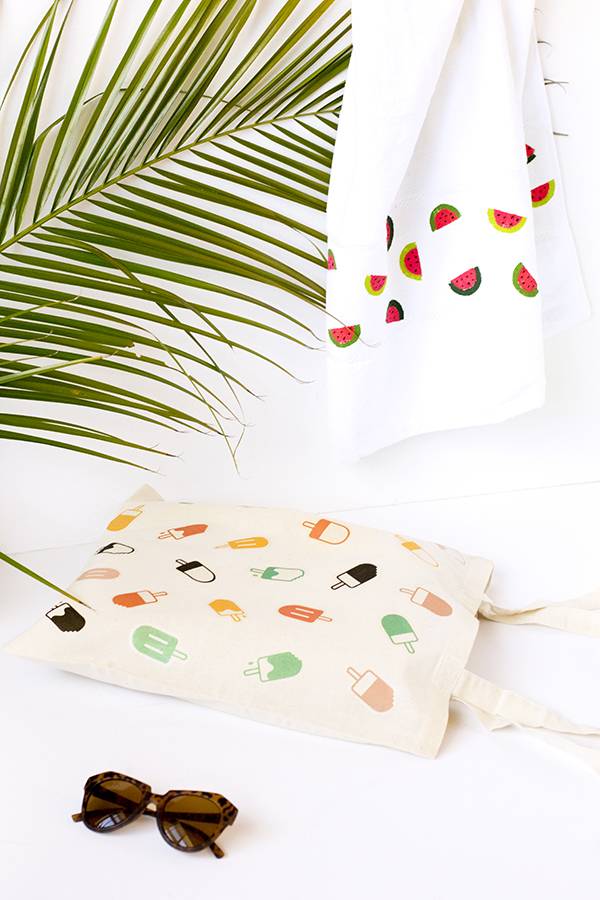
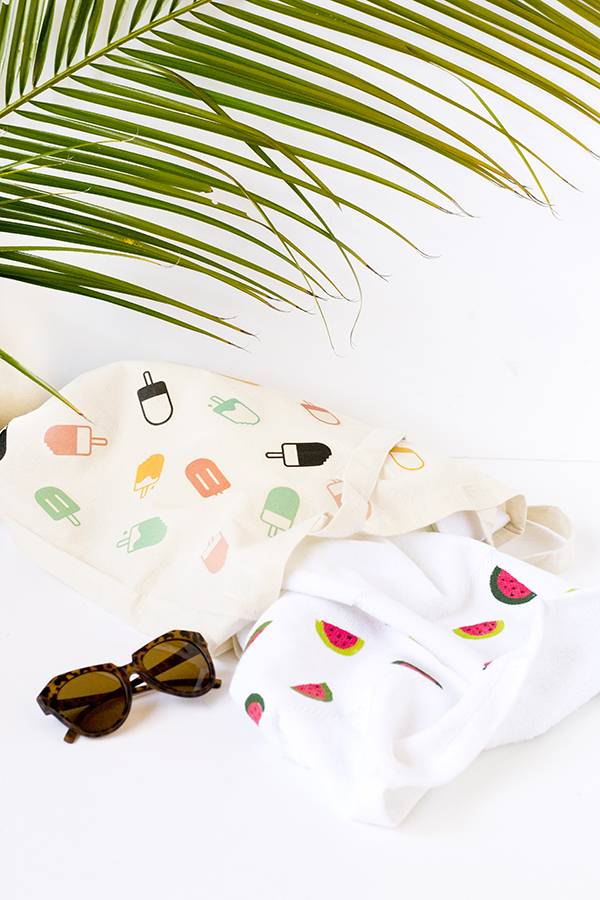
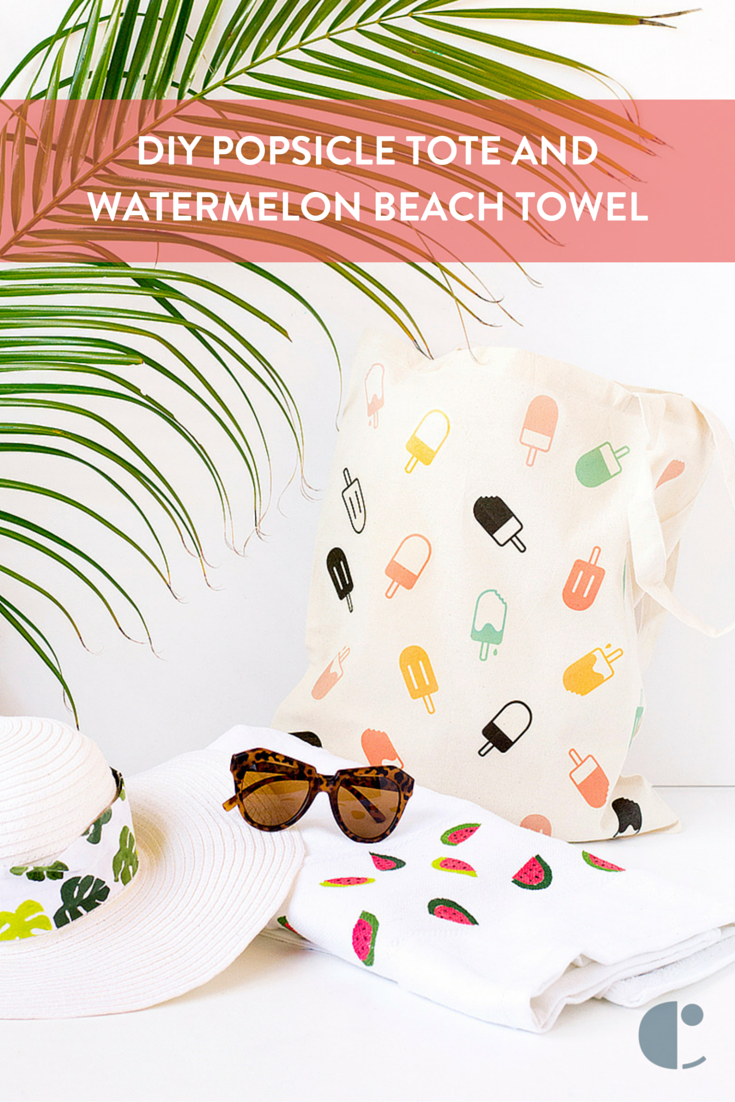
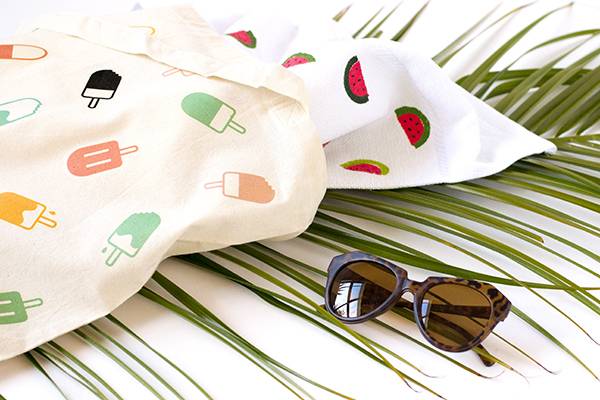
Well no more. I’ve decided the easiest way to easily identify our stuff is to make sure it looks different to everyone else’s, and I think this bright watermelon and popsicle combo might just do the trick!

Materials
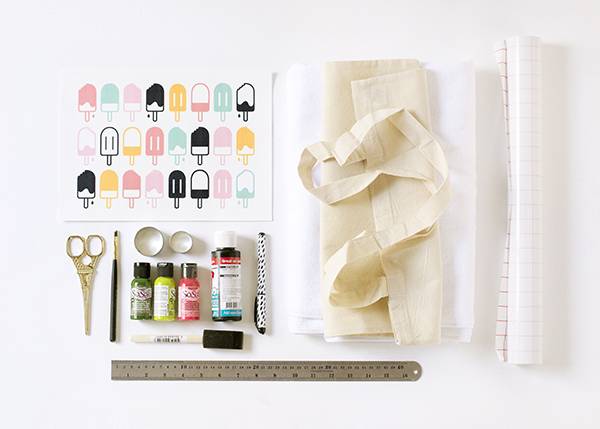
Popsicle Tote
- Plain calico tote bag
- Printable popsicle template
- Iron-on transfer paper
- Scissors
- Iron
Watermelon Beach Towel
- Plain beach towel
- Circle cookie cutters (1 small and 1 large)
- Clear self-adhesive contact paper
- Pen
- Ruler
- Scissors
- Fabric paint in pink, green and black
- Foam paintbrush
- Fine paintbrush
Tutorial for Popsicle Tote
Step
Prep your tote by washing it and giving it a good iron once it’s dry to remove any creases.
Step
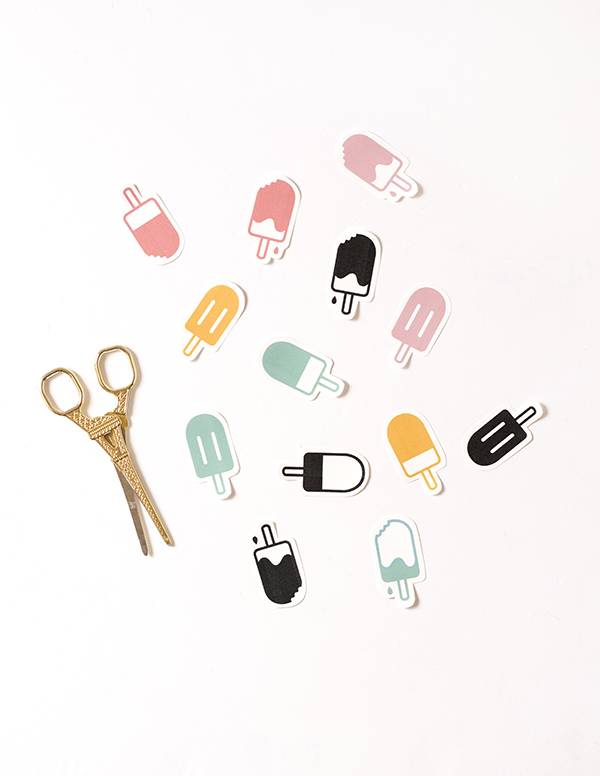
Print the popsicle template onto iron-on transfer paper. Then cut out each of the popsicles with a pair of scissors, leaving a border around each one.
Step
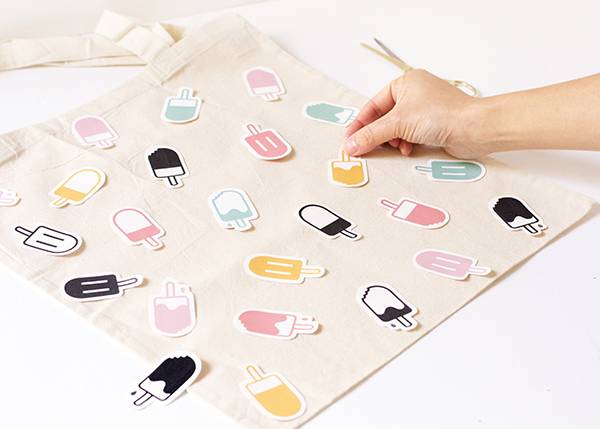
Lay the popsicles onto your tote bag, moving them around until you’re happy with how the final design looks.
Step
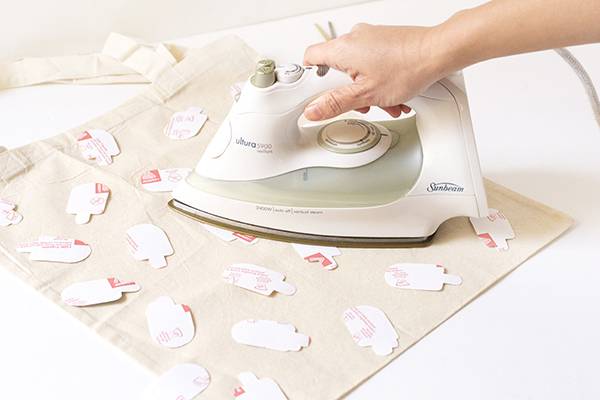
Flip each of the popsicles over so that they’re face down, then iron them onto your tote bag (make sure you follow the manufacturer’s instructions for your iron-on transfer paper).
Step
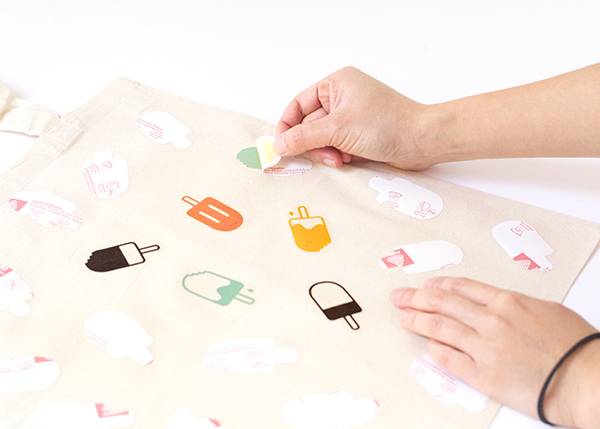
Wait until your tote bag has completed cooled, then carefully peel the backing off each of your popsicles. Once you’ve removed all the backing paper, your tote bag is complete!

Tutorial for Watermelon Beach Towel
Step 1
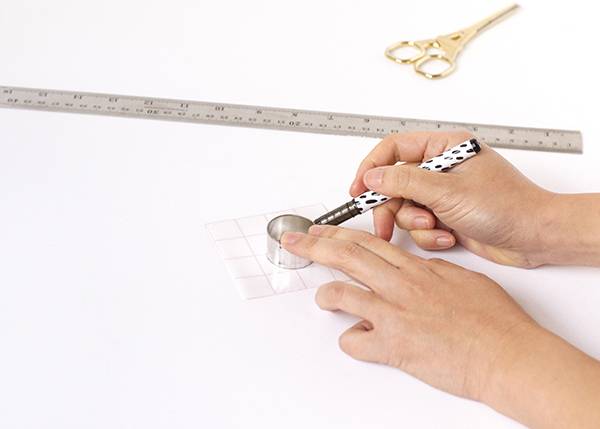
Firstly, cut a small square of contact paper. Then trace a small circle onto it using a pen and a circle cookie cutter.
Draw a line through the center of your circle with your pen and ruler.
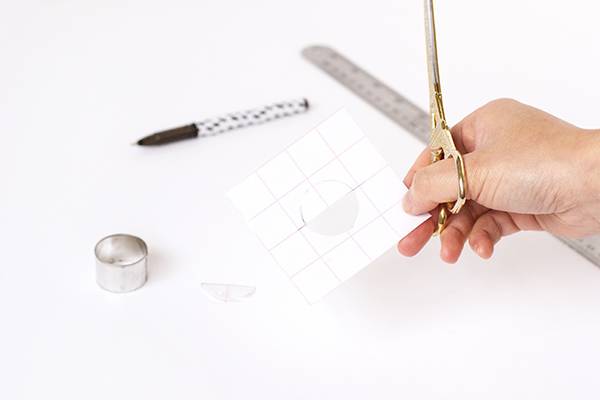
Cut out one half of the circle so you have a semi-circle hole in the middle of your contact paper. This will be your template for the pink section of your watermelon.
Step 2
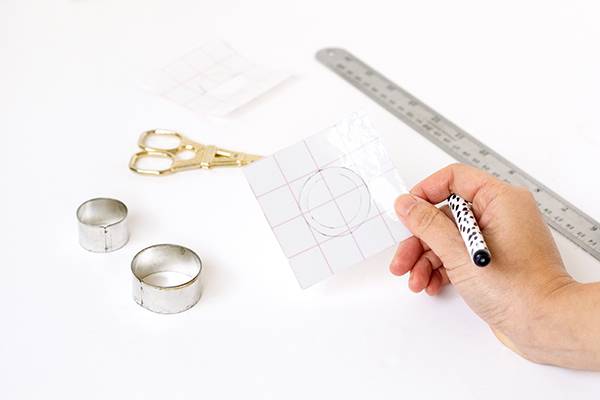
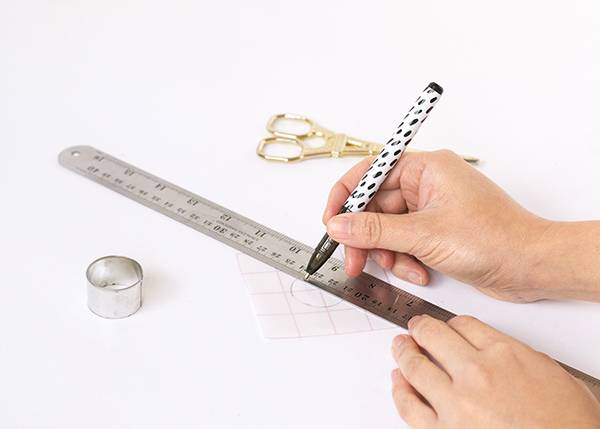
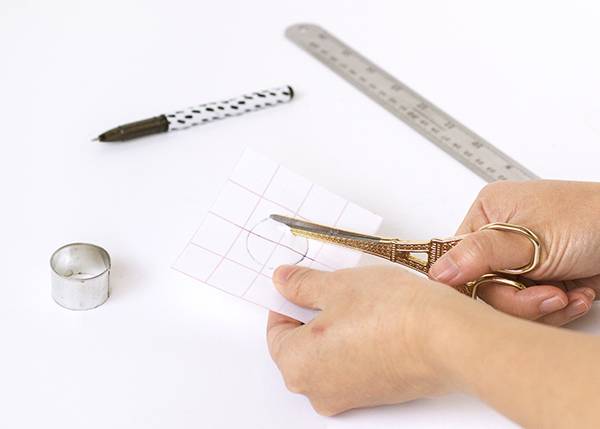
Place your semi-circle template to one side and cut out a second piece of contact paper. On this piece draw two circles, one inside the other. The smaller circle should be the same size as the circle you drew in Step 1; the larger circle should be around a centimeter larger in diameter.
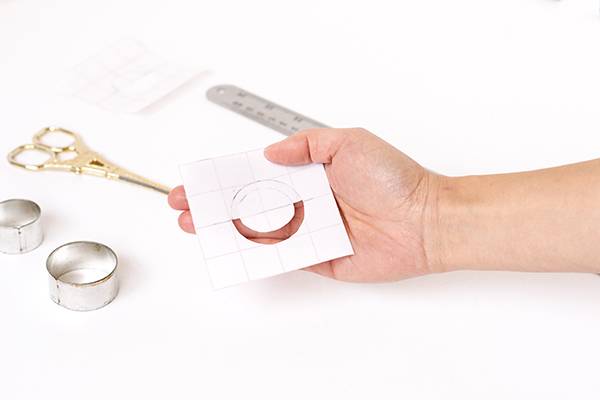
Cut out the area between the small and large circles so you have a crescent shaped gap as shown above. This will be the stencil for your green watermelon rind.
Step 3
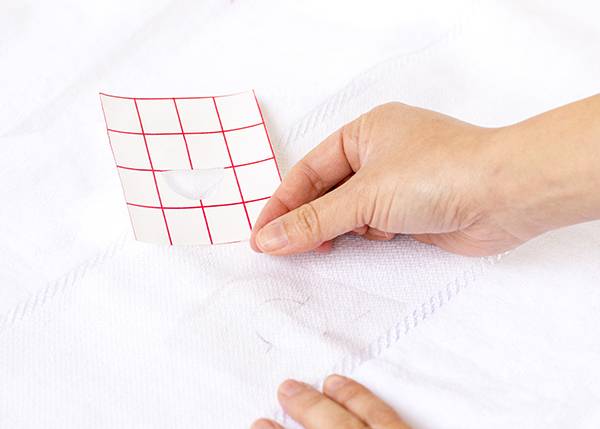
Remove the backing from your semi-circle stencil (the one you created in Step 1), and stick it onto your beach towel.
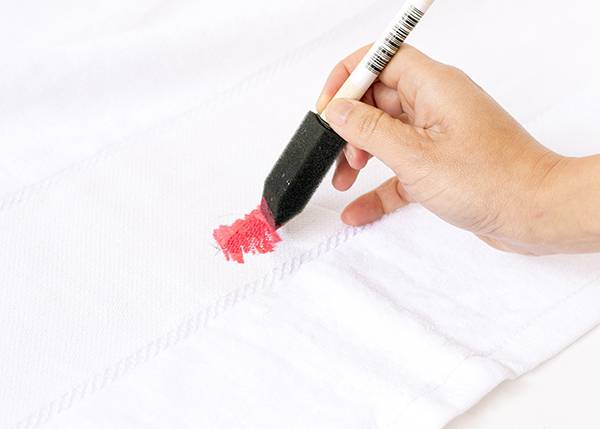
With a foam paintbrush, dab pink fabric paint on the hole in your stencil until the area is completely covered.
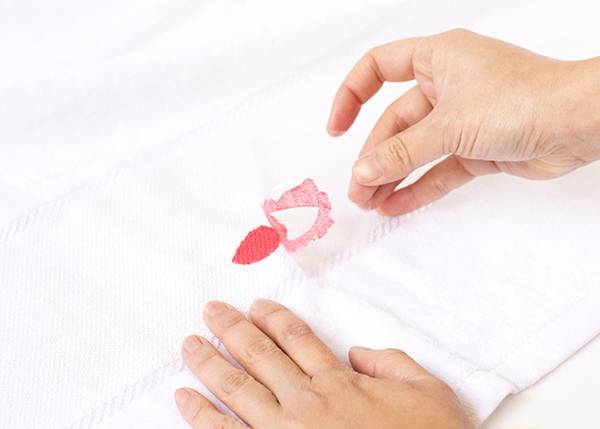
Remove the contact paper to reveal a semi-circle underneath.
Stick the stencil down on another part of your towel and repeat the painting process until your towel is covered in lots of pink semi-circles. Then wait for the pink paint to completely dry.
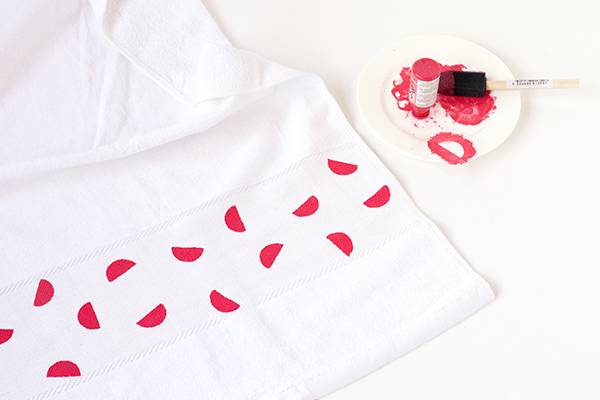
Step 4
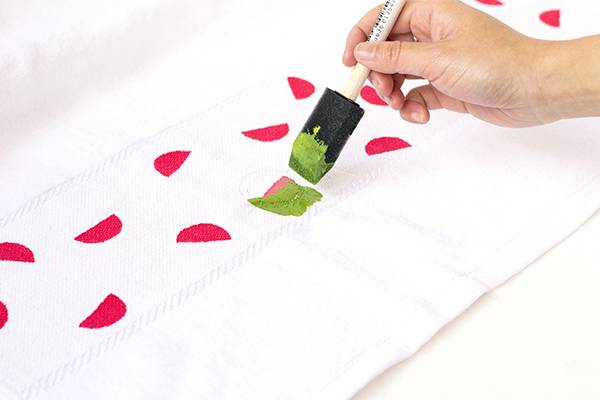
When the pink paint has dried, place your crescent stencil (the one you made in Step 7) over one of the pink semi-circles. Then dab green fabric paint onto the crescent area.

Remove the contact paper to reveal your watermelon rind. Stick the stencil down over another pink semi-circle and repeat the painting process until all your watermelons have green skins.
Step 5
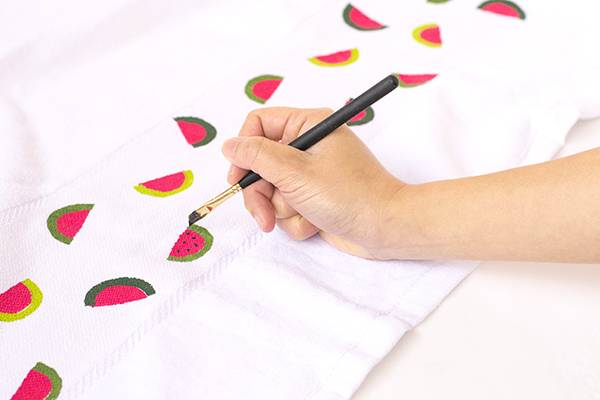
When the green paint has dried completely, get some black fabric paint and add seeds to each of your watermelons using a fine paintbrush. Once you’ve painted those in, your towel is complete!
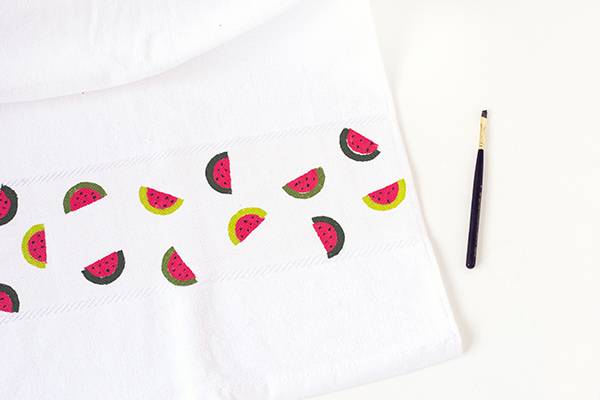
Given how brightly patterned my towel and tote now are, I’m pretty sure I’ll never again lose my belongings when I’m at the beach. Now if only our Aussie winter would hurry up and be over so I can take these newly painted pretties out to play!