This year, I’m all over making my own wrapping paper. I’ve made bold, graphic paper using type, drawn a subtle handmade snowflake design, and adorned plain paper with DIY stamps, but I wanted to do a full-on printed pattern over an entire sheet. I do know how to screen print, but it’s a lot of work for a couple sheets, so I turned to another classic printmaking technique: a carved linoleum block. A contemporary update to woodblock printing, this method carves away the negative space of a design, leaving your image raised and inkable, which then gets transfered to the paper or fabric. You can get all the supplies you need for less than $10 at the art supply store, and can keep using the blocks you create countless times for years to come.
Materials and tools
- Linoleum or rubber printing block (I like the ones mounted on fiberboard)
- Carving tools
- Graphite transfer paper
- Pencil and ball point pen
- Rubber brayer
- block printing inks
- small pane of glass or plastic, or a sheet pan
- roll of solid color gift wrap or craft paper
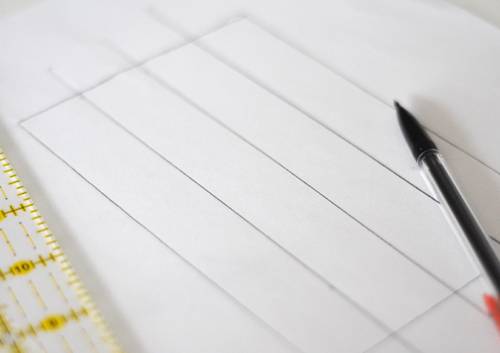
1. Begin by tracing your block onto a piece of paper. Since I wanted to make my design into a repeating pattern, I divided the paper equally.
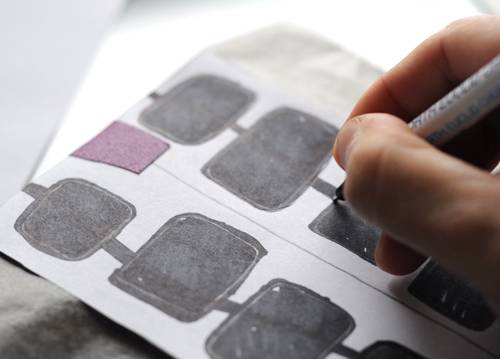
2. Draw out your design (or find and print an image from a book or the web). Note that your image will be reversed on the final page, so you’ll want to flip any text, etc. Place the transfer paper onto the block, and tape your design on top. (You could also just cover the back of the paper with pencil, but graphite paper is super cheap, and lasts forever). Using a ball point pen or stylus, go over the outlines of your designs, transferring it to the block. Of course, if you’re a more reliable artist than I am, you could draw directly onto the linoleum.
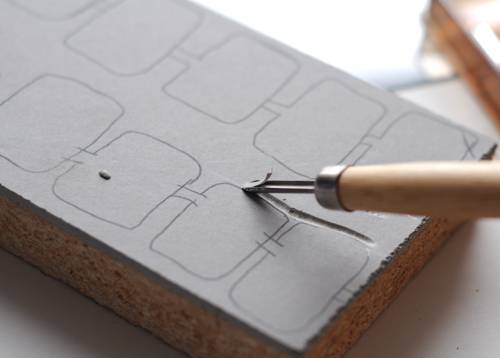
3. Using the carving tools and assorted blades, cut away anything that’s not part of your design. Begin by cutting fine lines around your image, and then using the larger tools to remove the blank space.

4. When your block is prepped, layout your paper on a flat, hard surface and tape down the edges. Squeeze out a bit of ink onto the glass or other smooth surface, and roll out a thin layer with the brayer.
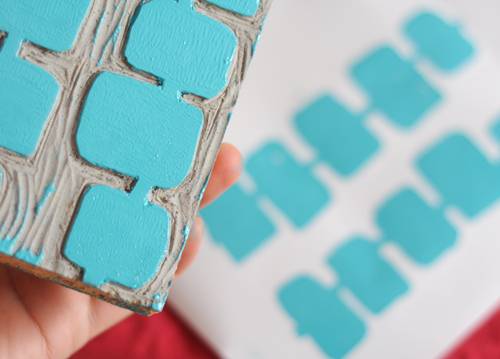
5. Build up several thin layers of ink on the block with the brayer, and make several test prints to figure out how to get the best image. Press down with a heavy, even pressure, making sure that the stamp doesn’t slide around. Then, note where your block will repeat, and start making that pattern!
When you’re ready to switch colors, just rinse the stamp and brayer off with water, and let dry for 10 minutes or so. Each stamp can be used as many times as you want. I’ve never got up to the thousands, but haven’t had one fall apart yet.
Happy Holidays!