
I’ll admit it: I’m an excitable guy. I get really energized by surrounding myself with inspiring things. And this DIY geometric mobile project combines three of my favorites: the combination of natural wood grain and solid color, kinetic, evolving art, and really inexpensive materials that come together to look like something I’d paid bundles for.
So, I came up with this easy DIY project that uses around $7.00 in materials but makes a fun impact on any space. (It’s hanging in my office right now!) By using wooden cubes, but painting different sides and hanging them by the corner, it creates the effect of much more complicated geometric shapes but without having to cut any fancy angles (or cutting the wood at all), or do any math.
And its always moving and changing, so it looks different from all sides, and the color combinations are never the same.
Watch the video and follow the steps below
Tools and Materials
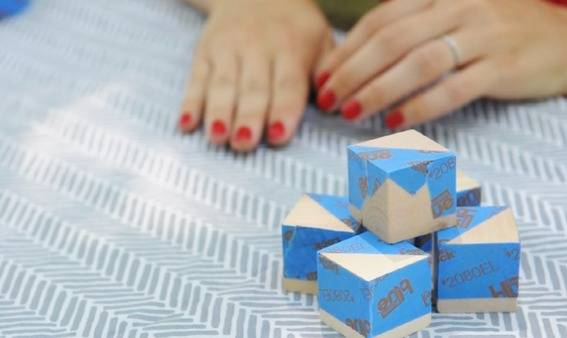
- 5x 1 1/2″ wooden cubes (available in the unfinished wood aisle at the craft store in packs of six)
- ScotchBlue painters tape
- Acrylic paint in various colors and brushes
- Small screw eyes, such as 13/16″
- Measuring tape or long ruler
- 2x 36″ lengths piano (music) wire or thin metal rods, such as .047″ (found in hobby shops, craft stores, and some independent hardware stores or online)
- Cutting pliers
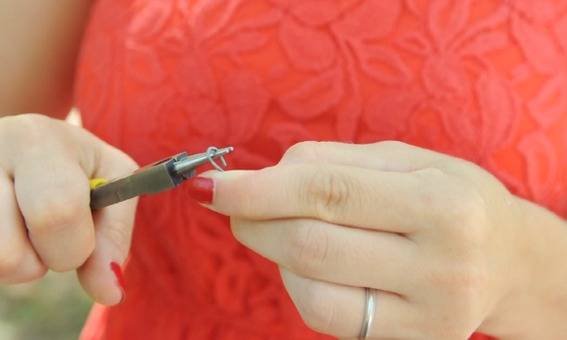
- Round nose or needle nose pliers
- Awl or thick nail
- Electric drill and drill bits
1. Begin by using ScotchBlue Painter’s Tape to tape off your blocks to create crisp paint lines. Take a small length of tape and apply it corner to corner on one face of your block. Then, tape off the opposite sides so you have a 45-45-90° triangle of wood exposed. (Yay, geometry class!) Repeat with each block.
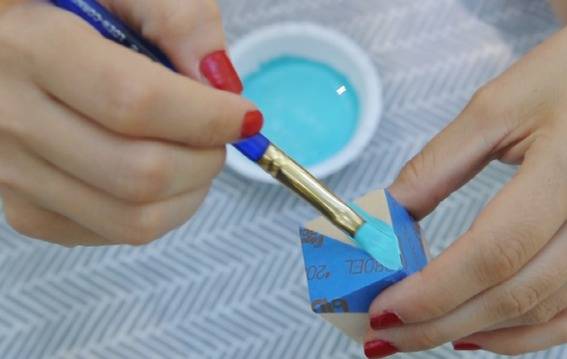
2. Mix up your colors, and paint inside the tape lines. Repeat for each block and each color, and allow to dry. By the time you’ve finished the last one, the first one should be dry enough to remove the tape.
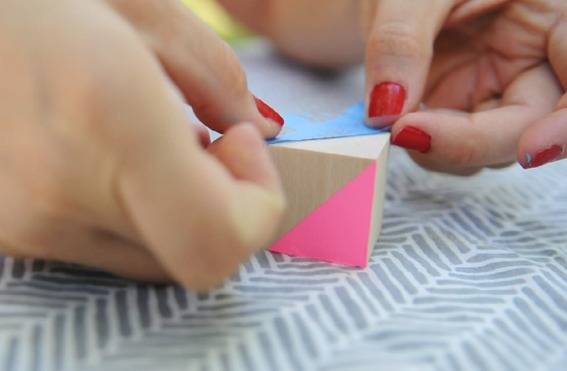
3. Choose another side of your block (not touching the first one, in case the paint isn’t full dry yet) and tape as in step one. Repeat for all blocks, choosing colors, sides, and triangles at random.
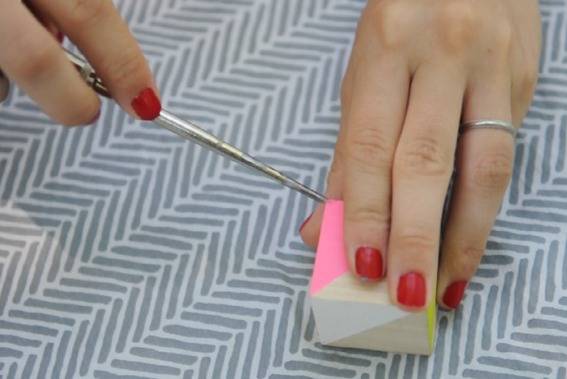
4. Use the awl or nail to create a starter divot in each of the blocks. This will give the spinning drill bit someplace to sit as you drill the pilot hole.
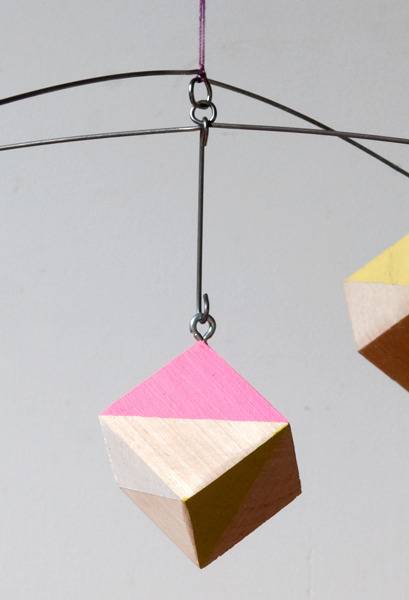
Note: I tried hanging the blocks from the center of a face, the center of an edge, and corner, and found the latter to be the most attractive. Feel free to experiment with the screw eye placement that works best for the look you’re going for.
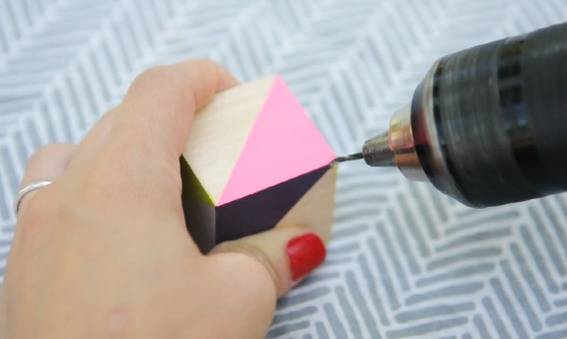
5. Select a drill bit that’s 1/8″ or 1/16″ smaller than your screw eyes, and drill a small pilot hole through your awl divot. Hold a screw eye in one hand, and spin the block onto it to allow the threads to bury themselves in the wood.
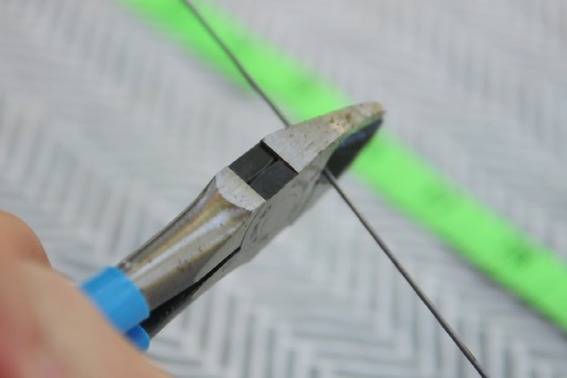
6. Cut one of your 36″ lengths of piano wire exactly in half to 18″. It’s important to be careful in your measurements here, as each need to be the same size so the mobile will balance perfectly.
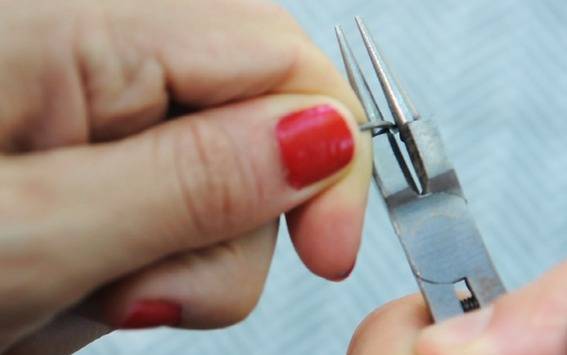
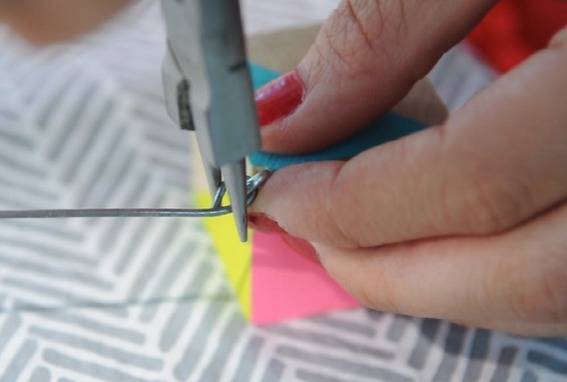
7. On each 18″ wire, mark a line at 9″. Test the balance point by letting the wire sit on the edge of your pliers. If it’s right on, use the needle nose or round nose (preferably) to create loop by bending each of the sides of the wire 180° to the other side of the pliers. Take your time, as your balance point will need to be exactly in the center of this loop so everything hangs evenly.
Test your balance by allowing your newly looped wire to rest on the edge of your pliers. It should be parallel to the floor on both sides. If it sits at an angle, snip tiny bits of wire off the lower side until it balances.
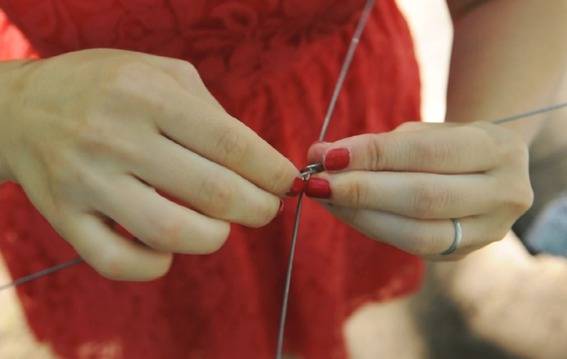 9. Connect the two rods at the loop point. This works a little like those bent nail puzzles, but it’s not nearly as complicated. Just finagle them until they’re connect by their center loops. The top one will now be upside-down, that is, with the loop to the bottom of the rod, and the bottom one will have it’s loop at the top. Just try it, it’ll make sense.
 10. On each end, use the round or needle nose pliers to make a loop that will interlock with the screw eyes in each block. Be sure that all of the loops face the same direction, so that all the blocks will hang evenly.
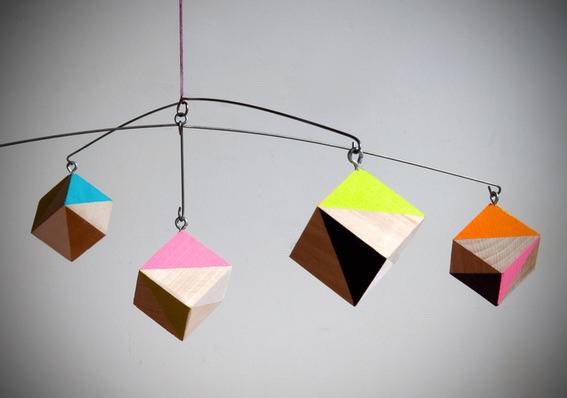
11. Attach four of the blocks via their screw eyes to the loops. Check for balance. If everything’s swell, make a shorter center rod (about 3 1/2″) with a loop on each end, as seen here:
Connect one to the center of the mobile, and the other to the fifth block.
12. Hang it up and enjoy!
Hi, this looks like a really great project! I don’t see a link for the video, however.