This Curbly guest post is written by Dale Mackey

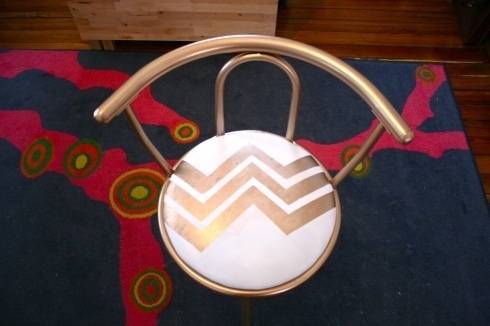
This weekend my friend Steph and I made this chair together. Well, to be completely accurate, we took an old chair and turned it into this vision in white and gold. Inspired by a chair I’d seen at Anthropolgie, we took a free swivel chair I’d been given by my sweetheart’s parents and transformed into a modern glam masterpiece in about four hours for exactly $4.71.
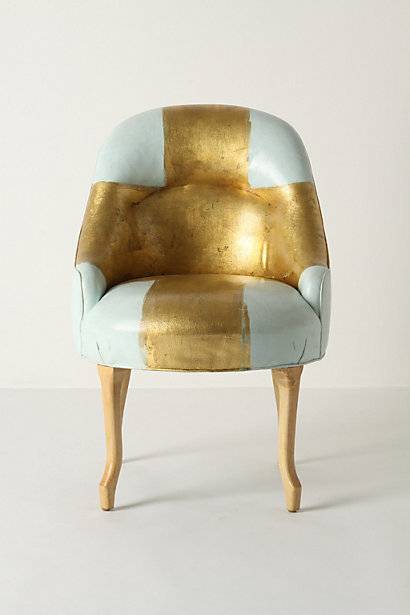
I’d seen this chair in the Anthropologie catalog and thought it was pretty effing sharp. Now, I can barely justify buying clearance dresses from Anthropolgie, let alone giant pieces of furniture, but I kept the image in the back of my mind, thinking it would be easy enough to make something sort of like it. So when this little chair came into my life I knew exactly what to do with it. Luckily, my infinitely helpful friend Steph decided to come over and help with the makeover. We had all but one of the materials on hand, but even if you had to buy everything, I’d estimate this would cost you less than $20 to complete. And it’s totally doable in a day.
Materials and tools:
- old chair with removable seat
- sandpaper
- 2x cans gold spray paint
- Spray sealer (we used polyuriethane)
- white latex or acrylic paint
- paintbrush and masking tape
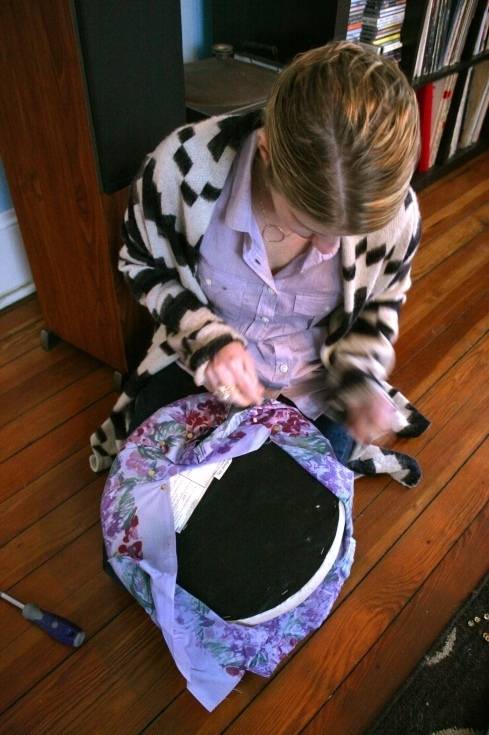
Step 1: Remove base of chair and prime seat cushion. First we took the seat of the chair off the frame. In our case this was easy; we just had to unscrew four screws from the bottom and it was free. The difficulty of this will vary with the type of chair you’re revamping. Since it was clear someone had already taken a stab at revamping the chair by reupholstering the seat, we removed the fabric they had tacked onto it to reveal the seriously dirty original seat cushion.
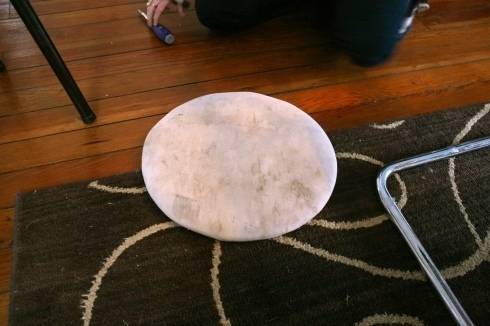
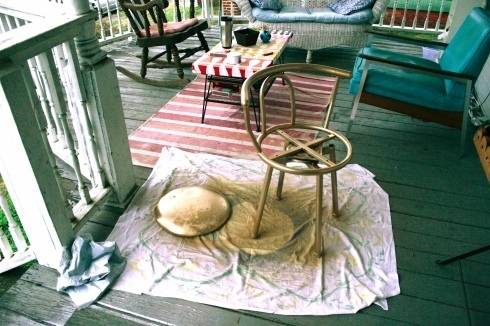
Next we coated the cushion with a sealer to make sure it wasn’t too absorbent when we painted it. If you’re dealing with a cushion that’s upholstered with cotton or some other super absorbent fabric, you’ll probably have to recover it with something sturdier, like canvas. While we waited for the sealer to dry, we moved to step 2.
Step 2: Sand down frame and spray paint it gold.
The chair was made of metal, but it had sort of a slick, glossy finish and we weren’t sure than spray paint would take to it, so we took sheets of sandpaper and sanded the entire frame to scuff it up a little. Make sure to wipe it down when you’re done, since it will be dusty (in our case, it was a gross black metallic dust), and wait for it to dry before starting to spray paint.
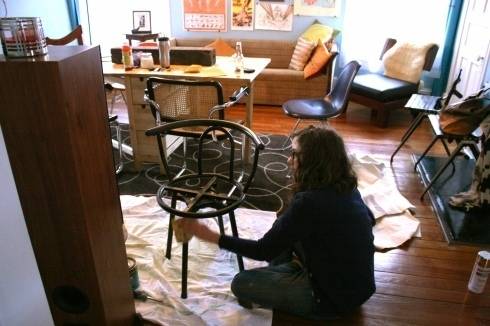
Next we spray painted the frame of the chair, making sure to spray evenly and to catch all the nooks and crannies. We sprayed it thoroughly with one coat, ran out of spray paint, went to the store for more, came back and added a second coat. Depending on the shape of your chair, you may need to turn it upside down after it had dried and make sure you’ve gotten every spot.
By this time, the sealer had dried on our cushion, so we spray painted that gold as well, waited for it to dry and sprayed another coat. Once the frame and cushion was dry, we moved to step three.
Step 3: Paint the seat
Once the seat was dry, we taped off zig-zaggy lines where we wanted the gold to show throw and painted it with white wall paint we had in the attic.

Immediately after painting, we removed the tape strips. We didn’t wait for it to dry because we worried if we did, the paint would dry to the masking tape and could pull off some of the gold paint with it. Once the wall paint dried, we sprayed it with a matte finish spray paint and sealer to prevent cracking and moved on the the final step.
Immediately after painting, we removed the tape strips. We didn’t wait for it to dry because we worried if we did, the paint would dry to the masking tape and could pull off some of the gold paint with it. Once the wall paint dried, we sprayed it with a matte finish spray paint and sealer to prevent cracking and moved on the the final step.

Step 4: Reassemble the Chair
Finally, we screwed the base back on the the frame and reveled in the fanciness of our newly madeover chair.