
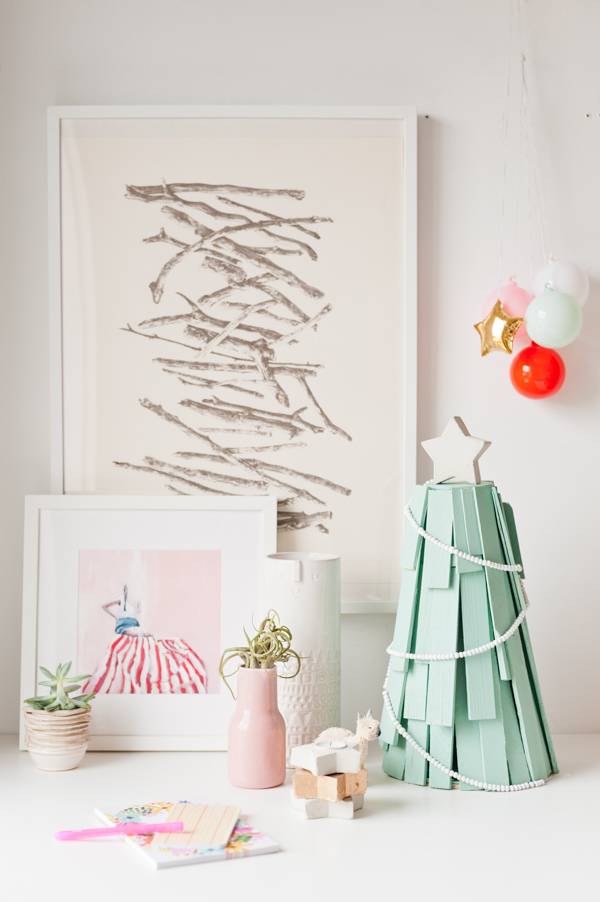
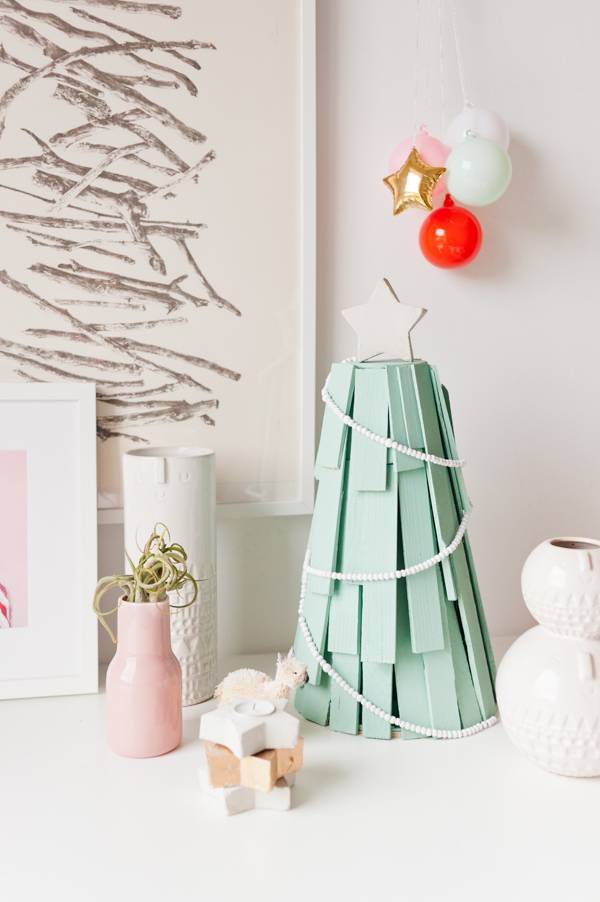
I’m getting into holiday decorating much earlier than normal this year. What about you? And I thought I would try my hand at another wood project because I happen to have a bunch of wood shims lying around from another project. So, with the help of the folks at Dremel, I created a tabletop wood shim Christmas tree for the holidays that is fun, festive, and a little bit pastel. The finished tree is about 16 inches tall, making it especially perfect for anyone with a small space that doesn’t have a lot of room to spare. Click through for the full tutorial.
Here’s what you’ll need to make your own DIY tabletop Christmas tree…
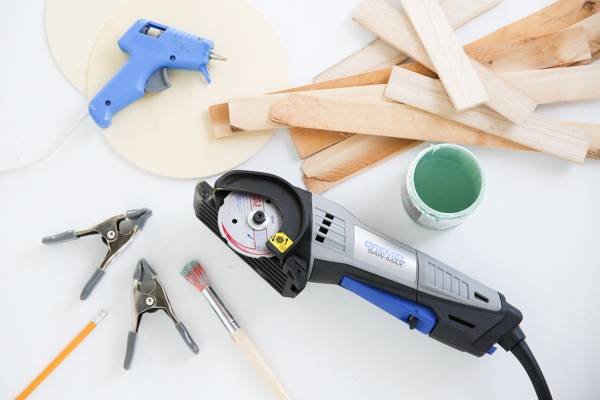
Materials:
- Dremel Saw-Max
- wood shims (I used 16 inch and 6 inch store bought lengths, then cut them down further)
- 3 wood rounds – 8 inch diameter / .25 inch thick
- 1 wood round – 4 inch diameter
- clamps (for securing wood while cutting)
- glue gun + wood glue sticks
- pencil
- acrylic paint or interior house paint (I used a mint green color)
- paint brush
How To:
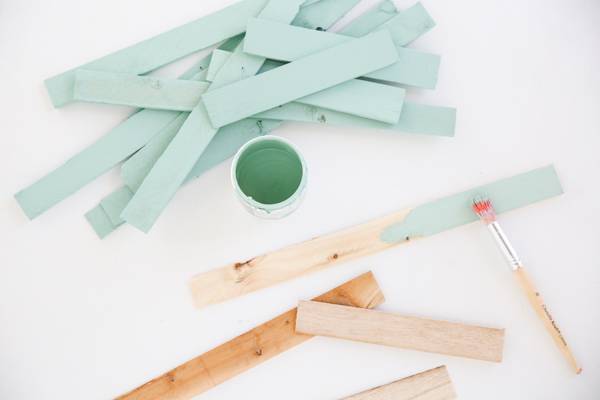
1. Start by painting the wood shims with a paint brush on all sides. You’ll need to allow the paint to dry before flipping the shims over and getting the backside. Don’t forget about the sides too. While you’re waiting for the sims to dry, paint the wood rounds as well (including the sides). FYI, there’s no need to prime the wood first (unless you really don’t like the look of some of the grain coming through ever so slightly).
2. Once everything is dry, it’s time to start assembling the tree. Start by heating up your glue gun (with wood glue sticks) until it reaches the proper temperature. Then, glue your 3 (8 inch) wood rounds together to create thicker base. *If you have a thick wood round already, you can skip this step.

3. Then, liberally apply wood glue to the bottom .5-.75 inch of a 16 inch wood shim and attach it to the circular base at an angle. Hold in place while it is drying, according to instructions on your wood glue packaging. This is why it’s important to use a thick base OR glue several layers of wood rounds together.
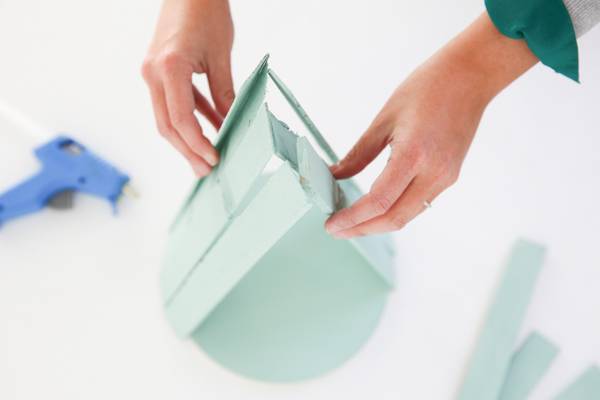
Repeat this process with 3 shims in a row. Then, on the opposite side of the circle, add 3 more shims the same way. This will help stabilize everything as it’s drying.
*Step 3 is easier with a friend around to help hold things in place while they’re drying. OR use a container that’s slightly smaller in diameter and height to help keep things propped up while drying. I didn’t figure that part out until after I had already started.

4. Once all the shims have been attached and have had ample time dry, bring them together at the top gently.
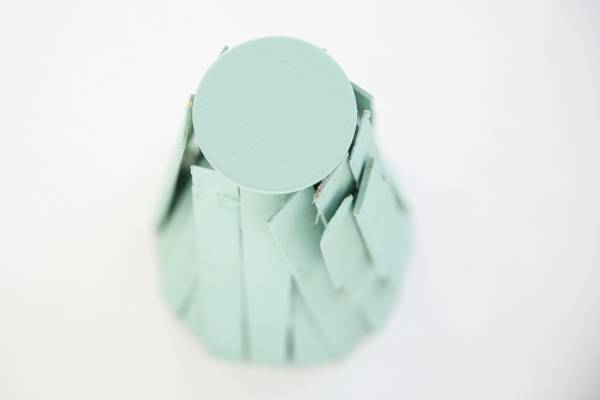
5. Then, attach the smaller 4 inch round with more wood glue. This will give the piece a more finished top.

6. Once the top has been glued, it’s time to give the tree more dimension, by adding shorter, staggered layers throughout. This is where the Dremel Saw-Max comes in handy. Using a pencil to mark off varying lengths, clamp excess wood shims to a workbench or table to secure. Then use the Saw-Max to make your cuts.
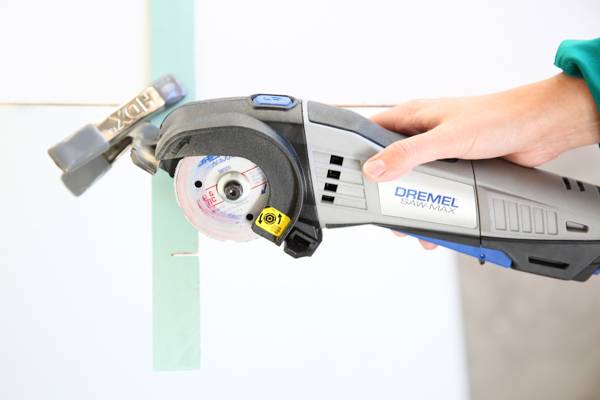
This was my first time using the Dremel Saw-Max and while I’m pretty well versed in the DIY department at this point, I don’t do a ton of wood projects. So, I was a little unsure how long it would take me to get used to the tool. But honestly, it was extremely easy to use, the cuts were super quick, and overall it was far, far more efficient than using a handsaw. Saved me so much time. And the cuts were way cleaner. Highly recommend it!
Once the cuts are completed, be sure to touch up any edges with more paint. Then, glue to the existing structure in a random staggered pattern.
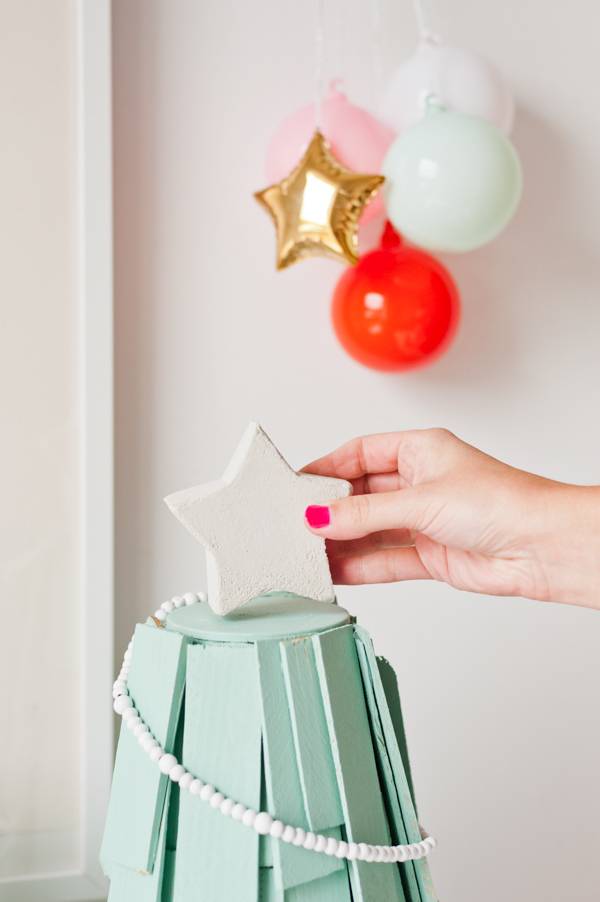
Take It Further: I added a a small DIY garland of wood beads (which was just a smaller and more simplified version of this wood bead project) and a concrete star ‘tree topper’ to cap things off. As another option, you could leave the top flat, or even add a votive candle on top instead.
That’s it! So, what do you think?
Any interest in tackling a DIY wood project like this for the holidays?
This post is sponsored by Dremel. Thanks for supporting the brands that support Curbly!
I love the idea, but I want to try this with my students using Popsicle sticks and recycled cardboard!