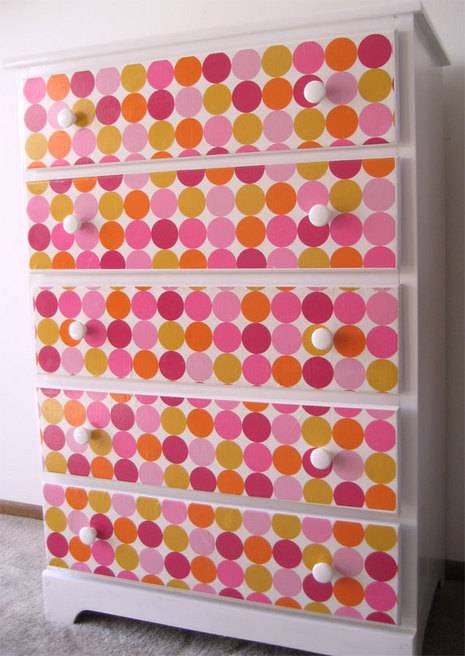
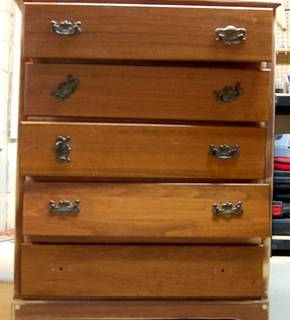
My three-year-old niece just moved from the nursery to her first “big girl room,” and the only thing holding back her new space’s style is this worn dresser from the 1960’s. It’s in good shape, but the finish is tired, and there are several broken pieces that are simply unacceptable for a toddler’s room. So, as a birthday gift, I wanted to turn this tattered piece into a sparkling pop bureau that suits her personality perfectly.
Click play, or watch the video here.
This technique will work on any non-lacquered wood furniture that you might wish to paint. Just adjust according to your needs. If you have any questions, post them below!
Materials
• Used furniture
• Latex primer
• Semi-gloss latex paint
• Painting supplies
• Colorful paper (such as gift wrap)
• Mod Podge or white glue
• Polyurethane finish
• Tack cloth
• Sandpaper (220 grit)
• #0000 Steel Wool
• New drawer pulls
• 1⁄4 hardboard
• Wood glue
• Wood filler
• Small nail
• Saw
• Screwdriver
• Safety gear: safety glasses, dust mask, gloves, ear protection
1. First, remove all the hardware and assess the condition of the furniture. Fill in any scratches or dents with wood filler, and remove any rough edges with sandpaper.
2. Sand the entire piece with 220 grit sandpaper until all the sheen in the wood is gone. Then wipe it down with a tack cloth. If any parts need replaced, do so now.
3. Open a window (or work outside) and apply an even coat of latex primer. Allow it to dry, and if its very splotchy, apply one more coat of primer.
4. Roll on a coat of paint onto the whole piece, and allow it to dry. Then sand the painted surface with 220 grit sandpaper, and wipe away the dust. Repeat the process-paint, dry, sand, wipe – and then apply a third and final coat of paint.
5. Add any extras, such as the color in the drawers in my niece’s dresser.
6. To apply the patterned paper, wipe down the surface and spread on a coat of Mod Podge or watered down white glue. Lay down the paper and squeeze out any air bubbles, and then add a couple coats of glue to the top of the paper. After it dries, if there are any huge bubbles, pop them with a sharp blade, and paint another top coat of glue.
7. Apply a coat of gloss or semi-gloss polyurethane finish and allow to dry. Rough up the surface with steel wool, wipe away the dust, and apply a second coat of polyurethane.
8. Add the new hardware, such as drawer pulls or hinges.
9. Enjoy your new furniture!
Don’t Forget: Subscribe to the Curbly.com YouTube Channel.