
Air dry clay is such a fun, versatile craft supply. You can use it to make just about anything and paint it whatever colors you want once it’s dry. Plus, since you don’t have to bake it, I think it’s great for dorm DIY projects! It’s dorm decor season, and this simple clay mountain photo holder is the perfect way to display your favorite photos in your dorm or in your home.
The project itself is quick, but you’ll need to allow time for the clay to dry out and harden. This will also make a nice gift along with a photo!
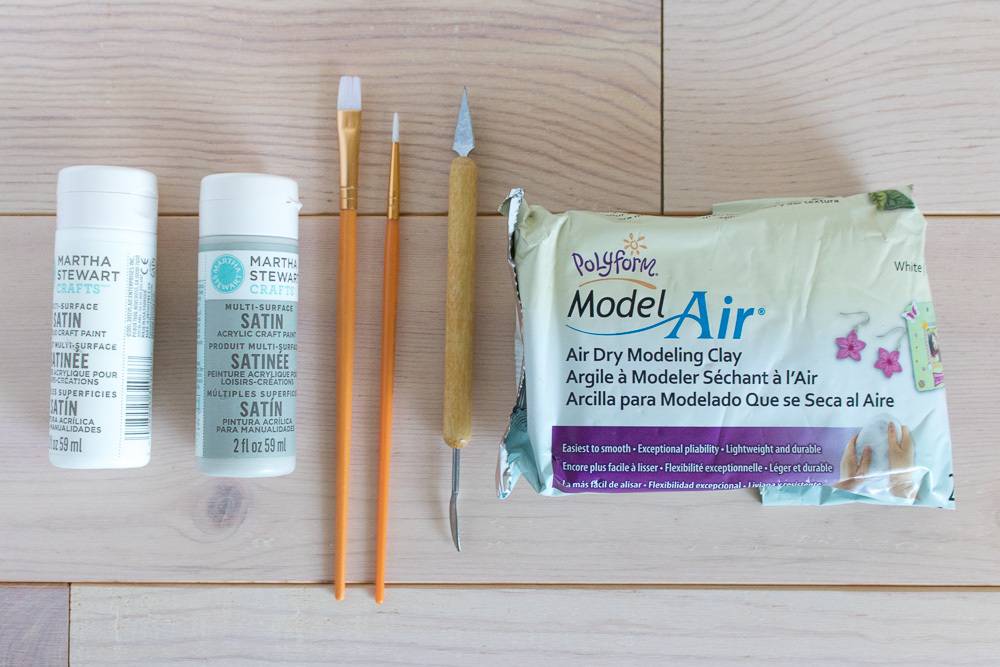
Materials:
- Air dry clay
- Rolling pin
- Cutting tool
- Paint brushes
- Acrylic paint
Step
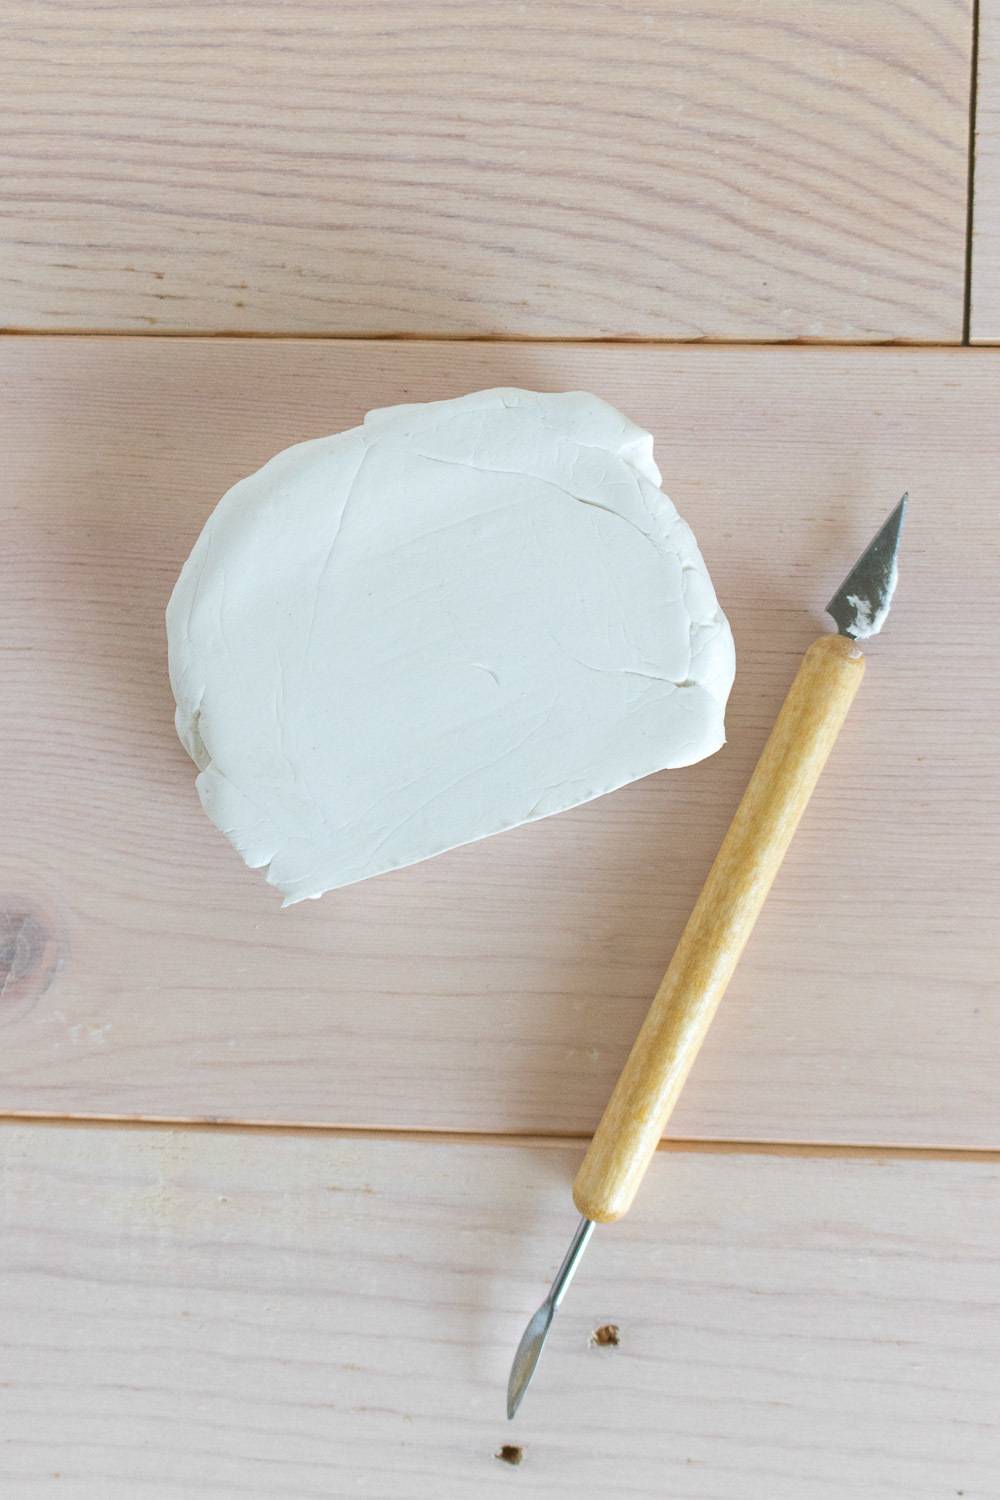
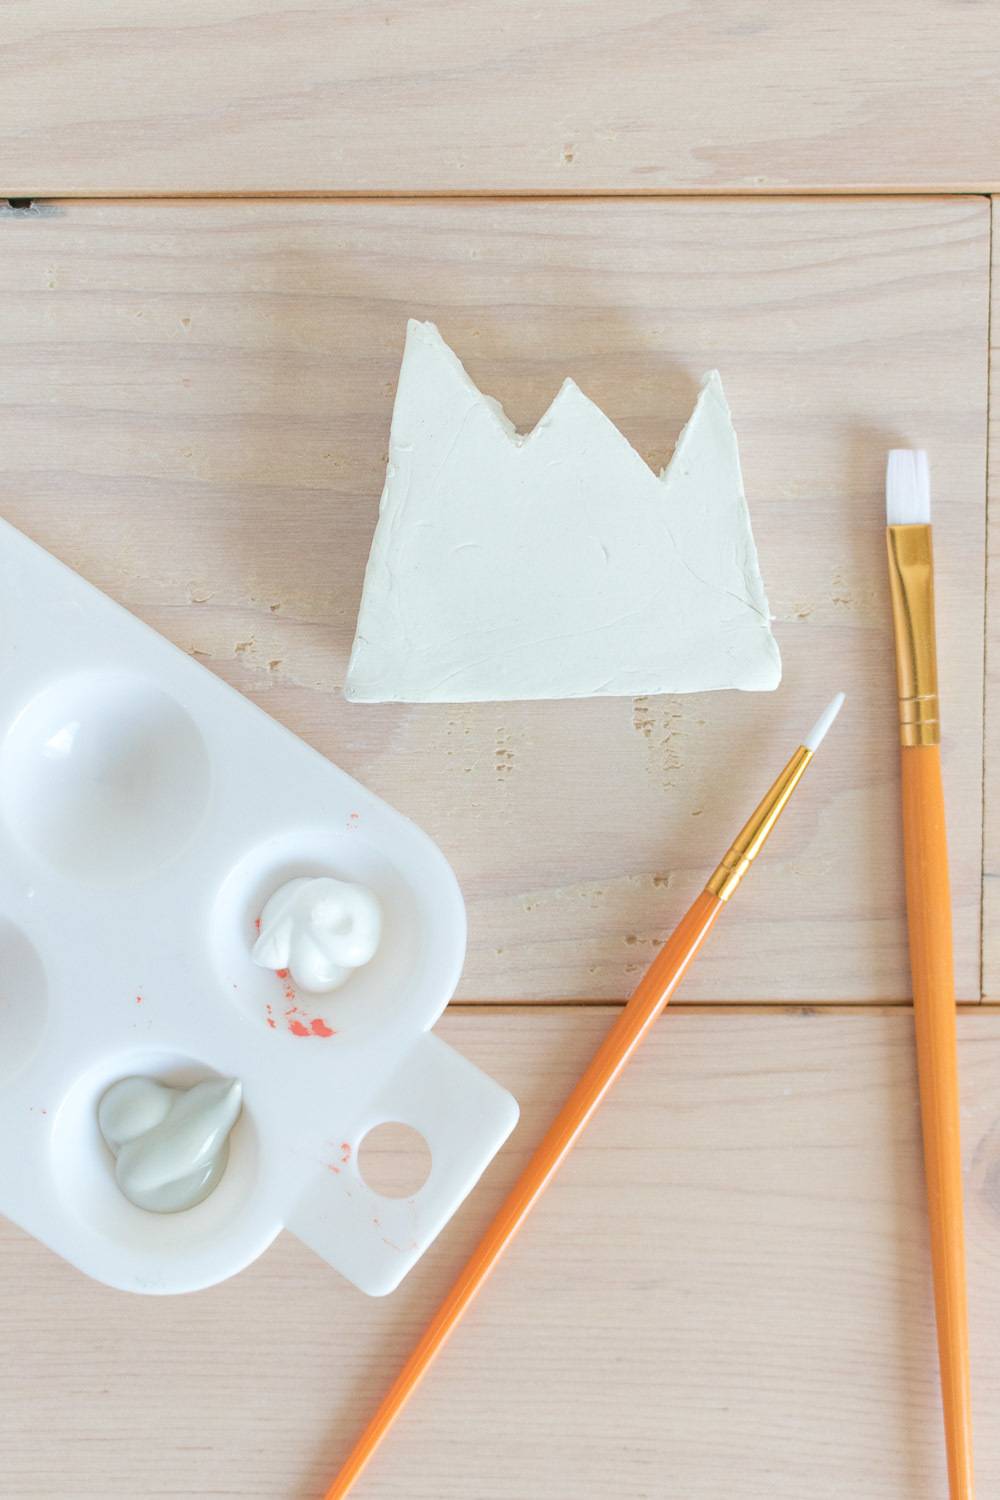
Take a chunk of clay and massage it in your hands, forming it into a thick disk that is about 4-5 inches wide. Place on a flat, covered surface and use the rolling pin to flatten. Stop when the clay is about 1 inch thick. In this case, thicker means sturdier.
Step
Use a cutting tool – either clay tools or a hobby knife – to cut straight along the bottom. This will be the flat bottom of the mountain.
Step
Then cut the straight sides at a slight angle. These will be the mountain sides.
Step
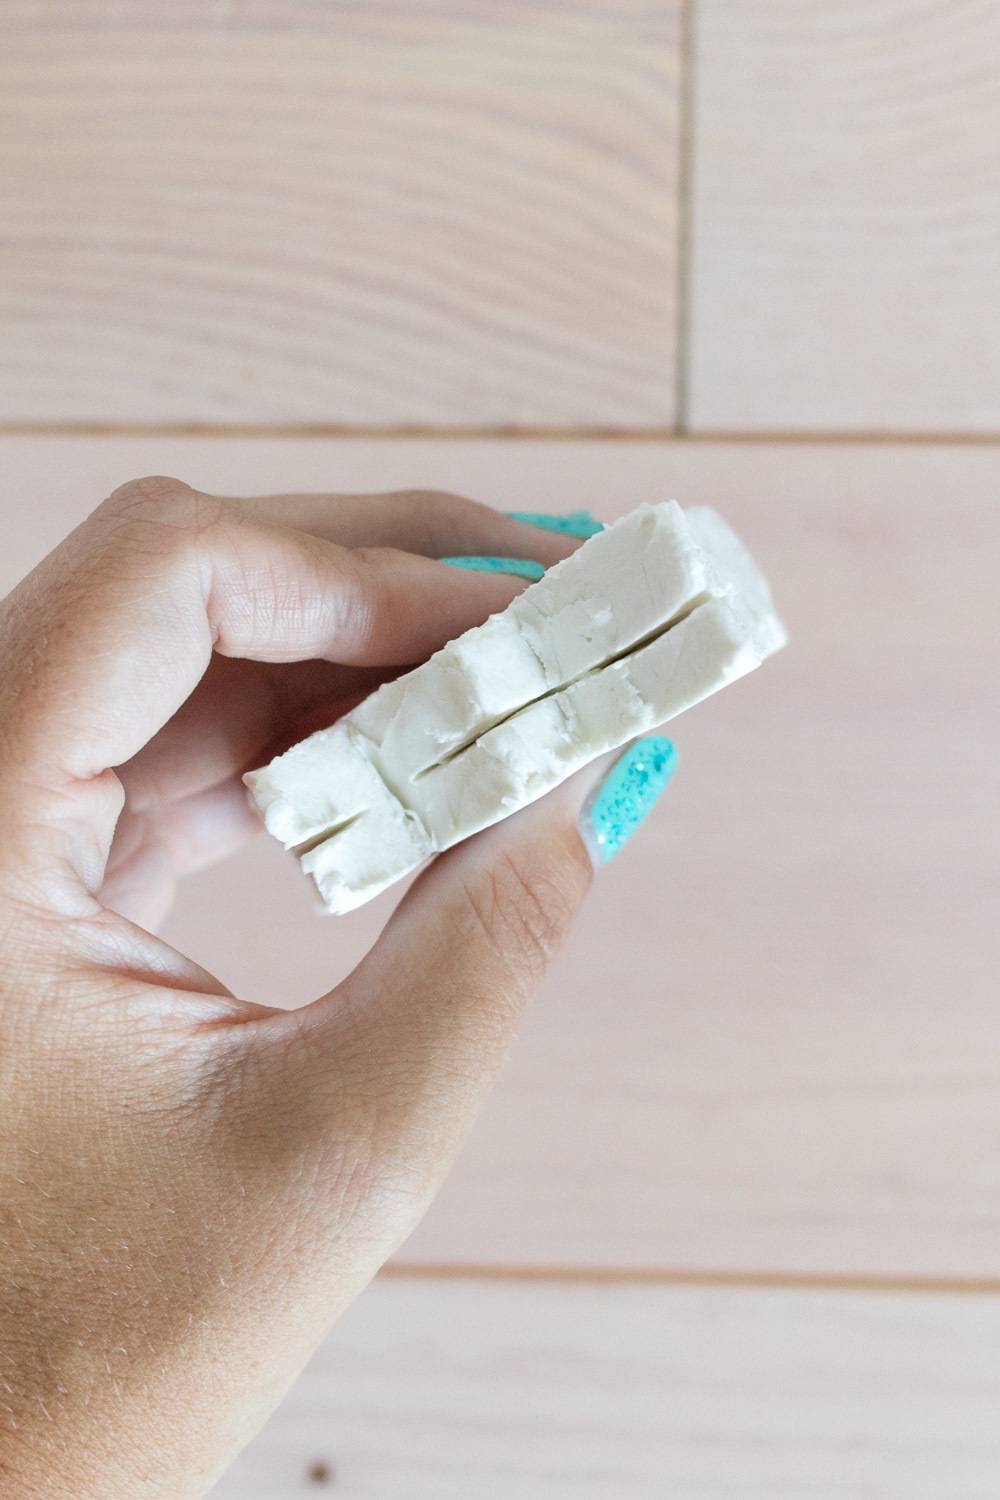
At the top, cut jagged pieces to become the mountain range. The sizes of the peaks should vary, but they don’t need to be perfect.
Step
Carefully pick up the clay and place bottom-side-down. Use the cutting tool to cut a deep slit into the mountain range. This will be where the photo will prop up, so it should go all the way across the range.
Smooth any jagged areas with your hands as needed and set aside to dry out completely overnight.
Step
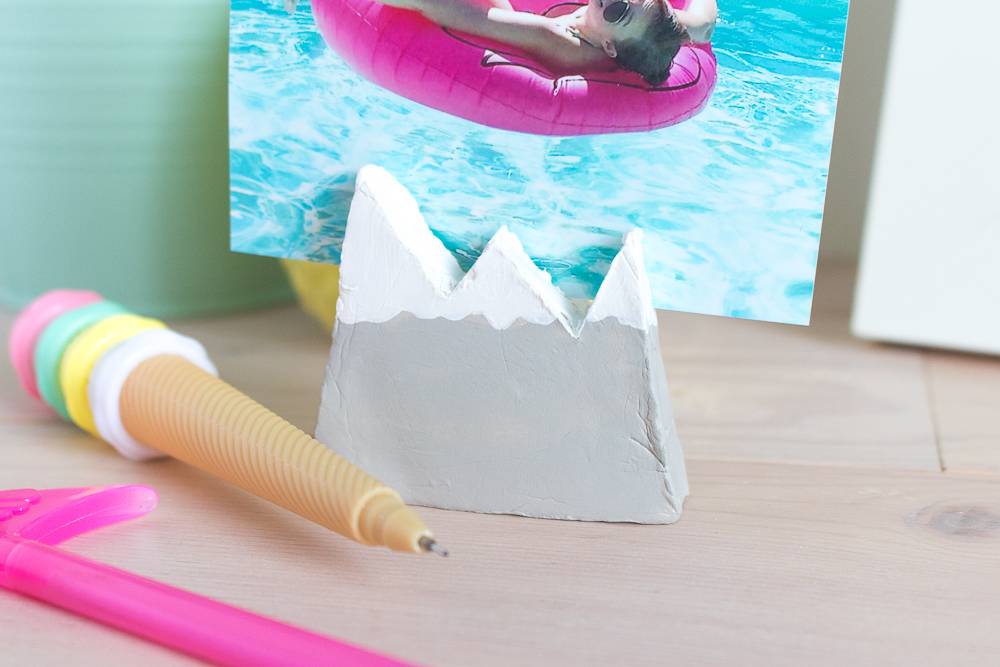
Once the clay has hardened, paint the mountains in your desired colors. In this case, white for snowy peaks and grey for the bottom of the mountain range.
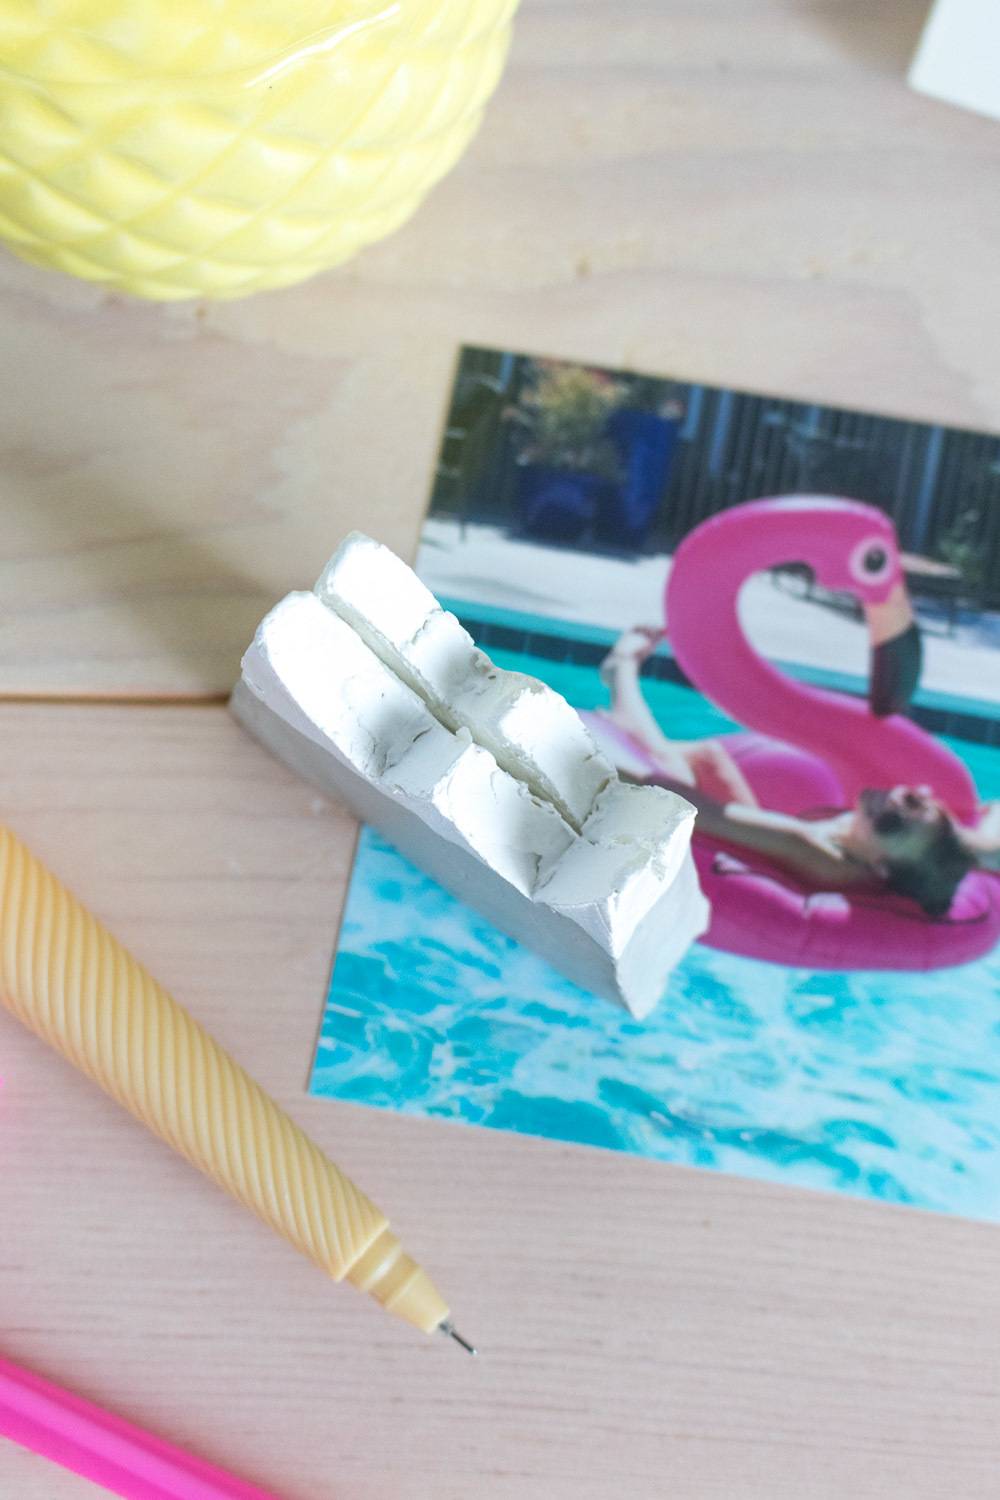
After the paint is dry, simply place a photo in the slit between the mountain range to display! It’s a sweet but small way to add more photos to your home.