Closet organizers are great, but for a smaller closet, they aren’t necessarily required. Case in point: my front closet. It had been the Bermuda Triangle of the house for a number of years now. Finally, it was time to conquer the territory, and by following some basic steps, we prevailed.
Step 1: Strip It
This may sound like a no-brainer, but it’s best to remove everything from the closet before you attempt to organize it. If it’s just a matter of straightening up, that might work, but our dark abyss was more that just a fluff and fold job.
At this point we made three categories in which to sort the contents of our closet. For us, they were: Keep, Throw, Give, and What is THIS doing in HERE?
Also, because we wanted to go all out, we removed the old shelving and rod as well. (The good news is, you may skip Step 2 entirely if you AREN’T going all out.)
Step 2: Pimp It
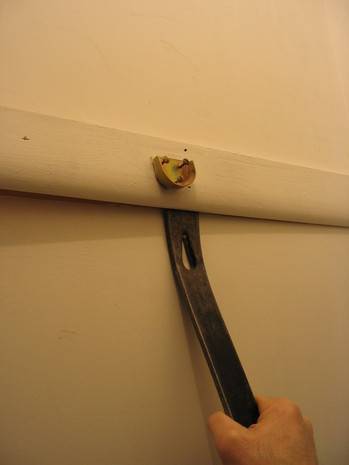
We filled the holes created by the removal of the old hardware with spackle and then painted the interior of the closet.
Next, we determined the height of our new shelves. For this, we measured up from the floor and marked the wall accordingly. Because we have an over-achiever in the house, we set up the laser level on a tripod and threw a line to achieve optimum level-ness.

We then installed the hardware to hang the shelving, which consisted of back clips and wall brackets, as well as specialty wall brackets that would hold the new rod (purchased separately).
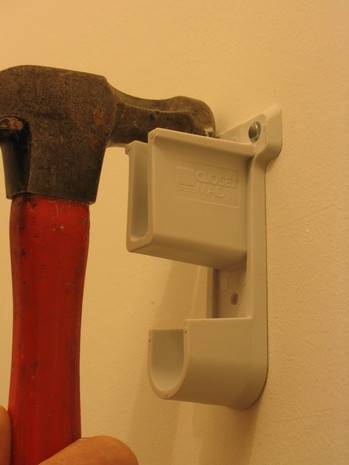
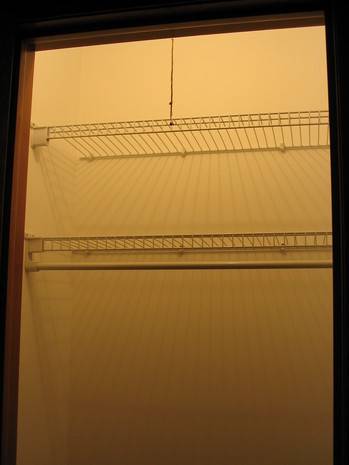
We finished up Step 2 by hack-sawing the shelving to size, installing it via the clips and brackets and hanging the new rod.
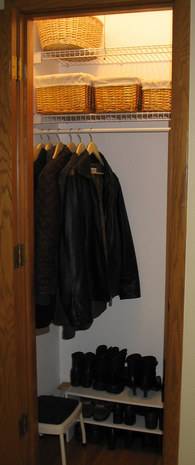
Step 3: Fill It
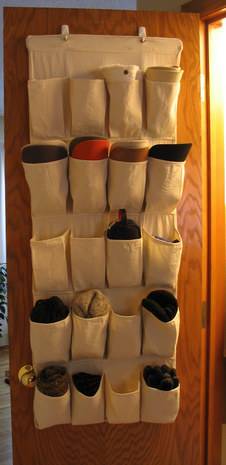
I searched the house for things I could use to organize the new closet. The pocketed organizer hanging on the door’s interior, using 3M Command Strips, was a hand-me-down, and although it’s made to keep shoes in, it works great for storing caps, gloves, scarves and such.
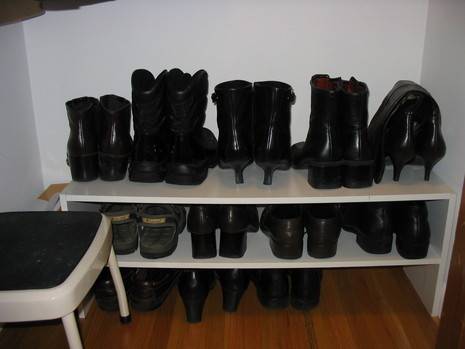
On the floor, I added a shoe rack/shelf that had been underutilized in another closet.
The oval basket on the top shelf had a very large handle, which I nipped off so it would fit and look better. Also added were a couple Sterilite shoe-box sized containers for household tools and electrical do-dads.
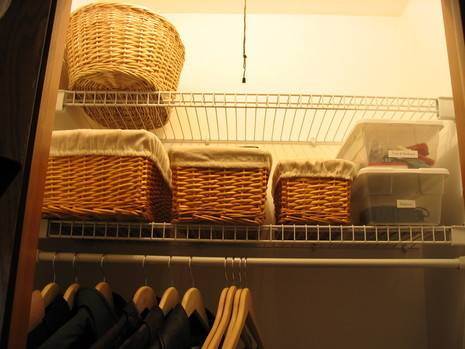
I did treat myself to a set of canvas-lined nesting baskets, which I found for 10 bucks at Walgreens of all places. I decided no ordinary hangers were good enough for the pimped-out closet, thus the new wooden hangers.
So, by following a few steps, we went from this (so embarrassing)…
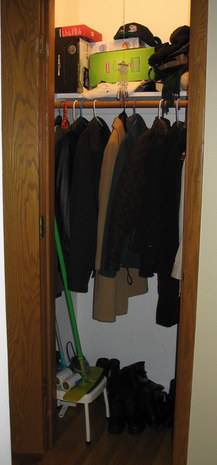
To this. Ah! Much better.
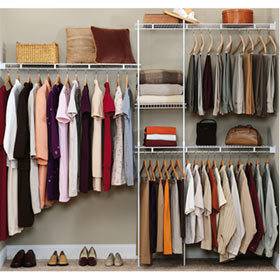
We used Closetmaid brand shelving and hardware for our project. Visit their website to find a retailer near you. And don’t forget to check out their on-line tutorials and vitural storage planner.