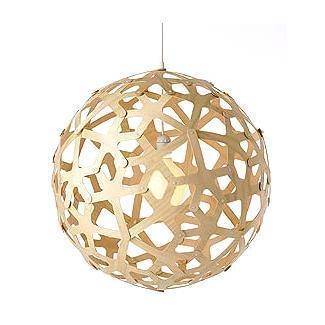
David Trubridge’s Coral lampshade has been around for a while. I saw
it first in Elle Canada and it’s been popping up everywhere (it’s in
this month’s Domino, where they have labeled it incorrectly as being a
Arne Jacobson piece). While it barely registered at first I am now
completely consumed by it…
wake-up-at-four-in-the-morning-thinking-about-it style consumed. The
trouble is that I don’t have $500 to spend on a lampshade. So I have
attempted a considerably smaller ‘Inspired by’ version,

I used:
- 3 rolls of Wood Effect Contact Paper
- Card
- A protractor, scissors, pencil
Here’s what I did:
- I covered the card on both sides with the contact paper.
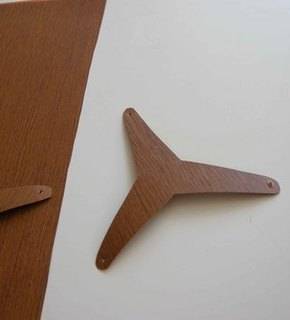
- I created a template for the three-pronged individual pieces, by
drawing a circle (I drew around a side plate) then used a protractor to
divide the circle into 3 (120 degrees between each line). I used this
shape, but you could go crazy shape-wise, so long as the lines are
central. - Once you’ve got your template cut out 20 of the shapes from your ‘wood’ card.
- Poke little holes in each of the ‘arms’ of your shapes, you could
use scissors or a SMALL hole punch. In the Center of one shape cut a
small hole like this, this will be your ‘top’ and the cord will go
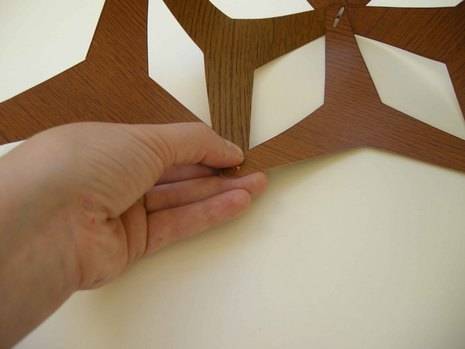
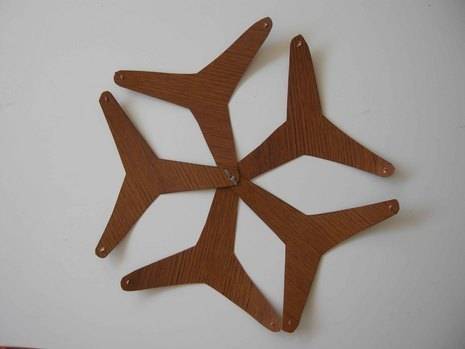
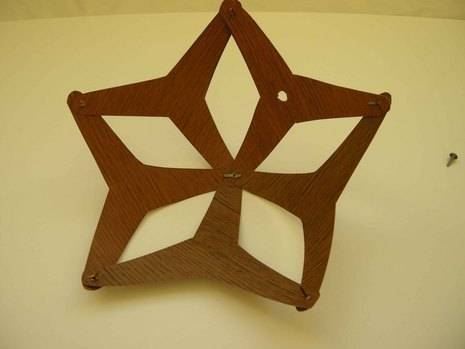
though here. - Join 5 of the shapes together with a brad, like this:
- next join the free set of arms together, poke the brads through but don’t close them. It should look something like this:
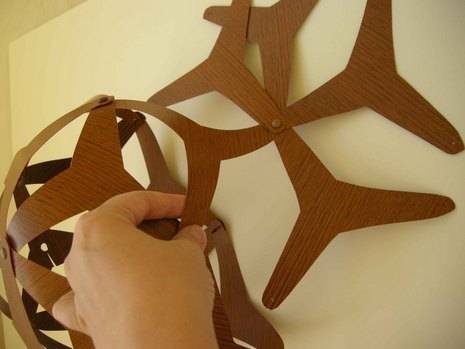
- Add the next layer of shapes, when there are 5 arms on each brad you can close them up. It should look like this:
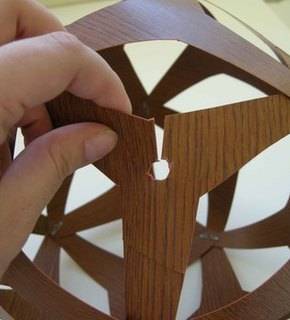
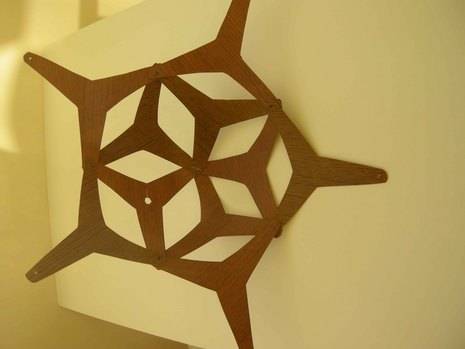
- Now start joining the arms together with more brads like this
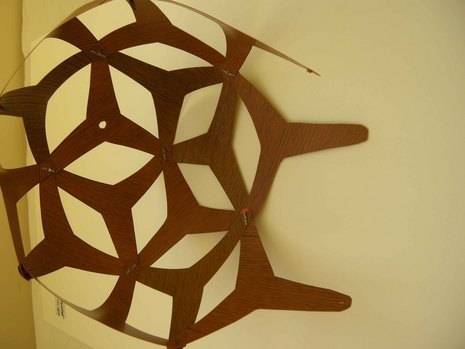
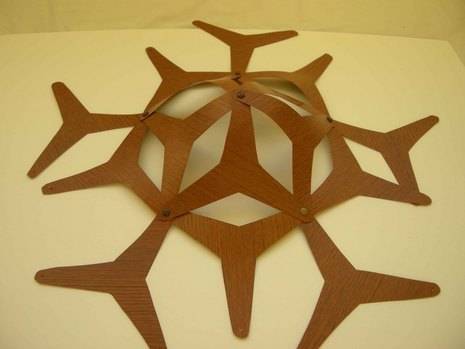
- the arms joining together should be forming a spherical shape like this:
- Almost done! You just need to add the last 5 shapes. It’s easiest
if you join them together at one point (like in the first picture)
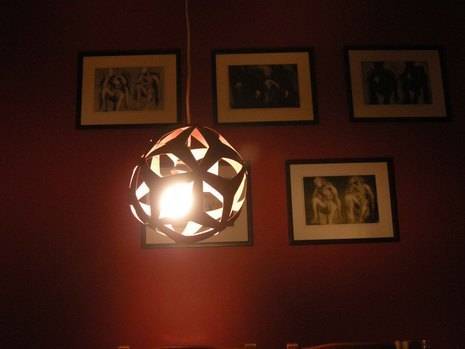
then attach them to the rest of the shape. - Done!
- Pop it onto your light fixture, making sure that the exposed bulb
doesn’t touch the shade anywhere. You could clip a bulldog clip to the
wire then pop the shade on top of it.