
A few years ago, when my wife and I moved across the country, we had absolutely no idea if anyone would ever come visit us. Sure, we had strong relationships with family and friends, and we moved to a city with plenty of attractions for visitors, but the truth is: we just didn’t know. We were far outside of driving distance, and cross-country air travel is an expensive investment. Both of our families had generations of firm roots in the Midwest, so it wasn’t just a location shift; it was a conceptual one too.
Good news: people came. They came for summer trips, for holidays, to spend time with us, and as a free launching pad for their own Pacific Northwest vacations. A few years later, they’re still coming. This summer alone, we’ve had no fewer than thirteen guests, with four more scheduled before the end of the year. We’ve become a little haven for folks exploring the mountains, the ocean, the waterfalls, the ancient forests, and the exceptional food and culture that Portland has to offer.
So, earlier this year, when we bought our first house, creating a guest room was a top priority. Thankfully, we found a place with an honest-to-goodness bedroom we could dedicate to guests. No more moving coffee tables and flipping desks and putting half a room in storage totes to make room for luggage and air mattresses.
But that also meant we had – literally – no furniture to put in there. Since hosting others is a real value for us, we decided to make the guest bedroom our first big project as we transform our new house into our forever home. So, we teamed up with True Value, our local neighborhood hardware store, to turn the worn out, patched up, 100-year-old empty room to a real home-away-from-home for our friends and family.

For more DIY projects, including my Ultimate Garage Bench tutorial (above), make sure to check out TrueValue on Facebook, Instagram, Twitter, Pinterest, and of course, TrueValueProjects.com.
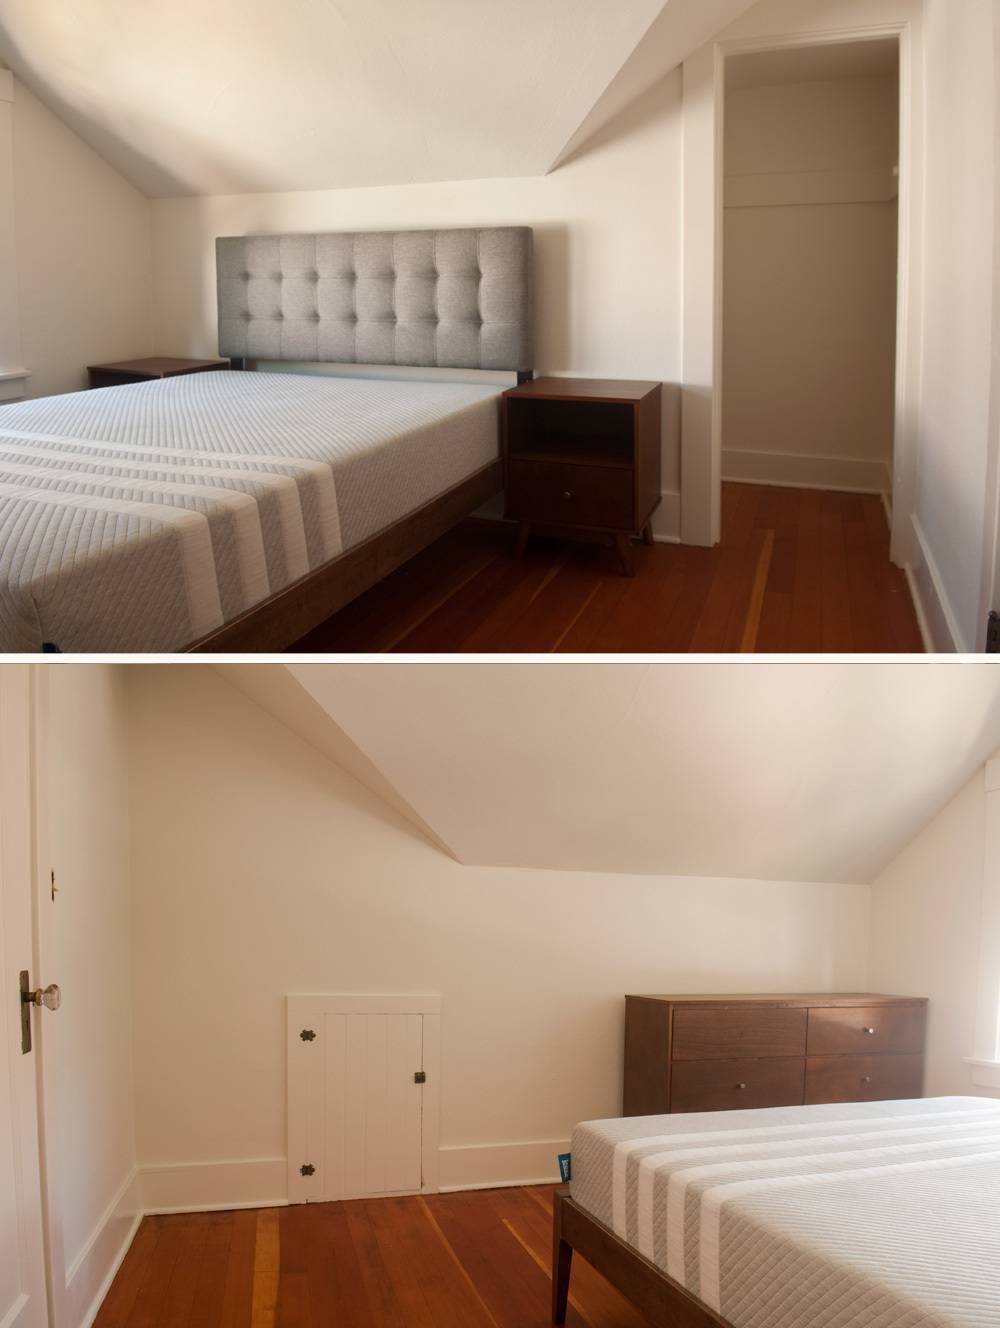
The Before
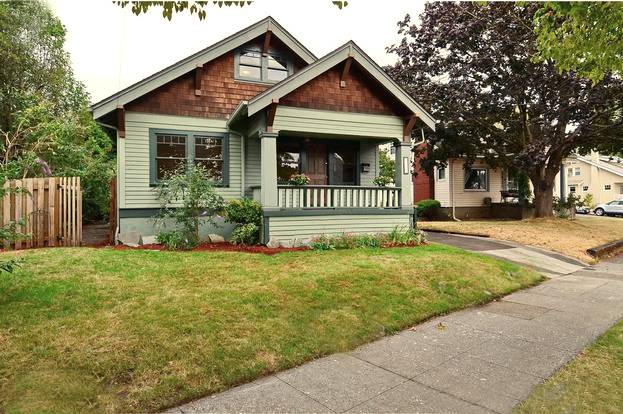
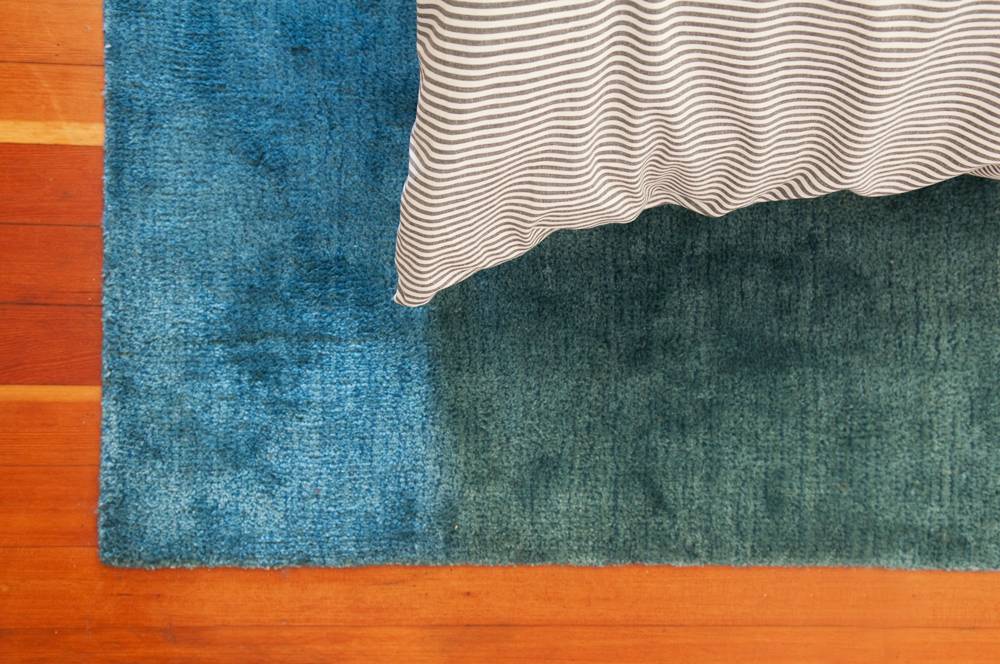
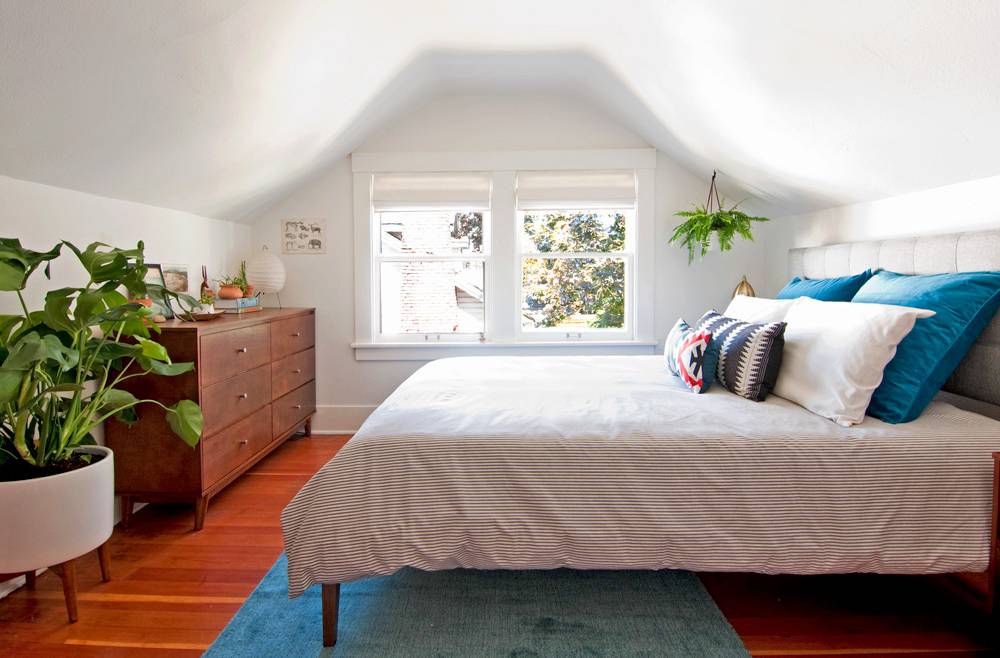
Okay, so here’s what we’re dealing with. It’s a second floor bedroom built into a dormer, so it has cool angled ceilings and a lovely nook-like vibe. It’s basically square, about 12×12’, and has a great set of original windows to let in natural light all day long.

Before we lived here, the house was rented to as many as seven young people, who shared it as roommates. So it bears the scars of many years worth of half-hearted repairs: hastily patched wall holes, weird cover-up paint jobs, and just-get-it-done landlord fixes. You can see the dark spots on the walls in the photos above. That’s the realtor’s handyman trying (and failing) to match the paint color …
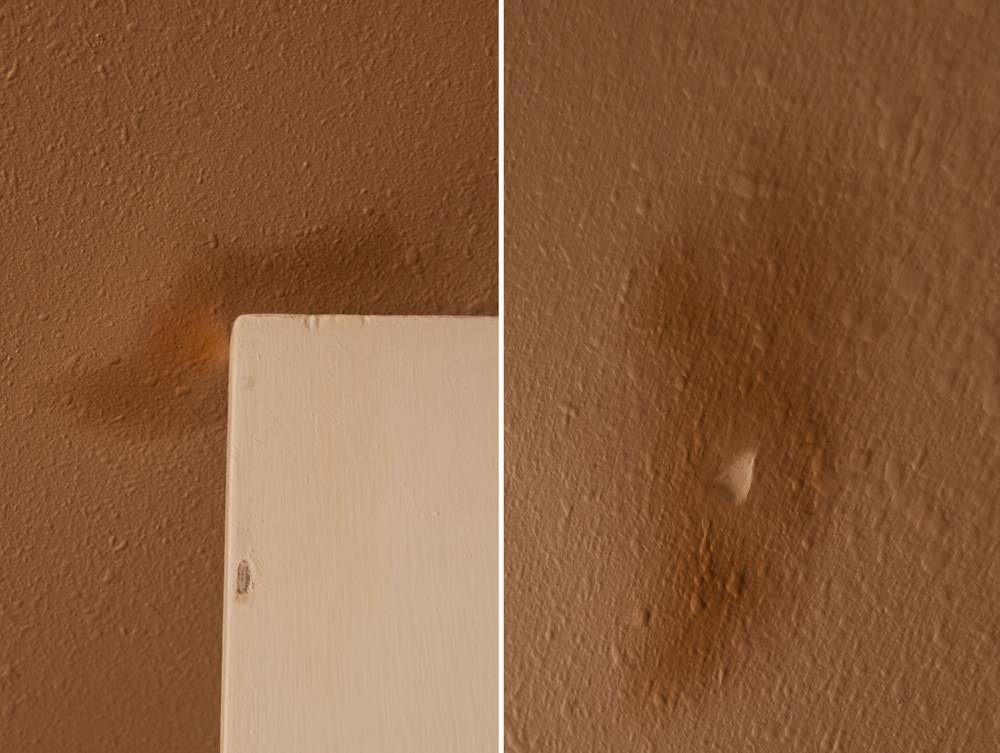
Also, because it’s an old house, things have shifted, and now the door actually bangs into the ceiling with quite a bit of force when it’s not latched shut – every, single, time. Also, note more patchy paint here:

It has a nice closet in the corner, but with a rather unusual door size. The original is long gone, and even if we could find a replacement with the right dimensions, there are decades of paint on the casing, and the hinges and hardware would have to be re-mortised. So, we needed to find a quick solution while keeping our eyes out for a new door.
We knew a huge aspect of making this room feel bright and welcoming would be focusing on the details, the little fixes and simple repairs that add up to make everything feel fresh and clean. Oh, and to redo all the questionable work and scrape away years of sloppy paint jobs on the windows, walls, and floors. Yes, the floors.
Let’s Make a Guest Room

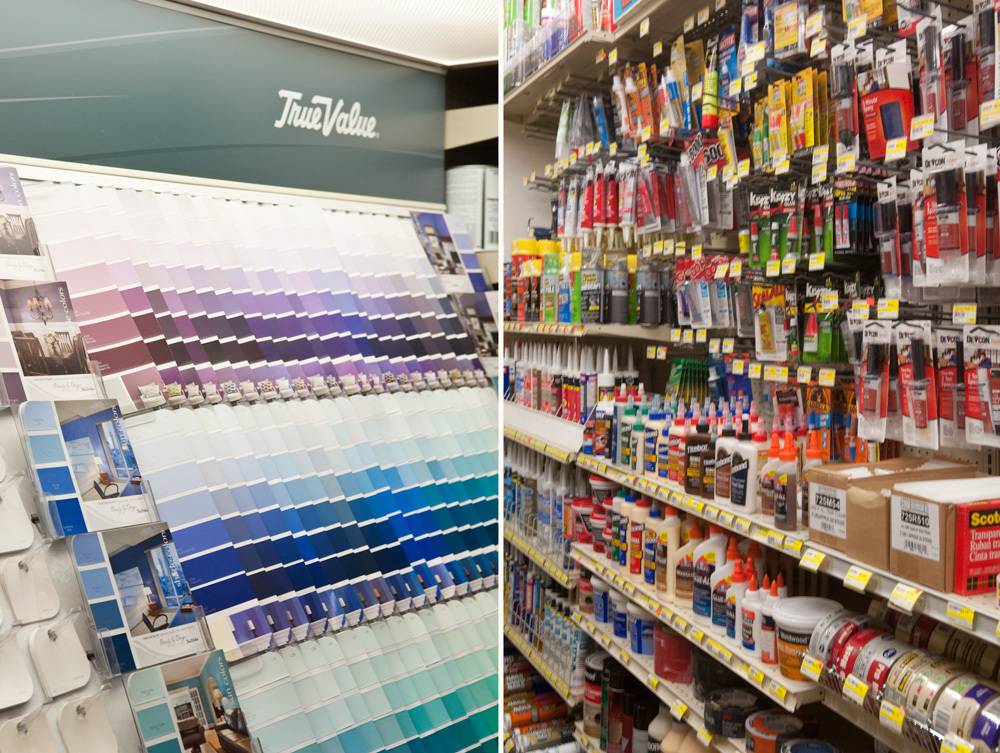
First things first: we headed to our local True Value hardware store to get what we needed to start from scratch. I really love this place, and here’s why:
- It’s right in our neighborhood! I can walk, ride my bike, or stop by on my way home from running errands any time I need to. With big projects like these, you end up making several trips for small things as they come up, so it’s great to be able to run in, grab exactly what you need, and get back to work within a few minutes.
- The staff is extremely helpful. When I’m going to the big box home improvement centers, I’m constantly doing research ahead of time and pulling up YouTube videos in the aisles to figure out how to accomplish my projects. At True Value, I know I can just show up and someone will ask me what they can help me find, and within a few minutes, I’ll have a solution and the materials I need to make it happen.
- Since it’s a neighborhood shop, they focus on materials and supplies for the older homes that exist here. The finishes match, things are sized appropriately, and hardware is easily replaced for period fixtures. Our neighborhood is full of Northwest bungalows and a few older Tudors, not new subdivisions and developer homes, and the store stocks the right kind of goodies to maintain these great Arts-and-Crafts-era houses.
First, we stopped by the paint section to pick out the new wall color. We knew we wanted something in the white family, but weren’t sure exactly what to go with, since we wanted to make sure all the trim work would stand out. Did we want an off-white for the walls and a true white for the trim? If we used the same paint on everything, would the window, door, and base trim just disappear into the space?
Thankfully, my new best friend Jason from True Value recommended going with a warm white for the whole room, opting for an eggshell for the walls, and then the same color in a semi-gloss on the trim. That way, the whole room reads as “white,” avoiding any of the gray, dingy feel you can sometimes get with older homes, while minimizing the shadows created from the dormer and strong roof lines.
So we went with a color called “Golf Ball” from True Value’s EasyCare line, which we thought would work best with the original Douglas fir floors, which at this point have aged to a red tone that we totally love.
A few other little items from the aisles, and it was time for a transformation.
Prepping and Cleaning
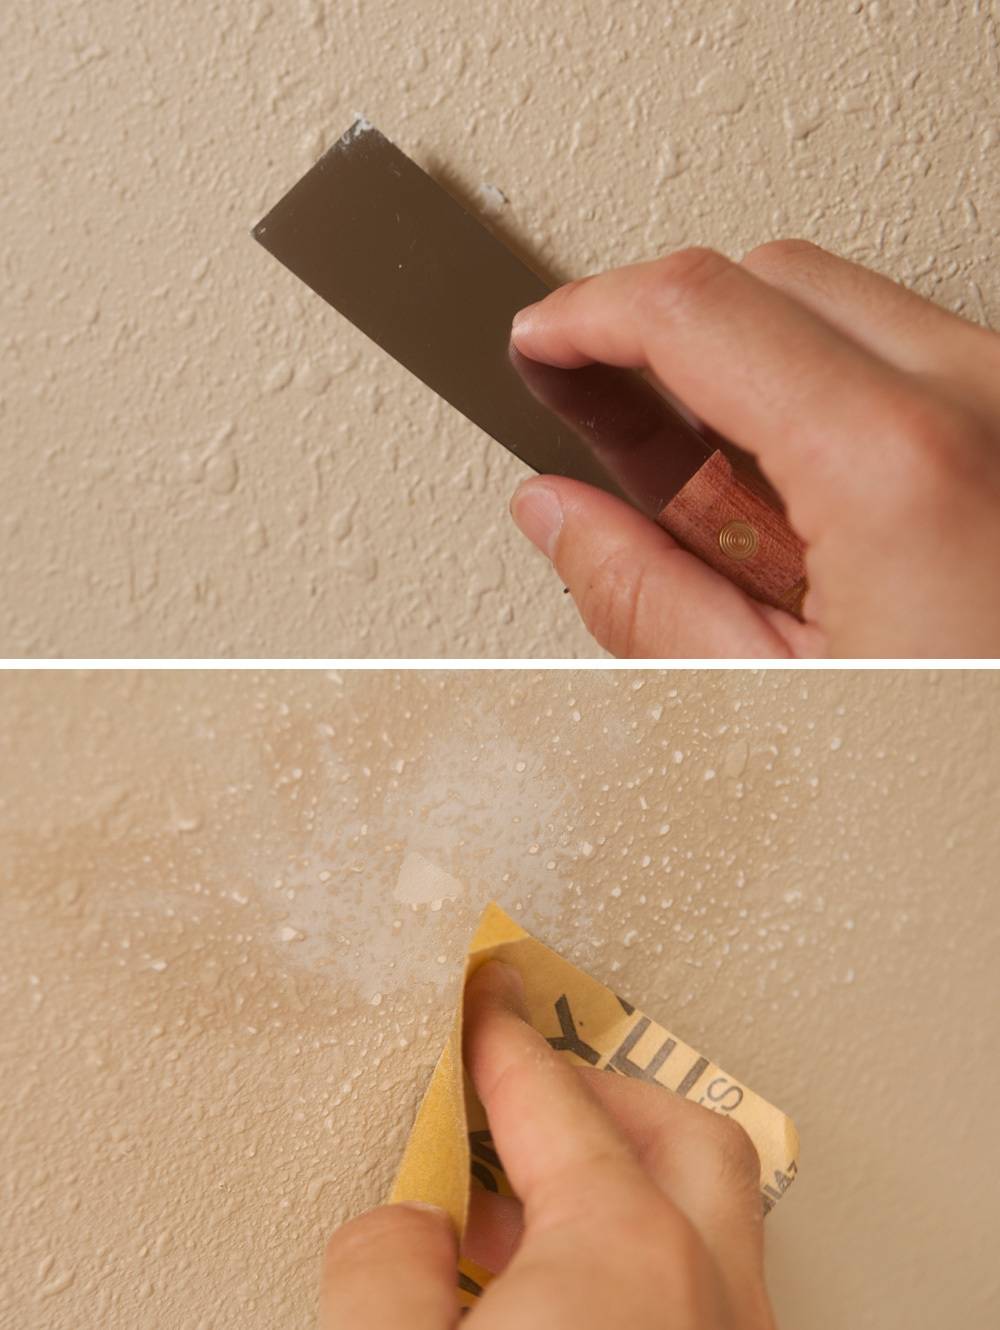
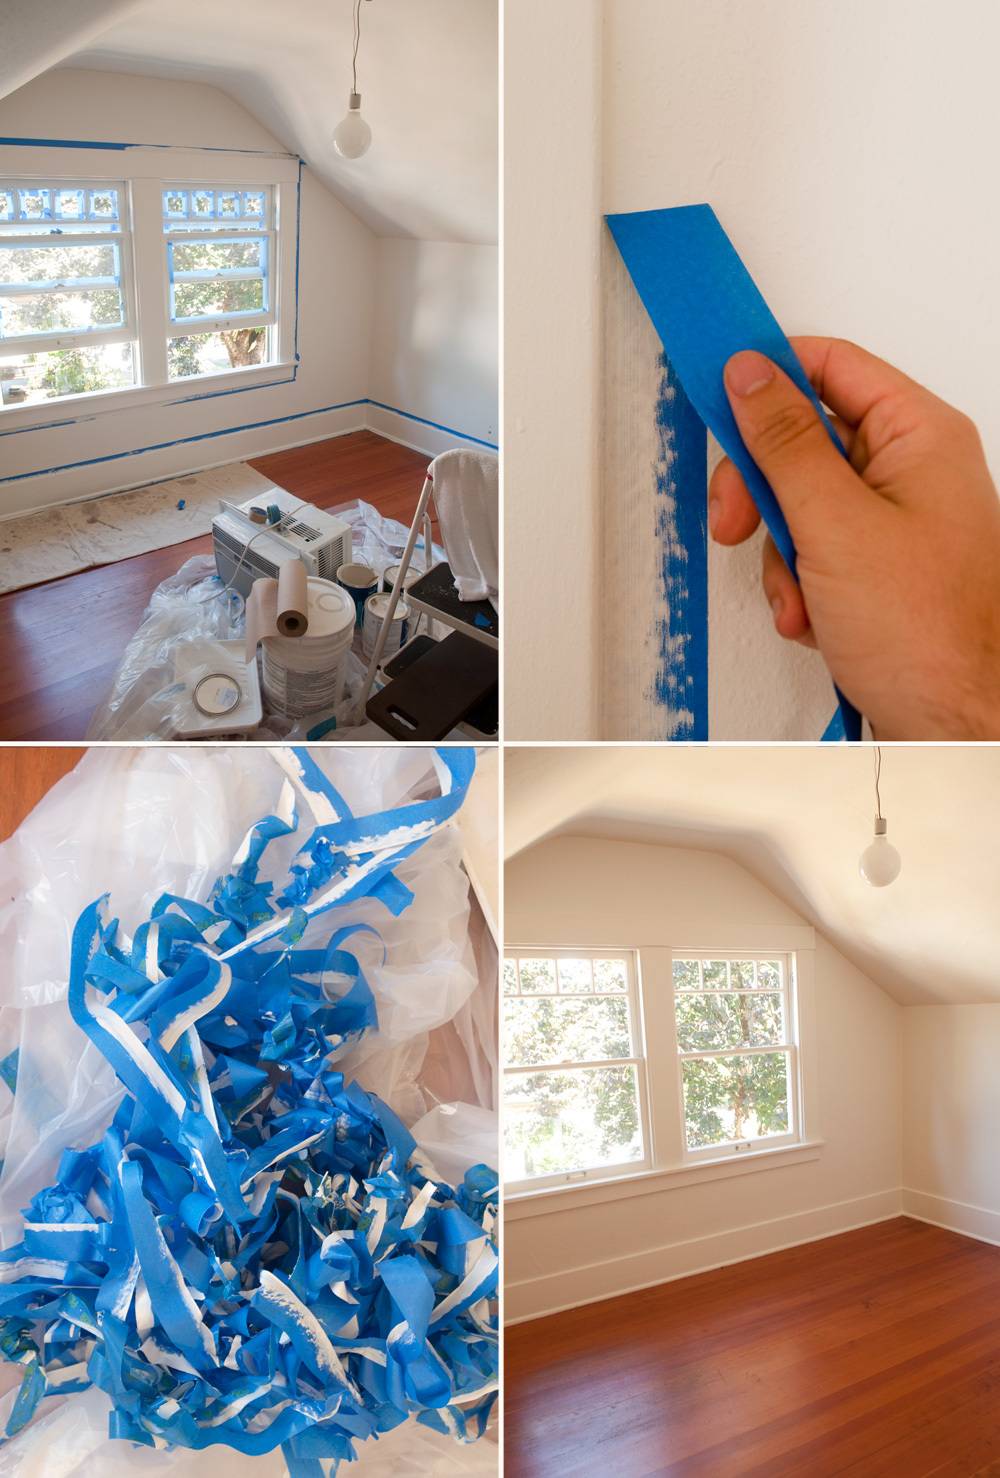
When you move into a new-to-you house, you often have no idea how or when the room was last painted. So, we decided we wanted to set ourselves up for success and get everything prepped properly. This means giving everything a deep clean so the primer will stick well and create a fresh, smooth surface for the walls.
There were a lot of pretty deep gouges in the walls, so we slowly built up a few layers of simple water-based spackling to make everything strong and flush.
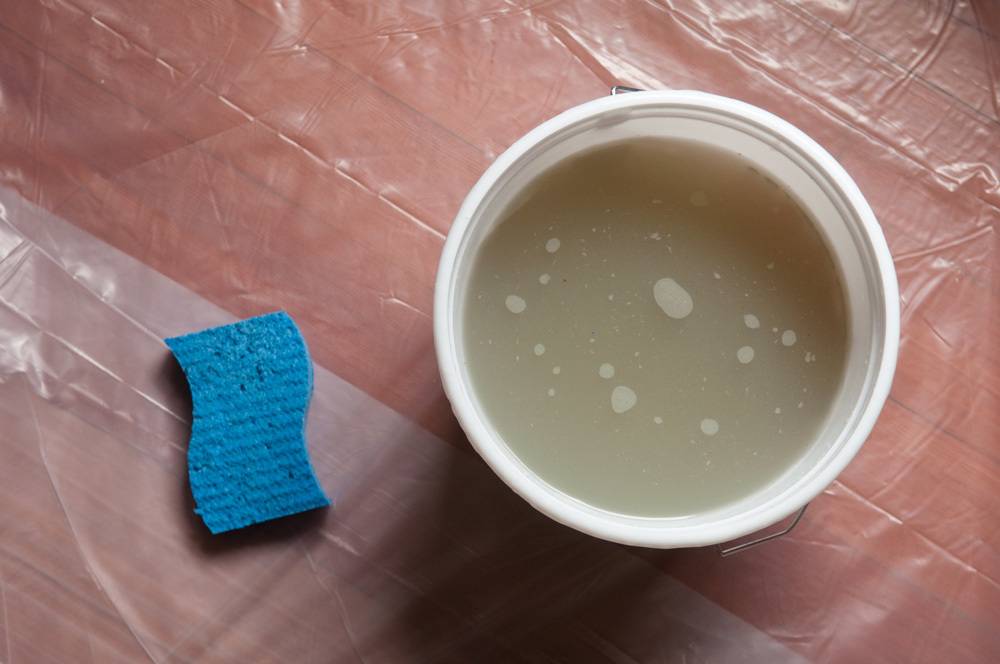
I also spent some time washing the walls and windows with a TSP solution. This might seem like a fussy extra step, but just look at the color of that water. All that grime was on the walls. You don’t want to paint over that. That’s a half-hour well spent.
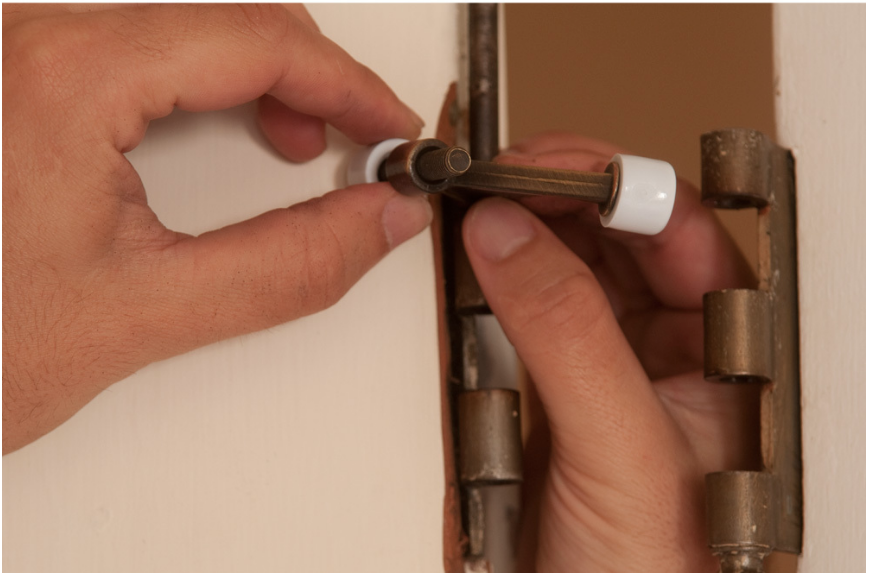
Jason also helped me find a hinge-pin door stop, which stopped the door from banging into the wall, and cost – wait for it – $2.00! I had all these elaborate plans to build and paint a wedge thing into the baseboard and somehow not make it a tripping hazard, and then I learn about this thing and it took me three minutes to install. I can’t believe no one put one of these on there before to prevent all that damage.
It’s the details, man. I’m telling you.
Painting, Painting, Painting
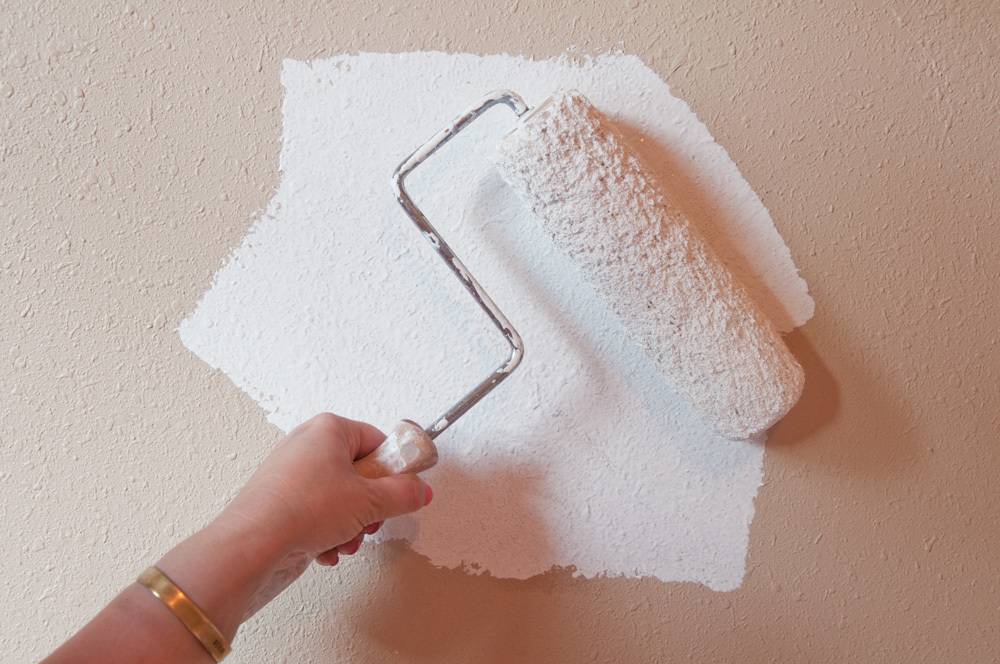
With the walls prepped, we began with a coat of water-based primer. This helps seal the surfaces and block stains in case there’s any future damage. (Many walls are right next to the roof and, again, it’s a 100-year-old house.) Plus, primer is much less expensive than paint, so it helped cover up that horrible blah-beige in fewer coats.
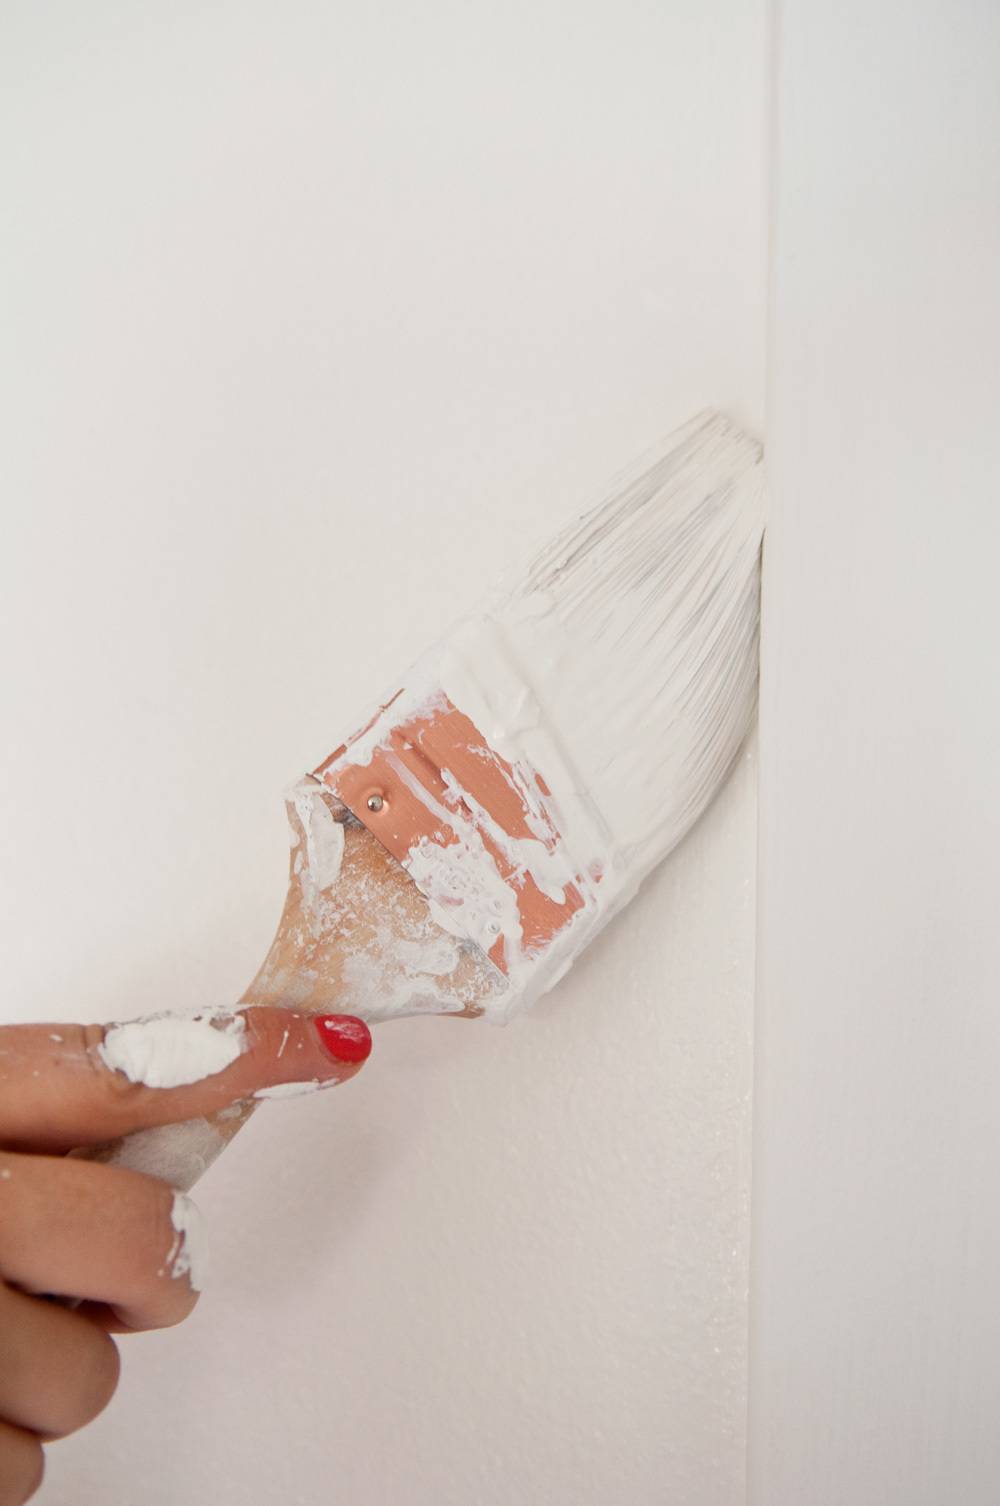
Then came two coats of eggshell “Golf Ball” on the walls, and a coat of the semi-gloss on the trim. The dormer room is great, with the ceiling and the walls just flowing right into each other and everything the same color. Makes quick work of painting.
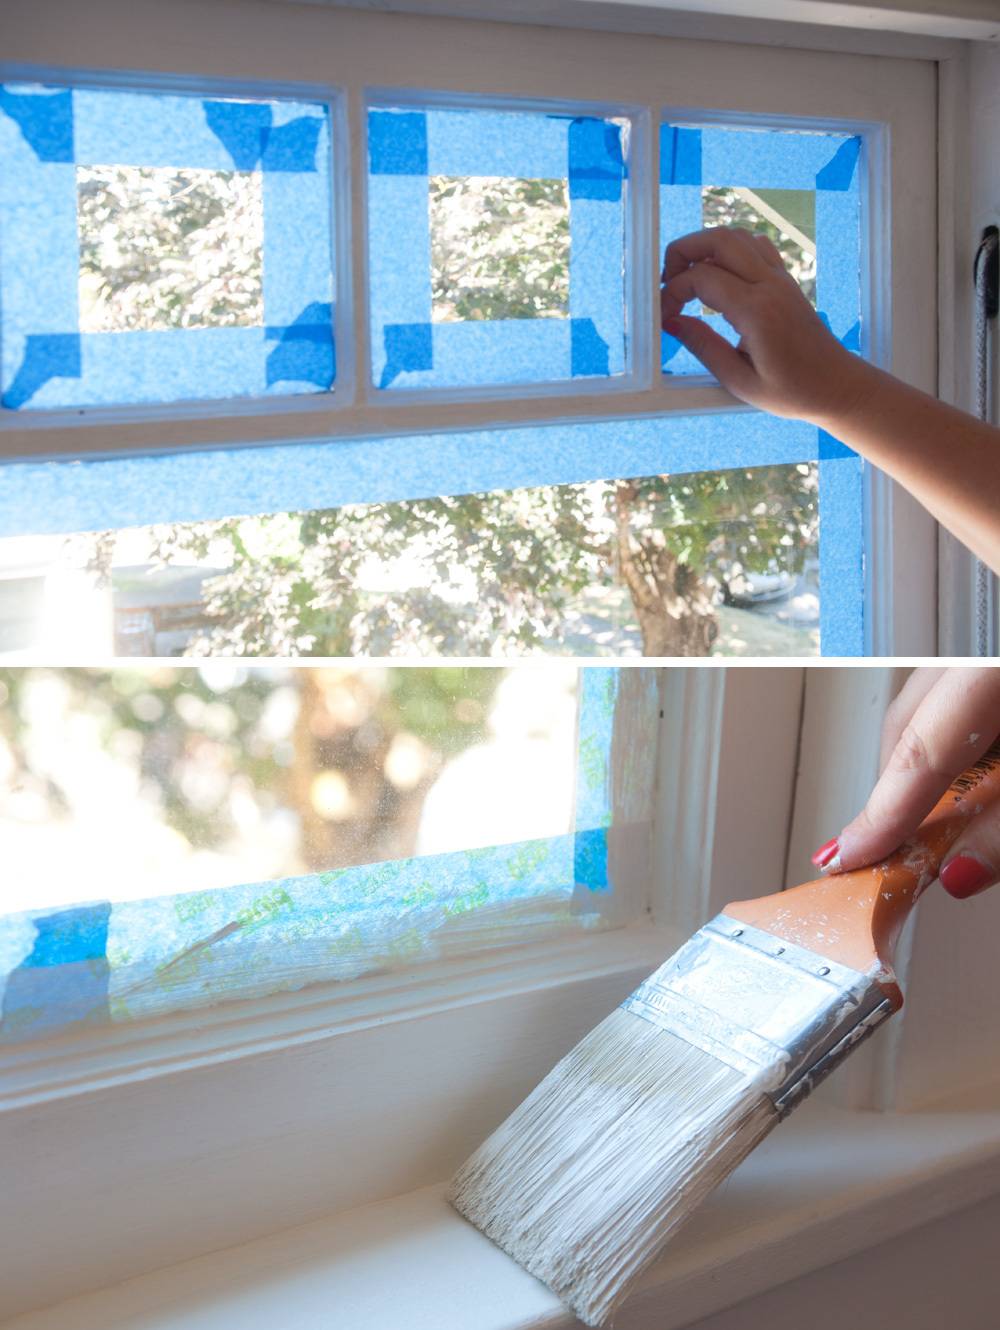
Whoever painted the windows last did not take the time to tape off the glass, so we found it worth it to scrape the old paint off with a putty knife, and then use blue tape to cover the panes.
Making Something Out of Nothing
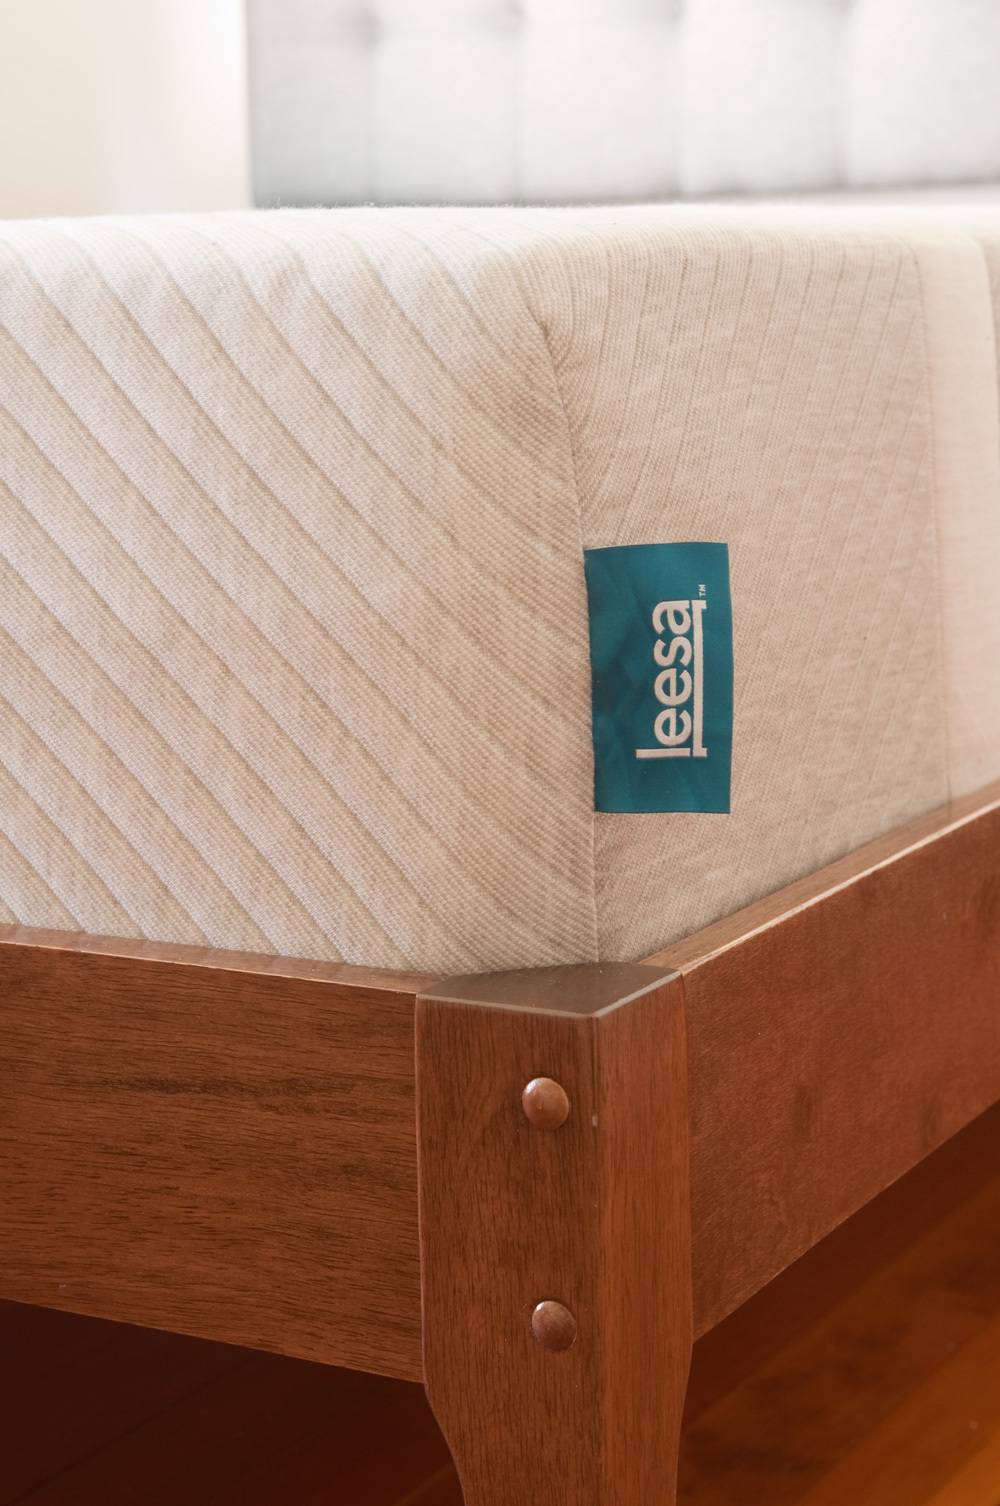
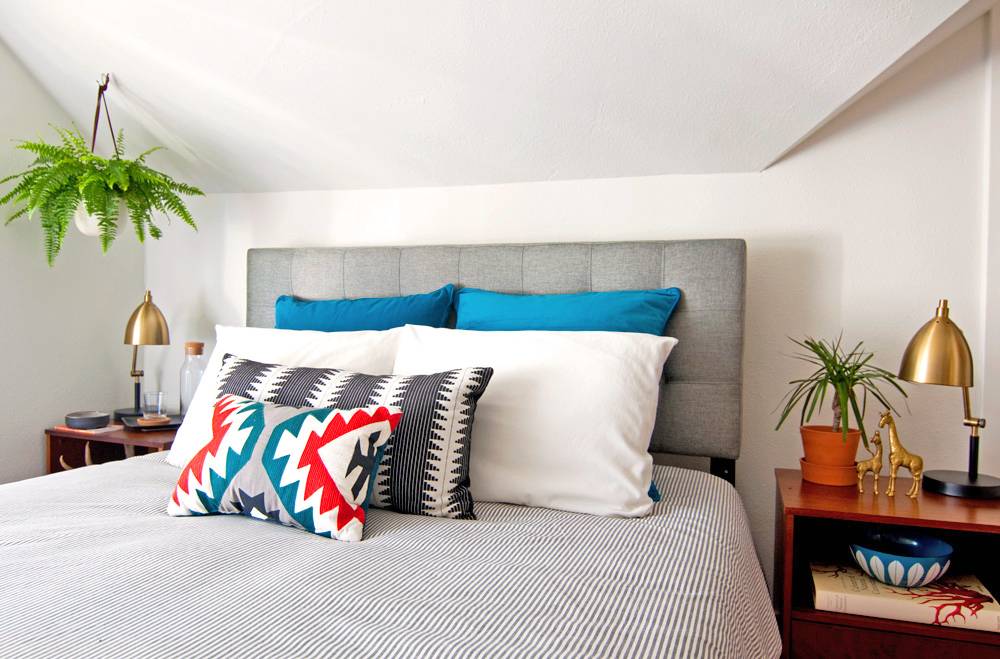
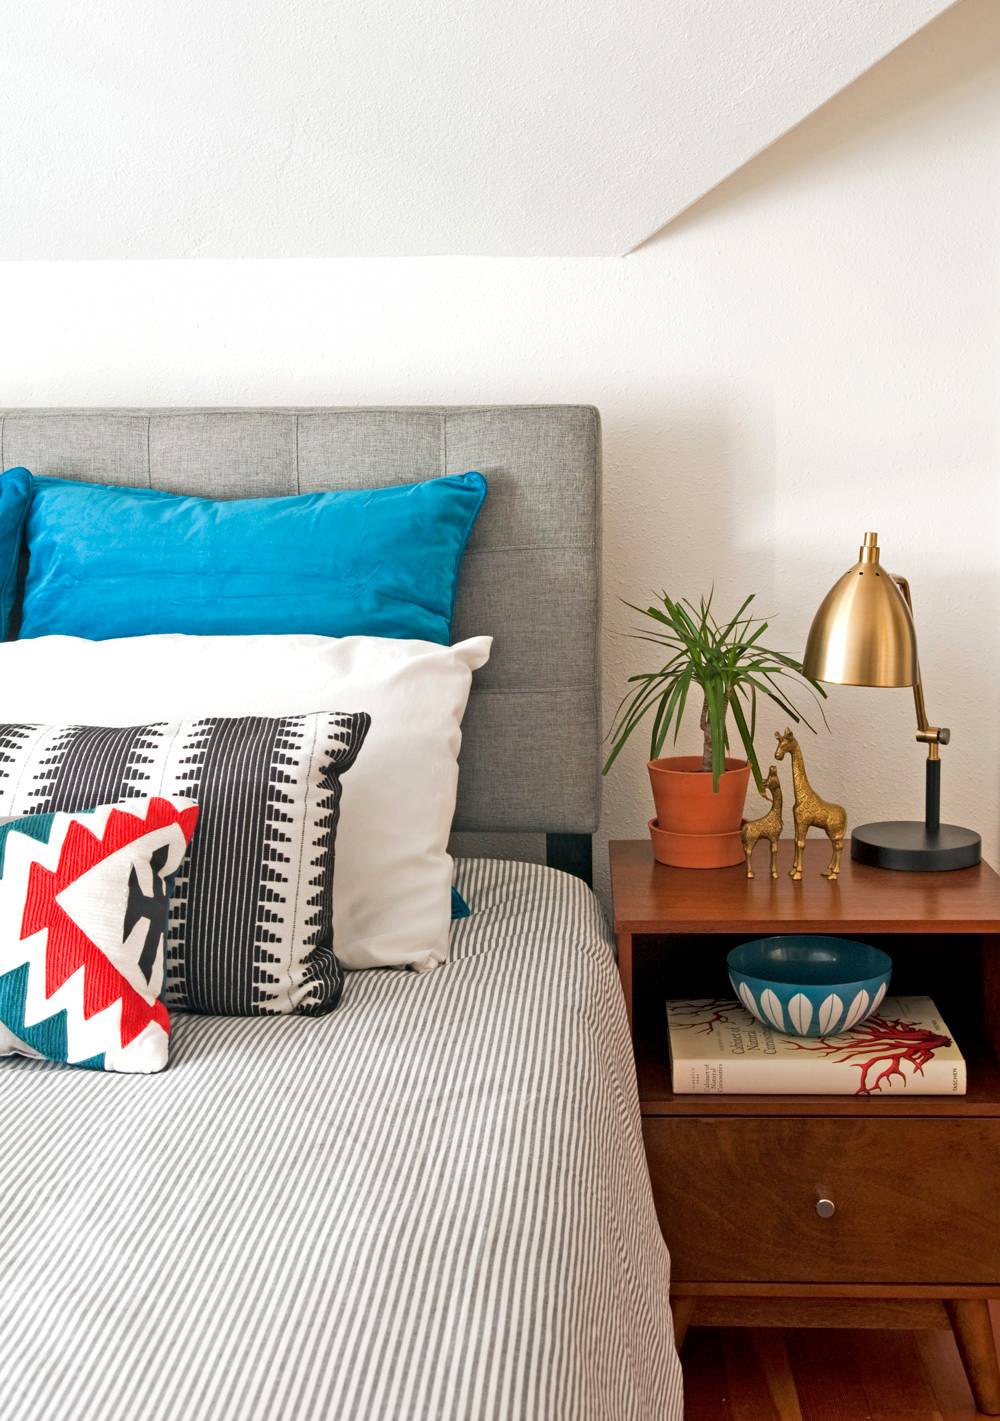
With the walls and trim primed and painted, it was time to start filling the space up. This is a guest bedroom, so … first things first … we needed a bed. We decided against a traditional mattress and box springs on a frame, and went with a platform bed and mattress from Leesa. They’re amazingly designed and crafted from three layers of cooling foam, made 100% in the USA. The box came straight to our front porch (the size of a mini-fridge!) and uncurled itself into a super comfy solution. Love it.
Our bed frame and headboard did not come as a set, and so I had to get a little creative with a DIY solution. I needed to find a way to secure the headboard supports to the minimalist bed frame, where there’s not a lot of material to attach to.

So, here’s another reason I like my neighborhood True Value over the big box store: the hardware aisle. Need something unusual? The hardware section is filled with little bins of less-common bolts, screws, and nails of a variety of materials. And you can actually touch things, try them out, and see if they work without having to open any boxes or blister packs.
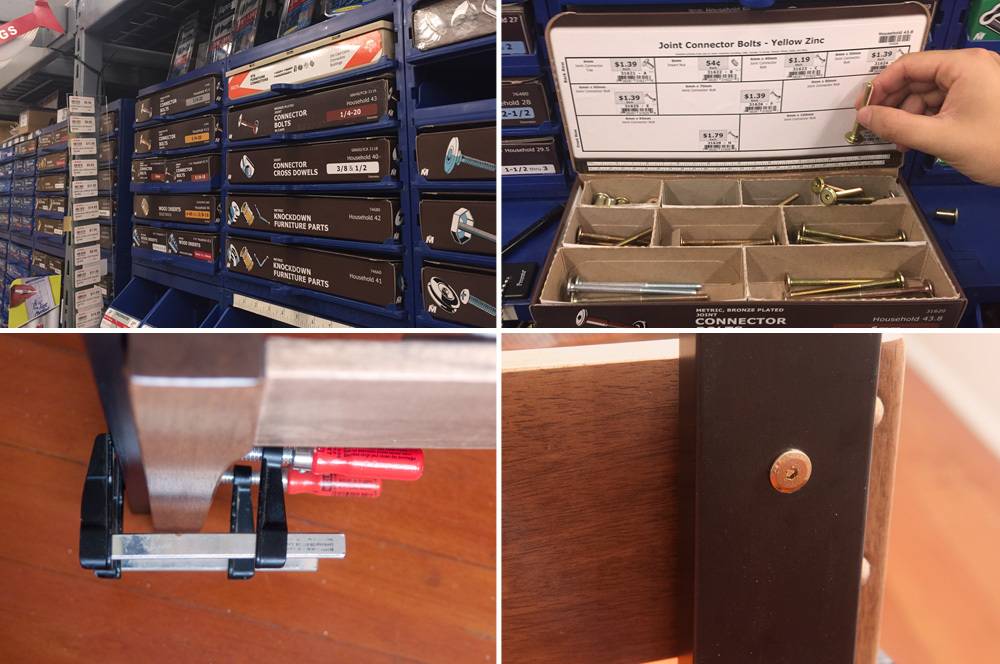
I found these little connector bolts, which have an accompanying finish nut, and tried out the lengths until I came up with the right size to go through both the bed frame and headboard. When I got home, I clamped the headboard to the frame, and drilled a clearance hole for the bolt, then tightened everything up for a nice, finished look. I repeated the process to add two bolts to each leg.
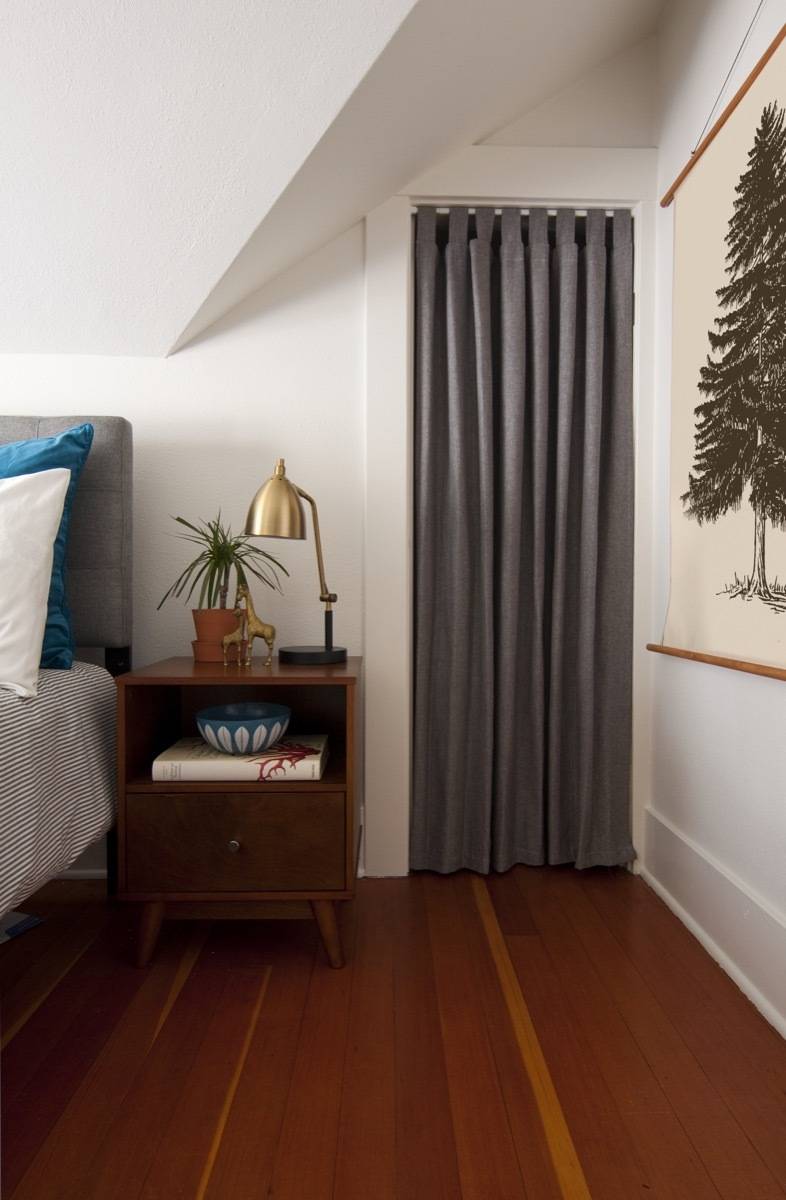
With the furniture in place, the last thing was to address the window treatments. We wanted something clean and simple that would help block the sunlight, keeping the room cool during the day and providing some privacy. My whole adult life, I’ve lived in rented spaces with crummy contractor-grade plastic mini blinds, which I’ve grown totally sick of. So, as homeowners that can actually invest in something for the long haul, we wanted some high-quality shades that would keep the lines of the room nice and simple.
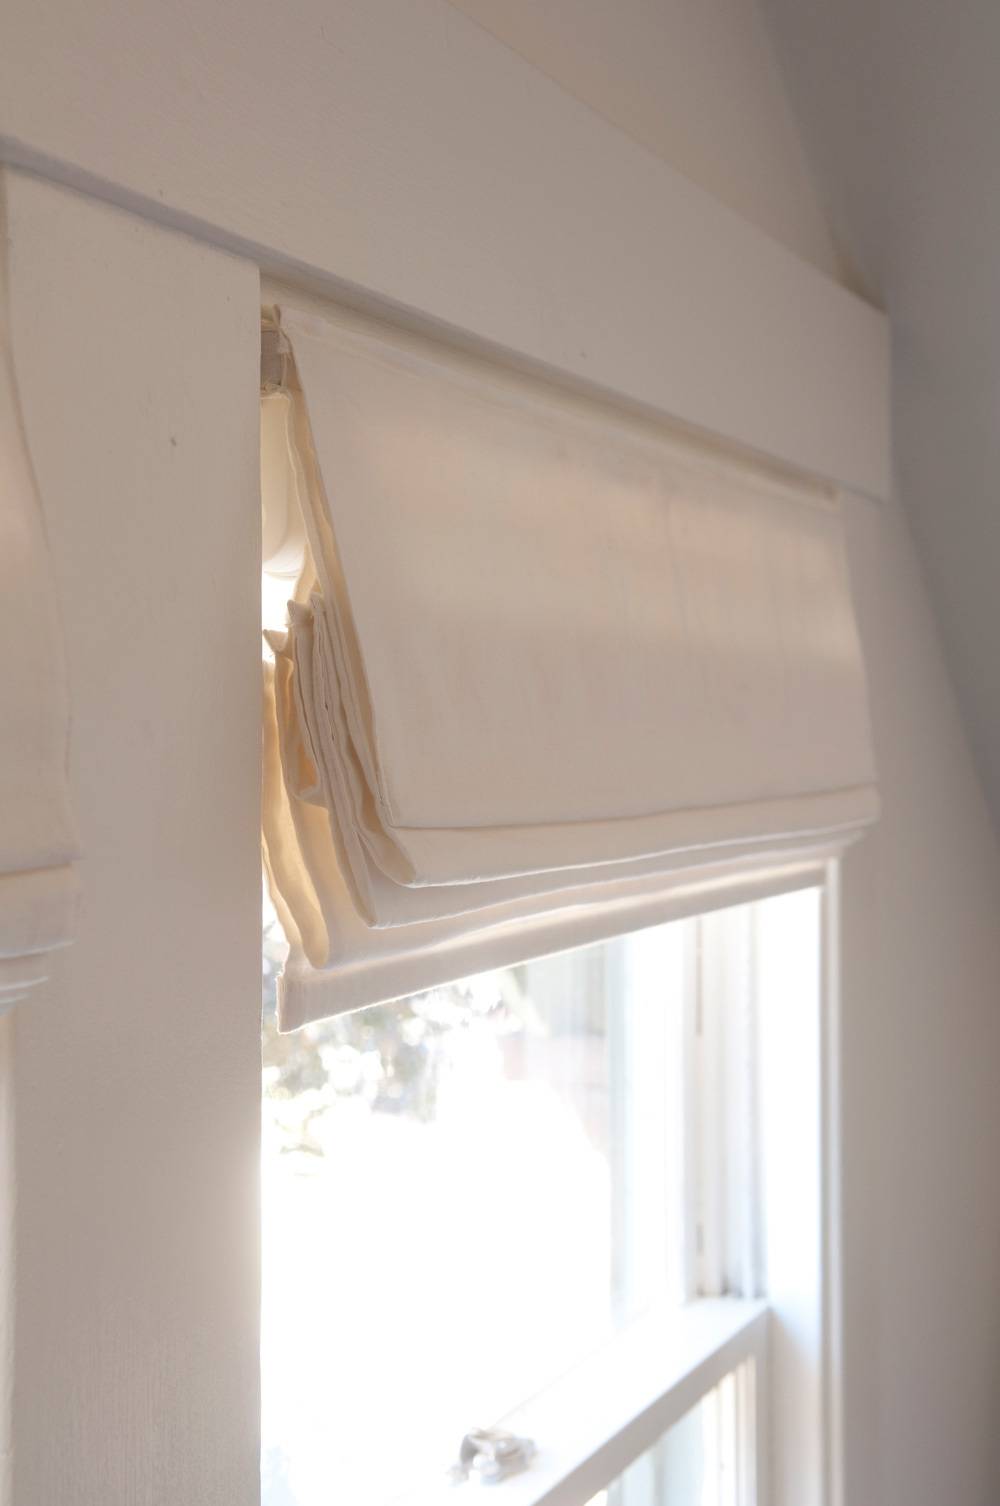
We chose the Signature Roman Shades from Blinds.com, in a basic white. They’re custom made to fit into our windows perfectly, feature a cordless design that’s super easy to raise and lower, and they look great whether up or down. Couldn’t be happier.
Finishing Up
A few simple detail-oriented things made all the difference. The fresh coat of paint highlighted some of the more worn out aspects of the room. Thankfully, they’re simple replacements that took less than thirty minutes total. I switched out the paint and rust-covered brass window pulls and locks for some clean brushed nickel options.
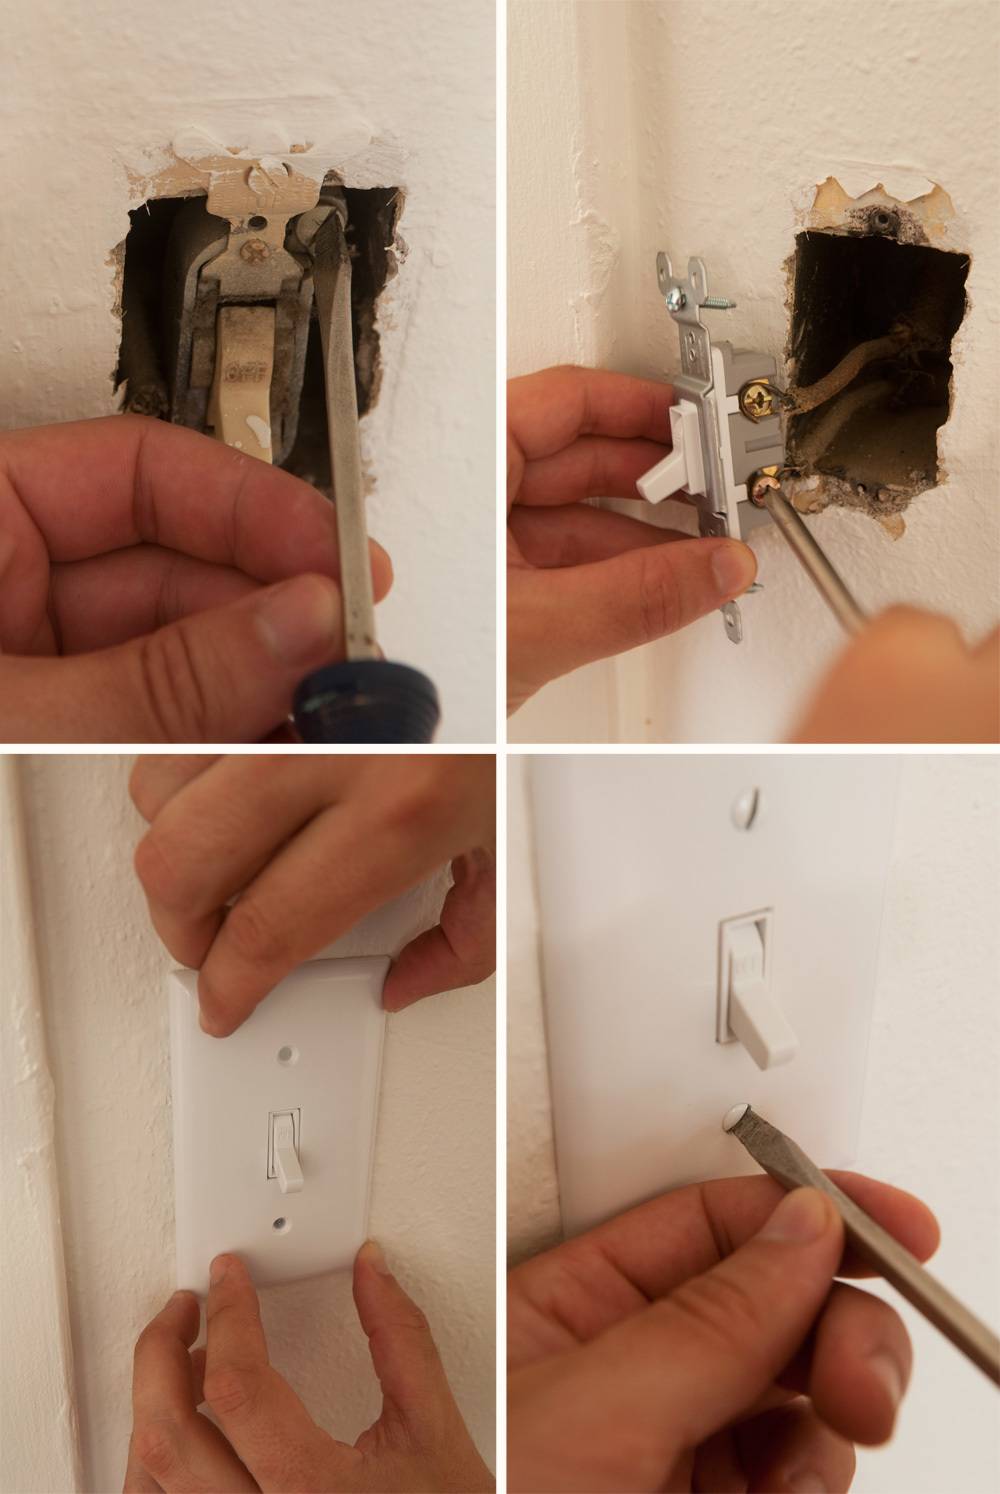
Finally, that worn-out, dirty, yellowed light switch had to go. This is an incredibly easy fix, and costs less than $2.00. I recommend doing it every time you paint a room.
To do it, just pick a new switch, and kill the power at the breaker. (Seriously, do this.) Then, open up the old switch and note which wire goes where. Remove them with a screwdriver, then reattach to a new switch. Secure it to the box, attach the faceplate, and you’re done. (To the handymen out there – yes, I know this is a two-wire run. We did replace all the knob-and-tube with modern, grounded wire to the receptacles and outlets. The only two-wire left goes from the light switch to the lamps.)
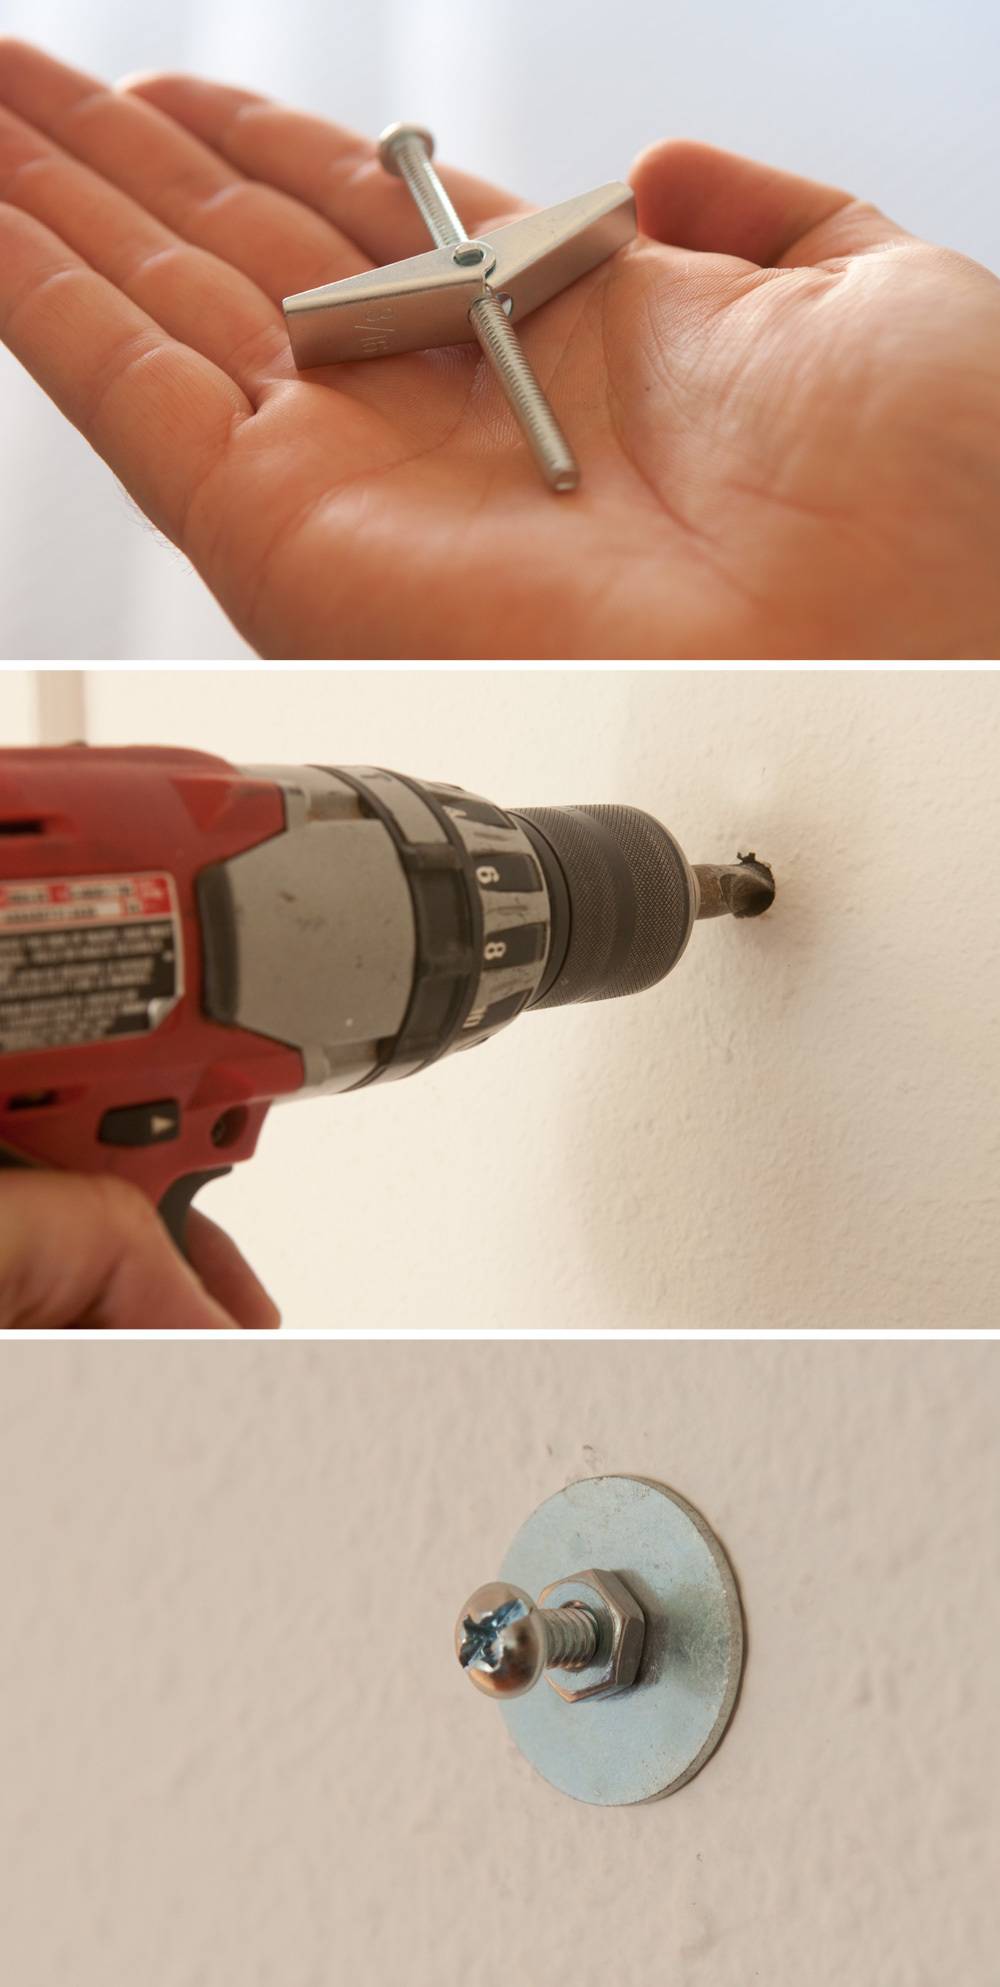
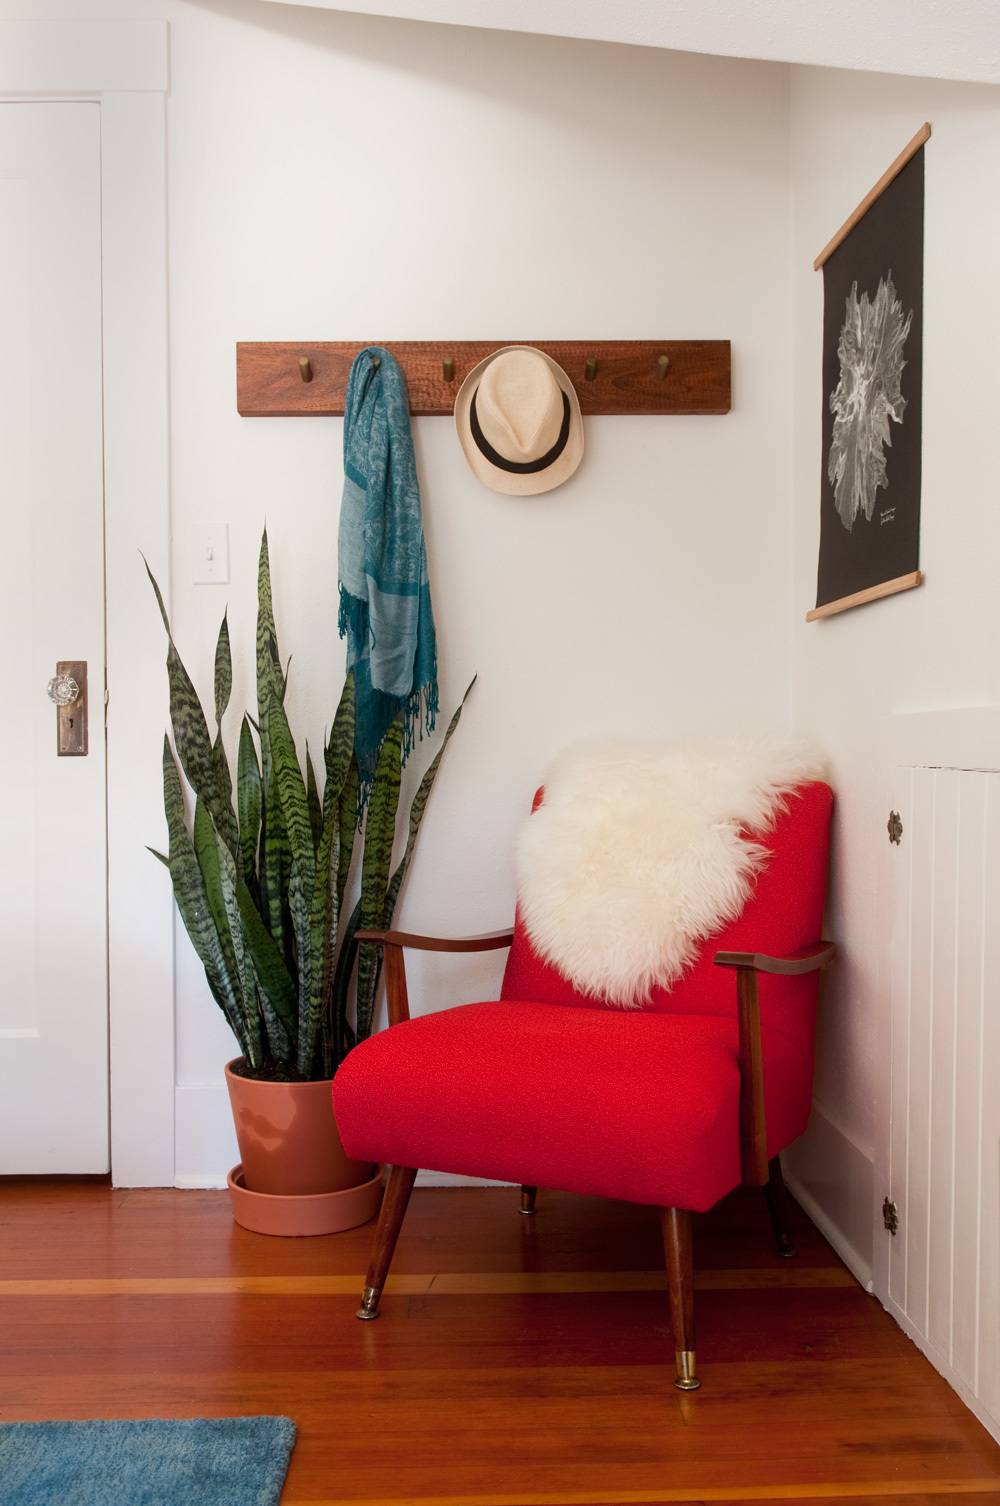
Also, because our walls are lath-and-plaster, we needed to get creative about how to hang a few heavy things, like the coat rack. To hang it, we snagged a toggle bolt from the hardware aisle, as well as a matching nut and washer. This allowed me to install the bolt, trigger the toggle to snug up against the inside wall, and then back out the bolt to keep the head protruding from the wall. Tightened up, this fit into the keyhole-hangers on the back of the coat rack with plenty of strength to hang heavy items on the pegs.
The After!
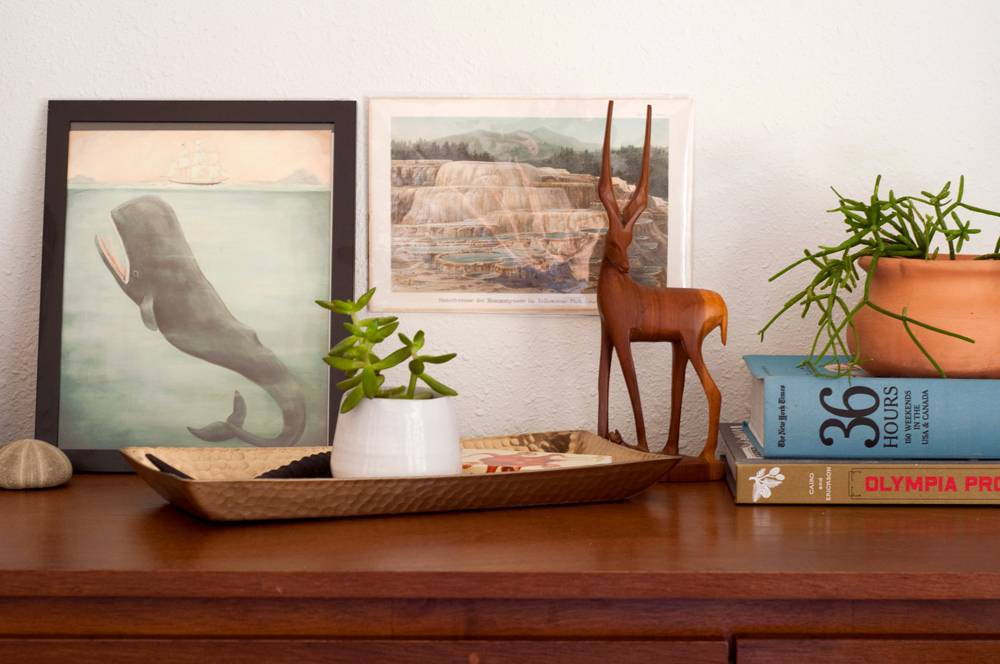
We added a cool chair from the vintage store, a bit of wall art, plenty of plants, and BOOM! The guest room is complete:

Check It Out: Simple DIY Poster Frame Project
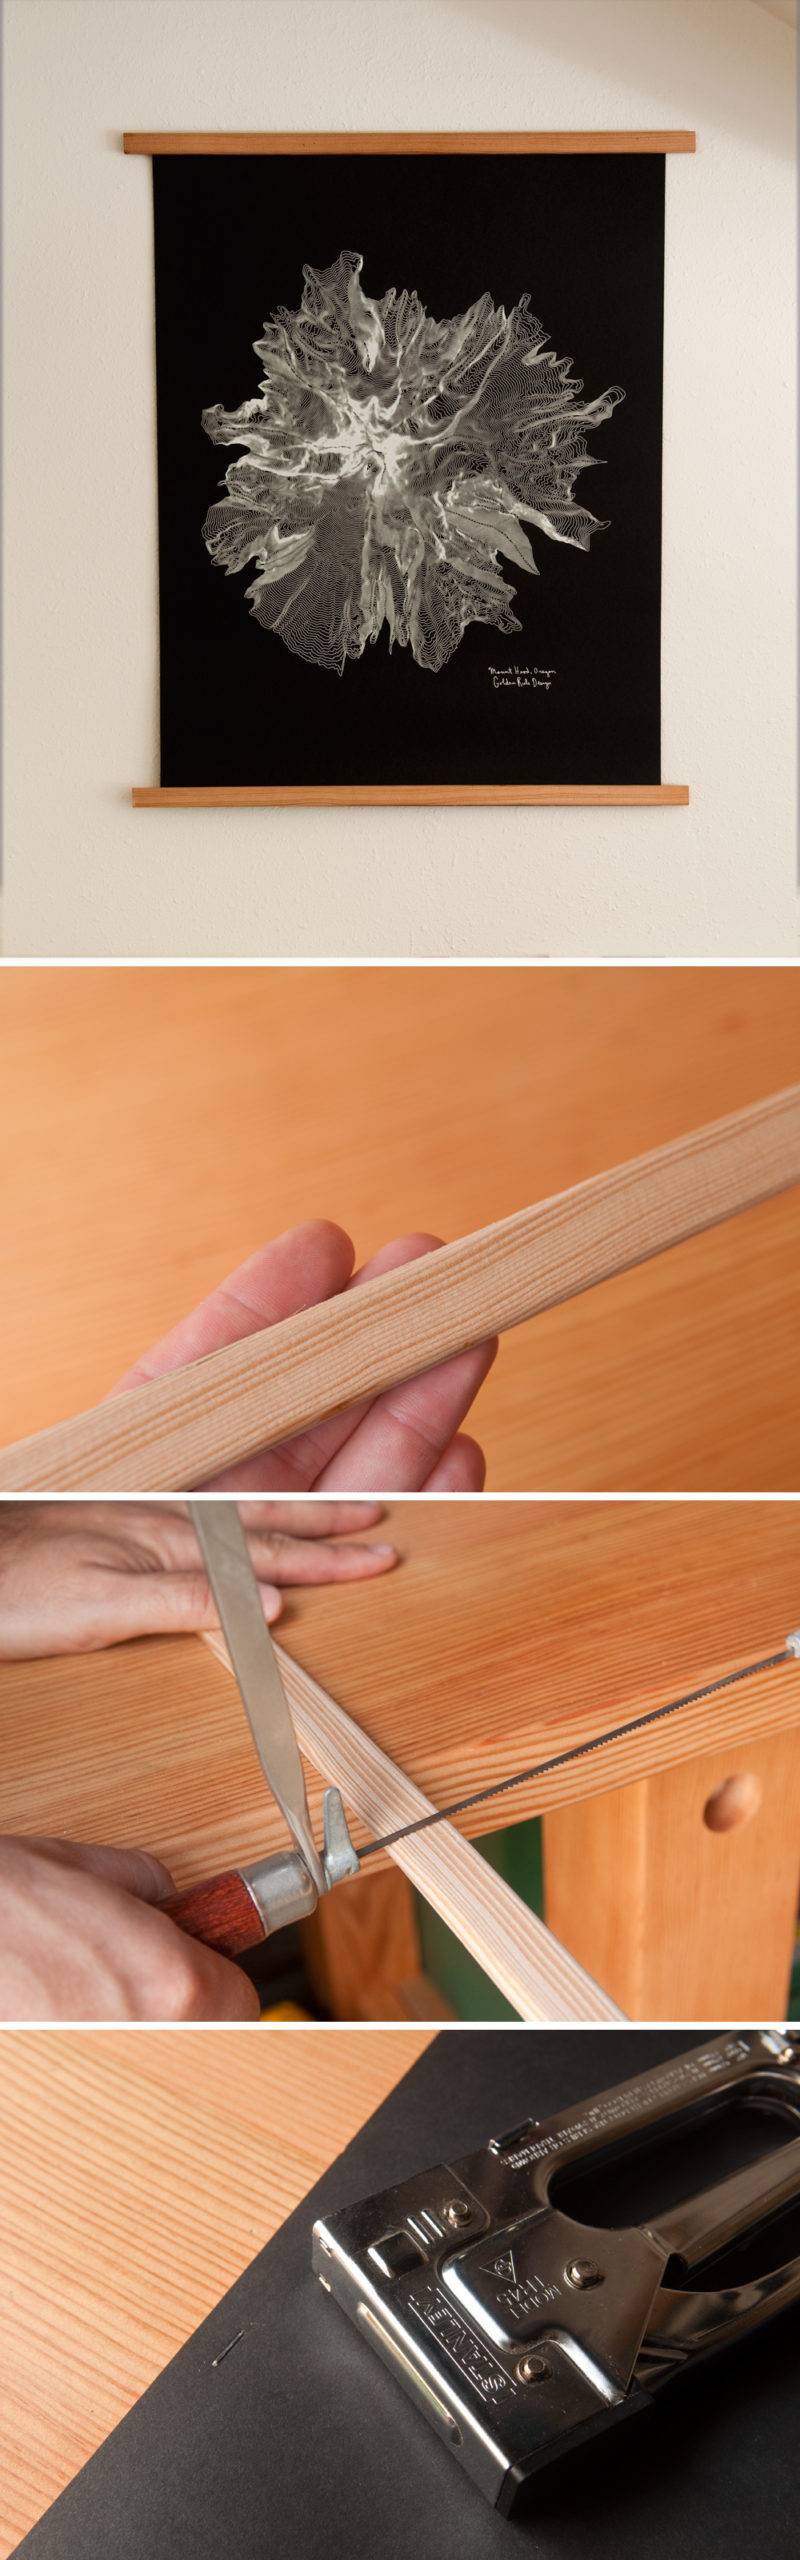
We picked up this aerial view print of Mt. Hood at a local craft fair, and wanted to find a simple way to attach it to the wall. So, I picked up some inexpensive trim molding at the hardware store, cut it to length with a coping saw, and the attached it to the top and bottom with a staple gun. A 3M Command strip to hang it on the wall, and it’s good to go.
More Photos!

This is a sponsored conversation written by me on behalf of True Value. The opinions and text are all mine.
![]()
WOW!!! Such an amazing transformation – it’s seriously perfect! Well done guys….when can I move in 😉
Thanks, Lidy. You are certainly welcome to come stay in it anytime. Bring the family!
It’s absolute perfection! Well done, Chris!
I really like the bed frame and side tables. Are these available anywhere or just finds? Awesome job!
Hi – Love the room!
Where did you get the bedside lamps from?
Hi Heather,
They’re from Target! Easy. We bought in the actual store, so I don’t have an online link, but they were in that big home decor special section in the middle of the store with many other lamps, some chairs, baskets, etc.
Thanks!
Chris
This is an amazing (and very accessible) makeover. The room looks so inviting, cheery and comfortable! The only part I would alter is where the plants are by the bed. The plant on the nightstand could be knocked over if you’re trying to turn on the lamp, or if you have an alarm set on the nightstand and groggily reach over to turn it off. I have done this several times before (!)
The hanging fern is gorgeous, but I would hang it elsewhere in the room so you don’t risk knocking your head on it getting in and out of bed. I also say this from experience. Just my 2 cents.
Buying from your local hardware store a “perfect” way to support your community. Thank you for that! Love all the special details in the room. It looks fantastic! Your family and friends will truly enjoy.
WOW! What a makeover. Love your style and especially love that funky rounded ceiling.
Great job guys!
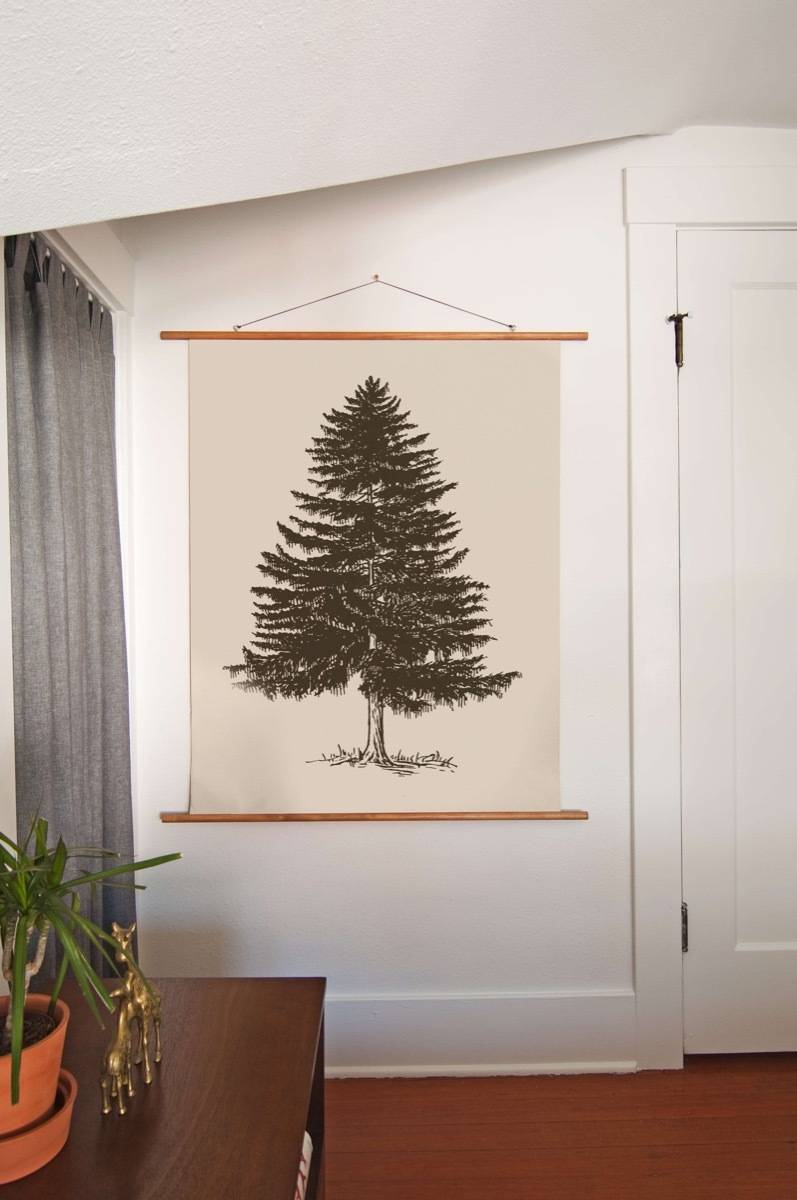
I love your Christmas tree and typewriter art! I can’t wait to try your framing idea. Really the whole room is dreamy. I believe in being original and I don’t want to copy your style but I have to ask. Where do you source your art?
That’s a great idea! I have a vintage christmas card that might be strong enough to be enlarged. Thanks for your response. i will let you know how it goes!
Just bought an older home which has an upstairs similar to yours… gave me some excellent ideas which I intend to use. Was concerned about so much white but it did turn out as a good choice.
Absolutely STUNNING!